10 python 多线程、多进程和线程池编程
python 中的 GIL
GIL:全局解释器锁 (global interpreter lock (cpython下))
gil会根据执行的字节码行数以及时间片释放gil,gil在遇到io的操作时候主动释放
total = 0

def add():
    global total
    for i in range(1000000):
        total += 1

def desc():
    global total
    for i in range(1000000):
        total -= 1

import threading

thread1 = threading.Thread(target=add)
thread2 = threading.Thread(target=desc)
thread1.start()
thread2.start()

thread1.join()
thread2.join()
print(total)
按理说,最后的结果应该是0,但是多次运行程序得到的值不是0,且每次都是不一样的,证明并非add函数执行完后,才会执行desc函数,也就是在函数add执行期间释放了GIL,去执行了desc函数,往复执行
一个小例子用字节码来解释为什么上面结果不为0
import dis


def add(a):
    a += 1


def desc(a):
    a -= 1


print(dis.dis(add))
print(dis.dis(desc))
输出结果如下
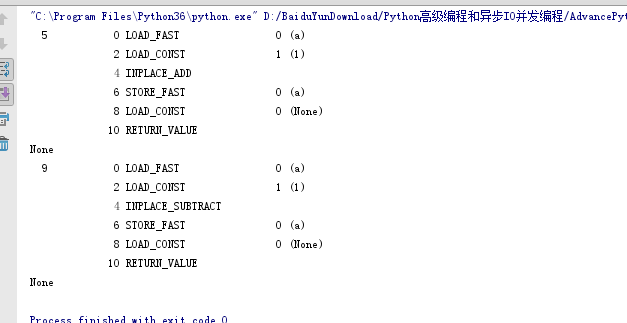
add函数字节码前4步, desc类似
1 load a
2 load 1
3 +操作
4 赋值给a
多线程编程 - threading
对于io操作来说,多线程和多进程性能差别不大
通过thread模块实现多线程编程
import time
import threading
def eat(x):
print("start eat")
time.sleep(2)
print("end eat")
def drink(x):
print("start drink")
time.sleep(2)
print("end drink")
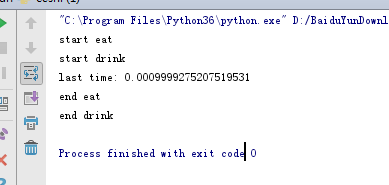
if __name__ == "__main__":
thread1 = threading.Thread(target=eat, args=("",))
thread2 = threading.Thread(target=drink, args=("",))
start_time = time.time()
thread1.start() # 启动线程
thread2.start()
print("last time: {}".format(time.time() - start_time))
输出结果如下
说明:
thread1.setDaemon(True)
thread2.setDaemon(True)
如果想等子线程执行完,再执行主线程
  thread1.join()
  thread2.join()
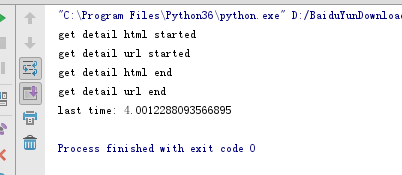
通过继承Thread来实现多线程
import time
import threading

class GetDetailHtml(threading.Thread):
    def __init__(self, name): # 自定义线程的名字
        super().__init__(name=name)

    def run(self):
        print("get detail html started")
        time.sleep(2)
        print("get detail html end")

class GetDetailUrl(threading.Thread):
    def __init__(self, name): # 自定义线程的名字
        super().__init__(name=name)

    def run(self):
        print("get detail url started")
        time.sleep(4)
        print("get detail url end")

if  __name__ == "__main__":
    thread1 = GetDetailHtml("get_detail_html")
    thread2 = GetDetailUrl("get_detail_url")
    start_time = time.time()
    thread1.start()
    thread2.start()

    thread1.join()
    thread2.join()

    #当主线程退出的时候, 子线程kill掉
    print ("last time: {}".format(time.time()-start_time))
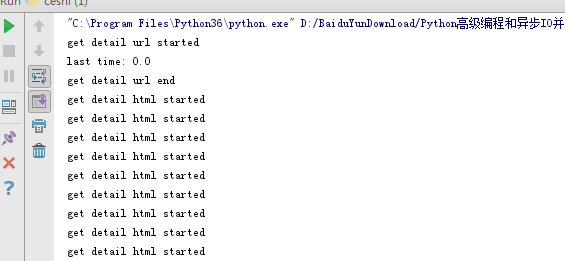
输出结果如下
线程间通信 - 共享变量和 Queue
(1)共享全局变量(不安全一般不用)
线程不安全,不同线程中可能会影响变量值,需要添加锁
import time
import threading

detail_url_list = []

def get_detail_html():
    # 爬取文章详情页
    while True:
        if len(detail_url_list):
            url = detail_url_list.pop()
            print("get detail html started")
            time.sleep(2)
            print("get detail html end")
        else:
            time.sleep(0.2)

def get_detail_url():
    # 爬取文章列表页,然后交给详情页
    print("get detail url started")
    time.sleep(4)
    for i in range(20):
        detail_url_list.append("http://projectsedu.com/{id}".format(id=i))
    print("get detail url end")


if __name__ == "__main__":
    thread_detail_url = threading.Thread(target=get_detail_url)
    thread_detail_url.start()
    for i in range(3):
        html_thread = threading.Thread(target=get_detail_html)
        html_thread.start()

    start_time = time.time()
    print("last time: {}".format(time.time() - start_time))
输出结果
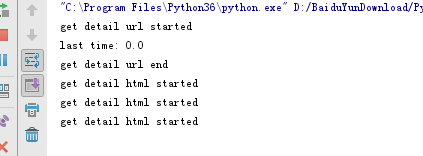
(2)使用queue的方式进行线程间同步(队列是线程安全的)
Queue类的几个函数介绍
full():判断队列是否已满
qsize(): 返回队列大小
empty(): 判断队列是否为空
join(): 使队列处于阻塞状态,只有接收到task_done()时,join()函数才会退出。所以这两个函数是成对出现的
from queue import Queue
import time
import threading

def get_detail_html(queue):
    # 爬取文章详情页
    while True:
        url = queue.get()  # 从队列中取数据,如果队列为空会一直停在这一行
        print("get detail html started")
        time.sleep(2)
        print("get detail html end")


def get_detail_url(queue):
    # 爬取文章列表页
    while True:
        print("get detail url started")
        time.sleep(4)
        for i in range(20):
            queue.put("http://projectsedu.com/{id}".format(id=i))  # 队列里放数据
        print("get detail url end")

if __name__ == "__main__":
    detail_url_queue = Queue(maxsize=1000)  # 设置队列最大值
    thread_detail_url = threading.Thread(target=get_detail_url, args=(detail_url_queue,))
    thread_detail_url.start()
    for i in range(10):
        html_thread = threading.Thread(target=get_detail_html, args=(detail_url_queue,))
        html_thread.start()

    start_time = time.time()
    print("last time: {}".format(time.time() - start_time))
输出结果如下
线程同步 - Lock、RLock
Lock 锁
这个主要用在多线程中,只有拿到锁的线程执行,没拿到锁的线程挂起
注意:
1)获取锁和释放锁都需要时间,所以锁会影响性能
2)锁会引起死锁,死锁情况2如下
A(a, b)
acquire(a) #需要先获得a,然后获得b
acquire(b)
B(a, b)
acquire(b) #需要先获得b, 然后获得a
acquire(a)
如果A(a, b)获得a的同时,B(a, b)获得了b,那么他们都在互相等待资源造成死锁
from threading import Lock

total = 0
lock = Lock()

def add():
    global total
    global lock
    for i in range(1000000):
        lock.acquire()  # 获取锁
        total += 1
        lock.release()  # 释放锁

def desc():
    global total
    global lock
    for i in range(1000000):
        lock.acquire()
        # lock.acquire()   死锁情况1:连续2次使用lock.acquire(),就会造成死锁,程序一直不执行
        total -= 1
        lock.release()


import threading

thread1 = threading.Thread(target=add)
thread2 = threading.Thread(target=desc)
thread1.start()
thread2.start()

thread1.join()
thread2.join()
print(total)
输出结果如下

RLock锁
这个同一个线程里面,可以连续调用多次acquire, 一定要注意acquire的次数要和release的次数。解决单线程中某函数调用另一个函数函数,并且也有lock的情况
from threading import Lock, RLock

total = 0
lock = RLock()


def add():
    global total
    global lock
    for i in range(1000000):
        lock.acquire()
        lock.acquire()
        total += 1
        lock.release()
        lock.release()

def desc():
    global total
    global lock
    for i in range(1000000):
        lock.acquire()
        total -= 1
        lock.release()


import threading

thread1 = threading.Thread(target=add)
thread2 = threading.Thread(target=desc)
thread1.start()
thread2.start()

thread1.join()
thread2.join()
print(total)
输出结果如下
线程同步 - condition 使用以及源码分析
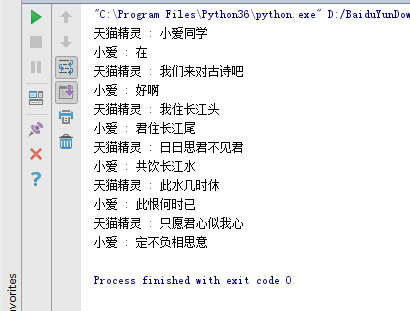
condition: 多线程条件变量,用于复杂的线程间同步,比如模拟机器人对话
天猫精灵 : 小爱同学
小爱 : 在
天猫精灵 : 我们来对古诗吧
小爱 : 好啊
天猫精灵 : 我住长江头
小爱 : 君住长江尾
天猫精灵 : 日日思君不见君
小爱 : 共饮长江水
天猫精灵 : 此水几时休
小爱 : 此恨何时已
天猫精灵 : 只愿君心似我心
小爱 : 定不负相思意
启动顺序很重要
在调用with cond之后才能调用wait或者notify方法
condition有两层锁, 一把底层锁会在线程调用了wait方法的时候释放, 上面的锁会在每次调用wait的时候分配一把并放入到cond的等待队列中,等到notify方法的唤醒
wait()必须要有notify()通知后才能响应
import threading

class XiaoAi(threading.Thread):
    def __init__(self, cond):
        super().__init__(name="小爱")
        self.cond = cond

    def run(self):
        with self.cond:
            self.cond.wait()
            print("{} : 在 ".format(self.name))
            self.cond.notify()

            self.cond.wait()
            print("{} : 好啊 ".format(self.name))
            self.cond.notify()

            self.cond.wait()
            print("{} : 君住长江尾 ".format(self.name))
            self.cond.notify()

            self.cond.wait()
            print("{} : 共饮长江水 ".format(self.name))
            self.cond.notify()

            self.cond.wait()
            print("{} : 此恨何时已 ".format(self.name))
            self.cond.notify()

            self.cond.wait()
            print("{} : 定不负相思意 ".format(self.name))
            self.cond.notify()

class TianMao(threading.Thread):
    def __init__(self, cond):
        super().__init__(name="天猫精灵")
        self.cond = cond

    def run(self):
        with self.cond:
            print("{} : 小爱同学 ".format(self.name))
            self.cond.notify()
            self.cond.wait()

            print("{} : 我们来对古诗吧 ".format(self.name))
            self.cond.notify()
            self.cond.wait()

            print("{} : 我住长江头 ".format(self.name))
            self.cond.notify()
            self.cond.wait()

            print("{} : 日日思君不见君 ".format(self.name))
            self.cond.notify()
            self.cond.wait()

            print("{} : 此水几时休 ".format(self.name))
            self.cond.notify()
            self.cond.wait()

            print("{} : 只愿君心似我心 ".format(self.name))
            self.cond.notify()
            self.cond.wait()


if __name__ == "__main__":
    from concurrent import futures
    cond = threading.Condition()
    xiaoai = XiaoAi(cond)
    tianmao = TianMao(cond)

    xiaoai.start()
    tianmao.start()
输出结果如下
线程同步 - Semaphore 使用以及源码分析
作用:控制进入数量的锁
举个例子:
写文件的时候,一般只用于一个线程写;读文件的时候可以用多个线程读,我们可以用信号量来控制多少个线程读文件
做爬虫的时候,也可以用信号量来控制并发数量,以免访问量过多而被反爬,如下面代码
import threading
import time


# 模拟2秒钟抓取一个html
class HtmlSpider(threading.Thread):
    def __init__(self, url, sem):
        super().__init__()
        self.url = url
        self.sem = sem

    def run(self):
        time.sleep(2)
        print("success")
        self.sem.release()  # 第三步:在这里释放锁,因为线程里运行的是爬虫


class UrlProducer(threading.Thread):
    def __init__(self, sem):
        super().__init__()
        self.sem = sem

    def run(self):
        for i in range(10):
            self.sem.acquire()  # 第二步:获得锁,每获得一个锁信号量中的值就减一。获得3个锁时暂停程序,等待锁释放,看Semaphore源码
            html_thread = HtmlSpider("https://baidu.com/{}".format(i), self.sem)
            html_thread.start()


if __name__ == "__main__":
    sem = threading.Semaphore(3)  # 第一步,设置3个并发
    url_producer = UrlProducer(sem)
    url_producer.start()
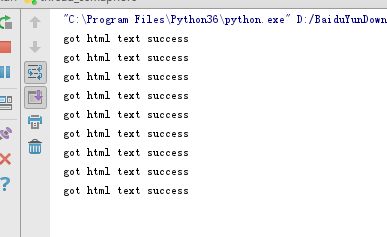
输出结果如下
ThreadPoolExecutor线程池
为什么要用线程池
1 线程池提供一个最大线程允许的数量,当任务请求过多而超过线程池最大值时,就会造成阻塞。这个功能信号量也能做到
2 线程池允许主线程中获得某一个子线程的状态,或者某一个任务的状态以及返回值
3 当一个子线程完成时,主线程能立即知道
4 futures模块可以让多线程和多进程编码接口一致,如果想把多线程切换为多进程就会很方便
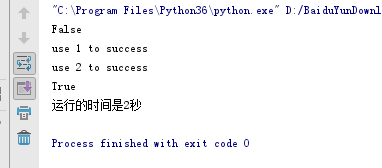
获取子线程的运行状态(done)和返回值(result)
from concurrent.futures import ThreadPoolExecutor
import time


def get_html(times):
    time.sleep(times)
    print("use {} to success".format(times))
    return "运行的时间是{}秒".format(times)


executor = ThreadPoolExecutor(max_workers=2)  # 生成一个线程池对象,设置线程池里同时运行的数量

# 通过submit函数提交执行的函数到线程池中,返回一个Future对象
task1 = executor.submit(get_html, (2))  # (2)为函数get_html中的参数值
task2 = executor.submit(get_html, (1))

# 返回对象的done方法可用于判断任务是否执行成功,并且是立即执行,这里用task1为例子
print(task1.done())
time.sleep(3)  # 等待3秒后,在用done方法测试,结果为True.  可能是pychram内部计算问题,这里不能写2,否则会显示False
print(task1.done())
print(task1.result())  # result方法可获得get_html函数的返回值
输出结果如下
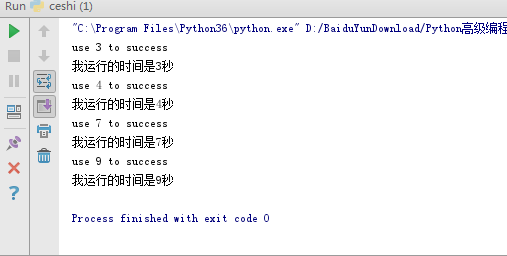
主线程实时获取已经成功执行的任务返回值,可以用as_completed库
不管urls列表中爬取时间顺序如何,主线程的输出都是按照时间先后顺序输出的
from concurrent.futures import ThreadPoolExecutor, as_completed

import time

def get_html(times):
    time.sleep(times)
    print("use {} to success".format(times))
    return "我运行的时间是{}秒".format(times)


executor = ThreadPoolExecutor(max_workers=2)  # 设置线程池里同时运行的数量

# 模拟各线程爬取时间为urls列表
urls = [3, 4, 9, 7]
all_task = [executor.submit(get_html, (url)) for url in urls]
for future in as_completed(all_task):
    data = future.result()
    print(data)
输出结果如下
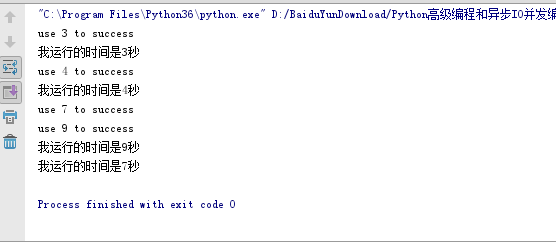
通过executor获取已经完成的task,需要用到map函数
主线程的输出顺序和urls列表中的时间顺序一样,和上面的例子注意区分
from concurrent.futures import ThreadPoolExecutor
import time

def get_html(times):
    time.sleep(times)
    print("use {} to success".format(times))
    return "我运行的时间是{}秒".format(times)


executor = ThreadPoolExecutor(max_workers=2)  # 设置线程池里同时运行的数量

# 模拟各线程爬取时间为urls列表
urls = [3, 4, 9, 7]

# 通过executor获取已经完成的task, 使用map(),和python中的map函数类似
for data in executor.map(get_html, urls):
    print(data)
输出结果如下
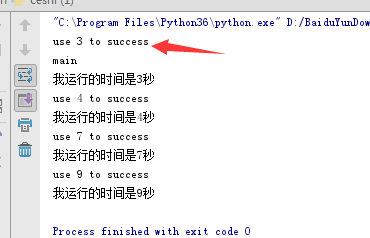
wait函数,可用于等待某一个任务完成时,输出自定义状态
这里是第一个任务执行完打印 main 输出中main的位置,看下wait的源码理解下return_when
from concurrent.futures import ThreadPoolExecutor, as_completed, wait, FIRST_COMPLETED
import time


def get_html(times):
    time.sleep(times)
    print("use {} to success".format(times))
    return "我运行的时间是{}秒".format(times)


executor = ThreadPoolExecutor(max_workers=2)  # 设置线程池里同时运行的数量

# 模拟各线程爬取时间为urls列表
urls = [3, 4, 9, 7]
all_task = [executor.submit(get_html, (url)) for url in urls]

# 添加wait函数,其中的return_when表示第一个线程完成时执行下一行代码
wait(all_task, return_when=FIRST_COMPLETED)
print("main")
for future in as_completed(all_task):
    data = future.result()
    print(data)
输出结果
ThreadPoolExecutor源码分析
1. 未来对象:Future对象
from concurrent.futures import Future: 主要用于作为task的返回容器
源码现在看不懂,以后有时间再看
多线程和多进程对比
python由于GIL锁的存在CPU同一时间不能执行多个线程,无法把多线程映射到多个CPU上。在有些情况下如果想充分利用多核,可以用多进程编程
import time
from concurrent.futures import ThreadPoolExecutor, as_completed
from concurrent.futures import ProcessPoolExecutor
def fib(n):
if n<=2:
return 1
return fib(n-1)+fib(n-2)
if __name__ == "__main__":
with ThreadPoolExecutor(3) as executor:
all_task = [executor.submit(fib, (num)) for num in range(25,35)]
start_time = time.time()
for future in as_completed(all_task):
data = future.result()
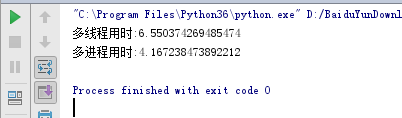
print("多线程用时:{}".format(time.time()-start_time))
with ProcessPoolExecutor(3) as executor:
all_task = [executor.submit(fib, (num)) for num in range(25,35)]
start_time = time.time()
for future in as_completed(all_task):
data = future.result()
print("多进程用时:{}".format(time.time()-start_time))
from concurrent.futures import ThreadPoolExecutor, as_completed
from concurrent.futures import ProcessPoolExecutor
import time
def random_sleep(n):
time.sleep(n)
return n
if __name__ == "__main__":
with ProcessPoolExecutor(3) as executor:
all_task = [executor.submit(random_sleep, (num)) for num in [1] * 30]
start_time = time.time()
for future in as_completed(all_task):
data = future.result()
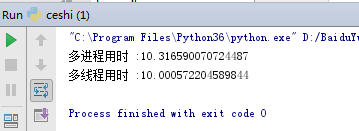
print("多进程用时 :{}".format(time.time() - start_time))
with ThreadPoolExecutor(3) as executor:
all_task = [executor.submit(random_sleep, (num)) for num in [1] * 30]
start_time = time.time()
for future in as_completed(all_task):
data = future.result()
print("多线程用时 :{}".format(time.time() - start_time))
输出结果如下
multiprocessing 多进程编程
fork函数创建子进程
fork在linux中用于创建子进程,不能在windows中使用,如下代码存在一个文件比如1.py中
import os
import time
pid = os.fork()
print("jack")
if pid == 0:
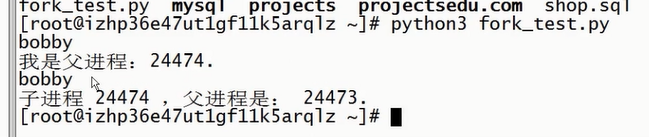
print('子进程 {} ,父进程是: {}.' .format(os.getpid(), os.getppid()))
else:
print('我是父进程:{}.'.format(pid))
time.sleep(2)
输出结果如下
说明:
结论:两个进程间的数据完全是隔离的
multiprocessing来实现多进程,比ProcessPoolExecutor更底层
使用multiprocessing下的线程池
import multiprocessing
import time
def get_html(n):
time.sleep(n)
print("sub_progress sucess")
return n
if __name__ == "__main__":
# 使用mulproccessing中的线程池
pool = multiprocessing.Pool(multiprocessing.cpu_count())
result = pool.apply_async(get_html, args=(3,)) # 这里的3是给get_html的参数设置为3秒
# 等待所有任务完成
pool.close() # 要先把进程池关闭,否则会抛异常
pool.join()
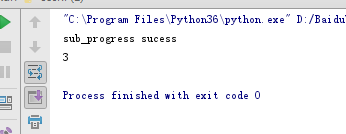
print(result.get())
输出结果如下
imap,对应线程中的map获取进程执行成功的返回值,按列表中的时间顺序输出
import multiprocessing
import time

def get_html(n):
    time.sleep(n)
    print("sub_progress sucess")
    return n


if __name__ == "__main__":
    pool = multiprocessing.Pool(multiprocessing.cpu_count())
    for result in pool.imap(get_html, [1, 5, 3]):  # result为get_html的返回值
        print("{} success".format(result))
输出结果如下
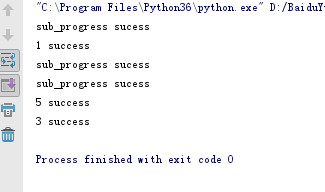
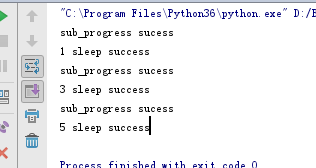
imap_unordered方法获取进程执行成功的返回值,按执行时间先后顺序输出
import multiprocessing
import time


def get_html(n):
    time.sleep(n)
    print("sub_progress sucess")
    return n


if __name__ == "__main__":
    pool = multiprocessing.Pool(multiprocessing.cpu_count())
    for result in pool.imap_unordered(get_html, [1, 5, 3]):
        print("{} sleep success".format(result))
输出结果如下
进程间通信 - Queue、Pipe,Manager
使用multiprocessing中的Queue进行通信
把一个进程中的值传给另一个进程
import time
from multiprocessing import Process, Queue

def producer(queue):
    queue.put("a")
    time.sleep(2)


def consumer(queue):
    time.sleep(2)  # 需等待producer执行完再拿数据
    data = queue.get()
    print(data)


if __name__ == "__main__":
    queue = Queue(5)
    my_producer = Process(target=producer, args=(queue,))
    my_consumer = Process(target=consumer, args=(queue,))
    my_producer.start()
    my_consumer.start()
    my_producer.join()
    my_consumer.join()
输出结果如下
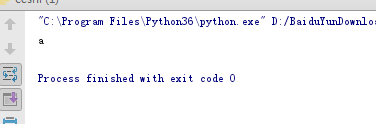
进程池中的进程间通信需要使用Manager实例化中的Queue
把一个进程中的值传给另一个进程
import time
from multiprocessing import Pool, Manager


def producer(queue):
    queue.put("a")
    time.sleep(2)

def consumer(queue):
    time.sleep(2)
    data = queue.get()
    print(data)

if __name__ == "__main__":
    queue = Manager().Queue(5)  # 使用Manage实例化后的Queue
    pool = Pool(2)

    pool.apply_async(producer, args=(queue,))
    pool.apply_async(consumer, args=(queue,))

    pool.close()
    pool.join()
输出结果如下
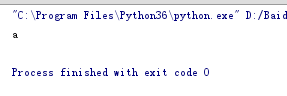
使用pipe实现进程间通信
pipe只能用于2个进程间的通信,pipe的性能是高于queue的
把一个进程中的值传给另一个进程
from multiprocessing import Process, Pipe


def producer(pipe):
    pipe.send("a")


def consumer(pipe):
    print(pipe.recv())


if __name__ == "__main__":
    recevie_pipe, send_pipe = Pipe()
    # pipe只能用于2个进程间的通信
    my_producer = Process(target=producer, args=(send_pipe,))
    my_consumer = Process(target=consumer, args=(recevie_pipe,))

    my_producer.start()
    my_consumer.start()
    my_producer.join()
    my_consumer.join()
输出结果如下
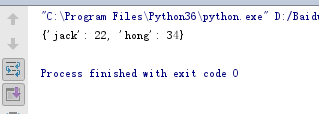
进程间使用共享内存
本例子是用dict来做说明,其实Manager()里还有list, tuple等数据结构都可以使用,进程间的数据合并了,都写入了主进程中的同一个内存中
from multiprocessing import Manager, Process


def add_data(p_dict, key, value):
    p_dict[key] = value


if __name__ == "__main__":
    progress_dict = Manager().dict()
    first_progress = Process(target=add_data, args=(progress_dict, "jack", 22))
    second_progress = Process(target=add_data, args=(progress_dict, "hong", 34))

    first_progress.start()
    second_progress.start()
    first_progress.join()
    second_progress.join()

    print(progress_dict)
输出结果如下

 浙公网安备 33010602011771号