React-Native 之 GD (二十)removeClippedSubviews / modal放置的顺序 / Android 加载git图\动图 / 去除 Android 中输入框的下划线 / navigationBar
1.removeClippedSubviews
用于提升大列表的滚动性能。需要给行容器添加样式overflow:’hidden’。(Android已默认添加此样式)此属性默认开启
这个属性是因为在早期 ListView 在数据到达一定程度的时候就会越来越卡,最终导致 APP 崩溃退出,使用这个属性后 APP 崩溃确实在一定程度上得到缓解,但是卡顿问题还是依旧存在。
废了这么多话,这边我们就先来使用一下 removeClippedSubviews ,很简单,使用它只需要在我们封装的 cell 中的 Container 样式中添加 overflow:'hidden' 即可。
GDCommunalCell.js
container: {
    flexDirection:'row',
    alignItems:'center',
    justifyContent:'space-between',
    backgroundColor:'white',
    height:120,
    width:width,
    borderBottomWidth:0.5,
    borderBottomColor:'gray',
    marginLeft:15,
    overflow:'hidden',
},
GDHome.js
<PullList                                               // 将ListView 改为 PullList
    ref="pullList"                                      // 一键置顶
    onPullRelease={(resolve) => this.loadData(resolve)} // 下拉刷新操作
    dataSource={this.state.dataSource}                  // 设置数据源
    renderRow={this.renderRow.bind(this)}               // 根据数据创建相应 cell
    showsHorizontalScrollIndicator={false}              // 隐藏水平指示器
    style={styles.listViewStyle}                        // 样式
    initialListSize={7}                                 // 优化:一次渲染几条数据
    renderHeader={this.renderHeader}                    // 设置头部视图
    onEndReached={this.loadMore}                        // 当接近底部特定距离时调用
    onEndReachedThreshold={60}                          // 当接近底部60时调用
    renderFooter={this.renderFooter}                    // 设置尾部视图
    removeClippedSubviews={true}                        // 优化
/>
2.modal放置的顺序
这边我们试了下安卓,发现当我们显示 modal 然后又关闭 modal 的时候,就会出现 ListView 列表消失的问题,那么其实是因为我们 modal 放置的顺序问题,modal 应当放置到所有主视图之后创建,避免它影响其他视图显示,这边就以 home 页面为例,其他视图自己实现哈:
GDHome.js
render() {
    return (
        <View style={styles.container}>
            {/* 导航栏样式 */}
            <CommunalNavBar
                leftItem = {() => this.renderLeftItem()}
                titleItem = {() => this.renderTitleItem()}
                rightItem = {() => this.renderRightItem()}
            />

            {/* 根据网络状态决定是否渲染 listView */}
            {this.renderListView()}

            {/* 初始化近半小时热门模态 */}
            <Modal
                animationType='slide'  // 动画 底部弹窗
                transparent={false}  // 透明度
                visible={this.state.isHalfHourHotModal}  // 可见性
                onRequestClose={() => this.onRequestClose()}  // 销毁
            >
                <Navigator
                    initialRoute={{
                        name:'halfHourHot',
                        component:HalfHourHot
                    }}

                    renderScene={(route, navigator) => {
                        let Component = route.component;
                        return <Component
                            removeModal={(data) => this.closeModal(data)}
                            {...route.params}
                            navigator={navigator} />
                    }} />
            </Modal>

            {/* 初始化筛选菜单模态 */}
            <Modal
                animationType='none'  // 无动画
                transparent={true}  // 为透明状态
                visible={this.state.isSiftModal}  // 可见性
                onRequestClose={() => this.onRequestClose()}  // 销毁
            >
                <CommunalSiftMenu
                    removeModal={(data) => this.closeModal(data)}
                    data={HomeSiftData}
                    loadSiftData={(mall, cate) => this.loadSiftData(mall, cate)}
                />
            </Modal>
        </View>
    );
}
3.Android 加载git图\动图
那其实解决这个问题很简单,我们只需要使用一下 facebokk 的一个强大的图片加载库就能解决这个问题了。
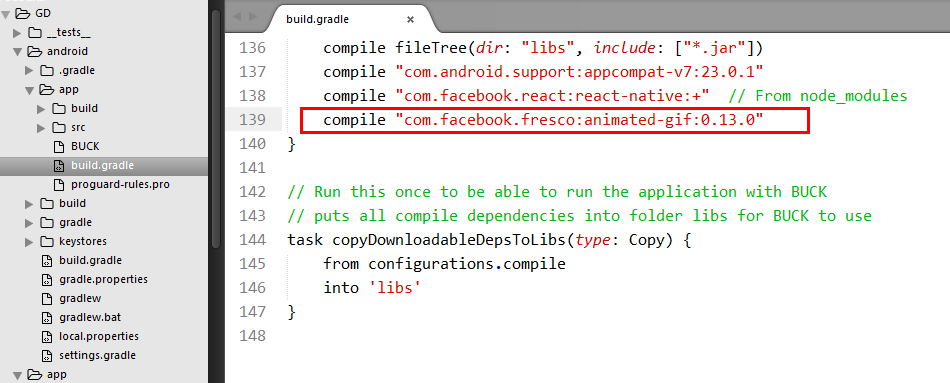
首先,我们打开 build.gradle ,在 dependencies 中添加下面一行代码
compile "com.facebook.fresco:animated-gif:0.13.0"
4.去除 Android 中输入框的下划线
那么 Android 中的 TextInput 的下划线是不是丑爆了?这边我们也来处理下它,直接使用 underlineColorAndroid 这个属性,让他为透明即可。
underlineColorAndroid={'transparent'}
{/* 左边 */}
<View style={styles.inputViewStyle} >
    <Image source={{uri:'search_icon_20x20'}} style={styles.searchImageStyle} />
    <TextInput
        style={styles.textInputStyle}
        keyboardType="default"                            // 键盘类型
        placeholder="请输入搜索商品关键字"                // 提示文字
        placeholderTextColor='gray'                       // 设置提示文字颜色
        autoFocus={true}                                  // 自动获取焦点,弹窗键盘
        clearButtonMode="while-editing"                   // 清除按钮(编辑情况下出现清除按钮)
        onChangeText={(text) => {this.changeText = text}} // 监听文本改变,将文字返回
        onEndEditing={() => this.loadData()}              // 结束编辑状态
        underlineColorAndroid={'transparent'}             // 隐藏 input 输入框下划线
    />
</View>
5.navigationBar
这边先来介绍一下 navigationBa 的使用,使用它可以让我们只在一个地方管理 navigator 导航栏的样式,就不用像现在这样在每个页面都手动添加导航栏。
首先,我们来看下 navigationBar 文件内的内容:
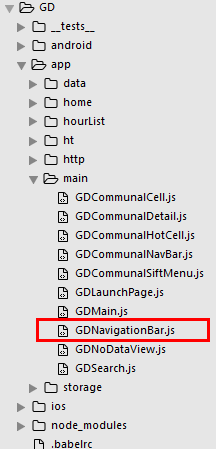
GDNavigationBar.js
/**
 * 公共导航组件
 */
import React, { Component } from 'react';
import {
    StyleSheet,
    Text,
    View,
    TouchableOpacity,
} from 'react-native';

// 导航器
import CustomerComponents, {
    Navigator
} from 'react-native-deprecated-custom-components';

const styles = StyleSheet.create({

});

let NavigationBarRouteMapper = {

	// 左边按钮
    LeftButton(route, navigator, index, navState) {
        if (index > 0) {
            return (
                <TouchableOpacity
                    onPress={() => navigator.pop()}
                >
                    <Text>返回</Text>
                </TouchableOpacity>
            )
        }
    },

    // 右边按钮
    RightButton(route, navigator, index, navState) {

    },

    // 中间标签
    Title(route, navigator, index, navState) {
        return(
            <Text>{route.name}</Text>
        )
    },
};

export default (
    <Navigator.NavigationBar
        style={{backgroundColor:'green'}}
        routeMapper={NavigationBarRouteMapper}
    />
)
接着,我们到 main文件中 使用一下这个 navigationBar :
GDMain.js
// 引入 公共导航组件
import NavigationBar from './GDNavigationBar';
<TabNavigator.Item
    selected={this.state.selectedTab === selectedTab}
    badgeText={badgeText == 0 ? '' : badgeText}  // 角标
    title={title}
    selectedTitleStyle={{color:'black'}}
    renderIcon={() => <Image source={{uri:image}} style={styles.tabbarIconStyle} />}
    renderSelectedIcon = {() => <Image source={{uri:selectedImage}} style={styles.tabbarIconStyle} />}
    onPress = {() => this.clickItem(selectedTab, subscription)}>
    <Navigator
        // 设置路由
        initialRoute = {
            {
                name: selectedTab,
                component: component
            }
        }

        // 设置导航动画
        configureScene={(route) => this.setNavAnimationType(route)}

        renderScene = {(route, navigator) => {
            let Component = route.component;
            return <Component
                        {...route.params}
                        navigator={navigator}
                        loadDataNumber={() => this.loadDataNumber()} />
        }}

        navigationBar={NavigationBar}
    />
</TabNavigator.Item>
效果图:

6.react-native 开发中你可能需要的一些小玩意
拨打电话(真机测试,模拟器没有打电话功能):
import { Linking } from ‘react-native’;

function callPhone() {
    return Linking.openURL('tel:10086');
}
获取视图组件的 x,y,宽,高,偏移量的值,可以使用 measure 方法:
this.refs.mainView.measure((x, y, width, height, px,py)) => {
    console.log(width);
}
.

 浙公网安备 33010602011771号