spring增加事务管理4个步骤
1.步骤线路图
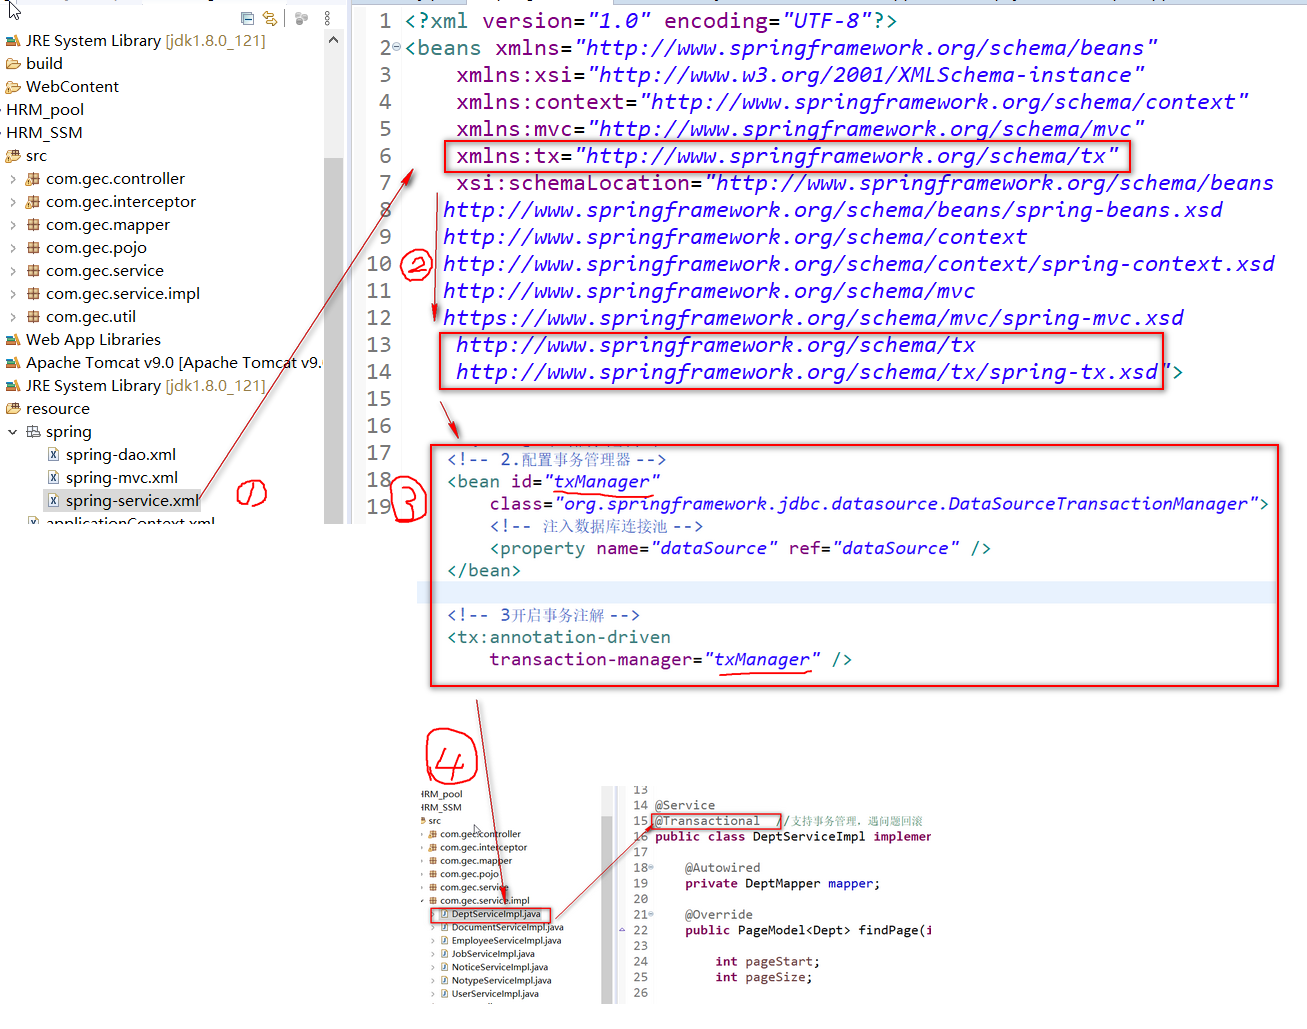
2.可以复制的代码
申明空间
 1 <beans xmlns="http://www.springframework.org/schema/beans"
 2     xmlns:xsi="http://www.w3.org/2001/XMLSchema-instance"
 3     xmlns:context="http://www.springframework.org/schema/context"
 4     xmlns:mvc="http://www.springframework.org/schema/mvc"
 5     xmlns:tx="http://www.springframework.org/schema/tx"
 6     xsi:schemaLocation="http://www.springframework.org/schema/beans
 7    http://www.springframework.org/schema/beans/spring-beans.xsd
 8    http://www.springframework.org/schema/context
 9    http://www.springframework.org/schema/context/spring-context.xsd
10    http://www.springframework.org/schema/mvc
11    https://www.springframework.org/schema/mvc/spring-mvc.xsd
12     http://www.springframework.org/schema/tx
13     http://www.springframework.org/schema/tx/spring-tx.xsd">
事务代理
 1 <!-- 1.扫描注解目录, com.gec.service可能跟你自己的不同-->
 2     <context:component-scan
 3         base-package="com.gec.service" />
 4
 5     <!-- 2.配置事务管理器 -->
 6     <bean id="txManager"
 7         class="org.springframework.jdbc.datasource.DataSourceTransactionManager">
 8         <!-- 注入数据库连接池 -->
 9         <property name="dataSource" ref="dataSource" />
10     </bean>
11
12     <!-- 3开启事务注解 -->
13     <tx:annotation-driven
14         transaction-manager="txManager" />

 浙公网安备 33010602011771号