前端打包成桌面应用、以及chrome扩展
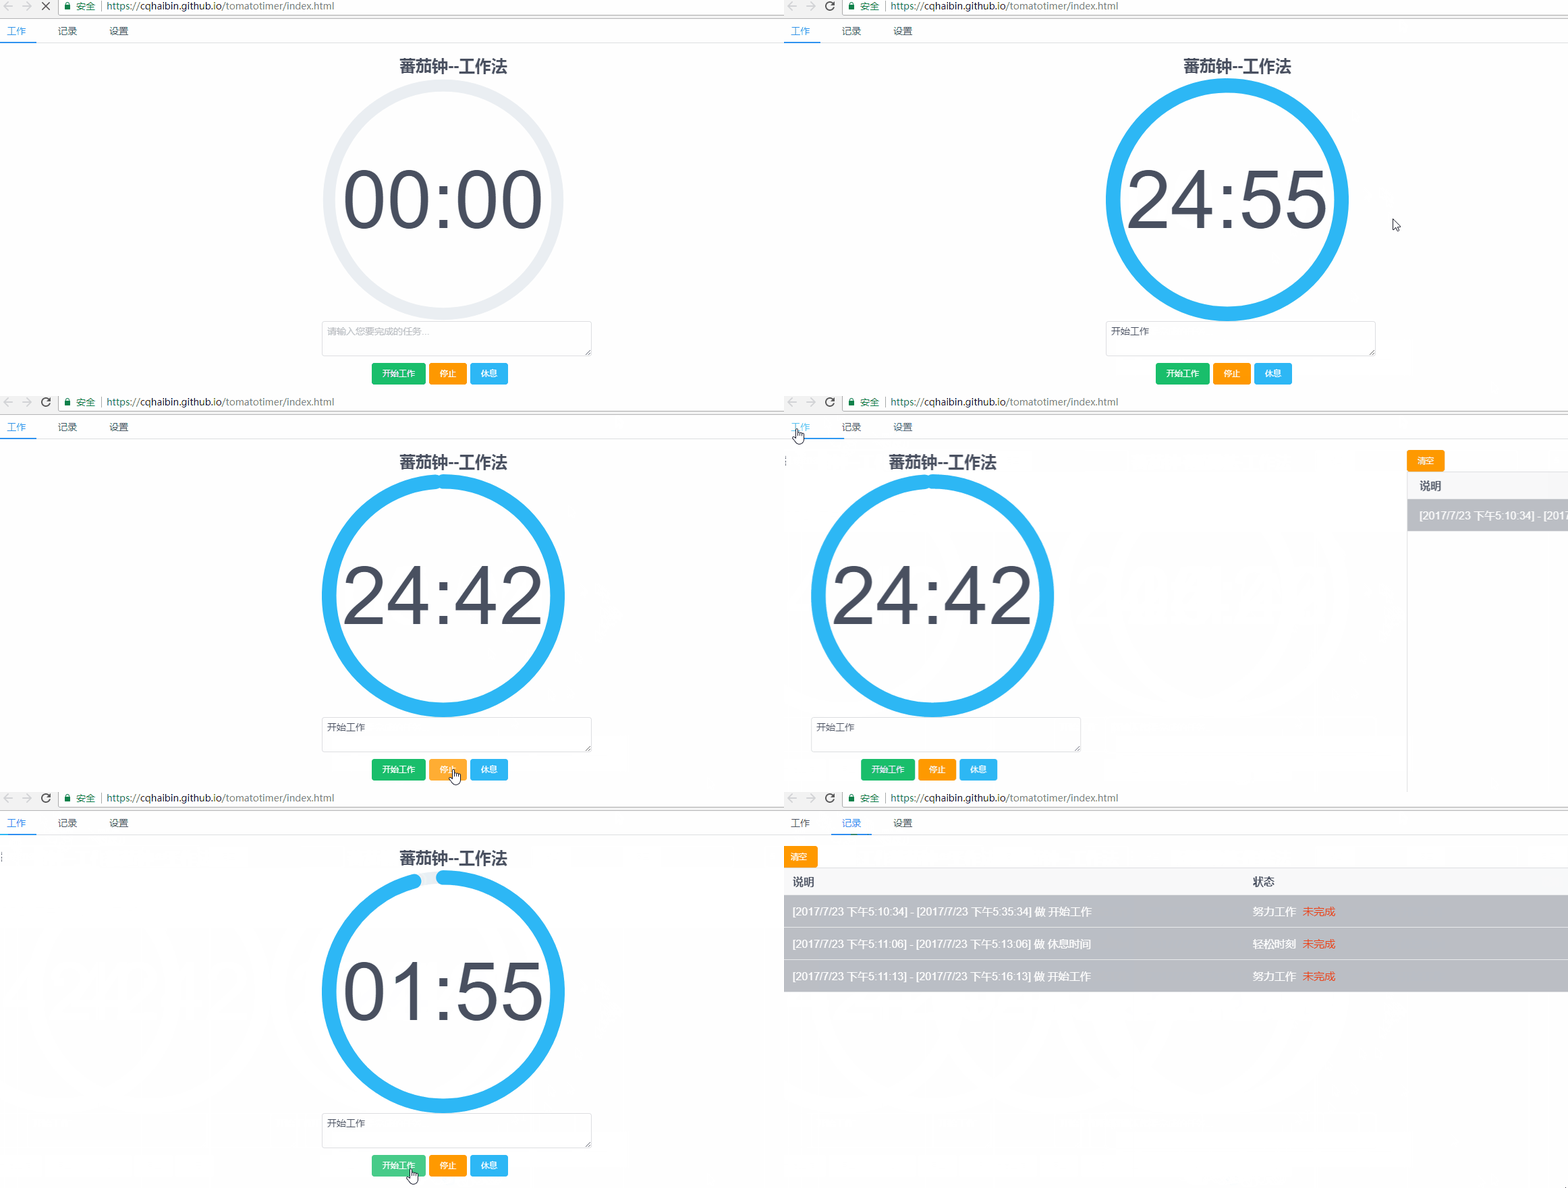
前段时间在利用工作之余开发了tomato timer这个蕃茄钟,然后部署到github.io上,由于greatway太厉害,偶尔会有打不开的情况。上周末对比做了扩展和改进,使其成为chrome的插件,或者成为桌面app。
chrome插件的使用与开发
一、如何安装与使用:
1、下载tomato timer项目,github地址 https://github.com/cqhaibin/tomato-timer.git
2、切换到V2.0.0.0的tag,然后如下图所配置:

3、然后单击 “小飞”图标即可使用,界面如下图:

二、打包源码简单介绍
本chrome插件的实现思路:插件开发是通过vue、vuex等实现的;然后通过rollup打包成为一个独立的js文件(tomatoTimer.js);最后配置chrome插件的manifest.json文件即可。
1、如何通过rollup把vue项目独立打包成一个js文件,代码片段如下:
var VueLoader = require('rollup-plugin-vue');
var Resolve = require('rollup-plugin-node-resolve');
var Commonjs = require("rollup-plugin-commonjs");
var replace = require('rollup-plugin-replace');
var path = require('path');
var babel = require('rollup-plugin-babel');
var paths = require("./paths");
var rollup = require('rollup');
var type = process.env.TYPE;

let config = {
    entry: path.resolve(__dirname, paths[type].source),
    plugins: [VueLoader(), babel({
      exclude: 'node_modules/**' // only transpile our source code
    }), Resolve({
    // pass custom options to the resolve plugin
    customResolveOptions: {
      moduleDirectory: 'node_modules'
    },
    jsnext: true,
    main: true,
    browser:true
  }), Commonjs(), replace({
    'process.env.NODE_ENV': JSON.stringify('development'),
    'process.env.VUE_ENV': JSON.stringify('browser')
  })]
};
rollup.rollup(config).then(function(bundle){
    bundle.write({
        format: 'iife',
        moduleName: "tomato",
        sourceMap: true,
        dest: path.resolve(__dirname, paths[type].dest)
    });
});
这里利用了rollup-plugin-replace插件替换vue中的一些配置,不加此插件在browser中运行时会报错。
2、对vue的引用需要注意,由于vue2.0开始,vue提供的文件分为runtime、compile等类型,所以要直接指定,如下代码所示:
import Vue from 'vue/dist/vue.js';
此代码在项目的aloneindex.js文件中。
3. chrome插件的配置
{
    "manifest_version": 2,
    "name": "tomato timer",
    "version": "1.0.0.0",
    "description": "tomato timer",
    "icons": {
        "16": "icons/tomatotimer-16.png",
        "48": "icons/tomatotimer-48.png",
        "64": "icons/tomatotimer-64.png",
        "128": "icons/tomatotimer-128.png"
    },
    "author": "sam long",
    "permissions": [
        "tabs", //可访问tab
        "storage" //可以访问本地存储
    ],
    //右键单击右上角插件logo时,弹出的窗口
    "options_page": "view/options.html",
    //左键单击右上角插件logo时,弹出的窗口
    "browser_action": {
        "default_icon": {
            "38": "icons/tomatotimer-48.png"
        },
        //"default_popup": "view/popup.html",
        "default_title": "tomato timer"
    },
    //后台运行的js进程对象
    "background": {
        "scripts": ["background.js"],
        "persistent": false
    },
    "content_security_policy": "script-src 'unsafe-eval'; object-src 'unsafe-eval'"
}
此配置只是实现一个chrome插件的简单配置,更多配置可以参考baidu。其中较为重要为background节点的配置,因为他能响应chrome插件上的行为,如你单击浏览器地址栏旁边的图标事件就需在此文件中捕获。background.js代码如下:
chrome.browserAction.onClicked.addListener(function(tab) {
    var destUrl = './index.html';
    chrome.tabs.create({ url: destUrl });
});
然后则是content_security_policy节点,他简称csp策略,默认chrome插件只会加同域下的安全文件夹下的js。所以此处要设置unsafe-eval。更多配置如下:
| 值 | 说明 |
| self | 同域(默认) |
| unsafe-inline | 行内js可以执行 |
| unsafe-eval | 本地js文件可以执行 |
| none |
4. 注意
1. browser_action中的default_popup有配置值时,chrome.browserAction.onClicked.addListener事件不会被触发
桌面App打包
一、此打包需要安装如下两个npm包:
electron:可将前端项目包装成为一个桌面app,并且他还提供了一系统的对操作系统的访问
electron-packager:发布桌面app
二、安装好后,对package.json文件进行如下配置
"name": "simple",
"version": "1.0.0",
"main": "electron/main.js",
这三个节点是必须的,且main会作为electron的入口文件。
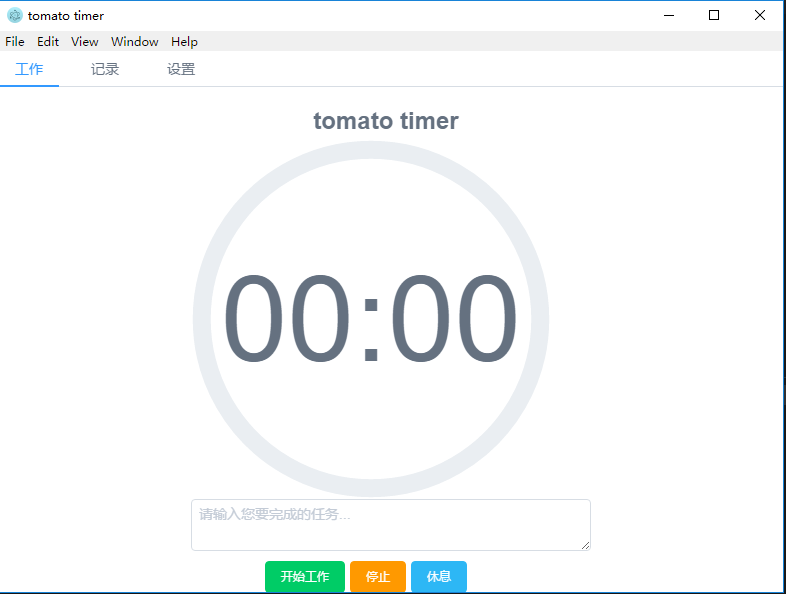
三、运行.\node_modules\.bin\electron . 即可看到如下界面:
四、利用electron-packager打包,输入如下命令后,就等待他的完成吧。
.\node_modules\.bin\electron-packager . tomatoTimer --out ./outApp
补充:
如果打包时间过长,或者直接打包失败(尤其是在windows平台),有如下两种情况:
- 使用的是cnpm进行的包安装,由于cnpm安装是扁平的,一下子展开node_modules文件夹太多,很有可能时间过长或者失败
- 没有忽略掉node_moduels中的包,使用如下命令忽略掉node_moduels包:
electron-packager ./ tomatoTimer --out ./outApp --overwrite --ignore=node_modules
2. 如本文对您有帮助请移步右下角,推荐本文,先谢谢各位看官,因为您的支持是我最大动力;
3. 欢迎大家转载本文;


【推荐】国内首个AI IDE,深度理解中文开发场景,立即下载体验Trae
【推荐】编程新体验,更懂你的AI,立即体验豆包MarsCode编程助手
【推荐】抖音旗下AI助手豆包,你的智能百科全书,全免费不限次数
【推荐】轻量又高性能的 SSH 工具 IShell:AI 加持,快人一步
· 10年+ .NET Coder 心语,封装的思维:从隐藏、稳定开始理解其本质意义
· .NET Core 中如何实现缓存的预热?
· 从 HTTP 原因短语缺失研究 HTTP/2 和 HTTP/3 的设计差异
· AI与.NET技术实操系列:向量存储与相似性搜索在 .NET 中的实现
· 基于Microsoft.Extensions.AI核心库实现RAG应用
· 10年+ .NET Coder 心语 ── 封装的思维:从隐藏、稳定开始理解其本质意义
· 地球OL攻略 —— 某应届生求职总结
· 提示词工程——AI应用必不可少的技术
· Open-Sora 2.0 重磅开源!
· 周边上新:园子的第一款马克杯温暖上架