多模块SSM RBAC案例项目环境搭建三 Spring整合mybatis
一 载入properties配置文件
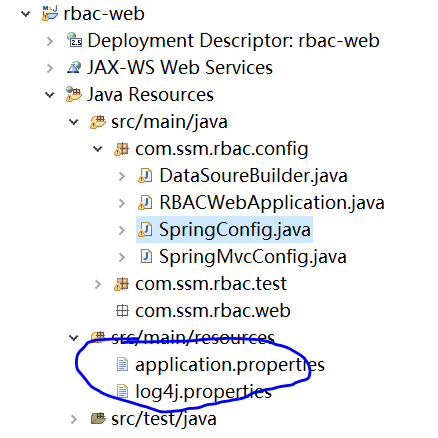
在rbac-web的类路径下新建application.properties配置文件,文件的内容包括配置数据源的一些值。图如下内容
配置如下:
database.username=root
database.password=123456
database.driver=com.mysql.jdbc.Driver
database.url=jdbc:mysql://localhost:3306/rbac?characterEncoding=utf-8
为了接收配置文件中的值,创建一个DataSourceBuilder类

代码如下
package com.ssm.rbac.config;

import org.springframework.beans.factory.annotation.Value;
import org.springframework.context.annotation.Configuration;
import org.springframework.context.annotation.PropertySource;

import lombok.Data;
@Data
public class DataSoureBuilder {

    @Value("${database.username}")
    private String username;

    @Value("${database.password}")
    private String password;

    @Value("${database.url}")
    private String url;

    @Value("${database.driver}")
    private String driver;


}
@PropertySource注解是把key载入的系统变量中,所以如果在properties文件中取的key的名称和操作系统中的系统变量相同,@Value注入的值将是系统变量。
如果有一个key是username,那么取的值是系统变量中的当前登录用户的名称,在本例中采用的是windows操作系统,所以如果key是username,就会取到登录的用户的名称admin,一般建议加入前缀,避免和系统中的系统变量冲突.。
二 把mybatis整合进spring中
其实就是在SpringConfig配置类中注入dataSource ,SqlSessionFactoryBean,MapperScannerConfigurer
package com.ssm.rbac.config;

import java.io.IOException;

import org.mybatis.spring.SqlSessionFactoryBean;
import org.mybatis.spring.mapper.MapperScannerConfigurer;
import org.springframework.beans.factory.annotation.Autowired;
import org.springframework.context.annotation.Bean;
import org.springframework.context.annotation.ComponentScan;
import org.springframework.context.annotation.ComponentScan.Filter;
import org.springframework.context.annotation.Configuration;
import org.springframework.context.annotation.FilterType;
import org.springframework.context.annotation.Import;
import org.springframework.context.annotation.PropertySource;
import org.springframework.context.support.PropertySourcesPlaceholderConfigurer;
import org.springframework.core.env.Environment;
import org.springframework.core.io.Resource;
import org.springframework.core.io.support.PathMatchingResourcePatternResolver;
import org.springframework.core.io.support.ResourcePatternResolver;
import org.springframework.stereotype.Controller;
import org.springframework.web.bind.annotation.RestController;
import org.springframework.web.servlet.config.annotation.EnableWebMvc;

import com.alibaba.druid.pool.DruidDataSource;

@Configuration
@ComponentScan(basePackages = { "com.ssm.rbac.*" }, excludeFilters = {
        @Filter(type = FilterType.ANNOTATION, value = Controller.class),
        @Filter(type = FilterType.ANNOTATION, value = RestController.class),
        @Filter(type = FilterType.ANNOTATION, value = EnableWebMvc.class) }) // 启动注解扫描,过滤掉Controller、RestController、EnableWebMvc注解标注的类
@PropertySource("classpath:application.properties")
public class SpringConfig {


    @Autowired
    private Environment env;


    @Bean
    public DataSoureBuilder getDataSoureBuilder() {
        return new DataSoureBuilder();
    }

    /**
     * 那么PropertyPlaceholderConfigurer类就是bean factory post-processor的一种(bean工厂后置处理器),
     * 它的作用是一个资源属性的配置器,能够将BeanFactory的里定义的内容放在一个以.propertis后缀的文件中。
     * PropertyPlaceholderConfigurer是个bean工厂后置处理器的实现,也就是 BeanFactoryPostProcessor接口的一个实现。
     * PropertyPlaceholderConfigurer可以将上下文(配置文 件)中的属性值放在另一个单独的标准java Properties文件中去。在XML文件中用${key}替换指定的properties文件中的值。
     * 这样的话,只需要对properties文件进 行修改,而不用对xml配置文件进行修改。
     *
     * @return
     */
    @Bean
    public static PropertySourcesPlaceholderConfigurer getPropertySourcesPlaceholderConfigurer() {
        return new PropertySourcesPlaceholderConfigurer();
    }

    /**
     * 配置数据源
     * @param builder
     * @return
     */
    @Bean(name = "dataSource")
    public DruidDataSource getDataSource(DataSoureBuilder builder ) {
        System.out.println(builder);
        DruidDataSource dataSource = new DruidDataSource();
        dataSource.setUrl(builder.getUrl());
        dataSource.setUsername(builder.getUsername());
        dataSource.setDriverClassName(builder.getDriver());
        dataSource.setPassword(builder.getPassword());
        return dataSource;
    }

    @Bean(name = "factoryBean")
    public SqlSessionFactoryBean getSqlSessionFactoryBean(DruidDataSource dataSource) throws IOException {
        SqlSessionFactoryBean factoryBean = new SqlSessionFactoryBean();
        factoryBean.setDataSource(dataSource);
        ResourcePatternResolver resolver = new PathMatchingResourcePatternResolver();
        Resource[] mapperLocations = resolver.getResources("classpath*:mapper/*.xml");
        factoryBean.setMapperLocations(mapperLocations);
        ;
        return factoryBean;
    }

    /**
     * MapperScannerConfigurer 自动扫描 将Mapper接口生成代理注入到Spring
     * @return
     */
    @Bean
    public MapperScannerConfigurer getScanner() {
        MapperScannerConfigurer scanner = new MapperScannerConfigurer();
        scanner.setBasePackage("com.ssm.rbac.common.mapper");
        scanner.setSqlSessionFactoryBeanName("factoryBean");
        return scanner;
    }

}
注意:classpath*:mapper/*.xml中的classpath后面的*,这个代码会扫描web应用下的classes目录和lib目录,如果仅仅是classpath,只会扫描classes目录

 浙公网安备 33010602011771号