
前言
Grunt是一款前端构建工具,帮助我们自动化搭建前端工程。它可以实现自动对js、css、html文件的合并、压缩等一些列操作。Grunt有很多插件,每一款插件实现某个功能,你可以通过npm命名去下载插件,然后使用它们。关于grunt的使用以及配置,卤煮不打算在此介绍。本篇博文重点要讲的是如何快速开发一款自定义的grunt插件。因为卤煮在打包合并代码的时候发现了无法将html和js混合的文件进行压缩处理,为此卤煮也翻了很多资料,没查找到理想的解决方案。在山穷水复之时,硬着头皮自己开发了一个简单的插件。在这里分享出来给诸位,望对正在使用grunt构建工具的诸君能有所帮助。
创建插件
1通过 npm install -g grunt-init 命令安装 grunt-init 。
2通过 git clone git://github.com/gruntjs/grunt-init-gruntplugin.git ~/.grunt-init/gruntplugin 命令安装grunt插件模版。
3在一个空的目录中执行 grunt-init gruntplugin 。
4执行 npm install 命令以准备开发环境。
在执行到第三步的时候会出现若干选择让你填写,这些选项都是初始化插件时的配置选项。把你的插件名称和github替换本地地址填上外其他的都可以选择默认。然后我们得到了一个默认的插件模块工程目录。如下所示:
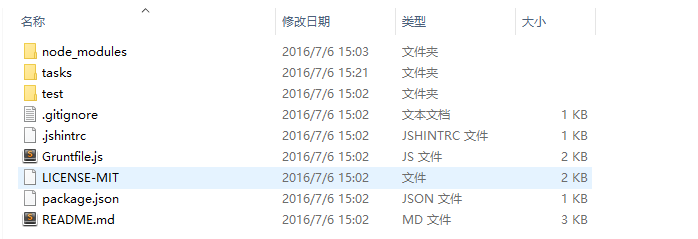
其中Gruntfile.js是当前模块需要的依赖,你需要的是在tasks中的js文件中编写自己的插件。
编写插件
一个插件是可以配置的,在开发插件之前,你需要了解一些执行参数和配置。假设你的插件放入到了工程中去了,那么在该工程的gruntfile文件中必须写上要加载的插件并且给他参数,告诉这个插件怎么样处理哪些文件。此处仍然以压缩js和html混合代码的html文件为例子,展示我们编写插件时的基础配置:
module.exports = function(grunt) {

    // 构建任务配置
    grunt.initConfig({

        //读取package.json的内容,形成个json数据
        pkg: grunt.file.readJSON('package.json'),
        //压缩模板文件
        htmlmin: {
            options: {
                a:1,
                b:2,
                c:3
            },
            html: {
                expand: true,
                cwd: 'js/tpl/',
                src: ['*.html'],
                dest: 'js/html_min/'
            }
        }

    });

    // 加载指定插件任务
    grunt.loadNpmTasks('grunt-htmlmin');


    // 默认执行的任务
    grunt.registerTask('default', ['htmlmin']);

};
我们可以看到在配置文件中有了若干的配置项,那么我们在自己开发的htmlmin插件中怎么样读取呢。对于options我们可以在自己的插件中用this.options获取到,其他html对象中的配置是直接作为文件的默认属性而引用的。
/*
 * template-uglify
 * https://github.com/烧炭党人-申包胥/grunt-plugin
 *
 * Copyright (c) 2016 chen.y
 * Licensed under the MIT license.
 */

'use strict';

module.exports = function(grunt) {

  // Please see the Grunt documentation for more information regarding task
  // creation: http://gruntjs.com/creating-tasks
//开始注册任务
  grunt.registerMultiTask('htmlmin', 'uglify these html template', function() {
    // Merge task-specific and/or target-specific options with these defaults.此处即为options中的参数默认配置项,上面的a b c都会传入其中
    var options = this.options({
      punctuation: '',
      separator: ', '
    });

    // Iterate over all specified file groups.
    this.files.forEach(function(f) {
      // Concat specified files.
      var src = f.src.filter(function(filepath) {
        // Warn on and remove invalid source files (if nonull was set).
        if (!grunt.file.exists(filepath)) {
          grunt.log.warn('Source file "' + filepath + '" not found.');
          return false;
        } else {
          return true;
        }
      }).map(function(filepath) {
        // Read file source.
        return grunt.file.read(filepath);
      }).join(grunt.util.normalizelf(options.separator));

      // Handle options.src未文件内容的字符串
      src += options.punctuation;
      //此处为添加的业务,将读取到的文件内容压缩
      src = src.replace(/\r\n/g, '').replace(/\s+/g, ' ').replace(/>\s+(?=<)/g, '$1');
      // 将处理后的文件存入目标位置 dest是上文中配置的路径/js/html_min/
      grunt.file.write(f.dest, src);

      // Print a success message.
      grunt.log.writeln('File "' + f.dest + '" created.');
    });
  });

};
发布插件
现在,你的基本的插件以及完成。通过本地测试后你可以执行 npm publish命令将你创建的 Grunt 插件提发布npm!为了检验插件,我们将一个html为后缀名的html文件进行压缩:
<!--消费订单-->
<script id="tplmenu" type="text/template">
	<footer class="bottom">
		<%for(var i=0; i<globalConfig.menu.length; i++){%>
		<div class="box <%if(globalConfig.menu[i].sub_button.length > 0){%>haschild<%}%>" data-url="<%=globalConfig.menu[i].url%>">
			<div><%=globalConfig.menu[i].name%></div>
			<%if(globalConfig.menu[i].sub_button.length > 0){%>
				<ul class="hidelist">
				<%for(var n=0; n<globalConfig.menu[i].sub_button.length; n++){%>
					<a href="<%=globalConfig.menu[i].sub_button[n].url%>"><%=globalConfig.menu[i].sub_button[n].name%></a>
				<%}%>
				</ul>
			<%}%>
		</div>
		<%}%>
	</footer>
</script>
配置gruntfile文件cwd:'source',src:['*.html'], dest:'target',执行grunt命令,得到压缩后的html:
<!--消费订单--><script id="tplmenu" type="text/template"><footer class="bottom"><%for(var i=0; i<globalConfig.menu.length; i++){%><div class="box <%if(globalConfig.menu[i].sub_button.length > 0){%>haschild<%}%>" data-url="<%=globalConfig.menu[i].url%>"><div><%=globalConfig.menu[i].name%></div><%if(globalConfig.menu[i].sub_button.length > 0){%><ul class="hidelist"><%for(var n=0; n<globalConfig.menu[i].sub_button.length; n++){%><a href="<%=globalConfig.menu[i].sub_button[n].url%>"><%=globalConfig.menu[i].sub_button[n].name%></a><%}%></ul><%}%></div><%}%></footer></script>
参考文档
http://www.gruntjs.net/creating-plugins

 浙公网安备 33010602011771号