CSS之bfc -- float布局
一、bfc布局
以下的代码加了子元素的上边距,为什么没有发生变化?
<div class="wrapper">
<div class="content"></div>
</div>
* {
padding: 0;
margin: 0;
}
.wrapper{
position: relative;
margin-left:100px;
margin-top:100px;
width: 100px;
height: 100px;
background: black;
}
.content{
margin-left:50px;
margin-top: 100px; //子标签设置了上边距有100像素,结果没发生变化
position: absolute;
width:50px;
height:50px;
background: red;
}
结果如下
为什么呢?每个盒子有它自己的规则。 垂直方向的margin-top父子元素是结合到一起的,就是说会黏在一起,子动父也会跟着一起动。它有个名词叫margin塌陷。也可以理解为子元素上面是没有相对的位置,所以子没有参照物,没法动(图1)。只有当子元素margin-top大于父元素才会动,子动父也会跟着动(图2)
图(1)
图(2)
可以使用bfc改变盒子内部的默认的规则(重新渲染盒子的内部),触发bfc之后盒子会遵循另一套语法规则。那怎么触发bfc呢?如下:
1.position:absolute;2.display:inline-block;3.float:left/right;4.overflow:hidden;
在开发中,用其中一个会对其它元素造成影响,可以换另一个使用。针对需求使用属性
给它的父标签加overflow:hidden;把溢出的部分裁剪掉

看!!是不是可以了
二、盒子共用
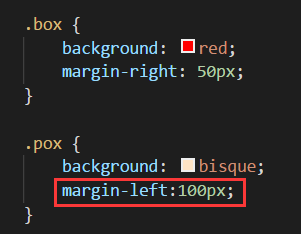
1.当有两个标签,只设置一个元素的右边距,会把另一个元素顶过去过去(图1)。这就叫盒子共用。区域不能共用
<span class="box">123</span>
<span class="pox">987</span>
* {
padding: 0;
margin: 0;
}
.box{
background: red;
margin-right: 50px;
}
.pox{
background: bisque;
}
图(1)
当第二元素设置左边距时,距离会累加。

三、浮动
<div class="warpper">
<div class="content">1</div>
<div class="content">2</div>
</div>
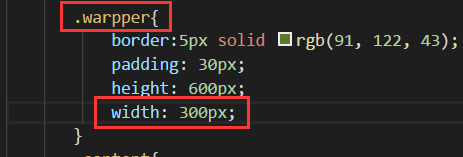
.warpper{
border:5px solid rgb(91, 122, 43);
padding: 30px;
height: 600px;
width: 100px;
}
.content{
float: left;
margin-left: 10px;
margin-bottom:40px;
width:100px;
height: 100px;
background: firebrick;
}
运行:
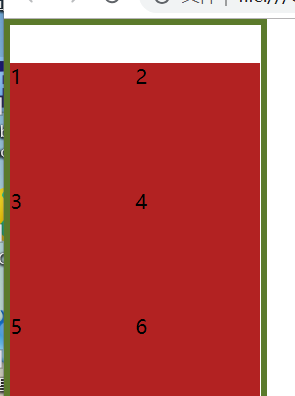
子标签元素会随着父级元素的宽度而有所调整,所以怎么增加子标签的样式,都不会超出父元素边框,除了包不住高度( 最后会解释怎么包住父元素)
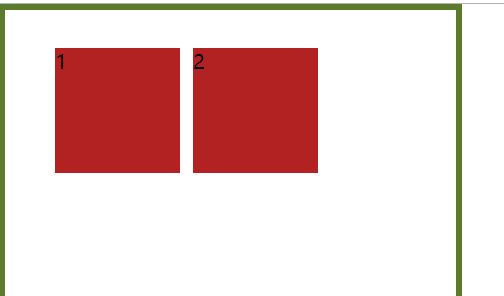
子元素在浮动中,站队的边界是它父元素的边界
<div class="warpper">
<div class="content">1</div>
<div class="content">2</div>
<div class="content">3</div>
<div class="content">4</div>
<div class="content">5</div>
<div class="content">6</div>
<div class="content">7</div>
</div>
* {
padding: 0;
margin: 0;
}
.warpper{
border:5px solid rgb(91, 122, 43);
padding-top: 30px;
height: 300px;
width: 400px;
}
.content{
float: left;
width:100px;
height: 100px;
background: firebrick;
}
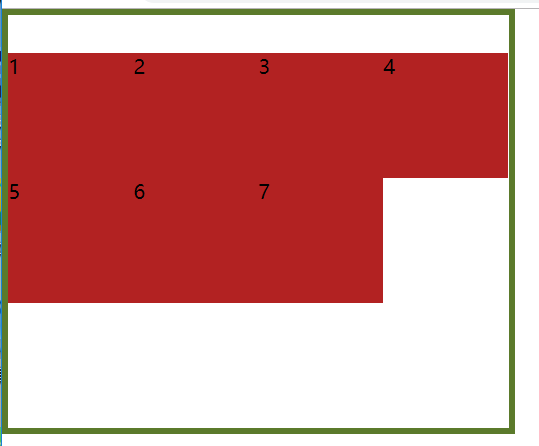
只要缩小父级的宽度,子元素宽度也会跟着发生改变。
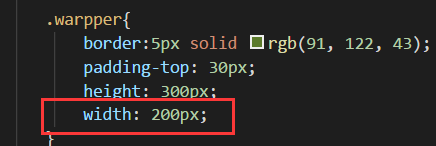
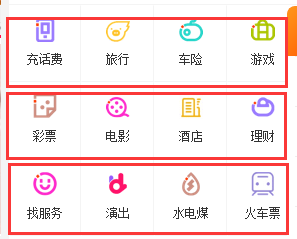
可以使用float实现下面的样式

2.浮动元素会产生浮动流。所有产生浮动流的元素,块级元素都看不到浮动他们。可以使用bfc触发。产生了bfc的元素和文本类属性以及文本类属性(inline)都能看到浮动元素,在子元素中触发bfc。加个:overflow: hidden;
<div class="box"></div>
<div class="demo"></div>
* {
padding: 0;
margin: 0;
}
.box{
float: left;
height: 100px;
width: 100px;
background:gold;
opacity: 0.5;
}
.demo{
height: 150px;
width:150px;
background: greenyellow;
}
重要:使用浮动流时,当父级块标签想要包住子级标签时,父级不能明确设置宽高,当后端数据传得多时,会溢出边框。可以在后面加个p标签,清除浮动流,(不要深度刨析原理)。现在可以在父元素中添加多个方块,都不会溢出边框。仅此一种方法
<div class="wrapper">
<div class="box">1</div>
---------------- <!-- 理论上会在这产生浮动流 -->
<div class="box">2</div>
----------------
<div class="box">3</div>
----------------
<p></p>
</div>
* {
padding: 0;
margin: 0;
}
.wrapper{
border: 4px solid red;
background:gold;
}
.box{
float: left;
height: 100px;
width: 100px;
}
p{
border-top: 0px solid red;
clear: both;
}


 浙公网安备 33010602011771号