uniapp专题学习(三)
前言
在uniapp专题学习(二)中学习到的知识点有viedo组件、form表单组件、navigator路由跳转以及page.json中的tabBar配置。
vue语法之计算属性computed
每一个计算属性都包含一个 getter 和一个 setter ,默认是利用 getter 来读取。所有 getter 和 setter 的 this 上下文自动地绑定为 Vue 实例。其实computed在运行结果和使用方法来看都是和methods是一样的,但是他们之间也是有区别的。
computed vs methods
我们可以通过在表达式中调用computed或者methods来达到同样的效果:
<template>
    <view>
        <view>Reversed message: "{{ reversedMessage() }}"</view>
    </view>
</template>
<script>
    export default {
        data() {
            return {
                message: 'Hello'
            }
        },
        computed/methods: {
            reversedMessage(){
                return this.message.split('').reverse().join('')
            }
        }
    }
</script>
两种方式的最终结果确实是完全相同的。然而,不同的是计算属性是基于它们的响应式依赖进行缓存的。
只在相关响应式依赖发生改变时它们才会重新求值。这就意味着只要 message 还没有发生改变,多次访问 reversedMessage 计算属性(computed)会立即返回之前的计算结果,而不必再次执行函数。
相比之下,每当触发重新渲染时,调用方法(methods)将总会再次执行函数。
我们为什么需要缓存?假设我们有一个性能开销比较大的计算属性 A,它需要遍历一个巨大的数组并做大量的计算。然后我们可能有其他的计算属性依赖于 A。如果没有缓存,我们将不可避免的多次执行 A 的 getter!如果你不希望有缓存,请用方法(methods)来替代。
vue语法之自定义组件
概念
- 组件是视图层的基本组成单元。
- 组件是一个单独且可复用的功能模块的封装。
- 一个组件包括开始标签和结束标签,标签上可以写属性,并对属性赋值。内容则写在两个标签之内。
下面是一个基本组件示例,在根
<template>
    <view>
        <view>{{userName}}</view>
    </view>
</template>
<script>
    export default {
        data() {
            return {
                "userName":"foo"
            }
        }
    }
</script>
优势
- 可以将组件进行任意次数的复用。
- 合理的划分组件,有助于提高应用性能。
- 代码更加方便组织和管理,并且扩展性也更强,便于多人协同开发。
- 组件化开发能大幅度提高应用开发效率、测试性、复用性等。
注册
在注册一个组件的时候,我们始终需要给它一个名字。
在uni-app工程根目录下的 components 目录,创建并存放自定义组件:
│─components            	符合vue组件规范的uni-app组件目录
│  └─componentA         	符合‘components/组件名称/组件名称.vue’目录结构,easycom方式可直接使用组件
│  		└─componentA.vue    可复用的componentA组件
│  └─component-a.vue        可复用的component-a组件
全局注册
uni-app 支持配置全局组件,需在 main.js 里进行全局注册,注册后就可在所有页面里使用该组件。
注意
- Vue.component 的第一个参数必须是静态的字符串。
- nvue 页面暂不支持全局组件。
main.js里进行全局导入和注册
	import Vue from 'vue'
	import pageHead from './components/page-head.vue'
	Vue.component('page-head',pageHead)
index.vue里可直接使用组件
<template>
    <view>
        <page-head></page-head>
    </view>
</template>
局部注册
局部注册之前,在需要引用该组件的页面,导入你想使用的组件。
- 传统vue规范: 在 index.vue 页面中,通过
import方式引入组件 ,在components选项中定义你想要使用的组件。
<!-- 在index.vue引入 uni-badge 组件-->
<template>
    <view>
        <uni-badge text="1"></uni-badge><!-- 3.使用组件 -->
    </view>
</template>
<script>
    import uniBadge from '@/components/uni-badge/uni-badge.vue';//1.导入组件(这步属于传统vue规范,但在uni-app的easycom下可以省略这步)
    export default {
        components:{uniBadge }//2.注册组件(这步属于传统vue规范,但在uni-app的easycom下可以省略这步)
    }
</script>
- 通过uni-app的easycom(推荐):将组件引入精简为一步。只要组件安装在项目的
components目录下,并符合components/组件名称/组件名称.vue目录结构。就可以不用引用、注册,直接在页面中使用。
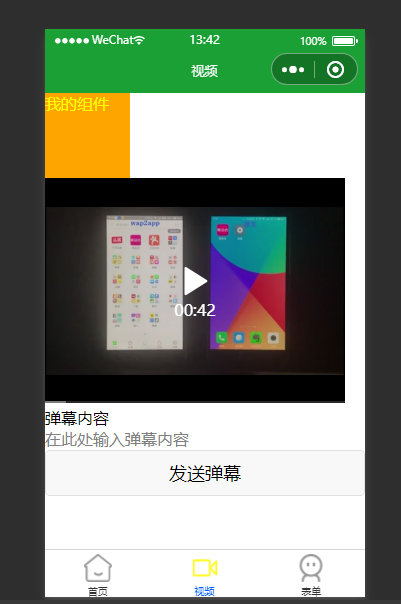
代码案例:
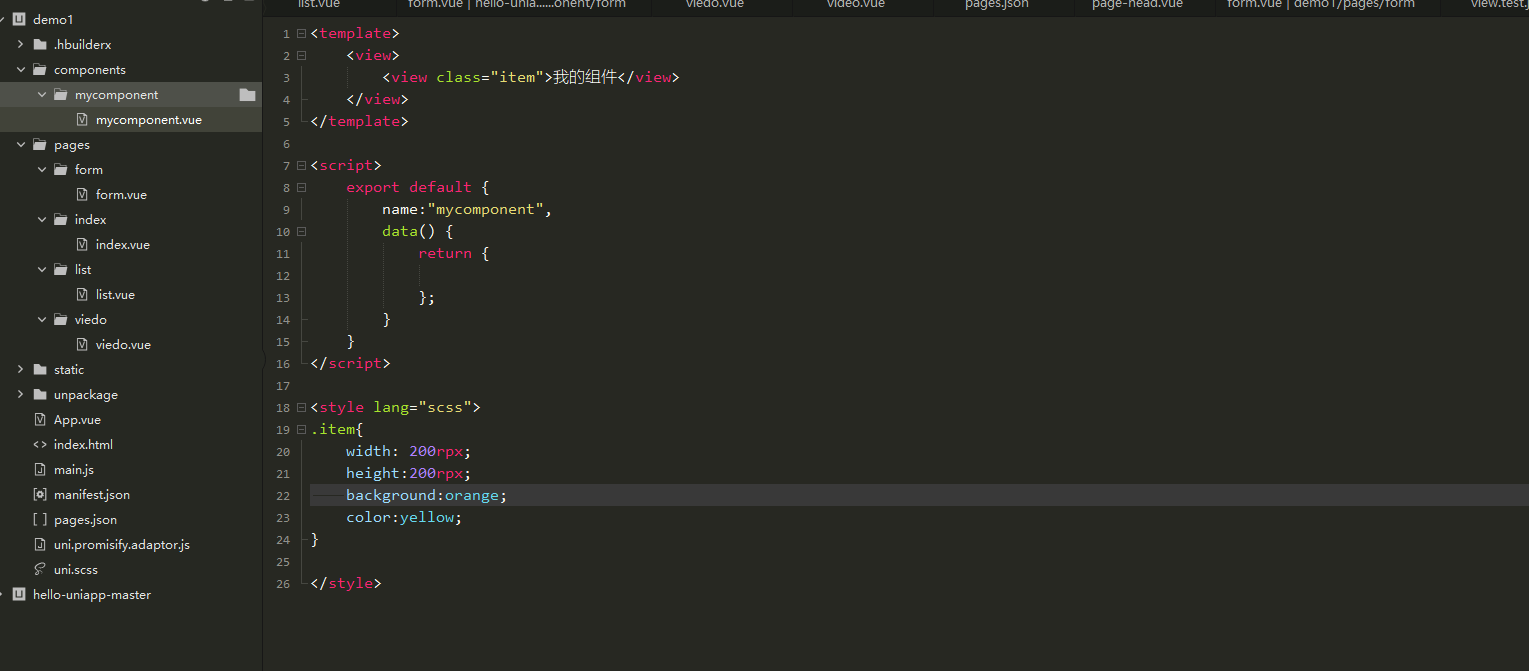
- 定义组件

<template>
	<view>
		<view class="item">我的组件</view>
	</view>
</template>

<script>
	export default {
		name:"mycomponent",
		data() {
			return {

			};
		}
	}
</script>

<style lang="scss">
.item{
	width: 200rpx;
	height:200rpx;
	background:orange;
	color:yellow;
}

</style>
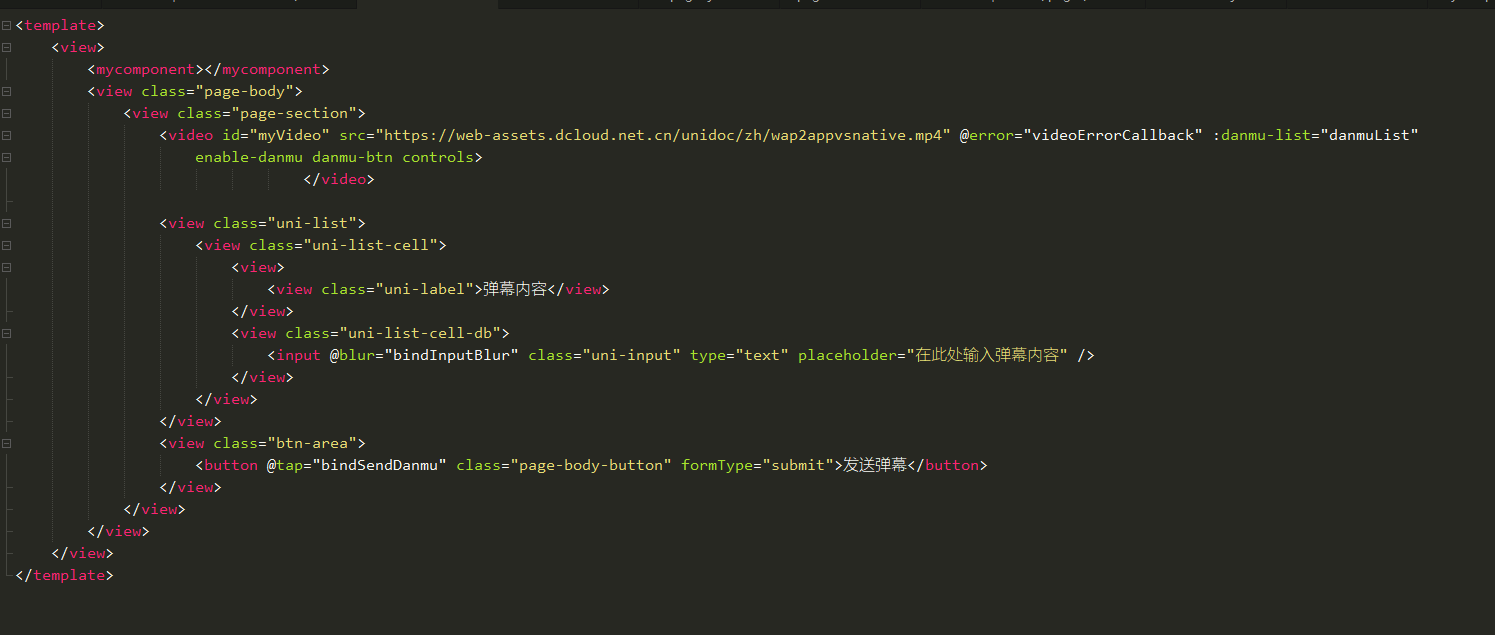
- 其他页面引入组件,组件可以引入多个页面,并且组件代码变动,引入的组件也会跟着变动。


vue语法之自定义组件的传值
props静态传值
子组件:
<template>
	<view>
		<view class="item">{{title}}</view>
	</view>
</template>

<script>
	export default {
		name:"mycomponent",
		props:["title"],
		data() {
			return {

			};
		}
	}
</script>
父组件:
<mycomponent title="静态传值"></mycomponent>
props动态传值、数据类型校验及默认值
子组件:
<template>
	<view>
		<view class="item">{{title}}</view>
	</view>
</template>

<script>
	export default {
		name:"mycomponent",
		props:{
            title:{
				type:String,
				default:"默认值"
			}
        },
		data() {
			return {

			};
		}
	}
</script>
父组件:
没有值就会显示默认值
<mycomponent></mycomponent>
将title申明成变量就显示变量的值,并且如果传其他的数据类型会报错
<template>
	<view>
		<mycomponent :title="title"></mycomponent>
	</view>
</template>

<script>
	export default {
		data() {
			return {
				title: "动态变量"
			};
		}
	}
</script>
Tips:
Prop 校验,你可以向props 选项提供一个带有 props 校验选项的对象,例如:
export default {
  props: {
    // 基础类型检查
    //(给出 `null` 和 `undefined` 值则会跳过任何类型检查)
    propA: Number,
    // 多种可能的类型
    propB: [String, Number],
    // 必传,且为 String 类型
    propC: {
      type: String,
      required: true
    },
    // Number 类型的默认值
    propD: {
      type: Number,
      default: 100
    },
    // 对象类型的默认值
    propE: {
      type: Object,
      // 对象或者数组应当用工厂函数返回。
      // 工厂函数会收到组件所接收的原始 props
      // 作为参数
      default(rawProps) {
        return { message: 'hello' }
      }
    },
    // 自定义类型校验函数
    propF: {
      validator(value) {
        // The value must match one of these strings
        return ['success', 'warning', 'danger'].includes(value)
      }
    },
    // 函数类型的默认值
    propG: {
      type: Function,
      // 不像对象或数组的默认,这不是一个
      // 工厂函数。这会是一个用来作为默认值的函数
      default() {
        return 'Default function'
      }
    }
  }
}
自定义事件传值(子组件向父组件传值)
子组件:
<template>
	<view>
		<input class="uni-input" placeholder="自动获得焦点" @input="oninput" />
	</view>
</template>

<script>
	export default {
		name:"myinput",
		data() {
			return {

			};
		},
		methods:{
			oninput(e){
				this.$emit("compponentData",e.detail.value)
			}
		}
	}
</script>

<style lang="scss">

</style>
父组件:
<template>
	<view>
		<myinput @compponentData="compponentData"></myinput>
	</view>
</template>

<script>
	export default {
		data() {
			return {
			};
		},
		methods:{
			compponentData(e){
				console.log("从子组件传过来的参数:"+e)
			}
		}
	}
</script>


 浙公网安备 33010602011771号