Spring Boot GraphQL 实战 01_快速入门
hello,大家好,我是小黑,又和大家见面啦~
新开一个专题是关于 GraphQL 的相关内容,主要是通过 Spring Boot 来快速开发 GraphQL 应用,希望对刚接触 GraphQL 的同学有所帮助。
项目 github 地址:https://github.com/shenjianeng/graphql-spring-boot-example
什么是 GraphQL
先看一下官网的解释:
GraphQL is a query language for APIs and a runtime for fulfilling those queries with your existing data. GraphQL provides a complete and understandable description of the data in your API, gives clients the power to ask for exactly what they need and nothing more, makes it easier to evolve APIs over time, and enables powerful developer tools.
GraphQL 既是一种用于 API 的查询语言也是一个满足你数据查询的运行时。 GraphQL 对你的 API 中的数据提供了一套易于理解的完整描述,使得客户端能够准确地获得它需要的数据,而且没有任何冗余,也让 API 更容易地随着时间推移而演进,还能用于构建强大的开发者工具。
再看一下维基百科的解释:
https://en.wikipedia.org/wiki/GraphQL
GraphQL is an open-source data query and manipulation language for APIs, and a runtime for fulfilling queries with existing data.GraphQL was developed internally by Facebook in 2012 before being publicly released in 2015.
It allows clients to define the structure of the data required, and the same structure of the data is returned from the server.
GraphQL 是一种用于 api 的开源数据查询和操作语言,也是一种用于实现现有数据查询的运行时。GraphQL 于2012年由 Facebook内部开发,2015年公开发布。
它允许客户端定义所需数据的结构,并从服务器返回相同的数据结构。
从字面上理解:GraphQL = Graph + QL = 图表化、可视化的查询语言。它允许客户端定义所需数据的结构,并从服务器返回相同的数据结构。
Hello world
GraphQL 是一种规范,已有多种编程语言支持。
在本系列文章中,我们使用 graphql-spring-boot-starter 来完成 GraphQL 相关开发讲解。
github 地址:https://github.com/graphql-java-kickstart/graphql-spring-boot
引入相关依赖
构建一个基础的 Spring Boot Web 项目工程,引入最新的 graphql-spring-boot-starter:
  <dependency>
    <groupId>org.springframework.boot</groupId>
    <artifactId>spring-boot-starter-web</artifactId>
  </dependency>

  <dependency>
    <groupId>org.projectlombok</groupId>
    <artifactId>lombok</artifactId>
    <optional>true</optional>
  </dependency>

  <dependency>
    <groupId>com.graphql-java-kickstart</groupId>
    <artifactId>graphql-spring-boot-starter</artifactId>
    <version>8.0.0</version>
  </dependency>
通过 maven 我们可以很清楚的看到 graphql-spring-boot-starter 引入了哪些依赖包:
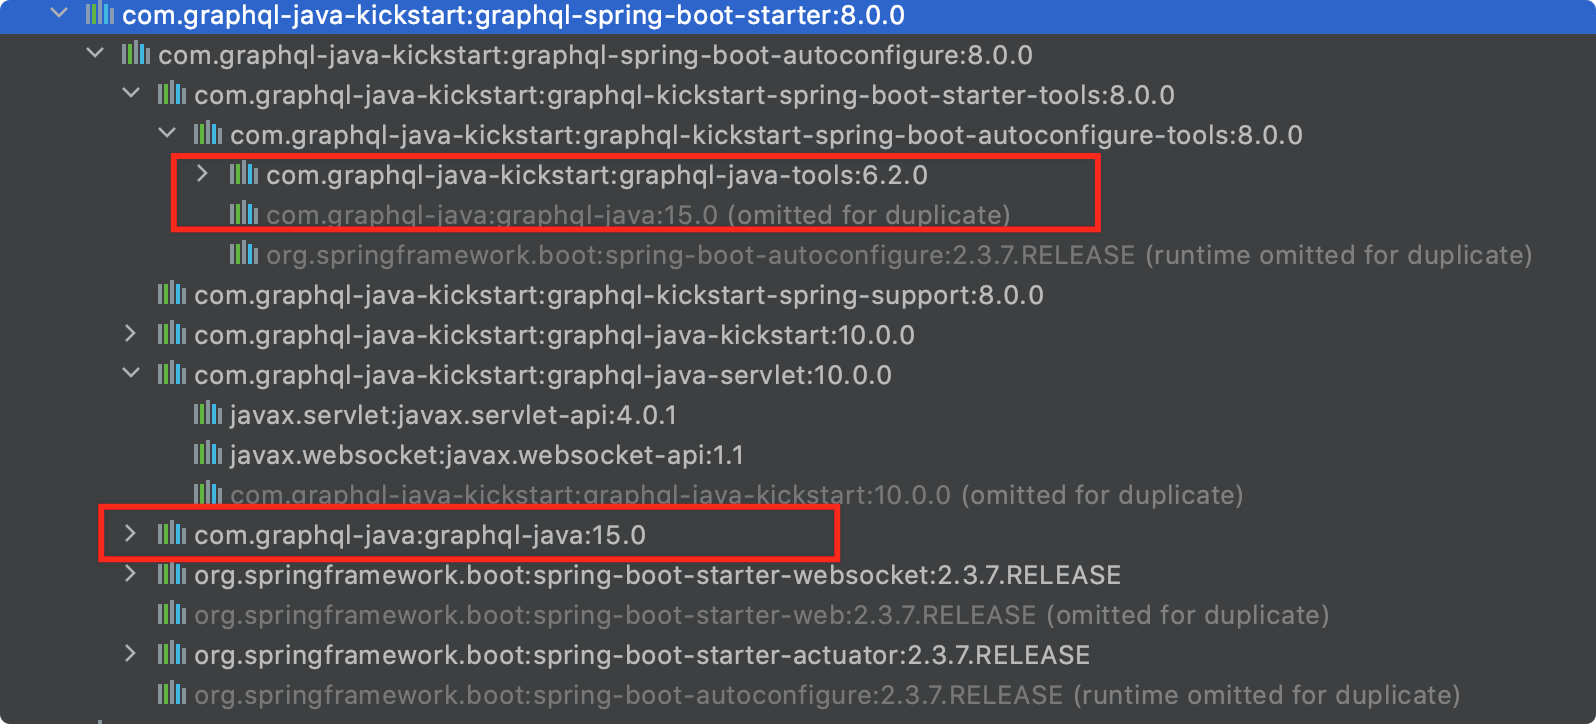
graphql-spring-boot-starter 默认情况下会扫描 classpath 下所有的 graphqls 后缀文件。
当然,我们也可以通过 application.properties 来配置修改相关属性,本案例中,我们使用默认配置即可。

编写第一个 graphqls 文件
在 resources 文件夹下新建 schema.graphqls 文件。
如果你在使用 idea 的话,可以安装 https://plugins.jetbrains.com/plugin/8097-js-graphql 插件来帮助你编写 graphqls 文件。
# 表示构建一个 user 数据结构
type User{
    # id,类型就是 ID ,! 表示是必填字段
    id:ID!
    # username 字段,String 类型
    username:String!
    nickname:String!
    # city 字段,类型是 City 枚举
    city:City
}

# City 枚举值
enum City{
    hangzhou
    shanghai
}

# 查询相关接口
type Query{
    # 获取用户列表,返回 user 数组
    userList:[User!]
}
上述 schema.graphqls 文件中定义了 User 和 City 这两种数据类型。同时,我们生成两个 Java Bean 来与之相对应。
public enum City {
    hangzhou,
    shanghai,
}

@Data
public class User {
    private UUID id;
    private String username;
    private String nickname;
    private City city;
}
定义 GraphQLQueryResolver
@Component
public class UserGraphQLQueryResolver implements GraphQLQueryResolver {

    public Collection<User> userList() {
        User user1 = new User();
        user1.setId(UUID.randomUUID());
        user1.setUsername("coder小黑");
        user1.setNickname("coder小黑没有昵称");
        user1.setCity(City.hangzhou);

        User user2 = new User();
        user2.setId(UUID.randomUUID());
        user2.setUsername("今晚打老虎");
        user2.setNickname("爱老虎油");
        user2.setCity(City.shanghai);
        return Arrays.asList(user1, user2);
    }
}
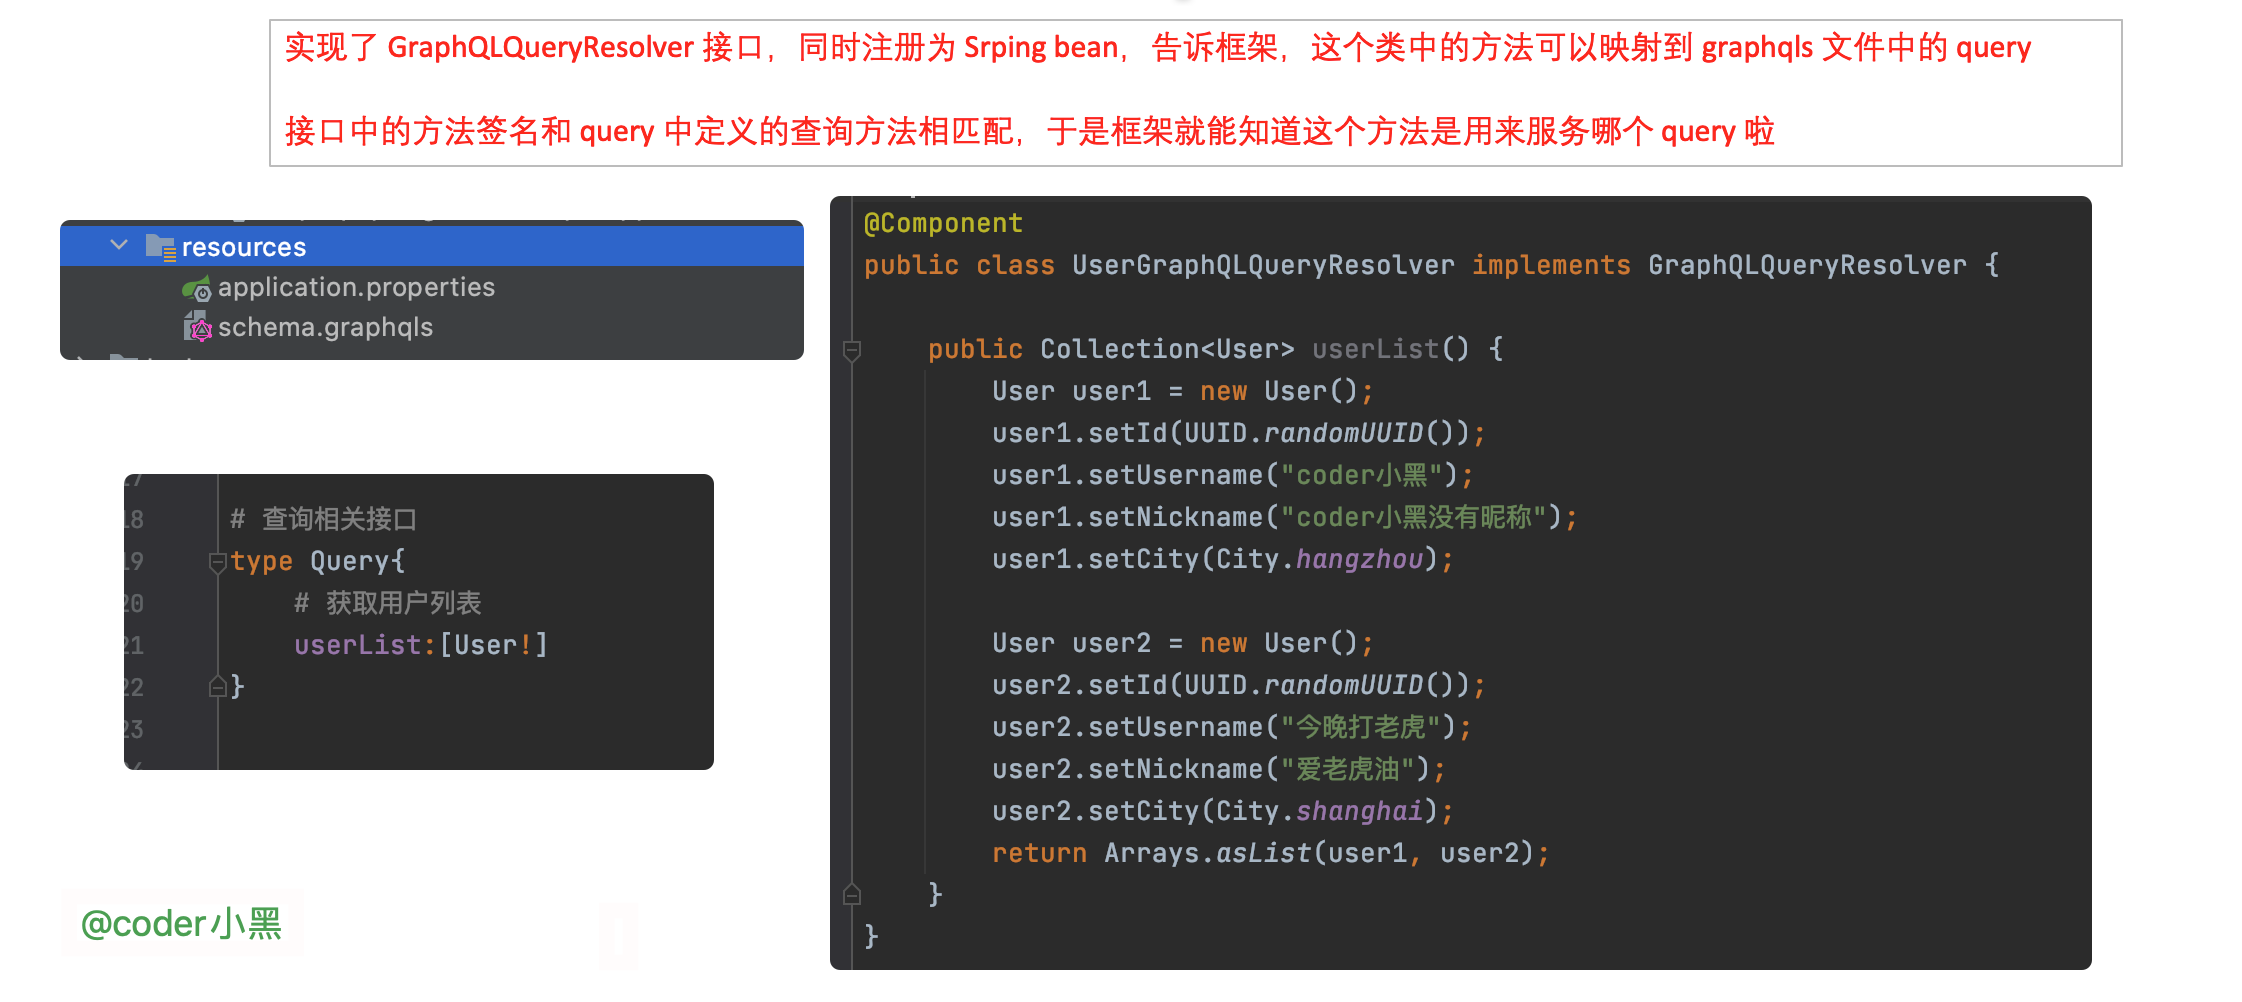
- 定义了一个 Spring Beran
UserGraphQLQueryResolver,实现了graphql.kickstart.tools.GraphQLQueryResolver接口 - 有一个名为
userList的方法,方法不需要入参,返回Collection<User>
没错,聪明的读者同学是不是已经发现了:
UserGraphQLQueryResolver#userList 就是用来匹配 schema.graphqls 文件中定义的获取用户列表查询。
使用 graphiql 请求服务器
graphiql 可以帮助我们方便的向 graphql 服务端发起请求,使用也十分简单,引入相关依赖即可。
  <dependency>
    <groupId>com.graphql-java-kickstart</groupId>
    <artifactId>graphiql-spring-boot-starter</artifactId>
    <version>8.0.0</version>
    <scope>runtime</scope>
  </dependency>
好,让我们启动 Spring Boot 应用,访问 http://localhost:8080/graphiql
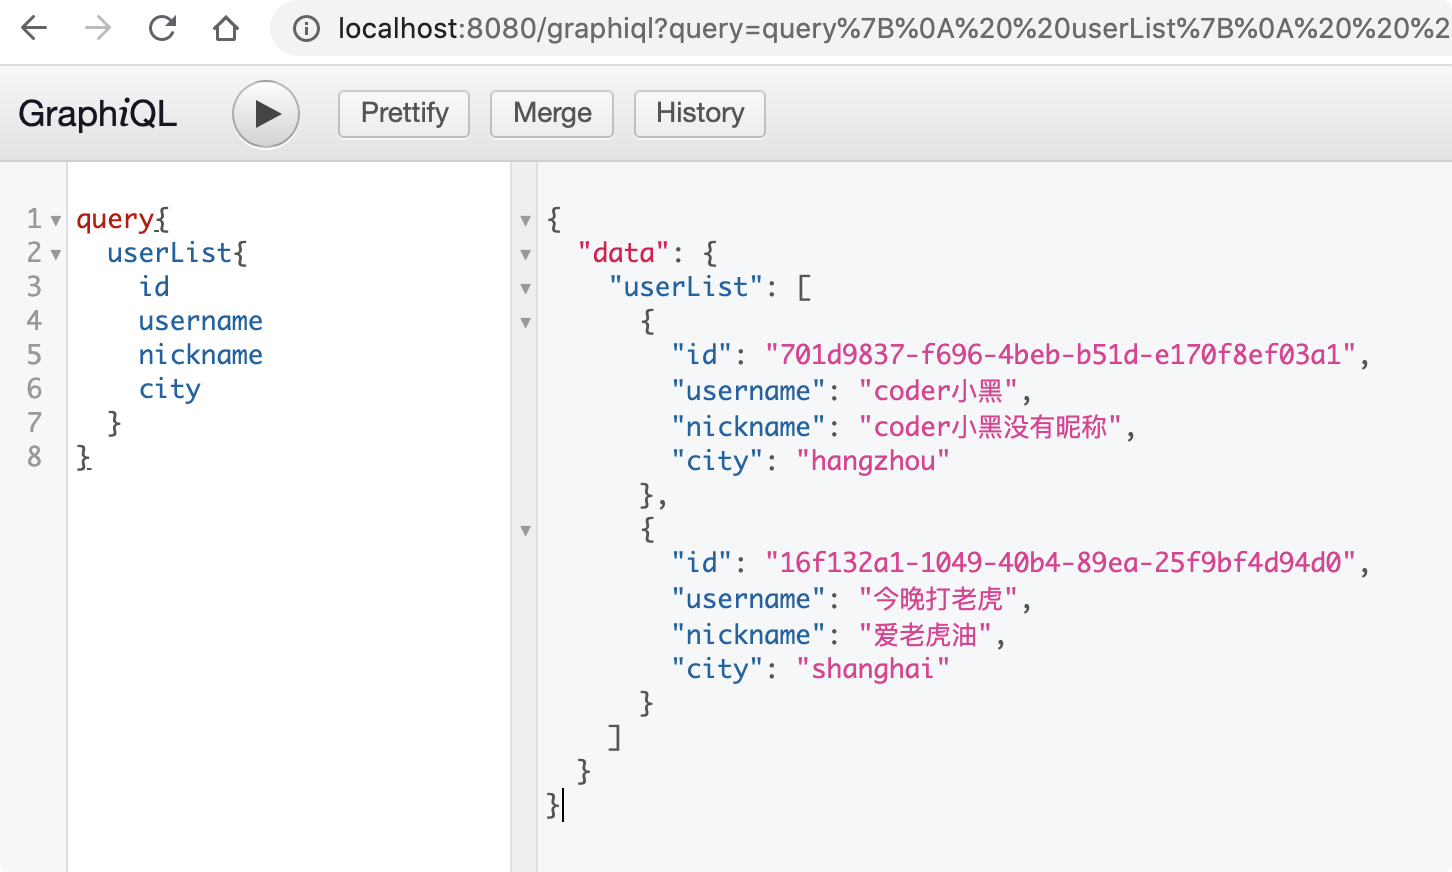
在 https://github.com/graphql-java-kickstart/graphql-spring-boot 的帮助下,实现一个 graphql 服务就是这么的简单。
自定义 Servlet Mapping 地址
我们来看看客户端发出的请求长什么样子:
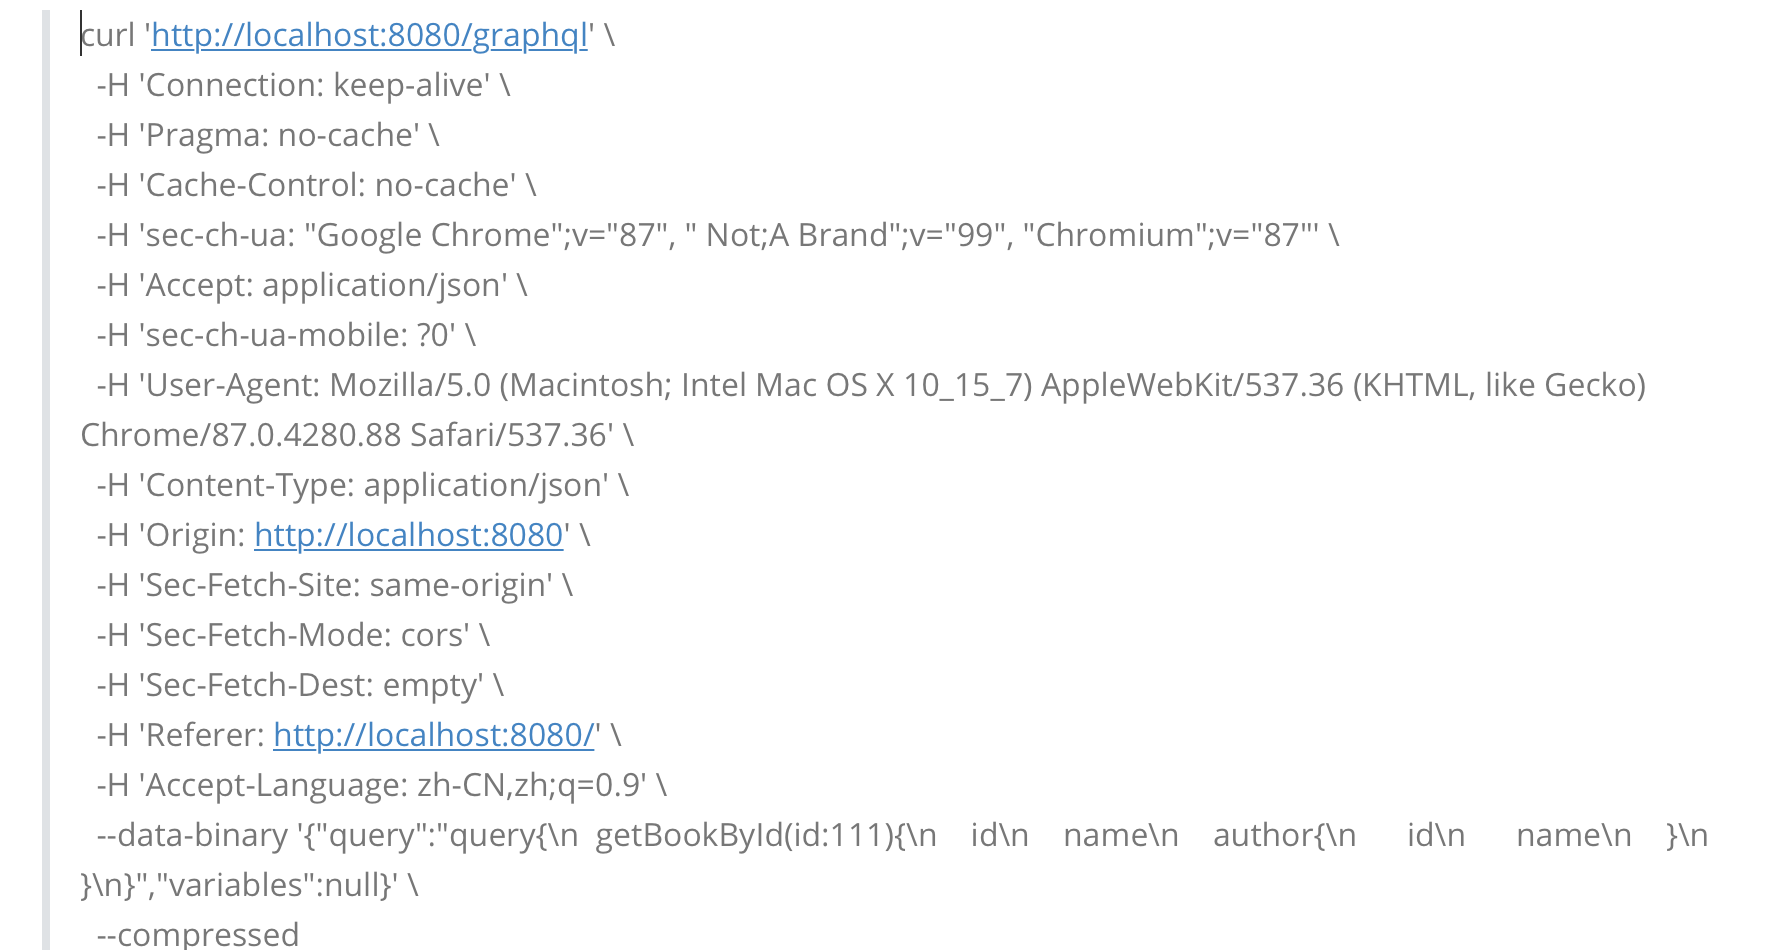
同时,我们可以通过 application.properties 文件来修改服务端的请求接收路径:
graphql.servlet.mapping=/coder-xiao-hei
使用原生 GraphQL 实现
下面,我们再使用 GraphQL 的原生 api 来实现一下上述的案例。
public class HelloWorld {

    static Collection<User> userList() {
        User user1 = new User();
        user1.setId(UUID.randomUUID());
        user1.setUsername("coder小黑");
        user1.setNickname("coder小黑没有昵称");
        user1.setCity(City.hangzhou);
        return Collections.singletonList(user1);
    }

    public static void main(String[] args) throws IOException {
        Resource resource = new DefaultResourceLoader().getResource("classpath:schema.graphqls");
        String schema = StreamUtils.copyToString(resource.getInputStream(), StandardCharsets.UTF_8);

        SchemaParser schemaParser = new SchemaParser();
        TypeDefinitionRegistry typeDefinitionRegistry = schemaParser.parse(schema);

        RuntimeWiring runtimeWiring =
                RuntimeWiring.newRuntimeWiring()
                        .type(TypeRuntimeWiring
                                .newTypeWiring("Query")
                                .dataFetcher("userList",
                                        (DataFetcher<Collection<User>>) environment -> userList()))
                        .build();

        SchemaGenerator schemaGenerator = new SchemaGenerator();
        GraphQLSchema graphQLSchema = schemaGenerator.makeExecutableSchema(typeDefinitionRegistry, runtimeWiring);

        GraphQL build = GraphQL.newGraphQL(graphQLSchema).build();
        ExecutionResult executionResult = build.execute("query{\n" +
                "  userList{\n" +
                "    id\n" +
                "    username\n" +
                "  }\n" +
                "}");

        // {userList=[{id=486a181e-eec7-4001-a9d9-65e94a004f8c, username=coder小黑}]}
        System.out.println(executionResult.getData().toString());
    }
}
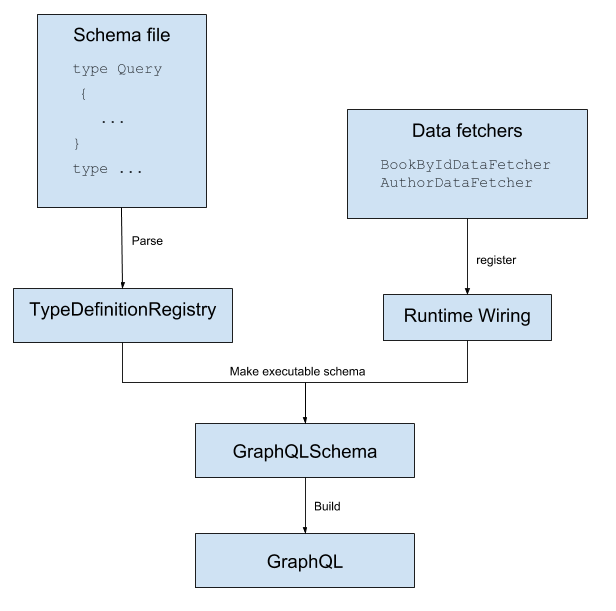
下图清晰的描述了上述程序中相关组件的关系:
下期预告
下期我们将使用 graphQL 来实现简单的增删改查和自定义标量类型。感谢大家的关注和阅读~~
参考资料:
https://github.com/graphql-java-kickstart/graphql-spring-boot
https://www.graphql-java.com/tutorials/getting-started-with-spring-boot/


 浙公网安备 33010602011771号