
在springboot中一些框架和插件的配置
springboot常用配置
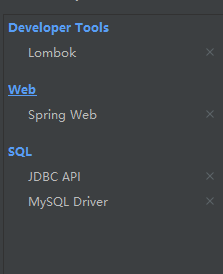
1,创建工程
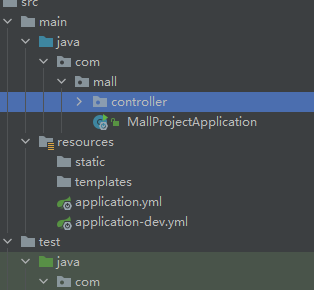
2,创建基本配置和多环境配置
在创建工程后直接运行会出现报错,如下
Failed to configure a DataSource: 'url' attribute is not specified and no embedded datasource could be configured.
无法配置数据源:未指定“url”属性,无法配置嵌入的数据源。
所以我们需要进行基本环境配置
application.yml
spring:
  datasource:
    driver-class-name: com.mysql.jdbc.Driver
    url: jdbc:mysql://127.0.0.1:3306/project_table?useSSL=false&useUnicode=true&characterEncoding=utf-8
    username: root
    password: root
  profiles:
    # 当前环境
    active: dev
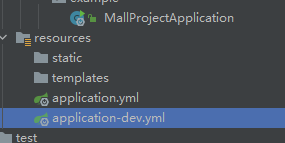
application-dev.yml
server:
  port: 8888
  servlet:
    # 默认为空,写后路径会变成127.0.0.1/项目路径/user/add
    context-path: /demo
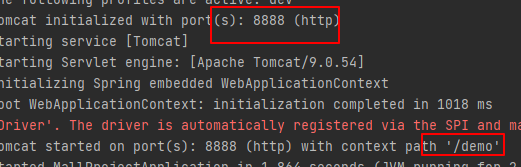
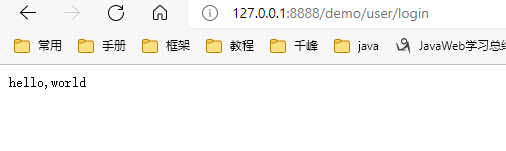
运行无异常,定义个接口测试
package com.mall.controller;

import org.springframework.web.bind.annotation.CrossOrigin;
import org.springframework.web.bind.annotation.GetMapping;
import org.springframework.web.bind.annotation.RequestMapping;
import org.springframework.web.bind.annotation.RestController;

@RestController  // 返回数据 等同于@Controller + @ResponseBody。
@CrossOrigin  // 解决跨域
@RequestMapping("/user")
public class UserController {
    @GetMapping("/login")
    public String login(){
        return  "hello,world";
    }
}
运行项目,访问指定连接,测试成功
3,配置热部署
1, pom.xml
<!-- 热部署 -->
<dependency>
    <groupId>org.springframework.boot</groupId>
    <artifactId>spring-boot-devtools</artifactId>
</dependency>
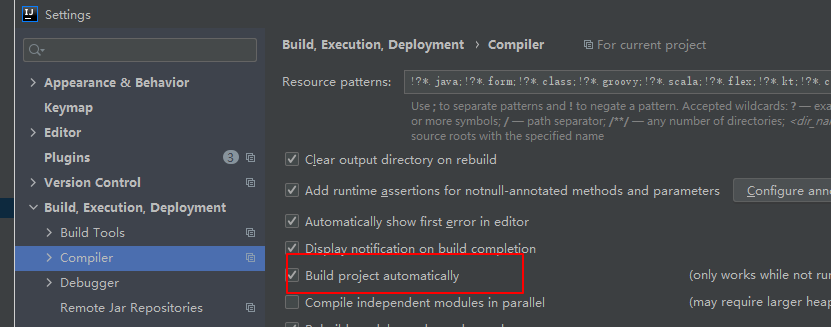
2, 设置中开启如下:建议全局设置
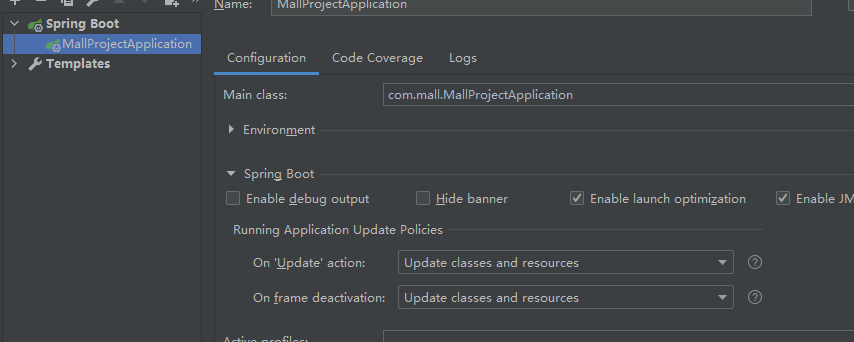
3,设置自动更新
4,配置druid
pom.xml
     <!-- 配置druid连接池 -->
        <dependency>
            <groupId>com.alibaba</groupId>
            <artifactId>druid-spring-boot-starter</artifactId>
            <version>1.2.4</version>
        </dependency>
修改 application.yml
# 默认连接数据库方式
spring:
  datasource:
    driver-class-name: com.mysql.jdbc.Driver
    url: jdbc:mysql://127.0.0.1:3306/project_mall?useSSL=false&useUnicode=true&characterEncoding=utf-8
    username: root
    password: root
    # 设置类型,如果不适应druid连接池则不需要使用
    type: com.alibaba.druid.pool.DruidDataSource


# 第二种方式
#spring:
#  datasource:
#    druid:
#      driver-class-name: com.mysql.jdbc.Driver
#      url: jdbc:mysql://127.0.0.1:3306/project_mall?useSSL=false&useUnicode=true&characterEncoding=utf-8
#      username: root
#      password: root
重启运行;如下说明成功

5,配置swagger2
pom.xml
<!--swagger2-->
<dependency>
    <groupId>io.springfox</groupId>
    <artifactId>springfox-swagger2</artifactId>
    <version>2.9.2</version>
</dependency>
<dependency>
    <groupId>io.springfox</groupId>
    <artifactId>springfox-swagger-ui</artifactId>
    <version>2.9.2</version>
</dependency>
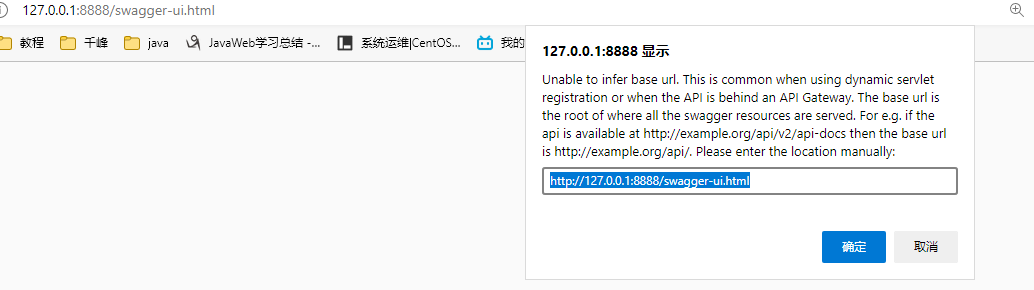
导入依赖后不能直接访问页面,需要启动,如果不启用会出现如下错误:
Unable to infer base url. This is common when using dynamic servlet registration or when the API is behind an API Gateway. The base url is the root of where all the swagger resources are served. For e.g. if the api is available at http://example.org/api/v2/api-docs then the base url is http://example.org/api/. Please enter the location manually:
创建配置类,启用swagger2
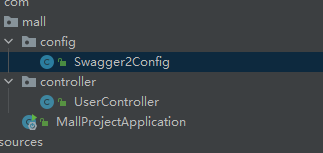
@Configuration  // 声明为配置类
@EnableSwagger2  // 启用
public class Swagger2Config {
}
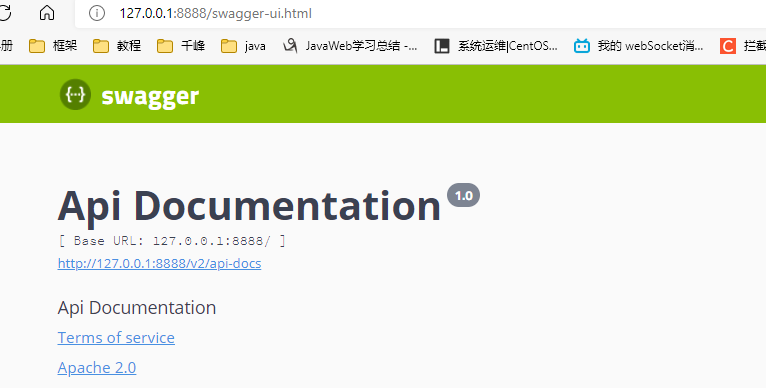
启用后就能正常访问 :http://127.0.0.1:9999/swagger-ui.html出现页面,说明已经成功,不过我们需要把我们自己的信息写上去
Swagger2Config 常规配置
package com.project.config;


import org.springframework.context.annotation.Bean;
import org.springframework.context.annotation.Configuration;
import org.springframework.core.env.Environment;
import org.springframework.core.env.Profiles;
import springfox.documentation.builders.RequestHandlerSelectors;
import springfox.documentation.service.ApiInfo;
import springfox.documentation.service.Contact;
import springfox.documentation.spi.DocumentationType;
import springfox.documentation.spring.web.plugins.Docket;
import springfox.documentation.swagger2.annotations.EnableSwagger2;

import java.util.ArrayList;

@Configuration  // 声明为配置类
@EnableSwagger2  // 启用
public class Swagger2Config {

    //配置文档信息
    private ApiInfo apiInfo() {
        Contact contact = new Contact("联系人名字", "http://xxx.xxx.com/联系人访问链接", "联系人邮箱");
        return new ApiInfo(
                "商城接口", // 标题
                "用于商城接口的描述", // 描述
                "v1.0", // 版本
                "http://terms.service.url/组织链接", // 组织链接
                contact, // 联系人信息
                "Apach 2.0 许可", // 许可
                "许可链接", // 许可连接
                new ArrayList<>()// 扩展
        );
    }

    //Swagger2实例Bean是Docket,所以通过配置Docket实例来配置Swaggger2。
    @Bean
    public Docket docket(Environment environment) {
        //设置要显示swagger的环境
        Profiles of = Profiles.of("dev");
        //判断当前是否处于该环境
        boolean flag = environment.acceptsProfiles(of);
        return new Docket(DocumentationType.SWAGGER_2)   // 返回默认配置,必须是DocumentationType.SWAGGER_2
                .apiInfo(apiInfo())  // 加载自定义api的一些数据
                .groupName("默认分组")  // 如果添加多个分组,则仿写多个本方法即可,例如方法docket1
                .enable(flag)  // 启用swagger
                .select() // 通过.select()方法,去配置扫描接口,RequestHandlerSelectors配置如何扫描接口
                .apis(RequestHandlerSelectors.basePackage("com.project.controller"))   //  配置扫描的包
                .build();
    }
     右上角分类,相当于一个新的页面,
    //@Bean
    //public Docket docket1(){
    //    return new Docket(DocumentationType.SWAGGER_2).groupName("group1");
    //}
}
这时候其实一个最基本的swagger以及完成
6,mybatisPlus配置
这里使用mybatisPlus ,里面包含mybatis
pom.xml
<!-- mybatisPlus  -->
<dependency>
    <groupId>com.baomidou</groupId>
    <artifactId>mybatis-plus-boot-starter</artifactId>
    <version>3.4.3</version>
</dependency>
    <resources>
        <resource>
            <directory>src/main/java</directory>
            <includes>
                <include>**/*.xml</include>
            </includes>
        </resource>
    </resources>
创建myBatisPlus配置类 =》 MyBatisPlusConfig
package com.mall.config;

import com.baomidou.mybatisplus.annotation.DbType;
import com.baomidou.mybatisplus.extension.plugins.MybatisPlusInterceptor;
import com.baomidou.mybatisplus.extension.plugins.inner.PaginationInnerInterceptor;
import org.mybatis.spring.annotation.MapperScan;
import org.springframework.context.annotation.Bean;
import org.springframework.context.annotation.Configuration;

@Configuration
@MapperScan("com.project.mapper")
public class MyBatisPlusConfig {

}
完成
7,mybatisPlus分页配置
修改myBatisPlus配置类
@Configuration
@MapperScan("com.project.mapper")
public class MyBatisPlusConfig {

    /**
     * 分页插件(内置)
     * @return
     */
    @Bean
    public MybatisPlusInterceptor mybatisPlusInterceptor() {
        MybatisPlusInterceptor interceptor = new MybatisPlusInterceptor();
        interceptor.addInnerInterceptor(new PaginationInnerInterceptor(DbType.MYSQL));
        return interceptor;
    }
}
完成
测试
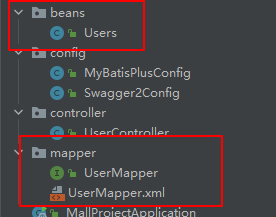
UserMapper
package com.mall.mapper;
import com.mall.beans.Users;
import java.util.List;
public interface UserMapper  extends BaseMapper<Users> {
    List<Users> all();

}
userMapper.xml
<?xml version="1.0" encoding="UTF-8" ?>
<!DOCTYPE mapper PUBLIC "-//mybatis.org//DTD Mapper 3.0//EN" "http://mybatis.org/dtd/mybatis-3-mapper.dtd" >
<mapper namespace="com.mall.mapper.UserMapper">
    <select id="all" resultType="com.mall.beans.Users">
        select * from users
    </select>
</mapper>
测试类
@SpringBootTest(classes = MallProjectApplication.class)
class MallProjectApplicationTests {
    @Autowired
    private UserMapper userMapper;

    @Test
    public void test() {
        val all = userMapper.all();
        System.out.println(all); // 正常打印,说明mybaits成功

        //  分页
        Page<Users> usersPage = new Page<>(2,3);
        Page<Users> usersPage1 = userMapper.selectPage(usersPage, null);
        usersPage1.getRecords().forEach(v -> System.out.println("\033[1;34m" + v + "\033[1;34m \n"));


    }

}
这里有一点需要特别注意,打印mapper中接口方法和普通的service这些是不一样的,区别在与顶部:,在自动生成的测试类中
@SpringBootTest
class MallProjectApplicationTests {

这种只能测试@service这些,而不能测试mapper接口中的方法,否则会报错
java.lang.IllegalStateException: Unable to find a @SpringBootConfiguration, you need to use @ContextConfiguration or @SpringBootTest(classes=…) with your test
解决
有两种方式
第一种
@SpringBootTest(classes = MallProjectApplication.class)

第二种:
@SpringBootTest
@ContextConfiguration(classes = MallProjectApplication.class)
8,mybatisPlus自动生成

pom.xml
<!-- 代码生成器 -->
<dependency>
    <groupId>com.baomidou</groupId>
    <artifactId>mybatis-plus-generator</artifactId>
    <version>3.4.1</version>
</dependency>
<dependency>
    <groupId>org.apache.velocity</groupId>
    <artifactId>velocity-engine-core</artifactId>
    <version>2.0</version>
</dependency>
MybatisPlueGenerator
package com.mall;

import com.baomidou.mybatisplus.annotation.DbType;
import com.baomidou.mybatisplus.annotation.IdType;
import com.baomidou.mybatisplus.generator.AutoGenerator;
import com.baomidou.mybatisplus.generator.config.DataSourceConfig;
import com.baomidou.mybatisplus.generator.config.GlobalConfig;
import com.baomidou.mybatisplus.generator.config.PackageConfig;
import com.baomidou.mybatisplus.generator.config.StrategyConfig;
import com.baomidou.mybatisplus.generator.config.rules.NamingStrategy;

public class MybatisPlueGenerator {
    public static void main(String[] args) {
        // 需要修改的值
        String author = "wei";// 作者
        String outputDir = "E:\\PC\\Desktop\\project\\03_mall_project\\src\\main\\java"; //代码生成位置的绝对路径
        String url = "jdbc:mysql://localhost:3306/project_table?useSSL=false&useUnicode=true&characterEncoding=utf-8";
        String username = "root";  // 数据库账户
        String password = "root";  // 数据库密码
        String tablePrefix = "project_";//数据库表前缀
        //String includeTable = "category" ; //生成的表
        String[] includeTable = {"orders", "order_item"};// 同时生成多个表
        String parent = "com.mall";父包


        //1. 全局配置
        GlobalConfig config = new GlobalConfig();
        config.setActiveRecord(false)
                .setAuthor(author) // 作者
                .setOutputDir(outputDir) //代码生成位置的绝对路径
                .setFileOverride(true)  // 文件覆盖
                .setIdType(IdType.AUTO) // 主键策略
                .setServiceName("%sService")  // 设置生成的service接口的名字的首字母是否为I
                .setBaseResultMap(true) // 是否生成BaseResultMap
                .setBaseColumnList(true); // 是否生成BaseColumnList

        //2. 数据源配置
        DataSourceConfig dsConfig = new DataSourceConfig();
        dsConfig.setDbType(DbType.MYSQL)  // 设置数据库类型
                .setDriverName("com.mysql.jdbc.Driver")
                .setUrl(url)
                .setUsername(username)
                .setPassword(password);

        //3. 策略配置
        StrategyConfig stConfig = new StrategyConfig();
        stConfig.setCapitalMode(true) //全局大写命名
                .setNaming(NamingStrategy.underline_to_camel) // 数据库表映射到实体的命名策略
                .setTablePrefix(tablePrefix) //数据库表前缀
                .setInclude(includeTable);  //生成的表

        //4. 包名策略配置
        PackageConfig pkConfig = new PackageConfig();
        pkConfig.setParent(parent) //父包
                .setMapper("mapper")
                .setService("service")
                .setController("controller")
                .setEntity("beans")
                .setXml("mapper");

        //5. 整合配置
        AutoGenerator ag = new AutoGenerator();

        ag.setGlobalConfig(config)
                .setDataSource(dsConfig)
                .setStrategy(stConfig)
                .setPackageInfo(pkConfig);

        //6. 执行
        ag.execute();
    }
}
9,打印sql语句
注意
#
# 设置日志级别,后面跟生效的区域,比如root表示整个项目,也可以设置为某个包下,也可以具体到某个类名(日志级别的值不区分大小写)
logging:
  level:
    com:
      project:
        mapper: debug

#logging:
#  level:
#    com: debug

#  logging.level.com.qfedu.mapper=DEBUG
10,pageHelper 分页
pom.xml
<!-- 分页助手 -->
<dependency>
    <groupId>com.github.pagehelper</groupId>
    <artifactId>pagehelper-spring-boot-starter</artifactId>
    <version>1.2.13</version>
</dependency>
测试
// 分页插件
PageHelper.startPage(2,3);
List<Users> all = userMapper.all();//紧跟着的第一个select方法会被分页
PageInfo<Users> pageInfo = new PageInfo<>(all);
System.out.println("===============");
System.out.println("总记录数:" + pageInfo.getTotal());
System.out.println("当前页:" + pageInfo.getPageNum());
System.out.println("总页数:" + pageInfo.getPages());
System.out.println("上一页:" + pageInfo.getPrePage());
System.out.println("下一页:" + pageInfo.getNextPage());
System.out.println("是否是首页:" + pageInfo.isIsFirstPage());
System.out.println("是否是尾页:" + pageInfo.isIsLastPage());
System.out.println("\033[1;34m" + pageInfo + "\033[1;34m \n");

 浙公网安备 33010602011771号