
springboot+jdbcTemplate配置多数据源
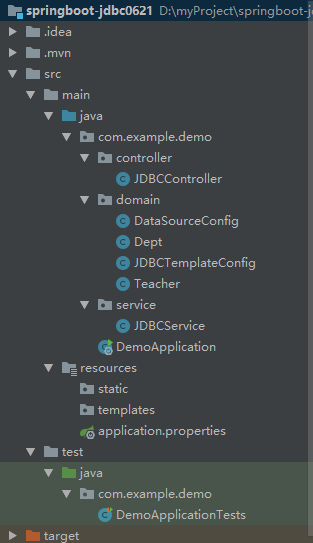
本文介绍的是采用springboot利用template对接mysql中的两个不同库的两个表(多个库类推),两个库分别是mytest和db20,对应的表为teacher和dept,项目结构如下图所示:
话不多说,开干,奥利给~
一、添加项目相关依赖
<dependency>

<groupId>org.springframework.boot</groupId>

<artifactId>spring-boot-starter-jdbc</artifactId>

</dependency>


<dependency>

<groupId>mysql</groupId>

<artifactId>mysql-connector-java</artifactId>

<scope>runtime</scope>

<version>5.1.27</version>

</dependency>


<dependency>

<groupId>com.alibaba</groupId>

<artifactId>druid-spring-boot-starter</artifactId>

<version>1.1.10</version>

</dependency>
二、进行相关配置
- 配置application.properties(对于application.yml同样可以)
########################################################
###datasource
########################################################
spring.datasource.one.url = jdbc:mysql://localhost:3306/mytest?serverTimezone=UTC
#useUnicode=true&characterEncoding=utf8&useSSL=false
spring.datasource.one.username = root
spring.datasource.one.password = root
spring.datasource.one.driverClassName = com.mysql.cj.jdbc.Driver
spring.datasource.one.max-active=20
spring.datasource.one.max-idle=8
spring.datasource.one.min-idle=8
spring.datasource.one.initial-size=10

spring.datasource.two.url = jdbc:mysql://localhost:3306/db20?serverTimezone=UTC
#useUnicode=true&characterEncoding=utf8&useSSL=false
spring.datasource.two.username = root
spring.datasource.two.password = root
spring.datasource.two.driverClassName = com.mysql.cj.jdbc.Driver
spring.datasource.two.max-active=20
spring.datasource.two.max-idle=8
spring.datasource.two.min-idle=8
spring.datasource.two.initial-size=10
2.由于我们配置了多数据源,springboot提供的自动化配置也就失效,需要我们手动配置。
创建DataSourceConfig和jdbctemplateConfig配置类
@Configuration
public class DataSourceConfig {
    @Bean
    @ConfigurationProperties(prefix = "spring.datasource.one")
    public DataSource dsOne(){
        return DruidDataSourceBuilder.create().build();
    }

    @Bean
    @ConfigurationProperties(prefix = "spring.datasource.two")
    public DataSource dsTwo(){
        return DruidDataSourceBuilder.create().build();
    }
}
@Configuration
public class JDBCTemplateConfig {
    @Bean
    @Primary
    public JdbcTemplate jdbcTemplateOne(@Qualifier("dsOne")DataSource dataSource){
        return new JdbcTemplate(dataSource);
    }
    @Bean
    public JdbcTemplate jdbcTemplateTwo(@Qualifier("dsTwo")DataSource dataSource){
        return new JdbcTemplate(dataSource);
    }
}
注:@Qualifier :告诉是使用哪个数据源
@ConfigurationProperties :加载application.properties中的哪个数据源
@Primary:自动装配时若出现多个Bean候选者时,被该注解修饰的bean将被作为首选者,否则会被抛出异常
三、创建相关类进行测试
public class Dept {
    private int id;
    private String name;

    public Dept() {
    }

    public Dept(int id, String name) {
        this.id = id;
        this.name = name;
    }

    public int getId() {
        return id;
    }

    public void setId(int id) {
        this.id = id;
    }

    public String getName() {
        return name;
    }

    public void setName(String name) {
        this.name = name;
    }

    @Override
    public String toString() {
        return "Dept{" +
                "id=" + id +
                ", name='" + name + '\'' +
                '}';
    }
}
public class Teacher {
    private int t_id;
    private String t_name;

    public Teacher() {
    }

    public Teacher(int t_id, String t_name) {
        this.t_id = t_id;
        this.t_name = t_name;
    }

    public int getT_id() {
        return t_id;
    }

    public void setT_id(int t_id) {
        this.t_id = t_id;
    }

    public String getT_name() {
        return t_name;
    }

    public void setT_name(String t_name) {
        this.t_name = t_name;
    }

    @Override
    public String toString() {
        return "Teacher{" +
                "t_id=" + t_id +
                ", t_name='" + t_name + '\'' +
                '}';
    }
}
创建JDBCService
@Service
public class JDBCService {
    @Autowired
    @Qualifier("jdbcTemplateOne")
    private JdbcTemplate jdbcTemplateOne;
    @Autowired
    @Qualifier("jdbcTemplateTwo")
    private JdbcTemplate jdbcTemplateTwo;

    public List<Teacher> getAllTeacher(){
        return jdbcTemplateOne.query("select * from teacher",new BeanPropertyRowMapper<>(Teacher.class));
    }
    public List<Dept>  getAllUser(){
        return jdbcTemplateTwo.query("select * from dept",new BeanPropertyRowMapper<>(Dept.class));
    }

}
创建JDBCController
@RestController
public class JDBCController {
    @Autowired
    private JDBCService jdbcService;

    @RequestMapping("/findAllTeacher")
    public List<Teacher> getAllTeacher() {
//        System.out.println("teacher======================");
        return jdbcService.getAllTeacher();
    }
    @RequestMapping("/findAllUser")
    public List<Dept> getAllUser(){
//        System.out.println("dept=============================");
        return jdbcService.getAllUser();
    }
}
最终效果:


小伙伴们赶紧去试试吧!
若文中有不合适的地方,欢迎留言指正。

 浙公网安备 33010602011771号