OpenFeign - 使用
介绍
Feign
OpenFeign是声明式、模板化的HTTP请求客户端。可以更加便捷、优雅地调用http api。
OpenFeign会根据带有注解的函数信息构建出网络请求的模板,在发送网络请求之前,OpenFeign会将函数的参数值设置到这些请求模板中。
主要是用来构建微服务消费端。只要使用OpenFeign提供的注解修饰定义网络请求的接口类,就可以使用该接口的实例发送RESTful的网络请求。还可以集成Ribbon和Hystrix,提供负载均衡和断路器。
Feign和OpenFeign的关系
- Feign本身不支持Spring MVC的注解,它有一套自己的注解
- OpenFeign是Spring Cloud 在Feign的基础上支持了Spring MVC的注解,如@RequesMapping等等。 OpenFeign的@FeignClient可以解析SpringMVC的@RequestMapping注解下的接口, 并通过动态代理的方式产生实现类,实现类中做负载均衡并调用其他服务。
踩坑说明:
通过Feign发送Get请求,一定要在接口的参数前面加上@RequestParam注解,否则会报如下的错误:
feign.FeignException$MethodNotAllowed: [405] during [GET] to [http://api-02-application/getObjParam] [PersonClient#getObjParam(String)]: [{"timestamp":"2020-09-16T05:35:22.853+0000","status":405,"error":"Method Not Allowed","message":"Request method 'POST' not supported","path":"/getObjParam"}]
准备服务提供者
构建一个新的项目API-02-APPLICATION,提供访问的API,并注册到注册中心(这里使用Eureka做注册中心)上

(OPENFEIGN-APP是等下要构建的项目,这里先不用管)
API-02-APPLICATION的pom文件以及配置如下:
<?xml version="1.0" encoding="UTF-8"?>
<project xmlns="http://maven.apache.org/POM/4.0.0"
         xmlns:xsi="http://www.w3.org/2001/XMLSchema-instance"
         xsi:schemaLocation="http://maven.apache.org/POM/4.0.0 http://maven.apache.org/xsd/maven-4.0.0.xsd">
    <parent>
        <groupId>org.springframework.boot</groupId>
        <artifactId>spring-boot-starter-parent</artifactId>
        <version>2.2.6.RELEASE</version>
        <relativePath/> <!-- lookup parent from repository -->
    </parent>
    <modelVersion>4.0.0</modelVersion>

    <artifactId>eureka-client002</artifactId>

    <properties>
        <java.version>1.8</java.version>
        <spring-cloud.version>Hoxton.SR3</spring-cloud.version>
    </properties>

    <dependencies>
        <dependency>
            <groupId>com.qiankai</groupId>
            <artifactId>client-common</artifactId>
            <version>1.0-SNAPSHOT</version>
        </dependency>

        <dependency>
            <groupId>org.springframework.cloud</groupId>
            <artifactId>spring-cloud-starter-netflix-eureka-client</artifactId>
        </dependency>

        <dependency>
            <groupId>org.springframework.boot</groupId>
            <artifactId>spring-boot-starter-web</artifactId>
        </dependency>

        <!-- 用于上报节点信息 -->
        <dependency>
            <groupId>org.springframework.boot</groupId>
            <artifactId>spring-boot-starter-actuator</artifactId>
        </dependency>
    </dependencies>

    <dependencyManagement>
        <dependencies>
            <dependency>
                <groupId>org.springframework.cloud</groupId>
                <artifactId>spring-cloud-dependencies</artifactId>
                <version>${spring-cloud.version}</version>
                <type>pom</type>
                <scope>import</scope>
            </dependency>
        </dependencies>
    </dependencyManagement>

    <build>
        <plugins>
            <plugin>
                <groupId>org.springframework.boot</groupId>
                <artifactId>spring-boot-maven-plugin</artifactId>
            </plugin>
        </plugins>
    </build>
</project>
配置文件:
server:
  port: 8001
eureka:
  client:
    # 设置服务注册中心的url
    service-url:
      defaultZone: http://localhost:7900/eureka
  instance:
    instance-id: qiankai-client-002 #显示此名字(默认是当前项目http://localhost:8001)
    prefer-ip-address: true #访问路径可以显示ip地址

spring:
  application:
    name: api-02-application
在API-02-APPLICATION中的Controller中提供两个接口,以便等下在其他项目中演示调用该接口:
@GetMapping("/getObjParam")
public Person getObjParam(String name) {
    Person person = new Person();
    person.setId(100);
    person.setName(name);
    return person;
}

@PostMapping("/postParam")
public Person postParam(@RequestBody String name) {
    System.out.println("name:" + name);
    Person person = new Person();
    person.setId(100);
    person.setName("xiaoming" + name);
    return person;
}
OpenFeign 基本使用
构建项目OPENFEIGN-APP
- 引入OpenFeign依赖
<!-- openFeign-->
<dependency>
    <groupId>org.springframework.cloud</groupId>
    <artifactId>spring-cloud-starter-openfeign</artifactId>
</dependency>
pom.xml文件如下:
<?xml version="1.0" encoding="UTF-8"?>
<project xmlns="http://maven.apache.org/POM/4.0.0"
         xmlns:xsi="http://www.w3.org/2001/XMLSchema-instance"
         xsi:schemaLocation="http://maven.apache.org/POM/4.0.0 http://maven.apache.org/xsd/maven-4.0.0.xsd">
    <parent>
        <groupId>org.springframework.boot</groupId>
        <artifactId>spring-boot-starter-parent</artifactId>
        <version>2.2.6.RELEASE</version>
        <relativePath/> <!-- lookup parent from repository -->
    </parent>
    <modelVersion>4.0.0</modelVersion>

    <artifactId>client-open-feign</artifactId>

    <properties>
        <java.version>1.8</java.version>
        <spring-cloud.version>Hoxton.SR3</spring-cloud.version>
    </properties>

    <dependencies>
        <!-- 导入自定义公共模块中的Person类 -->
        <dependency>
            <groupId>com.qiankai</groupId>
            <artifactId>client-common</artifactId>
            <version>1.0-SNAPSHOT</version>
        </dependency>

        <!-- eureka client -->
        <dependency>
            <groupId>org.springframework.cloud</groupId>
            <artifactId>spring-cloud-starter-netflix-eureka-client</artifactId>
        </dependency>

        <!-- openFeign-->
        <dependency>
            <groupId>org.springframework.cloud</groupId>
            <artifactId>spring-cloud-starter-openfeign</artifactId>
        </dependency>

        <!-- web -->
        <dependency>
            <groupId>org.springframework.boot</groupId>
            <artifactId>spring-boot-starter-web</artifactId>
        </dependency>

        <!-- 用于上报节点信息 -->
        <dependency>
            <groupId>org.springframework.boot</groupId>
            <artifactId>spring-boot-starter-actuator</artifactId>
        </dependency>
    </dependencies>

    <dependencyManagement>
        <dependencies>
            <dependency>
                <groupId>org.springframework.cloud</groupId>
                <artifactId>spring-cloud-dependencies</artifactId>
                <version>${spring-cloud.version}</version>
                <type>pom</type>
                <scope>import</scope>
            </dependency>
        </dependencies>
    </dependencyManagement>

    <build>
        <plugins>
            <plugin>
                <groupId>org.springframework.boot</groupId>
                <artifactId>spring-boot-maven-plugin</artifactId>
            </plugin>
        </plugins>
    </build>
</project>
- 配置文件
server:
  port: 8020
eureka:
  client:
    # 设置服务注册中心的url
    service-url:
      defaultZone: http://localhost:7900/eureka
  instance:
    instance-id: qiankai-client-8020 #显示此名字(默认是当前项目http://localhost:8001)
    prefer-ip-address: true #访问路径可以显示ip地址

spring:
  application:
    name: openfeign-app
- 启动类上添加注解 @EnableFeignClients
package com.qiankai.feign;

import org.springframework.boot.SpringApplication;
import org.springframework.boot.autoconfigure.SpringBootApplication;
import org.springframework.cloud.netflix.eureka.EnableEurekaClient;
import org.springframework.cloud.openfeign.EnableFeignClients;

/**
 * OpenFeign 客户端调用
 *
 * @author kai_qian
 * @version v1.0
 * @since 2020/09/16 09:15
 */
@SpringBootApplication
@EnableEurekaClient
@EnableFeignClients // 激活Feign
public class AppOpenFeign {
    public static void main(String[] args) {
        SpringApplication.run(AppOpenFeign.class, args);
    }
}
- 编写客户端调用接口
package com.qiankai.feign.client;

import com.qiankai.common.dto.Person;
import org.springframework.cloud.openfeign.FeignClient;
import org.springframework.web.bind.annotation.GetMapping;
import org.springframework.web.bind.annotation.PostMapping;
import org.springframework.web.bind.annotation.RequestBody;
import org.springframework.web.bind.annotation.RequestParam;

/**
 * OpenFeign 客户端调用演示
 *
 * @author kai_qian
 * @version v1.0
 * @since 2020/09/16 09:24
 */
@FeignClient(value = "API-02-APPLICATION")  // value为 Eureka上的服务应用名,会自动去注册中心中查找对应的服务地址
public interface PersonClient {

    @GetMapping("/getObjParam")
    Person getObjParam(@RequestParam("name") String name);  // GET 请求的参数一定要加上 @RequestParam注解,否则会报错

    @PostMapping("/postParam")
    Person postParam(@RequestBody String name);
}
- 通过Feign客户端调用其他服务的接口
package com.qiankai.feign.controller;

import com.qiankai.common.dto.Person;
import com.qiankai.feign.client.PersonClient;
import org.springframework.beans.factory.annotation.Autowired;
import org.springframework.web.bind.annotation.GetMapping;
import org.springframework.web.bind.annotation.RestController;

/**
 * openFeign 客户端调用演示
 *
 * @author kai_qian
 * @version v1.0
 * @since 2020/09/16 09:27
 */
@RestController
public class PersonController {

    @Autowired
    private PersonClient personClient;

    @GetMapping("/testGetPerson")
    public void getPerson() {
        Person person = personClient.getObjParam("aaa");
        System.out.println(person.toString());
    }

    @GetMapping("/testPostPerson")
    public void postPerson() {
        Person person = personClient.postParam("bbb");
        System.out.println(person.toString());
    }
}
- 结果展示
依次访问接口 /testGetPerson, /testPostPerson,控制台打印返回的Person信息

便捷的使用方式
上面的方式调用其他客户端接口,每次都需要将API接口手动写一遍,比较繁琐,可以通过将API写成接口,单独抽成一个项目模块,然后在原项目中引入API模块,Controller继承这些接口。
其他客户端想要调用这些接口的时候,只需要引入 API接口模块,然后通过接口直接继承即可。
例如,有项目中有两个模块,User-Module用户模块,Article-Module文章模块,在Article-Module中想通过Feign调用User-Module的接口。
在构建 User-Module 的时候,可以先构建一个 User-Module-Api模块,在User-Module-Api模块中定义 User-Module 中的所有接口:
// 代码在 User-Module-Api 模块中

public interface UserApi {
    @PutMapping("/v1/user")
    Result update(@RequestBody UserReqDto userReqDto);

    @GetMapping("/v1/user/{id}")
    Result<UserRespDto> findUserById(@PathVariable("id") Long id);

    @PostMapping("/v1/user/subscribe")
    Result<SubscribeRespDto> follow(@RequestParam("id") Long id);

    @DeleteMapping("/v1/user/subscribe")
    Result unFollow(@RequestParam("id") Long id);
}
然后在 User-Module 模块中 引入 User-Module-Api 的代码(pom文件中添加User-Module-Api的依赖),编写Controller
// 代码在 User-Modul 模块中

@RestController
public class UserController implements UserApi {

    private final UserService userService;

    @Override
    public Result update(UserReqDto userReqDto) {
        // doSomething
        return Result.newSuccess();
    }

    @Override
    public Result<UserRespDto> findUserById(Long id) {
        // doSomething
        return Result.newSuccess(userRespDto);
    }


    @Override
    public Result follow(Long id) {
        // doSomething
        return Result.newSuccess(subscribeRespDto);
    }

    @Authentication
    @Override
    public Result unFollow(Long id) {
        // doSomething
        return Result.newSuccess();
    }
}
上面将User模块的 接口路径参数 和 具体实现逻辑 进行了分离,分为了两个模块
在 Article-Module 项目中,如果想调用 User-Module 的接口,仅需要引入 User-Module-Api 的依赖,然后通过继承该接口即可
// 代码在 Article-Modul 模块中

@FeignClient("User-Module")
public interface UserClient extends UserApi {
      // 无需编写内容
}
Feign自定义配置
为了演示配置,对服务提供者的接口加上权限校验
API-02-APPLICATION添加权限
修改前面的 API-02-APPLICATION应用,添加权限校验:
pom中添加依赖:
<!-- 安全认证 -->
<dependency>
	<groupId>org.springframework.boot</groupId>
	<artifactId>spring-boot-starter-security</artifactId>
</dependency>
新建权限认证配置类:
@Configuration
@EnableWebSecurity
public class WebSecurityConfig extends WebSecurityConfigurerAdapter {

	@Override
	protected void configure(HttpSecurity http) throws Exception {
		// 关闭csrf
		http.csrf().disable();
		// 表示所有的访问都必须认证,认证处理后才可以正常进行
		http.httpBasic().and().authorizeRequests().anyRequest().fullyAuthenticated();
		// 所有的rest服务一定要设置为无状态,以提升操作效率和性能
		http.sessionManagement().sessionCreationPolicy(SessionCreationPolicy.STATELESS);
	}
}
配置文件中添加:
spring:
  security:
    user:
      name: root
      password: root
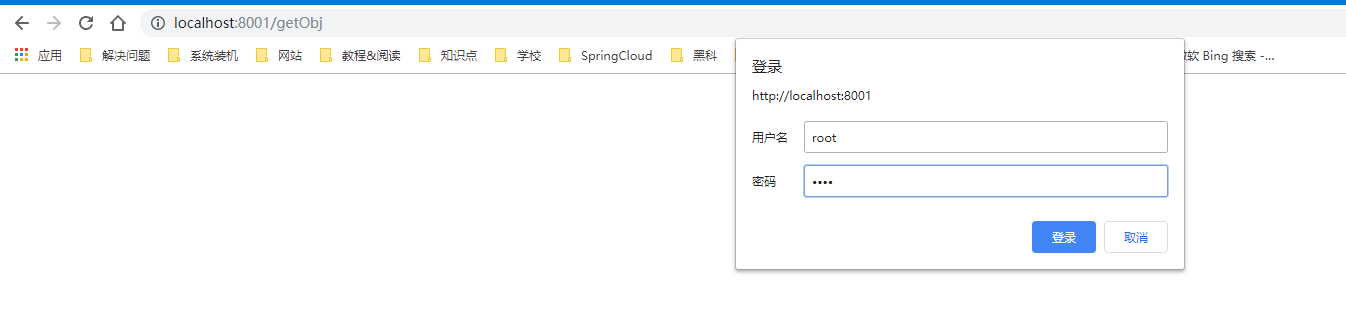
此时再访问 API-02-APPLICATION应用的接口,会弹窗要求登录,只有通过验证才能继续访问:
如果不对 Feign进行配置就直接调用接口会报错

OPENFEIGN-APP的OpenFeign配置
在 OPENFEIGN-APP 中有两种方式进行配置
- 自定义配置类
- 增加拦截器
方式一:自定义配置类
- 编写配置类(不用加 @Component):
package com.qiankai.api.config;

import feign.auth.BasicAuthRequestInterceptor;
import org.springframework.context.annotation.Bean;

/**
 * OpenFeign 配置
 *
 * @author kai_qian
 * @version v1.0
 * @since 2020/09/16 14:44
 */
public class FeignAuthConfiguration {

    @Bean
    public BasicAuthRequestInterceptor basicAuthRequestInterceptor() {
        return new BasicAuthRequestInterceptor("root", "root");
    }
}
- 在feign上加配置
@FeignClient(name = "service-valuation",configuration = FeignAuthConfiguration.class)
package com.qiankai.feign.client;

import com.qiankai.common.dto.Person;
import com.qiankai.feign.config.FeignAuthConfiguration;
import org.springframework.cloud.openfeign.FeignClient;
import org.springframework.web.bind.annotation.GetMapping;
import org.springframework.web.bind.annotation.PostMapping;
import org.springframework.web.bind.annotation.RequestBody;
import org.springframework.web.bind.annotation.RequestParam;

/**
 * OpenFeign 客户端调用演示
 *
 * @author kai_qian
 * @version v1.0
 * @since 2020/09/16 09:24
 */
@FeignClient(name = "API-02-APPLICATION", configuration = FeignAuthConfiguration.class) // 添加了配置
public interface PersonClient {

    @GetMapping("/getObjParam")
    Person getObjParam(@RequestParam("name") String name);

    @PostMapping("/postParam")
    Person postParam(@RequestBody String name);
}
这样接口就又可以正常访问了。
小结:
如果在配置类上添加了@Configuration注解,并且该类在@ComponentScan所扫描的包中,那么该类中的配置信息就会被所有的@FeignClient共享。
最佳实践是:不指定@Configuration注解(或者指定configuration,用注解忽略),而是手动:@FeignClient(name = "service-valuation",configuration = FeignAuthConfiguration.class)
方式二:添加拦截器
取消上面的方式一所做的操作,访问报错,然后:
1.新建一个拦截器
package com.qiankai.feign.config;

import feign.RequestInterceptor;
import feign.RequestTemplate;

/**
 * 拦截器
 *
 * @author kai_qian
 * @version v1.0
 * @since 2020/09/16 14:56
 */
public class MyBasicAuthRequestInterceptor implements RequestInterceptor {
    @Override
    public void apply(RequestTemplate template) {
        // TODO Auto-generated method stub
        template.header("Authorization", "Basic cm9vdDpyb290");
    }
}
说明:
cm9vdDpyb290 表示通过 BASE64 加密过的账号密码

- 配置文件中添加 feign拦截器的配置
server:
  port: 8020
eureka:
  client:
    # 设置服务注册中心的url
    service-url:
      defaultZone: http://localhost:7900/eureka
  instance:
    instance-id: qiankai-client-8020 #显示此名字(默认是当前项目http://localhost:8001)
    prefer-ip-address: true #访问路径可以显示ip地址

spring:
  application:
    name: openfeign-app

feign:
  client:
    config:
      API-02-APPLICATION:
        requestInterceptors:
          - com.qiankai.feign.config.MyBasicAuthRequestInterceptor
重新启动OPENFEIGN-APP服务,又可以正常的调用接口了
说明
Feign服务配置
指定服务名称的配置:
feign:
     client:
       config:
         api-02-application:
           connect-timeout: 5000
           read-timeout: 5000
           logger-level: full
通用配置:
   feign:
     client:
       config:
         default:
           connect-timeout: 5000
           read-timeout: 5000
           logger-level: full
属性配置比Java代码优先级高。也可通过配置设置java代码优先级高。
feign:
  client:
    default-to-properties: false
原理
- 主程序入口添加@EnableFeignClients注解开启对Feign Client扫描加载处理。根据Feign Client的开发规范,定义接口并加@FeignClient注解。
- 当程序启动时,会进行包扫描,扫描所有@FeignClient注解的类,并将这些信息注入Spring IoC容器中。当定义的Feign接口中的方法被调用时,通过JDK的代理方式,来生成具体的RequestTemplate。当生成代理时,Feign会为每个接口方法创建一个RequestTemplate对象,该对象封装了HTTP请求需要的全部信息,如请求参数名、请求方法等信息都在这个过程中确定。
- 然后由RequestTemplate生成Request,然后把这个Request交给client处理,这里指的Client可以是JDK原生的URLConnection、Apache的Http Client,也可以是Okhttp。最后Client被封装到LoadBalanceClient类,这个类结合Ribbon负载均衡发起服务之间的调用。
压缩
服务端provider配置
# 服务端开启压缩
server.compression.enabled=true
调用方consumer配置
# 配置请求GZIP压缩
feign.compression.request.enabled=true
# 配置响应GZIP压缩
feign.compression.response.enabled=true
# 单位是B
feign.compression.request.min-request-size=100

 浙公网安备 33010602011771号