SpringBoot使用缓存及整合Redis
1.环境准备
-
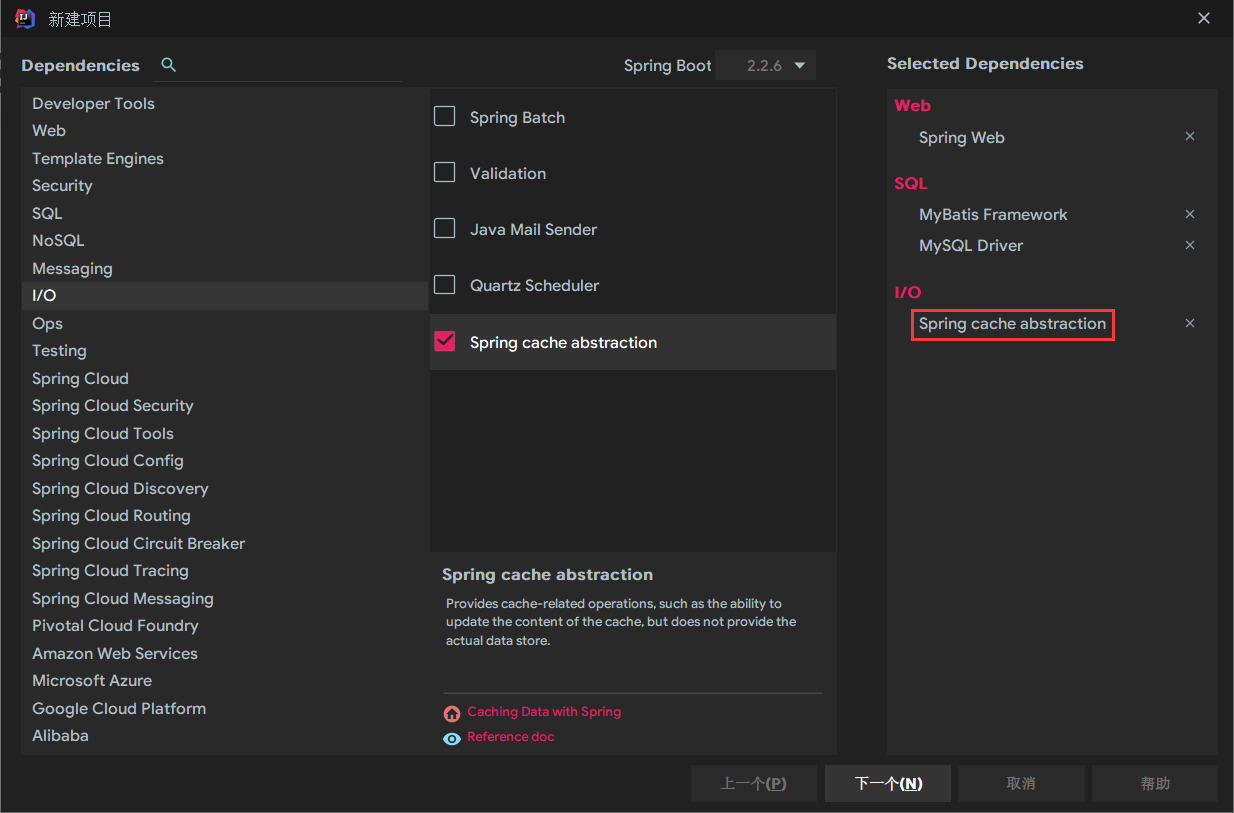
创建springboot项目
-
引入依赖如下
<dependencies> <dependency> <groupId>org.springframework.boot</groupId> <artifactId>spring-boot-starter-cache</artifactId> </dependency> <dependency> <groupId>org.springframework.boot</groupId> <artifactId>spring-boot-starter-web</artifactId> </dependency> <dependency> <groupId>org.mybatis.spring.boot</groupId> <artifactId>mybatis-spring-boot-starter</artifactId> <version>2.1.2</version> </dependency> <dependency> <groupId>mysql</groupId> <artifactId>mysql-connector-java</artifactId> <scope>runtime</scope> </dependency> <dependency> <groupId>org.springframework.boot</groupId> <artifactId>spring-boot-starter-test</artifactId> <scope>test</scope> <exclusions> <exclusion> <groupId>org.junit.vintage</groupId> <artifactId>junit-vintage-engine</artifactId> </exclusion> </exclusions> </dependency> </dependencies> -
配置application.properties
spring.datasource.url=jdbc:mysql://localhost:3306/mybatis?useUnicode=true&characterEncoding=utf-8&useSSL=false spring.datasource.username=root spring.datasource.password=991105 spring.datasource.driver-class-name=com.mysql.jdbc.Driver #mybatis开启驼峰命名法 mybatis.configuration.map-underscore-to-camel-case=true -
创建实体类Employee和Department
package com.chenpeng.springcache.bean; import java.io.Serializable; public class Employee implements Serializable { private Integer id; private String lastName; private String email; private Integer gender; //性别 1男 0女 private Integer dId; public Employee() { super(); } public Employee(Integer id, String lastName, String email, Integer gender, Integer dId) { super(); this.id = id; this.lastName = lastName; this.email = email; this.gender = gender; this.dId = dId; } public Integer getId() { return id; } public void setId(Integer id) { this.id = id; } public String getLastName() { return lastName; } public void setLastName(String lastName) { this.lastName = lastName; } public String getEmail() { return email; } public void setEmail(String email) { this.email = email; } public Integer getGender() { return gender; } public void setGender(Integer gender) { this.gender = gender; } public Integer getdId() { return dId; } public void setdId(Integer dId) { this.dId = dId; } @Override public String toString() { return "Employee [id=" + id + ", lastName=" + lastName + ", email=" + email + ", gender=" + gender + ", dId=" + dId + "]"; } } package com.chenpeng.springcache.bean; public class Department { private Integer id; private String departmentName; public Integer getId() { return id; } public void setId(Integer id) { this.id = id; } public String getDepartmentName() { return departmentName; } public void setDepartmentName(String departmentName) { this.departmentName = departmentName; } @Override public String toString() { return "Department{" + "id=" + id + ", departmentName='" + departmentName + '\'' + '}'; } } -
创建mapper层接口
package com.chenpeng.springcache.mapper; import com.chenpeng.springcache.bean.Employee; import org.apache.ibatis.annotations.*; @Mapper public interface EmployeeMapper { @Select("select * from employee where id = #{id}") Employee getEmpById(Integer id); @Insert("insert into employee(lastName,email,gender,d_id) values(#{lastName},#{email},#{gender},#{dId})") void insertEmp(Employee employee); @Update("update employee set lastName = #{lastName},email = #{email},gender = #{gender},d_id = #{dId} where id = #{id}") void updateEmp(Employee employee); @Delete("delete from employee where id = #{id}") void deleteEmp(Integer id); @Select("select * from employee where lastName = #{lastName}") Employee getEmpByLastName(String lastName); } package com.chenpeng.springcache.mapper; import com.chenpeng.springcache.bean.Department; import org.apache.ibatis.annotations.Mapper; import org.apache.ibatis.annotations.Select; @Mapper public interface DepartmentMapper { @Select("select * from department where id = #{id}") public Department getDeptById(Integer id); } -
创建service层类
package com.chenpeng.springcache.service; import com.chenpeng.springcache.bean.Employee; import com.chenpeng.springcache.mapper.EmployeeMapper; import org.springframework.beans.factory.annotation.Autowired; import org.springframework.stereotype.Service; @Service public class EmployeeService { @Autowired EmployeeMapper employeeMapper; public Employee getEmp(Integer id){ System.out.println("查找"+id+"号员工"); Employee emp = employeeMapper.getEmpById(id); return emp; } } package com.chenpeng.springcache.service; import com.chenpeng.springcache.bean.Department; import com.chenpeng.springcache.mapper.DepartmentMapper; import org.springframework.beans.factory.annotation.Autowired; import org.springframework.stereotype.Service; @Service public class DepartmentService { @Autowired DepartmentMapper departmentMapper; public Department getDept(Integer id){ System.out.println("查找"+id+"号部门"); Department dept = departmentMapper.getDeptById(id); return dept; } } -
创建controller层类
package com.chenpeng.springcache.controller;

import com.chenpeng.springcache.bean.Employee;
import com.chenpeng.springcache.service.EmployeeService;
import org.springframework.beans.factory.annotation.Autowired;
import org.springframework.web.bind.annotation.GetMapping;
import org.springframework.web.bind.annotation.PathVariable;
import org.springframework.web.bind.annotation.RestController;

@RestController
public class EmployeeController {

    @Autowired
    EmployeeService employeeService;

    @GetMapping("/emp/{id}")
    public Employee getEmployee(@PathVariable("id") Integer id){
        Employee employee = employeeService.getEmp(id);
        return employee;
    }
}


package com.chenpeng.springcache.controller;

import com.chenpeng.springcache.bean.Department;
import com.chenpeng.springcache.service.DepartmentService;
import org.springframework.beans.factory.annotation.Autowired;
import org.springframework.web.bind.annotation.GetMapping;
import org.springframework.web.bind.annotation.PathVariable;
import org.springframework.web.bind.annotation.RestController;

@RestController
public class DepartmentController {

    @Autowired
    DepartmentService departmentService;

    @GetMapping("/dept/{id}")
    public Department getDept(@PathVariable("id") Integer id){
        Department dept = departmentService.getDept(id);
        return dept;
    }
}
2.使用缓存
@Cacheable
作用在方法上,将方法的运行结构进行缓存,以后再要相同的数据,直接从缓存中获取,不用再调用方法
属性:
- cacheNames/value:指定缓存组件的名字
- key:缓存数据使用的key,可以用它来指定,默认是使用方法参数的值,例如:1-方法的返回值,可以使用#SpEl,如#id指参数id的值(@Cacheable不能使用#result)

- keyGenerator:key的生成器,可以自己指定key的生成器的组件id,key/keyGenerator:二选一使用
- cacheManager:指定缓存的管理器,(CacheManager管理多个Cache组件,对缓存的真正CRUD操作在Cache数组中,每一个缓存组件有自己唯一一个名字)
- cacheResolver:指定缓存的解析器
- condition:指定符合条件的情况下才缓存,如:condition = "#a0>1":第一个参数的值大于1时才进行缓存
- unless:否定缓存,当unless指定的条件为true,方法的返回值就不会被缓存,可以获取到结果进行判断,如unless = "#result == null":结果为空时不缓存
- sync:是否使用异步模式
运行时机:
- 先进行缓存,再调用方法
@Cacheable(cacheNames = "emp")
    public Employee getEmp(Integer id){
        System.out.println("查找"+id+"号员工");
        Employee emp = employeeMapper.getEmpById(id);
        return emp;
    }
自定义keyGenerator:
package com.chenpeng.springcache.config;

import org.springframework.cache.interceptor.KeyGenerator;
import org.springframework.context.annotation.Bean;
import org.springframework.context.annotation.Configuration;

import java.lang.reflect.Method;
import java.util.Arrays;

/*
自定义key的生成策略
 */
@Configuration
public class MyCacheConfig {

    @Bean("myKeyGenerator")
    public KeyGenerator keyGenerator(){
        return new KeyGenerator(){
            @Override
            public Object generate(Object o, Method method, Object... objects) {
                return method.getName()+Arrays.asList(objects).toString();
            }
        };
    }
}
@CachePut
即调用方法,又更新缓存数据,修改了数据库的某个数据,同时更新缓存
注意需要指定@CachePut的key,使@CachePut的key与@Cacheable的key一样
运行时机:
- 先调用方法,再将方法的结果缓存起来
@CachePut(value = "emp", key = "#result.id")
    public Employee updateEmp(Employee employee){
        System.out.println("更新"+employee);
        employeeMapper.updateEmp(employee);
        return employee;
    }
@CacheEvict
清除缓存
属性:
- key:指定要清除的数据
- allEntries = true:指定清除这个缓存中所有的数据
- beforeInvocation = false:缓存的清除是否在方法之前执行,默认代表缓存清除操作是在方法执行之后执行,如果出现异常缓存就不会清除
- beforeInvocation = true:代表清除缓存操作是在方法执行之前执行,无论方法是否出现异常,缓存都清除
@CacheEvict(value = "emp",beforeInvocation = true)
    public void deleteEmp(Integer id){
        System.out.println("删除"+id+"号员工");
        employeeMapper.deleteEmp(id);
    }
@Caching
定义复杂的缓存规则
@Caching(
            cacheable = {
                    @Cacheable(value = "emp",key="#lastName")
            },
            put = {
                    @CachePut(value="emp",key="#result.id"),
                    @CachePut(value="emp",key="#result.email")
            }
    )
    public Employee getEmpByLastName(String lastName){
        return employeeMapper.getEmpByLastName(lastName);
    }
缓存原理和运行流程
原理
-
自动配置类:CacheAutoConfiguration
-
缓存的配置类:
org.springframework.boot.autoconfigure.cache.GenericCacheConfiguration
org.springframework.boot.autoconfigure.cache.JCacheCacheConfiguration
org.springframework.boot.autoconfigure.cache.EhCacheCacheConfiguration
org.springframework.boot.autoconfigure.cache.HazelcastCacheConfiguration
org.springframework.boot.autoconfigure.cache.InfinispanCacheConfiguration
org.springframework.boot.autoconfigure.cache.CouchbaseCacheConfiguration
org.springframework.boot.autoconfigure.cache.RedisCacheConfiguration
org.springframework.boot.autoconfigure.cache.CaffeineCacheConfiguration
org.springframework.boot.autoconfigure.cache.GuavaCacheConfiguration
org.springframework.boot.autoconfigure.cache.SimpleCacheConfiguration
org.springframework.boot.autoconfigure.cache.NoOpCacheConfiguration
-
SimpleCacheConfiguration默认生效
-
给容器中注册了一个CacheManager:ConcurrentMapCacheManager
-
可以获取和创建ConcurrentMapCache类型的缓存组件,将数据保存在ConcurrentMap中
运行流程
@Cacheable:
- 方法运行之前,先去查询Cache缓存组件,按照cacheNames指定的名字获取,CacheManager先获取相应的缓存,第一次获取缓存如果没有Cache组件会自动创建
- 按照key去Cache中查找缓存的数据,默认是方法的参数
- key是按照某种策略生成的,默认使用SimpleKeyGenerator生成key
- SimpleKeyGenerator生成key的策略
- 如果没有参数:key = newSimpleKey()
- 如果有一个参数:key = 参数的值
- 如果有多个参数:key = new SimpleKey(params)
- SimpleKeyGenerator生成key的策略
- key是按照某种策略生成的,默认使用SimpleKeyGenerator生成key
- 没有查到缓存就调用目标方法
- 将目标方法返回的结果放进缓存中
整合Redis管理缓存
1.环境准备
-
利用Docker安装Redis镜像运行Redis容器
docker pull redis docker run -d -p 8089:6379 redis -
下载安装RedisDeskTopManager并连接运行的redis容器
-
pom文件中引入redis的依赖
<dependency> <groupId>org.springframework.boot</groupId> <artifactId>spring-boot-starter-data-redis</artifactId> </dependency> -
application.properties中添加redis的配置
#指定IP地址
spring.redis.host=xxx
#指定端口号
spring.redis.port=8089
2.测试缓存
实体类需要实现序列化接口
RedisCacheManager默认使用jdk的序列化器
3.自定义CacheManager
创建MyRedisConfig类,把默认的jdk序列化器改为json的序列化器
package com.chenpeng.springcache.config;

import com.chenpeng.springcache.bean.Employee;
import org.springframework.context.annotation.Bean;
import org.springframework.context.annotation.Configuration;
import org.springframework.data.redis.cache.RedisCacheConfiguration;
import org.springframework.data.redis.cache.RedisCacheManager;
import org.springframework.data.redis.cache.RedisCacheWriter;
import org.springframework.data.redis.connection.RedisConnectionFactory;
import org.springframework.data.redis.core.RedisTemplate;
import org.springframework.data.redis.serializer.GenericJackson2JsonRedisSerializer;
import org.springframework.data.redis.serializer.Jackson2JsonRedisSerializer;
import org.springframework.data.redis.serializer.RedisSerializationContext;
import org.springframework.data.redis.serializer.RedisSerializer;

import java.net.UnknownHostException;
import java.time.Duration;

@Configuration
public class MyRedisConfig {

    /**
     * 测试时使用
     * @param redisConnectionFactory
     * @return
     * @throws UnknownHostException
     */
    @Bean
    public RedisTemplate<Object, Employee> empRedisTemplate(RedisConnectionFactory redisConnectionFactory) throws UnknownHostException {
        RedisTemplate<Object, Employee> template = new RedisTemplate<Object, Employee>();
        template.setConnectionFactory(redisConnectionFactory);
        Jackson2JsonRedisSerializer<Employee> ser = new Jackson2JsonRedisSerializer<Employee>(Employee.class);
        template.setDefaultSerializer(ser);
        return template;
    }

    /**
     * springboot2.x版本RedisCacheManager自定义配置
     * @param redisConnectionFactory
     * @return
     */
    @Bean
    public RedisCacheManager employeeCacheManager(RedisConnectionFactory redisConnectionFactory){
        //初始化一个RedisCacheWriter
        RedisCacheWriter redisCacheWriter = RedisCacheWriter.nonLockingRedisCacheWriter(redisConnectionFactory);
        //设置CacheManager的值序列化方式为json序列化
        RedisSerializer<Object> jsonSerializer = new GenericJackson2JsonRedisSerializer();
        RedisSerializationContext.SerializationPair<Object> pair = RedisSerializationContext.SerializationPair.fromSerializer(jsonSerializer);
        RedisCacheConfiguration defaultCacheConfig = RedisCacheConfiguration.defaultCacheConfig().serializeValuesWith(pair);
        //设置默认过期时间1天
        defaultCacheConfig.entryTtl(Duration.ofDays(1));
        //初始化RedisCacheManager
        RedisCacheManager cacheManager = new RedisCacheManager(redisCacheWriter, defaultCacheConfig);
        return cacheManager;
    }
}

 浙公网安备 33010602011771号