
C++结构体
结构体
结构体基本概念
结构体属于用户自定义的数据类型,允许用户存储不同的数据类型
结构体定义和使用
语法:struct 结构体名 { 结构体成员列表 };
通过结构体创建变量的方式有三种:
- struct 结构体名 变量名
- struct 结构体名 变量名 = { 成员1值,成员2值....};
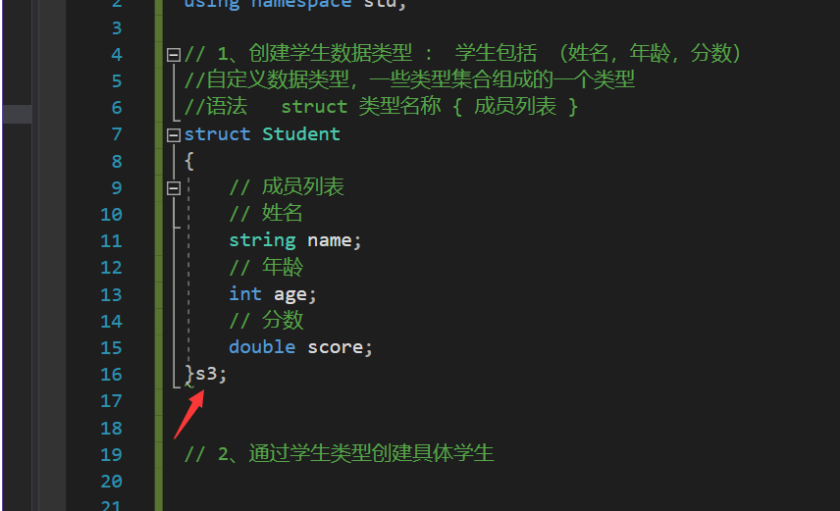
- 定义结构体时顺便创建变量
示例:
#include <iostream>
using namespace std;
// 1、创建学生数据类型 : 学生包括 (姓名,年龄,分数)
//自定义数据类型,一些类型集合组成的一个类型
//语法 struct 类型名称 { 成员列表 }
struct Student
{
// 成员列表
// 姓名
string name;
// 年龄
int age;
// 分数
double score;
};
// 2、通过学生类型创建具体学生
int main() {
// 2.1 struct Student s1
// struct关键字可以省略 (创建的时候可以省略,定义的时候不可以省略)!!!!
struct Student s1; // Student s1 (此处可以省略struct关键字)
struct Student s1;
// 给s1属性赋值,通过.访问结构体变量中的属性
s1.name = "张三";
s1.age = 18;
s1.score = 85.5;
cout << "姓名:" << s1.name << "年龄:" << s1.age << "分数:" << s1.score << endl;
// 2.2 struct Student s2 = { ... }
struct Student s2 = { "李四", 19, 90 };
cout << "姓名:" << s2.name << "年龄:" << s2.age << "分数:" << s2.score << endl;
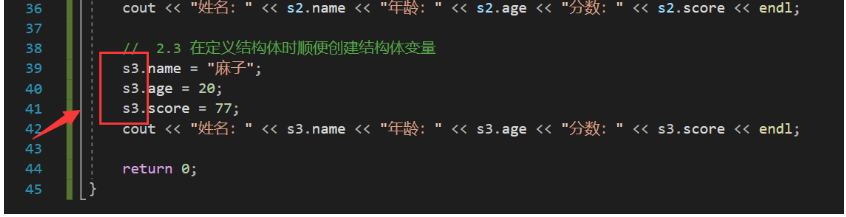
// 2.3 在定义结构体时顺便创建结构体变量
return 0;
}
定义结构体时顺便创建变量(用的比较少)
总结1:定义结构体时的关键字是struct,不可省略
总结2:创建结构体变量时,关键字struct可以省略
总结3:结构体变量利用操作符"."访问成员
结构体数组
作用:将自定义的结构体放入到数组中方便维护
语法:struct 结构体名 数组名[元素个数] = { {}, {}, {}, ... {} }
示例:
#include <iostream>
using namespace std;

// 结构体数组
// 1、定义结构体
struct Student
{
	string name;
	int age;
	int score;
};


int main() {
	// 2、创建结构体数组
	struct Student stuAaary[3] =
	{
		{"张三", 15, 88},
		{"李四", 20, 90},
		{"王二", 18, 100}
	};

	// 3、给结构体数组中的元素赋值
	stuAaary[2].name = "赵六";
	stuAaary[2].age = 80;
	stuAaary[2].score = 60;

	// 4、遍历结构体数组
	for (int i = 0; i < 3; i++)
	{
		cout << "姓名:" << stuAaary[i].name << "年龄:" << stuAaary[i].age << "分数:" << stuAaary[i].score << endl;
	}
	return 0;
}
output:
姓名:张三年龄:15分数:88
姓名:李四年龄:20分数:90
姓名:赵六年龄:80分数:60
请按任意键继续. . .
结构体指针
作用:通过指针访问结构体中的成员
- 利用操作符
->可以通过结构体指针访问结构体属性
示例:
#include <iostream>
using namespace std;

// 结构体指针
// 定义结构体
struct Student
{
	string name;
	int age;
	int score;
};


int main() {
	// 1、创建学生结构体变量
	struct Student s1 = { "张三", 18, 90 };

	// 2、通过指针指向结构体变量
	struct Student* p = &s1;

	// 3、通过指针访问结构体变量中的数据
	cout << "姓名: " << p->name << "年龄: " << p->age << "分数: " << p->score << endl;


	return 0;
}
output:
姓名: 张三年龄: 18分数: 90
请按任意键继续. . .
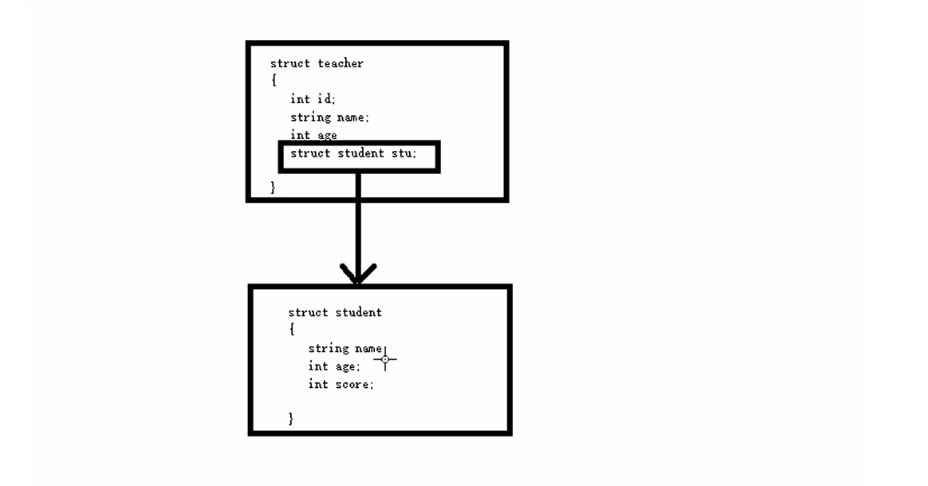
结构体嵌套结构体
作用:结构体中的成员可以是另一个结构体
例如:每个老师辅导一个学院,一个老师的结构体中,记录一个学生的结构体
示例:
#include <iostream>
using namespace std;

// 结构体指针
// 定义结构体
struct Student
{
	string name;
	int age;
	int score;
};


int main() {
	// 1、创建学生结构体变量
	struct Student s1 = { "张三", 18, 90 };

	// 2、通过指针指向结构体变量
	struct Student* p = &s1;

	// 3、通过指针访问结构体变量中的数据
	cout << "姓名: " << p->name << "年龄: " << p->age << "分数: " << p->score << endl;


	return 0;
}
总结:在结构体中可以定义另一个结构体作为成员,用来解决实际问题
结构体做函数参数
作用:将结构体作为参数向函数中传递
传递方式有两种:
- 值传递
- 地址传递
示例:
#include <iostream>
using namespace std;


// 定义学生结构体
struct Student
{
	string name;
	int age;
	int score;
};


// 打印学生信息函数
// 1、值传递
void printStudent01(struct Student s)
{
	cout << "在子函数1中打印  姓名:" << s.name << "年龄:" << s.age << "分数:" << s.score << endl;
};

// 2、地址传递
void printStudent02(struct Student * p)
{
	cout << "在子函数2中打印  姓名:" << p->name << "年龄:" << p->age << "分数:" << p->score << endl;
};


int main() {
	// 将结构体做函数参数
	// 将学生传入到一个参数中,打印学生身上的所有信息

	// 创建结构体变量
	struct Student s;
	s.name = "张三";
	s.age = 18;
	s.score = 85;

	printStudent01(s);
	printStudent02(&s);
	// cout << "在main函数中打印  姓名:" << s.name << "年龄:" << s.age << "分数:" << s.score << endl;

	return 0;
}
总结:如果不想修改主函数中的数据,用值传递,反之用地址传递
结构体中const使用场景
作用:用const来防止误操作
示例:
#include <iostream>
using namespace std;


// 定义学生结构体
struct Student
{
	string name;
	int age;
	int score;
};


// 将函数中的形参改为指针,可以减少内存空间,而且不会复制新的副本出来
// void printStudents(struct Student s)
void printStudents(const struct Student *s)  // 加入const防止函数体中的误操作
{
	// cout << "姓名:" << s.name << "年龄:" << s.age << "分数:" << s.score << endl;
	// s->age = 150; // 加入const之后,一旦有修改的操作就会报错,可以防止我们的误操作
	cout << "姓名:" << s->name << "年龄:" << s->age << "分数:" << s->score << endl;
};


int main() {


	// 创建结构体变量
	struct Student s = {"张三" , 18 , 70};

	// 通过函数打印结构体变量信息
	// printStudents(s);
	printStudents(&s);

	return 0;
}
结构体案例

示例:
#include <iostream>
using namespace std;


// 定义学生结构体
struct Student
{
	string sName;
	int score;
};

// 定义老师结构体
struct Teacherss
{
	string tName;
	struct Student sArray[5];
};


// 给老师和学生赋值的函数
void allocateSpace(struct Teacherss tArray[], int len)
{
	string nameSeed = "ABCDE";
	// 给老师赋值
	for (int i = 0; i < len; i++)
	{
		tArray[i].tName = "Teacher_";
		tArray[i].tName += nameSeed[i];

		// 通过循环给每名老师所带的学生赋值
		for (int j = 0; j < 5; j++)
		{
			tArray[i].sArray[j].sName = "student_";
			tArray[i].sArray[j].sName += nameSeed[j];

			tArray[i].sArray[j].score = 60;

		}
	}
};

// 打印所有信息
void printInfo(struct Teacherss tArray[], int len)
{
	for (int i = 0; i < len; i++)
	{
		cout << "\t老师姓名:" << tArray[i].tName << endl;

		for (size_t j = 0; j < 5; j++)
		{
			cout << "学生姓名:" << tArray[i].sArray[j].sName <<
				"考试分数:" << tArray[i].sArray[j].score << endl;
		}
	}
};

int main() {
	// 1、 创建3名老师的数组
	struct Teacherss tArray[3];

	// 2、通过函数给3名老师的信息赋值,并给老师带的学生信息赋值
	int len = sizeof(tArray) / sizeof(tArray[0]);
	allocateSpace(tArray, len);

	// 3、打印所有老师及所带的学生信息
	printInfo(tArray, len);
	return 0;
}
output:
        老师姓名:Teacher_A
学生姓名:student_A考试分数:60
学生姓名:student_B考试分数:60
学生姓名:student_C考试分数:60
学生姓名:student_D考试分数:60
学生姓名:student_E考试分数:60
        老师姓名:Teacher_B
学生姓名:student_A考试分数:60
学生姓名:student_B考试分数:60
学生姓名:student_C考试分数:60
学生姓名:student_D考试分数:60
学生姓名:student_E考试分数:60
        老师姓名:Teacher_C
学生姓名:student_A考试分数:60
学生姓名:student_B考试分数:60
学生姓名:student_C考试分数:60
学生姓名:student_D考试分数:60
学生姓名:student_E考试分数:60
请按任意键继续. . .
修改分数随机数 (36行和61行int random = rand() % 61 + 40; // 40 ~ 100 )
#include <iostream>
using namespace std;


// 定义学生结构体
struct Student
{
	string sName;
	int score;
};

// 定义老师结构体
struct Teacherss
{
	string tName;
	struct Student sArray[5];
};


// 给老师和学生赋值的函数
void allocateSpace(struct Teacherss tArray[], int len)
{
	string nameSeed = "ABCDE";
	// 给老师赋值
	for (int i = 0; i < len; i++)
	{
		tArray[i].tName = "Teacher_";
		tArray[i].tName += nameSeed[i];

		// 通过循环给每名老师所带的学生赋值
		for (int j = 0; j < 5; j++)
		{
			tArray[i].sArray[j].sName = "student_";
			tArray[i].sArray[j].sName += nameSeed[j];

			int random = rand() % 61 + 40; // 40 ~ 100
			tArray[i].sArray[j].score = random;

		}
	}
};

// 打印所有信息
void printInfo(struct Teacherss tArray[], int len)
{
	for (int i = 0; i < len; i++)
	{
		cout << "\t老师姓名:" << tArray[i].tName << endl;

		for (size_t j = 0; j < 5; j++)
		{
			cout << "学生姓名:" << tArray[i].sArray[j].sName <<
				"考试分数:" << tArray[i].sArray[j].score << endl;
		}
	}
};

int main() {

	// 随机数种子
	srand((unsigned int)time(NULL));

	// 1、 创建3名老师的数组
	struct Teacherss tArray[3];

	// 2、通过函数给3名老师的信息赋值,并给老师带的学生信息赋值
	int len = sizeof(tArray) / sizeof(tArray[0]);
	allocateSpace(tArray, len);

	// 3、打印所有老师及所带的学生信息
	printInfo(tArray, len);
	return 0;
}
output:
        老师姓名:Teacher_A
学生姓名:student_A考试分数:81
学生姓名:student_B考试分数:85
学生姓名:student_C考试分数:91
学生姓名:student_D考试分数:66
学生姓名:student_E考试分数:55
        老师姓名:Teacher_B
学生姓名:student_A考试分数:87
学生姓名:student_B考试分数:50
学生姓名:student_C考试分数:57
学生姓名:student_D考试分数:40
学生姓名:student_E考试分数:43
        老师姓名:Teacher_C
学生姓名:student_A考试分数:72
学生姓名:student_B考试分数:64
学生姓名:student_C考试分数:80
学生姓名:student_D考试分数:92
学生姓名:student_E考试分数:58
请按任意键继续. . .
本文来自博客园,作者:__username,转载请注明原文链接:https://www.cnblogs.com/code3/p/17303150.html

 浙公网安备 33010602011771号