

OpenCV 简单使用
导入SDK
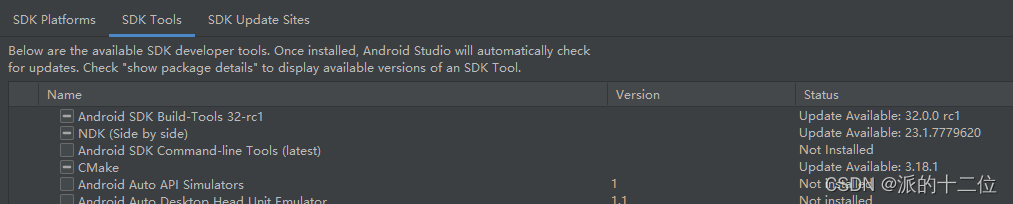
配置NDK和CMake
导入模块
将下载的sdk做为模块导入
file->New->import module
修改build.gradle下的版本号和主版本一致
    compileSdkVersion xx
    defaultConfig {
        minSdkVersion xx
        targetSdkVersion xx
    }
在app的build.gradle下添加依赖
dependencies {
    	......
        implementation project(path: ':opencv')
}
查看是否添加成功
   public void initLoadOpenCV() {
        boolean success = OpenCVLoader.initDebug();
        if (success) {
            Log.d("init", "initLoadOpenCV: openCV load success");
        } else {
            Log.e("init", "initLoadOpenCV: openCV load failed");
        }
    }
常用的几个类
Mat
图像矩阵,由头部和数据组成,其中头部还包含了一个指向数据的指针
Utils
Mat 和 Bitmap转换的工作
Imgproc
处理图像
Core
用于Mat的运算
基本函数
颜色转换 cvtColor(Mat src, Mat dst, int code)
Imgproc.cvtColor(src, dst, Imgproc.COLOR_RGB2RGBA);
二值化
只有黑白二色.
type类型
- THRESH_BINARY:当像素点灰度值 大于 thresh,像素点值为maxval,反之0
- THRESH_BINARY_INV:当像素点灰度值 大于 thresh,像素点值为0,反之maxval
- THRESH_TRUNC:当像素点灰度值 大于 thresh,像素点值为thresh,反之不变
- THRESH_TOZERO:当像素点灰度值 大于 thresh,像素点值不变,反之为0
- THRESH_TOZERO_INV:当像素点灰度值 大于 thresh,像素点值为0,反之不变
Imgproc.threshold(dst,dst,160,255,Imgproc.THRESH_BINARY)
绘图(Scalar代表颜色三个参数分别为R,G,B)
Imgproc.line(dst, new Point(12, 12), new Point(100, 100), new Scalar(255, 0, 0), 2);
颜色检测
需要先将mat转化为hsv格式的,low和heigh之间的转化为255(白色),否则为0(黑色)
Core.inRange(imgHSV,new Scalar(lowH,lowS,lowV),new Scalar(heighH.heighS,heighV),dst);
实例
检测形状和颜色
 public static void check(Bitmap bmp){
        Bitmap srcBitmap = adjust(null,bmp);
        if (srcBitmap == null){
            return 0;
        }
        Mat rgbMat = new Mat();

        Mat src = new Mat();

        //将原始的bitmap转换为mat型.
        Utils.bitmapToMat(srcBitmap, rgbMat);

        Imgproc.cvtColor(rgbMat, src, Imgproc.COLOR_RGB2HSV);

        Core.inRange(src, new Scalar(26, 0, 0), new Scalar(85, 255, 255), src);

        //这就是一个运算核,一个3x3的矩阵
        Mat kernel = Imgproc.getStructuringElement(Imgproc.MORPH_RECT, new Size(3, 3));
//进行开运算
        Imgproc.morphologyEx(src, src, Imgproc.MORPH_OPEN, kernel);
//进行闭运算
        Imgproc.morphologyEx(src, src, Imgproc.MORPH_CLOSE, kernel);

        //寻找图形的轮廓
        List<MatOfPoint> contours = new ArrayList<>();
        Mat hierarchy = new Mat();
        Imgproc.findContours(src, contours, hierarchy, Imgproc.RETR_TREE, Imgproc.CHAIN_APPROX_SIMPLE);

        //加载颜色标签的类
        CVColorLabeler cl = new CVColorLabeler();
        //形状检测
        CVShapeDetector shapeDetector = new CVShapeDetector();
        for (MatOfPoint c : contours) {
            //计算轮廓的中心,并根据中心确定形状
            Moments m = Imgproc.moments(c);
            int cx = (int) (m.m10 / m.m00);
            int cy = (int) (m.m01 / m.m00);

        //传入图片和每个形状的轮廓
            String color = cl.label(rgbMat, c);

            shapeDetector.green = label.equals("green");
            //shape
            String shape = shapeDetector.detect(new MatOfPoint2f(c.toArray()));
            //画轮廓
            Imgproc.drawContours(rgbMat, contoursnew, -1, new Scalar(255, 0, 0), 2);
            //在中心显示文字
            Imgproc.putText(rgbMat, label + " " + shape, new Point(cx, cy), Core.FONT_HERSHEY_SIMPLEX, 0.5, new Scalar(255, 0, 0), 2);
            //将Mat转换为位图
            Bitmap grayBitmap = Bitmap.createBitmap(srcBitmap.getWidth(), srcBitmap.getHeight(), Bitmap.Config.RGB_565);
            Utils.matToBitmap(rgbMat, grayBitmap);
        }

    }
形状检测类
public class CVShapeDetector {


    private static final String TAG = "CVShapeDetector" ;
    public boolean green = false;

    public int maxCirclWidth = 1;

    public Rect maxRect = new Rect();


    private static CVShapeDetector detector;

    public CVShapeDetector(){

    }
    public static CVShapeDetector getInstance(){
        if (detector == null){
            detector = new CVShapeDetector();
        }
        return detector;
    }

    public String detect(MatOfPoint point) {
        return detect(new MatOfPoint2f(point.toArray()));
    }

    public String detect(MatOfPoint2f c) {
        String shape = "unknow";
//计算轮廓的周长
        double peri = Imgproc.arcLength(c, true);
        MatOfPoint2f approx = new MatOfPoint2f();
//得到轮廓的大概
        Imgproc.approxPolyDP(c, approx, 0.04 * peri, true);

        Log.d(TAG, "detect: 有:" + approx.toList().size() + "个定点");
        double maxY = 0;
//如果是三角形形状,则有三个顶点
        if (approx.toList().size() == 3) {
            shape = "triangle";
        }

//如果有四个顶点,则是正方形或者长方形
        else if (approx.toList().size() == 4) {

            //计算轮廓的边界框并使用边界框来计算宽高比
            Rect rect = new Rect();
            rect = Imgproc.boundingRect(new MatOfPoint(approx.toArray()));
            float ar = rect.width / (float) rect.height;

            //正方形的宽高比接近为1,除此之外就为长方形
            if (ar >= 0.95 && ar <= 1.05) {
                shape = "square";
            } else {
                shape = "rectangle";
            }

            if (rect.width > maxRect.width && green) {
                maxRect = rect;
            }
            Log.d(TAG, "detect: width rectangle---" + rect.width + " sss:" + rect.x + "  y:" + rect.y);


        }//如果是五角形,则有五个顶点
        else if (approx.toList().size() == 5) {
            shape = "pentagon";
        } else {

            Rect rect = Imgproc.boundingRect(new MatOfPoint(approx.toArray()));
            float ar = rect.width / (float) rect.height;

            // 宽高比接近为1,除此之外就为长方形
            if (ar >= 0.9  && ar <= 1.1) {
                shape = "circle";
                maxCirclWidth = Math.max(rect.width, maxCirclWidth);
            } else {
                shape = "rectangle";
            }

        }

        return shape;
    }
}
颜色检测类
public class CVColorLabeler {

    //定义一个颜色名称数组
    private String[] colorNames = {"blue", "green", "red"};
    //用mat存放rgb和lab
    private Mat[] rgbMat = new Mat[3];
    private Mat[] labMat = new Mat[3];

    public CVColorLabeler() {
        //对应颜色数组的蓝色
        rgbMat[0] = new Mat(1, 1, CvType.CV_8UC3, new Scalar(0, 0, 255));
        //绿色
        rgbMat[1] = new Mat(1, 1, CvType.CV_8UC3, new Scalar(0, 255, 0));
        //红色
        rgbMat[2] = new Mat(1, 1, CvType.CV_8UC3, new Scalar(255, 0, 0));

        //把rgb转换成lab
        for (int i = 0; i < 3; i++) {
            labMat[i] = new Mat();
            Imgproc.cvtColor(rgbMat[i], labMat[i], Imgproc.COLOR_RGB2Lab);
        }

    }

    public String label(Mat rgbImage, MatOfPoint contour) {

        Mat blur1 = new Mat();

        //以两个不同的模糊半径对图像做模糊处理,前两个参数分别是输入和输出图像,第三个参数指定应用滤波器时所用核的尺寸,最后一个参数指定高斯函数中的标准差数值
        Imgproc.GaussianBlur(rgbImage, blur1, new Size(5, 5), 0);

        //将图像转换为lab
        Mat image = new Mat(blur1.size(), blur1.type());
        Imgproc.cvtColor(blur1, image, Imgproc.COLOR_RGB2Lab);

        //传入每个图形的轮廓
//由于画轮廓的时候是需要一个list,因此这里新建一个list来存放每一个图形轮廓,然后再画出来
        List<MatOfPoint> contours = new ArrayList<>();
        contours.add(contour);

        String label = "unknown";
//定义一个新的mat来为图形增添蒙版
        Mat mask = Mat.zeros(image.rows(), image.cols(), 0);
//根据蒙版来画轮廓
        Imgproc.drawContours(mask, contours, -1, new Scalar(255, 255, 255), -1);
//腐蚀化图像的结构元素,默认采用3*3的正方形
        Mat kernel = Imgproc.getStructuringElement(Imgproc.MORPH_RECT, new Size(3, 3));
        Imgproc.erode(mask, mask, kernel, new Point(-1, -1), 2);
//计算lab和蒙版的平均值,返回一个scalar对象
        Scalar scalar = Core.mean(image, mask);
//由于下面要计算scalar和lab的欧氏距离,所以需要创建一个与lab的大小和类型都一样的mat
        Mat mean = new Mat(1, 1, CvType.CV_8UC3, scalar);

        //计算平均值跟各个颜色的lab的欧式距离
        double dis = Integer.MAX_VALUE;
        int min = 0;
        for (int i = 0; i < 3; i++) {

            double d = Core.norm(labMat[i], mean);

            if (d < dis) {
                dis = d;
                min = i;
            }
        }
//得到的最小距离的颜色即为该形状的颜色
        label = colorNames[min];
        return label;

    }

}
将倾斜的长方形摆正
public static Bitmap adjust(Context context,Bitmap srcBmp){


        Bitmap srcBitmap = srcBmp;

        //建立几个Mat类型的对象
        Mat rgbMat = new Mat();
        Mat src = new Mat();
        //将原始的bitmap转换为mat型.
        Utils.bitmapToMat(srcBitmap, rgbMat);
        Imgproc.cvtColor(rgbMat, src, Imgproc.COLOR_RGB2HSV);
        Core.inRange(src, new Scalar(30, 0, 0), new Scalar(85, 255, 255), src);
        //这就是一个运算核,一个3x3的矩阵
        Mat kernel = Imgproc.getStructuringElement(Imgproc.MORPH_RECT, new Size(3, 3));
//进行开运算
        Imgproc.morphologyEx(src, src, Imgproc.MORPH_OPEN, kernel);
//进行闭运算
        Imgproc.morphologyEx(src, src, Imgproc.MORPH_CLOSE, kernel);

        //寻找图形的轮廓
        List<MatOfPoint> contours = new ArrayList<>();
        Mat hierarchy = new Mat();
        Imgproc.findContours(src, contours, hierarchy, Imgproc.RETR_CCOMP, Imgproc.CHAIN_APPROX_SIMPLE);
        int index = -1;
        double max = 0;

        //形状检测
        CVShapeDetector shapeDetector = CVShapeDetector.getInstance();

        for (int i = 0; i < contours.size(); i++)
        {

            String shape = shapeDetector.detect(contours.get(i));
            if (!shape.equals("rectangle")) {
                continue;
            }

            double area = Imgproc.contourArea(contours.get(i));
            if (area > max)
            {
                max = area;
                index = i;
            }
        }
        if (index == -1){
            return null;
        }

        MatOfPoint2f p = new MatOfPoint2f(contours.get(index).toArray());
        double peri = Imgproc.arcLength(p, true);
        MatOfPoint2f approx = new MatOfPoint2f();
//得到轮廓的大概
        Imgproc.approxPolyDP(p, approx, 0.04 * peri, true);

        Point dstpoint[] = new Point[4];//存放变换后四顶点

        Point srcpoint[]   = approx.toArray();
        double width1, width2, height1, height2, avgw, avgh;
        width1 = Math.sqrt(Math.pow(Arrays.asList(srcpoint).get(2).x - Arrays.asList(srcpoint).get(3).x,2) + Math.pow(Arrays.asList(srcpoint).get(2).y - Arrays.asList(srcpoint).get(3).y,2));
        width2 = Math.sqrt(Math.pow(Arrays.asList(srcpoint).get(1).x - Arrays.asList(srcpoint).get(0).x,2) + Math.pow(Arrays.asList(srcpoint).get(1).y - Arrays.asList(srcpoint).get(0).y,2));
        height1 = Math.sqrt(Math.pow(Arrays.asList(srcpoint).get(1).x - Arrays.asList(srcpoint).get(2).x, 2) + Math.pow(Arrays.asList(srcpoint).get(1).y - Arrays.asList(srcpoint).get(2).y, 2));
        height2 = Math.sqrt(Math.pow(Arrays.asList(srcpoint).get(0).x - Arrays.asList(srcpoint).get(3).x, 2) + Math.pow(Arrays.asList(srcpoint).get(0).y - Arrays.asList(srcpoint).get(3).y, 2));
        avgw = (width1 + width2) / 2;
        avgh = (height1 + height2) / 2;

        if (avgw > avgh){
            double tmp = 0;
            tmp = avgh;
            avgh = avgw;
            avgw = tmp;
            dstpoint[0]= new Point(0, 0);
            dstpoint[1] = new Point(0, avgh-1);
            dstpoint[2] = new Point(avgw-1, avgh-1);
            dstpoint[3] = new Point(avgw-1, 0);
        }else {
            dstpoint[0]= new Point(avgw-1, 0);
            dstpoint[1] = new Point(0, 0);
            dstpoint[2] = new Point(0, avgh-1);
            dstpoint[3] = new Point(avgw-1, avgh-1);
        }

        Mat newmat = new Mat();
        Mat srcmat = Converters.vector_Point2f_to_Mat(Arrays.asList(srcpoint));
        Mat dstmat = Converters.vector_Point2f_to_Mat(Arrays.asList(dstpoint));

        Mat perMat = Imgproc.getPerspectiveTransform(srcmat,dstmat);
        Imgproc.warpPerspective(rgbMat,newmat,perMat,new Size(avgw, avgh));

        Bitmap bmp = Bitmap.createBitmap(newmat.width(), newmat.height(), Bitmap.Config.ARGB_8888);
        Utils.matToBitmap(newmat,bmp);

        return bmp;
    }
结合tess-two实现文字识别
添加tess-two的依赖
implementation 'com.rmtheis:tess-two:9.1.0'
添加识别库识别库下载地址

识别工具类
识别之前先将图像二值化
public class OcrUtils {

    /**
     * 识别图像
     * @param activity
     * @param bitmap
     */
    public static void recognition(final Activity activity, final Bitmap bitmap) {
        Log.d("test--", "run: begin---");
        new Thread(new Runnable() {
            @Override
            public void run() {
                /**
                 * 检测sd卡是否存在语言库
                 * 若不存在,从assets获取到本地sd卡
                 */
                if (!checkTrainedDataExists()){
                    SDUtils.assets2SD(activity.getApplicationContext(), PathUtils.LANGUAGE_PATH, PathUtils.DEFAULT_LANGUAGE_NAME);
                }


                TessBaseAPI tessBaseAPI = new TessBaseAPI();
                tessBaseAPI.setDebug(true);
                tessBaseAPI.init(PathUtils.DATAPATH, PathUtils.DEFAULT_LANGUAGE);
                //识别的图片
                tessBaseAPI.setImage(bitmap);
                //获得识别后的字符串
                String text = "";
                text = "识别结果:" + "\n" + tessBaseAPI.getUTF8Text();
                final String finalText = text;
                Log.d("test--", "run: "+finalText);
                tessBaseAPI.end();
            }
        }).start();
    }
    private static boolean checkTrainedDataExists() {
        File file = new File(PathUtils.LANGUAGE_PATH);
        return file.exists();
    }

}
识别库复制到sdk中
public class SDUtils {
    /**
     * 将assets中的识别库复制到SD卡中
     *
     * @param path 要存放在SD卡中的 完整的文件名。这里是"/storage/emulated/0/tessdata/chi_sim.traineddata"
     * @param name assets中的文件名 这里是 "chi_sim.traineddata"
     */
    public static void assets2SD(Context context, String path, String name) {
        //如果存在就删掉
        File f = new File(path);
        if (f.exists()) {
            f.delete();
        }
        if (!f.exists()) {
            File p = new File(f.getParent());//返回此抽象路径名父目录的路径名字符串
            if (!p.exists()) {
                p.mkdirs();//建立多级文件夹
            }
            try {
                f.createNewFile();
            } catch (IOException e) {
                e.printStackTrace();
            }
        }

        InputStream is = null;
        OutputStream os = null;
        try {
            //打开assets文件获得一个InputStream字节输入流
            is = context.getAssets().open(name);
            File file = new File(path);
            // 创建一个向指定 File 对象表示的文件中写入数据的文件输出流
            os = new FileOutputStream(file);
            byte[] bytes = new byte[4096];
            int len = 0;
            //从输入流中读取一定数量的字节,并将其存储在缓冲区数组bytes中
            //如果因为流位于文件末尾而没有可用的字节,则返回值-1
            while ((len = is.read(bytes)) != -1) {
                //将指定byte数组中从偏移量off开始的len个字节写入此缓冲的输出流
                os.write(bytes, 0, len);
            }
            //java在使用流时,都会有一个缓冲区,按一种它认为比较高效的方法来发数据:把要发的数据先放到缓冲区,
            //缓冲区放满以后再一次性发过去,而不是分开一次一次地发
            //flush()强制将缓冲区中的数据发送出去,不必等到缓冲区满
            os.flush();
        } catch (IOException e) {
            e.printStackTrace();
        } finally {
            try {
                //关闭输入流和输出流
                if (is != null)
                    is.close();
                if (os != null)
                    os.close();
            } catch (IOException e) {
                e.printStackTrace();
            }
        }

    }
}
路径
public class PathUtils {

    //TessBaseAPI初始化用到的第一个参数,是个目录
    public static final String DATAPATH = Environment.getExternalStorageDirectory()
            .getAbsolutePath() + File.separator;
    //在DATAPATH中新建这个目录,TessBaseAPI初始化要求必须有这个目录
    public static final String tessdata = DATAPATH + File.separator + "tessdata";
    //TessBaseAPI初始化测第二个参数,就是识别库的名字不要后缀名。
    public static String DEFAULT_LANGUAGE = "chi_sim";
    //assets中的文件名
    public static String DEFAULT_LANGUAGE_NAME = DEFAULT_LANGUAGE + ".traineddata";
    //保存到SD卡中的完整文件名
    public static String LANGUAGE_PATH = tessdata + File.separator + DEFAULT_LANGUAGE_NAME;

}

 浙公网安备 33010602011771号