【element UI】el-cascader 组件使用过程踩坑记录
前言
项目中使用到 el-cascader 组件,记录下遇到的一些问题以及解决方法,方便后续回顾查看。
样式问题
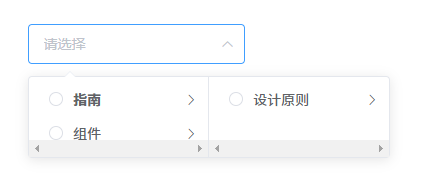
我是使用按需引入的 element UI,当使用到 el-cascader 组件时,下拉框里的布局有问题,如下图所示:

【解决方法】引入下面的 css
import 'element-ui/lib/theme-chalk/index.css'
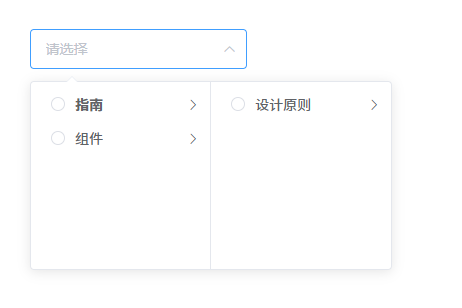
最终效果:

布局错乱
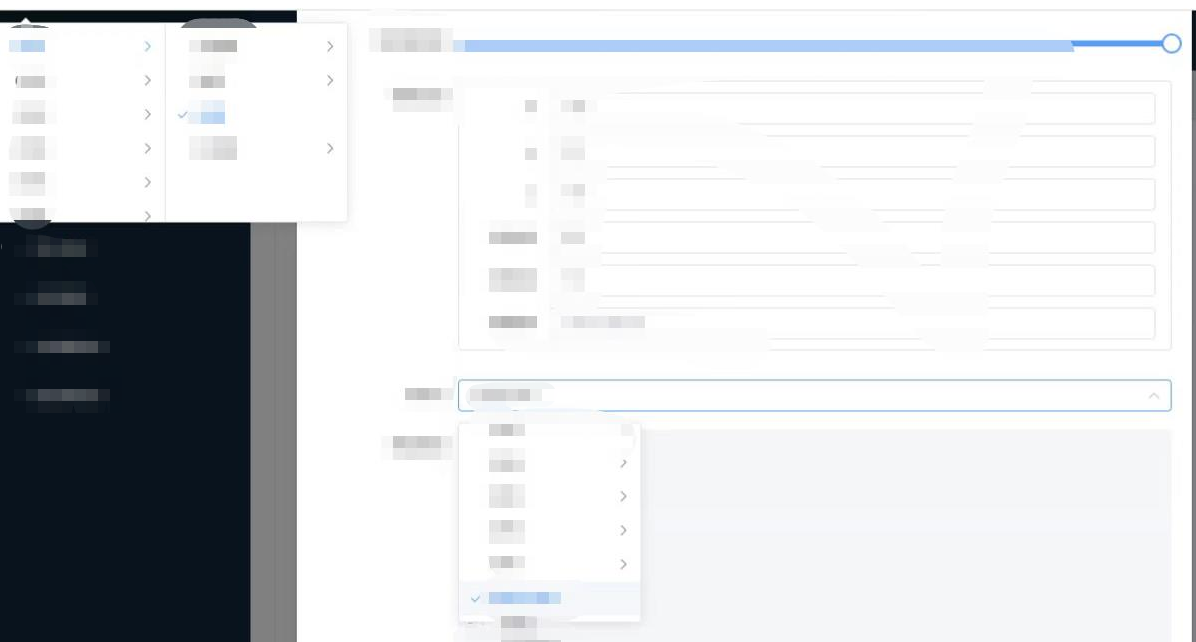
在项目我是使用弹窗表单的形式展示,使用到了 el-cascader ,在选择某级数据的时候,选中后,发现下拉面板跑到左上角去了,如下图:

【解决方法】在 el-cascader 加上 :append-to-body="false"
<el-cascader
   :props="props"
   :append-to-body="false"
   v-model="cascaderValue"
   @change="lastChange"
></el-cascader>
懒加载数据+回显
由于数据太多使用了懒加载的形式,下面是记录测试使用过的回显两种方法,都可以实现回显。
注意:数据回显的时候,一定要在最后一层的数据加上 leaf: true 这个字段,不然回显下拉框的数据是对应上了,但是会发现 input 输入框不显示回显的数据 !!!!
使用 key
组件绑定 key 值,当 el-cascader 使用 v-model 绑定的值改变时,也修改下 key 值,达到回显效果。
部分代码:
<el-cascader
   :props="props"
   :key="cascaderKey"
   v-model="cascaderValue"
   @change="lastChange"
></el-cascader>
<el-button @click="btn2">回显["zhinan", "shejiyuanze"]</el-button>
export default{
  data() {
    return {
      props: {
        lazy: true,
        lazyLoad: this.lazyLoad
      },
      cascaderValue: [],
      cascaderKey: 0, // 回显使用
    };
  },
  methods:{
    btn2(){
      this.cascaderValue = ["zhinan", "shejiyuanze"];
      this.cascaderKey++;
    }
  }
}
完整代码:(完整代码是根据项目需求实现的小demo,仅演示回显使用)
<template>
  <div class="main">
    <el-button @click="btn2">回显["zhinan", "shejiyuanze"]</el-button>
    <div class="Cascader">
      <el-cascader
        :props="props"
        :key="cascaderKey"
        v-model="cascaderValue"
      ></el-cascader>
    </div>
  </div>
</template>

<script>
export default {
  data() {
    return {
      props: {
        lazy: true,
        lazyLoad: this.lazyLoad,
      },
      cascaderValue: [],
      cascaderKey: 0, // 回显使用
    };
  },

  methods: {
    btn2() {
      this.cascaderValue = ["zhinan", "shejiyuanze"];
      this.cascaderKey++;
    },

    lazyLoad(node, resolve) {
      const { level, value } = node;
      let option =
        level === 0 ? this.getData(false, node) : this.getData(value, node);
      console.log(`${level}-`, option);
      setTimeout(() => {
        resolve(option);
      }, 500);
    },

    // 模拟后端数据
    getData(value = false, node) {
      let result = [];
      if (!value) {
        let list = [
          {
            value: "zhinan",
            label: "指南",
            isParent: true,
            type: "folder",
            leaf: false,
          },
          {
            value: "zujian",
            label: "组件",
            isParent: true,
            type: "folder",
            leaf: false,
          },
        ];

        result = list;
      } else {
        let obj = {
          zhinan: [
            {
              value: "shejiyuanze",
              label: "设计原则",
              isParent: true,
              type: "folder",
              leaf: false,
            },
          ],
          shejiyuanze: [
            {
              value: "tag",
              label: "Tag 标签",
              isParent: false,
              type: "file",
              leaf: false,
            },
          ],
          zujian: [
            {
              value: "layout",
              label: "Layout 布局",
              isParent: true,
              type: "folder",
            },
          ],
          layout: [
            {
              value: "table",
              label: "Table 表格",
              isParent: false,
              type: "file",
              leaf: false,
            },
          ],
        };
        let arr = obj[value];
        let newArr = [];
        arr.forEach((element) => {
          if (element.isParent) {
            newArr.push(element);
          }
        });
        // 类型为 文件夹的 type: "folder" 输出
        // 【回显重要步骤离不开 leaf,没有这个回显一直不生效,要在这里赋值判断是否是叶子最后节点,是的话赋值,然后才可以回显】
        if (newArr.length === 0) {
          node.data.leaf = true;
          result = [];
        } else {
          result = newArr;
        }
      }

      return result;
    },
  },
};
</script>
使用 lazyLoad() 方法
这个需要 el-cascader 需要绑定 ref,然后调用方法:
this.$refs.cascader.panel.lazyLoad();
部分代码:
<el-button @click="btn2">回显["zhinan", "shejiyuanze"]</el-button>
<el-cascader
   ref="cascader"
   :props="props"
   v-model="cascaderValue"
></el-cascader>
  data() {
    return {
      props: {
        lazy: true,
        lazyLoad: this.lazyLoad,
      },
      cascaderValue: [],
      cascaderKey: 0, // 回显使用
    };
  },
  methods:{
    btn2() {
      this.cascaderValue = ["zhinan", "shejiyuanze"];
      this.$refs.cascader.panel.lazyLoad();
    },
  }
完整代码:(完整代码是根据项目需求实现的小demo,仅演示回显使用)
<template>
  <div class="main">
    <el-button @click="btn2">回显["zhinan", "shejiyuanze"]</el-button>
    <div class="Cascader">
      <el-cascader
        ref="cascader"
        :props="props"
        v-model="cascaderValue"
      ></el-cascader>
    </div>
  </div>
</template>

<script>
export default {
  data() {
    return {
      props: {
        lazy: true,
        lazyLoad: this.lazyLoad,
      },
      cascaderValue: [],
      cascaderKey: 0, // 回显使用
    };
  },

  methods: {
    btn2() {
      this.cascaderValue = ["zhinan", "shejiyuanze"];
      this.$refs.cascader.panel.lazyLoad();
    },

    lazyLoad(node, resolve) {
      const { level, value } = node;
      let option =
        level === 0 ? this.getData(false, node) : this.getData(value, node);
      console.log(`${level}-`, option);
      setTimeout(() => {
        resolve(option);
      }, 500);
    },

    // 模拟后端数据
    getData(value = false, node) {
      console.log("getData:", this.cascaderValue);
      let result = [];
      if (!value) {
        let list = [
          {
            value: "zhinan",
            label: "指南",
            isParent: true,
            type: "folder",
            leaf: false,
          },
          {
            value: "zujian",
            label: "组件",
            isParent: true,
            type: "folder",
            leaf: false,
          },
        ];

        result = list;
      } else {
        let obj = {
          zhinan: [
            {
              value: "shejiyuanze",
              label: "设计原则",
              isParent: true,
              type: "folder",
              leaf: false,
            },
          ],
          shejiyuanze: [
            {
              value: "tag",
              label: "Tag 标签",
              isParent: false,
              type: "file",
              leaf: false,
            },
          ],
          zujian: [
            {
              value: "layout",
              label: "Layout 布局",
              isParent: true,
              type: "folder",
            },
          ],
          layout: [
            {
              value: "table",
              label: "Table 表格",
              isParent: false,
              type: "file",
              leaf: false,
            },
          ],
        };
        let arr = obj[value];
        let newArr = [];
        arr.forEach((element) => {
          if (element.isParent) {
            newArr.push(element);
          }
        });
        // 类型为 文件夹的 type: "folder" 输出
        // 【回显重要步骤离不开 leaf,没有这个回显一直不生效,要在这里赋值判断是否是叶子最后节点,是的话赋值,然后才可以回显】
        if (newArr.length === 0) {
          node.data.leaf = true;
          result = [];
        } else {
          result = newArr;
        }
      }

      return result;
    },
  },
};
</script>
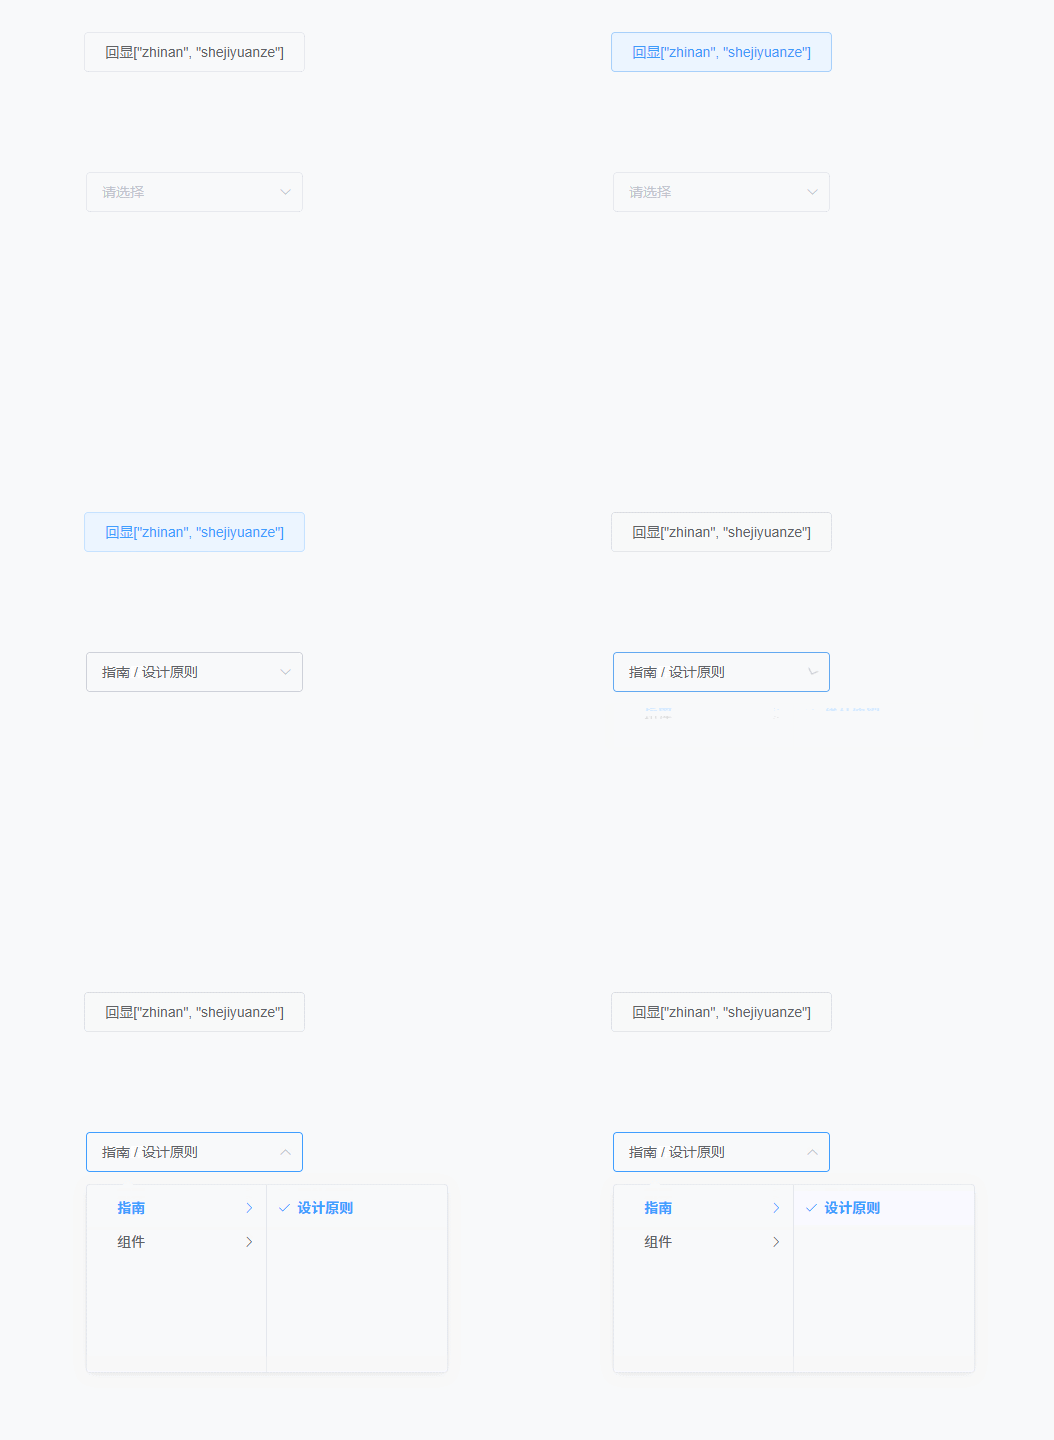
最终实现回显效果:

分类:
element UI


【推荐】国内首个AI IDE,深度理解中文开发场景,立即下载体验Trae
【推荐】编程新体验,更懂你的AI,立即体验豆包MarsCode编程助手
【推荐】抖音旗下AI助手豆包,你的智能百科全书,全免费不限次数
【推荐】轻量又高性能的 SSH 工具 IShell:AI 加持,快人一步
· 无需6万激活码!GitHub神秘组织3小时极速复刻Manus,手把手教你使用OpenManus搭建本
· Manus爆火,是硬核还是营销?
· 终于写完轮子一部分:tcp代理 了,记录一下
· 别再用vector<bool>了!Google高级工程师:这可能是STL最大的设计失误
· 单元测试从入门到精通