

httpd
1. httpd简介
httpd是Apache超文本传输协议(HTTP)服务器的主程序。被设计为一个独立运行的后台进程,它会建立一个处理请求的子进程或线程的池。
通常,httpd不应该被直接调用,而应该在类Unix系统中由apachectl调用,在Windows中作为服务运行。
2. httpd版本
本文主要介绍httpd的两大版本,httpd-2.2和httpd-2.4。
- CentOS6系列的版本默认提供的是httpd-2.2版本的rpm包
- CentOS7系列的版本默认提供的是httpd-2.4版本的rpm包
2.1 httpd的特性
httpd有很多特性,下面就分别来说说httpd-2.2版本和httpd-2.4版本各自的特性。
| 版本 | 特性 |
|---|---|
| 2.2 | 事先创建进程 按需维持适当的进程 模块化设计,核心比较小,各种功能通过模块添加(包括PHP),支持运行时配置,支持单独编译模块 支持多种方式的虚拟主机配置,如基于ip的虚拟主机,基于端口的虚拟主机,基于域名的虚拟主机等 支持https协议(通过mod_ssl模块实现) 支持用户认证 支持基于IP或域名的ACL访问控制机制 支持每目录的访问控制(用户访问默认主页时不需要提供用户名和密码,但是用户访问某特定目录时需要提供用户名和密码) 支持URL重写 支持MPM(Multi Path Modules,多处理模块)。用于定义httpd的工作模型(单进程、单进程多线程、多进程、多进程单线程、多进程多线程) |
| 2.4 | httpd-2.4的新特性: MPM支持运行DSO机制(Dynamic Share Object,模块的动态装/卸载机制),以模块形式按需加载 支持event MPM,eventMPM模块生产环境可用 支持异步读写 支持每个模块及每个目录分别使用各自的日志级别 每个请求相关的专业配置,使用 增强版的表达式分析器 支持毫秒级的keepalive timeout 基于FQDN的虚拟主机不再需要NameVirtualHost指令 支持用户自定义变量 支持新的指令(AllowOverrideList) 降低对内存的消耗 |
| 工作模型 | 工作方式 |
|---|---|
| prefork | 多进程模型,预先生成进程,一个请求用一个进程响应 一个主进程负责生成n个子进程,子进程也称为工作进程 每个子进程处理一个用户请求,即使没有用户请求,也会预先生成多个空闲进程, 随时等待请求到达,最大不会超过1024个 |
| worker | 基于线程工作,一个请求用一个线程响应(启动多个进程,每个进程生成多个线程) |
| event | 基于事件的驱动,一个进程处理多个请求 |
2.2 httpd-2.4新增的模块
httpd-2.4在之前的版本基础上新增了几大模块,下面就几个常用的来介绍一下。
| 模块 | 功能 |
|---|---|
| mod_proxy_fcgi | 反向代理时支持apache服务器后端协议的模块 |
| mod_ratelimit | 提供速率限制功能的模块 |
| mod_remoteip | 基于ip的访问控制机制被改变,不再支持使用Order,Deny,Allow来做基于IP的访问控制 |
3. httpd基础
3.1 httpd自带的工具程序
| 工具 | 功能 |
|---|---|
| htpasswd | basic认证基于文件实现时,用到的帐号密码生成工具 |
| apachectl | httpd自带的服务控制脚本,支持start,stop,restart |
| apxs | 由httpd-devel包提供的,扩展httpd使用第三方模块的工具 |
| rotatelogs | 日志滚动工具 |
| suexec | 访问某些有特殊权限配置的资源时,临时切换至指定用户运行的工具 |
| ab | apache benchmark,httpd的压力测试工具 |
3.2 rpm包安装的httpd程序环境
| 文件/目录 | 对应的功能 |
|---|---|
| /var/log/httpd/access.log | 访问日志 |
| /var/log/httpd/error_log | 错误日志 |
| /var/www/html/ | 站点文档目录 |
| /usr/lib64/httpd/modules/ | 模块文件路径 |
| /etc/httpd/conf/httpd.conf | 主配置文件 |
| /etc/httpd/conf.modules.d/*.conf | 模块配置文件 |
| /etc/httpd/conf.d/*.conf | 辅助配置文件 |
mpm:以DSO机制提供,配置文件为/etc/httpd/conf.modules.d/00-mpm.conf
3.3 web相关的命令
3.3.1 curl命令
curl是基于URL语法在命令行方式下工作的文件传输工具,它支持FTP,FTPS,HTTP,HTTPS,GOPHER,TELNET,DICT,FILE及LDAP等协议。
curl支持以下功能:
- https认证
- http的POST/PUT等方法
- ftp上传
- kerberos认证
- http上传
- 代理服务器
- cookies
- 用户名/密码认证
- 下载文件断点续传
- socks5代理服务器
- 通过http代理服务器上传文件到ftp服务器
//语法:curl [options] [URL ...]
//常用的options:
    -A/--user-agent <string>    //设置用户代理发送给服务器
    -basic              //使用Http基本认证
    --tcp-nodelay       //使用TCP_NODELAY选项
    -e/--referer <URL>      //来源网址
    --cacert <file>     //CA证书(SSL)
    --compressed        //要求返回时压缩的格式
    -H/--header <line>  //自定义请求首部信息传递给服务器
    -I/--head           //只显示响应报文首部信息
    --limit-rate <rate>     //设置传输速度
    -u/--user <user[:password]>     //设置服务器的用户和密码
    -0/--http1      //使用http 1.0版本,默认使用1.1版本。这个选项是数字0而不是字母o
    -o/--output     //把输出写到文件中
    -#/--progress-bar       //进度条显示当前的传送状态
[root@cl ~]# curl www.baidu.com
<!DOCTYPE html>
<!--STATUS OK--><html> <head><meta http-equiv=content-type content=text/html;charset=utf-8><meta http-equiv=X-UA-Compatible content=IE=Edge><meta content=always ...
//curl会将链接上的内容打印到标准输出,所以用curl命令下载需要指定下载到哪
[root@cl ~]# curl -o baidu.html www.baidu.com
  % Total    % Received % Xferd  Average Speed   Time    Time     Time  Current
                                 Dload  Upload   Total   Spent    Left  Speed
  0     0    0     0    0     0      0      0 --:--:-- --:--:-- --:--:--     100  2381  100  2381    0     0  35809      0 --:--:-- --:--:-- --:--:-- 36075
[root@cl ~]# ls
anaconda-ks.cfg  baidu.html
3.3.2 httpd命令
//语法:httpd [options]
//常用的options:
    -l      //查看静态编译的模块,列出核心中编译了哪些模块。 \
            //它不会列出使用LoadModule指令动态加载的模块
    -M      //输出一个已经启用的模块列表,包括静态编译在服务 \
            //器中的模块和作为DSO动态加载的模块
    -v      //显示httpd的版本,然后退出
    -V      //显示httpd和apr/apr-util的版本和编译参数,然后退出
    -X      //以调试模式运行httpd。仅启动一个工作进程,并且 \
            //服务器不与控制台脱离
    -t      //检查配置文件是否有语法错误
[root@cl ~]# httpd -l
Compiled in modules:
  core.c
  mod_so.c
  http_core.c
[root@cl ~]# httpd -M
AH00558: httpd: Could not reliably determine the server's fully qualified domain name, using fe80::20c:29ff:fe02:e223. Set the 'ServerName' directive globally to suppress this message
Loaded Modules:
 core_module (static)
 so_module (static)
 http_module (static)
 access_compat_module (shared)
 actions_module (shared)
 alias_module (shared)
 allowmethods_module (shared)
... ... ...
 proxy_express_module (shared)
 proxy_fcgi_module (shared)
 proxy_fdpass_module (shared)
 proxy_ftp_module (shared)
 proxy_http_module (shared)
 proxy_scgi_module (shared)
 proxy_wstunnel_module (shared)
 systemd_module (shared)
 cgi_module (shared)
 php5_module (shared)

[root@cl ~]# httpd -v
Server version: Apache/2.4.6 (Red Hat Enterprise Linux)
Server built:   May  9 2017 11:21:32

[root@cl ~]# httpd -V
AH00558: httpd: Could not reliably determine the server's fully qualified domain name, using fe80::20c:29ff:fe02:e223. Set the 'ServerName' directive globally to suppress this message
Server version: Apache/2.4.6 (Red Hat Enterprise Linux)
Server built:   May  9 2017 11:21:32
Server's Module Magic Number: 20120211:24
Server loaded:  APR 1.4.8, APR-UTIL 1.5.2
Compiled using: APR 1.4.8, APR-UTIL 1.5.2
Architecture:   64-bit
Server MPM:     prefork
  threaded:     no
    forked:     yes (variable process count)
Server compiled with....
 -D APR_HAS_SENDFILE
 -D APR_HAS_MMAP
 -D APR_HAVE_IPV6 (IPv4-mapped addresses enabled)
 -D APR_USE_SYSVSEM_SERIALIZE
 -D APR_USE_PTHREAD_SERIALIZE
 -D SINGLE_LISTEN_UNSERIALIZED_ACCEPT
 -D APR_HAS_OTHER_CHILD
 -D AP_HAVE_RELIABLE_PIPED_LOGS
 -D DYNAMIC_MODULE_LIMIT=256
 -D HTTPD_ROOT="/etc/httpd"
 -D SUEXEC_BIN="/usr/sbin/suexec"
 -D DEFAULT_PIDLOG="/run/httpd/httpd.pid"
 -D DEFAULT_SCOREBOARD="logs/apache_runtime_status"
 -D DEFAULT_ERRORLOG="logs/error_log"
 -D AP_TYPES_CONFIG_FILE="conf/mime.types"
 -D SERVER_CONFIG_FILE="conf/httpd.conf"
4. 编译安装httpd-2.4
4.1安装编译环境
[root@cl ~]# yum -y groups mark install "Development Tools"
Loaded plugins: product-id, search-disabled-repos, subscription-manager
This system is not registered with an entitlement server. You can use subscription-manager to register.
There is no installed groups file.
Maybe run: yum groups mark convert (see man yum)
Marked install: Development Tools

[root@cl ~]# yum -y install wget

Installed:
  wget.x86_64 0:1.14-15.el7

Complete!

[root@cl ~]# yum install make gcc gcc-c++ gzip bzip2 openssl-devel pcre-devel expat-devel libtool -y

Installed:
  bzip2.x86_64 0:1.0.6-13.el7         expat-devel.x86_64 0:2.1.0-10.el7_3
  libtool.x86_64 0:2.4.2-22.el7_3

Dependency Installed:
  autoconf.noarch 0:2.69-11.el7
  automake.noarch 0:1.13.4-3.el7
  m4.x86_64 0:1.4.16-10.el7
  perl-Data-Dumper.x86_64 0:2.145-3.el7
  perl-Test-Harness.noarch 0:3.28-3.el7
  perl-Thread-Queue.noarch 0:3.02-2.el7

Complete!
4.2下载httpd及apr和apr-util源码包
[root@cl ~]# wget http://mirrors.tuna.tsinghua.edu.cn/apache//httpd/httpd-2.4.39.tar.bz2

--2019-04-18 14:34:56--  http://mirrors.tuna.tsinghua.edu.cn/apache//httpd/httpd-2.4.39.tar.bz2
Resolving mirrors.tuna.tsinghua.edu.cn (mirrors.tuna.tsinghua.edu.cn)... 101.6.8.193, 2402:f000:1:408:8100::1
Connecting to mirrors.tuna.tsinghua.edu.cn (mirrors.tuna.tsinghua.edu.cn)|101.6.8.193|:80... connected.
HTTP request sent, awaiting response... 302 Found
Location: http://64.123.28.150/files/1208000000F8C33A/mirror.bit.edu.cn/apache//httpd/httpd-2.4.39.tar.bz2 [following]
--2019-04-18 14:34:56--  http://64.123.28.150/files/1208000000F8C33A/mirror.bit.edu.cn/apache//httpd/httpd-2.4.39.tar.bz2
Connecting to 64.123.28.150:80... connected.
HTTP request sent, awaiting response... 200 OK
Length: 7030539 (6.7M) [application/octet-stream]
Saving to: ‘httpd-2.4.39.tar.bz2’

100%[===================================>] 7,030,539   5.38MB/s   in 1.2s

2019-04-18 14:34:57 (5.38 MB/s) - ‘httpd-2.4.39.tar.bz2’ saved [7030539/7030539]

[root@cl ~]# wget https://mirrors.tuna.tsinghua.edu.cn/apache//apr/apr-util-1.6.1.tar.bz2

[root@cl ~]# wget https://mirrors.tuna.tsinghua.edu.cn/apache//apr/apr-1.7.0.tar.bz2
4.3编译安装
[root@cl ~]# tar xf httpd-2.4.39.tar.bz2
[root@cl ~]# tar xf apr-util-1.6.1.tar.bz2
[root@cl ~]# tar xf apr-1.7.0.tar.bz2
//编译安装apr
[root@cl ~]# cd apr-1.7.0/
[root@cl apr-1.7.0]# sed -i 's/$RM "$cfgfile"/#$RM "$cfgfile"/g' configure

[root@cl apr-1.7.0]# ./configure --prefix=/usr/local/apr
。。。
  restoring INCLUDES to ""
  setting EXTRA_INCLUDES to ""
configure: creating ./config.status
config.status: creating Makefile
config.status: creating include/apr.h
config.status: creating build/apr_rules.mk
config.status: creating build/pkg/pkginfo
config.status: creating apr-1-config
config.status: creating apr.pc
config.status: creating test/Makefile
config.status: creating test/internal/Makefile
config.status: creating include/arch/unix/apr_private.h
config.status: executing libtool commands
config.status: executing default commands
config.status: include/apr.h is unchanged
config.status: include/arch/unix/apr_private.h is unchanged
[root@cl apr-1.7.0]# make && make install
... ... ...
See any operating system documentation about shared libraries for
more information, such as the ld(1) and ld.so(8) manual pages.
----------------------------------------------------------------------
/usr/bin/install -c -m 644 apr.exp /usr/local/apr/lib/apr.exp
/usr/bin/install -c -m 644 apr.pc /usr/local/apr/lib/pkgconfig/apr-1.pc
for f in libtool shlibtool; do \
    if test -f ${f}; then /usr/bin/install -c -m 755 ${f} /usr/local/apr/build-1; fi; \
done
/usr/bin/install -c -m 755 /root/apr-1.7.0/build/mkdir.sh /usr/local/apr/build-1
for f in make_exports.awk make_var_export.awk; do \
    /usr/bin/install -c -m 644 /root/apr-1.7.0/build/${f} /usr/local/apr/build-1; \
done
/usr/bin/install -c -m 644 build/apr_rules.out /usr/local/apr/build-1/apr_rules.mk
/usr/bin/install -c -m 755 apr-config.out /usr/local/apr/bin/apr-1-config


//编译安装apr-util
[root@cl apr-1.7.0]# cd /root/apr-util-1.6.1/
[root@cl apr-util-1.6.1]# ./configure --prefix=/usr/local/apr-util --with-apr=/usr/local/apr/
。。。 。。。
configure: creating ./config.status
config.status: creating Makefile
config.status: creating export_vars.sh
config.status: creating build/pkg/pkginfo
config.status: creating apr-util.pc
config.status: creating apu-1-config
config.status: creating include/private/apu_select_dbm.h
config.status: creating include/apr_ldap.h
config.status: creating include/apu.h
config.status: creating include/apu_want.h
config.status: creating test/Makefile
config.status: creating include/private/apu_config.h
config.status: executing default commands

[root@cl apr-util-1.6.1]# make && make install
。。。
flag during linking and do at least one of the following:
   - add LIBDIR to the 'LD_LIBRARY_PATH' environment variable
     during execution
   - add LIBDIR to the 'LD_RUN_PATH' environment variable
     during linking
   - use the '-Wl,-rpath -Wl,LIBDIR' linker flag
   - have your system administrator add LIBDIR to '/etc/ld.so.conf'

See any operating system documentation about shared libraries for
more information, such as the ld(1) and ld.so(8) manual pages.
----------------------------------------------------------------------
/usr/bin/install -c -m 644 aprutil.exp /usr/local/apr-util/lib
/usr/bin/install -c -m 755 apu-config.out /usr/local/apr-util/bin/apu-1-config

//编译安装httpd

[root@cl apr-util-1.6.1]# cd /root/httpd-2.4.39/
[root@cl httpd-2.4.39]# ./configure --prefix=/usr/local/apache --sysconfdir=/etc/httpd24 --enable-so --enable-ssl --enable-cgi --enable-rewrite --with-zlib --with-pcre --with-apr=/usr/local/apr --with-apr-util=/usr/local/apr-util --enable-modules=most --enable-mpms-shared=all --with-mpm=prefork


。。。
config.status: creating support/split-logfile
config.status: creating build/rules.mk
config.status: creating build/pkg/pkginfo
config.status: creating build/config_vars.sh
config.status: creating include/ap_config_auto.h
config.status: executing default commands
configure: summary of build options:

    Server Version: 2.4.39
    Install prefix: /usr/local/apache
    C compiler:     gcc -std=gnu99
    CFLAGS:          -g -O2 -pthread
    CPPFLAGS:        -DLINUX -D_REENTRANT -D_GNU_SOURCE
    LDFLAGS:
    LIBS:
    C preprocessor: gcc -E

[root@cl apr-util-1.6.1]# make && make install

。。。
mkdir /usr/local/apache/cgi-bin
Installing header files
mkdir /usr/local/apache/include
Installing build system files
mkdir /usr/local/apache/build
Installing man pages and online manual
mkdir /usr/local/apache/man
mkdir /usr/local/apache/man/man1
mkdir /usr/local/apache/man/man8
mkdir /usr/local/apache/manual
make[1]: Leaving directory `/root/httpd-2.4.39'

//安装完成,添加环境变量
[root@cl ~]# ln -s /usr/local/apache/bin/* /usr/bin/
5. httpd常用配置
切换使用MPM(编辑/etc/httpd/conf.modules.d/00-mpm.conf文件):
//LoadModule mpm_NAME_module modules/mod_mpm_NAME.so
//NAME有三种,分别是:
    prefork
    event
    worker

//可以在配置文件里动态装卸载
[root@server httpd24]# vim /etc/httpd24/httpd.conf
    #LoadModule mpm_event_module modules/mod_mpm_event.so
    LoadModule mpm_prefork_module modules/mod_mpm_prefork.so
    #LoadModule mpm_worker_module modules/mod_mpm_worker.so
//三选一,取消一个注释,另外两个要有注释
访问控制法则:
| 法则 | 功能 |
|---|---|
| Require all granted | 允许所有主机访问 |
| Require all deny | 拒绝所有主机访问 |
| Require ip IPADDR | 授权指定来源地址的主机访问 |
| Require not ip IPADDR | 拒绝指定来源地址的主机访问 |
| Require host HOSTNAME | 授权指定来源主机名的主机访问 |
| Require not host HOSTNAME | 拒绝指定来源主机名的主机访问 |
| IPADDR的类型 | HOSTNAME的类型 |
|---|---|
| IP:192.168.1.1 Network/mask:192.168.1.0/255.255.255.0 Network/Length:192.168.1.0/24 Net:192.168 |
FQDN:特定主机的全名 DOMAIN:指定域内的所有主机 |
注意:httpd-2.4版本默认是拒绝所有主机访问的,所以安装以后必须做显示授权访问
示例:
[root@server httpd24]# vim /etc/httpd24/httpd.conf

<Directory />
    AllowOverride none
    Require all denied
</Directory>
//可以参照这个来设置目录权限
<Directory /var/www/html/www>
    <RequireAll>
        Require not ip 192.168.1.20
        Require all granted
    </RequireAll>
</Directory>
虚拟主机:
虚拟主机有三类:
- 相同IP不同端口
- 不同IP相同端口
- 相同IP相同端口不同域名
//相同ip不同端口

//设置主机名
ServerAdmin you@example.com

#
# ServerName gives the name and port that the server uses to identify itself.
# This can often be determined automatically, but we recommend you specify
# it explicitly to prevent problems during startup.
#
# If your host doesn't have a registered DNS name, enter its IP address here.
#
ServerName www.example.com:80  //此行如果有注释请取消

[root@server apache]# vim /etc/httpd24/extra/httpd-vhosts.conf //编写主机格式示例
[root@server apache]# vim /etc/httpd24/httpd.conf
//设置监听端口
#Listen 12.34.56.78:80
Listen 80
Listen 8080 //与添加主机的端口号相同

//在文本最后添加主机配置

<VirtualHost 192.168.163.128:80>
    ServerName cljhfy.example.com
    DocumentRoot "/usr/local/apache/htdocs/cljhfy"
    ErrorLog "/usr/local/apache/logs/cljhfy_error_log"
    ErrorLog "/usr/local/apache/logs/cljhfy_error_log"
    CustomLog "/usr/local/apache/logs/cljhfy_access_log" combined
    <Directory /usr/local/apache/htdocs/cljhfy>
        Require all granted
    </Directory>
</VirtualHost>

<VirtualHost 192.168.163.128:8080>
    ServerName chenliang.example.com
    DocumentRoot "/usr/local/apache/htdocs/chenliang"
    ErrorLog "/usr/local/apache/logs/chenliang_error_log"
    CustomLog "/usr/local/apache/logs/chenliang_access_log" combined
    <Directory /usr/local/apache/htdocs/cljhfy>
        Require all granted
    </Directory>
</VirtualHost>

[root@server htdocs]# mkdir cljhfy
[root@server htdocs]# mkdir chenliang
[root@server htdocs]# echo "cljhfy" > cljhfy/index.html
[root@server htdocs]# echo "chenliang" > chenliang/index.html
[root@server htdocs]# apachectl -t
Syntax OK
[root@server htdocs]# apachectl restart

客户端验证

[root@cl129 ~]# curl 192.168.163.128
cljhfy
[root@cl129 ~]# curl 192.168.163.128:8080
chenliang
Windows验证:
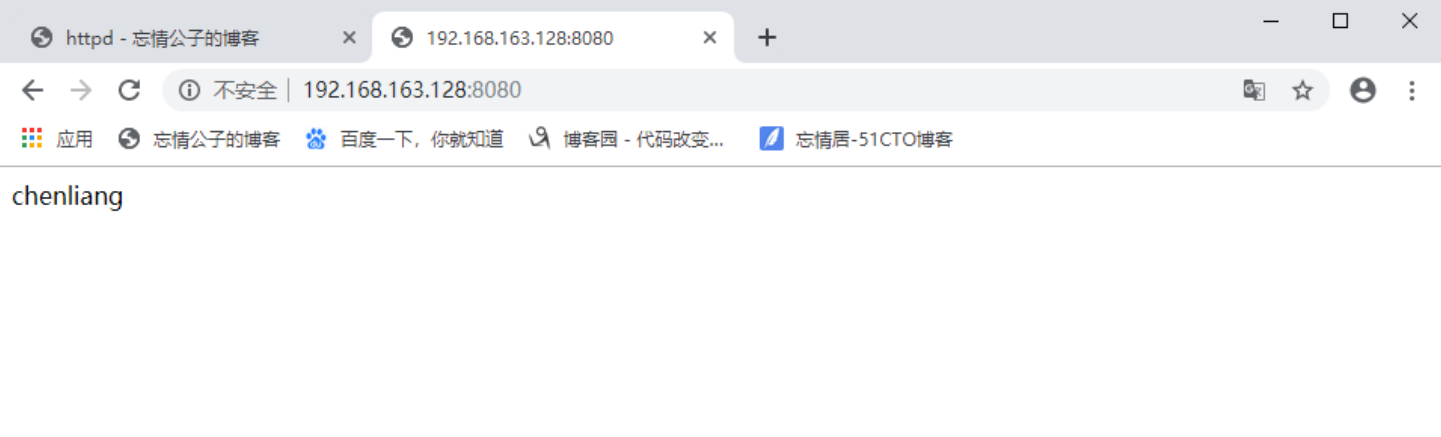

//不同ip相同端口

//设置主机名
ServerAdmin you@example.com

#
# ServerName gives the name and port that the server uses to identify itself.
# This can often be determined automatically, but we recommend you specify
# it explicitly to prevent problems during startup.
#
# If your host doesn't have a registered DNS name, enter its IP address here.
#
ServerName www.example.com:80  //此行如果有注释请取消

[root@server apache]# vim /etc/httpd24/extra/httpd-vhosts.conf //编写主机格式示例
[root@server apache]# vim /etc/httpd24/httpd.conf
//设置监听端口
#Listen 12.34.56.78:80
Listen 80

//在文本最后添加主机配置

<VirtualHost 192.168.163.128:80>
    ServerName cljhfy.example.com
    DocumentRoot "/usr/local/apache/htdocs/cljhfy"
    ErrorLog "/usr/local/apache/logs/cljhfy_error_log"
    ErrorLog "/usr/local/apache/logs/cljhfy_error_log"
    CustomLog "/usr/local/apache/logs/cljhfy_access_log" combined
    <Directory /usr/local/apache/htdocs/cljhfy>
        Require all granted
    </Directory>
</VirtualHost>

<VirtualHost 192.168.163.163:80>
    ServerName chenliang.example.com
    DocumentRoot "/usr/local/apache/htdocs/chenliang"
    ErrorLog "/usr/local/apache/logs/chenliang_error_log"
    CustomLog "/usr/local/apache/logs/chenliang_access_log" combined
    <Directory /usr/local/apache/htdocs/cljhfy>
        Require all granted
    </Directory>
</VirtualHost>

[root@server htdocs]# mkdir cljhfy
[root@server htdocs]# mkdir chenliang
[root@server htdocs]# echo "cljhfy" > cljhfy/index.html
[root@server htdocs]# echo "chenliang" > chenliang/index.html
[root@server htdocs]# apachectl -t
Syntax OK
[root@server htdocs]# apachectl restart
[root@server logs]# ip addr add 192.168.163.163/24 dev eth0
//临时添加新的ip,也可以修改配置文件

客户端验证:
[root@cl129 ~]# curl 192.168.163.128
cljhfy
[root@cl129 ~]# curl 192.168.163.163
chenliang
//相同端口相同ip不同域名

//设置主机名
ServerAdmin you@example.com

#
# ServerName gives the name and port that the server uses to identify itself.
# This can often be determined automatically, but we recommend you specify
# it explicitly to prevent problems during startup.
#
# If your host doesn't have a registered DNS name, enter its IP address here.
#
ServerName www.example.com:80  //此行如果有注释请取消

[root@server apache]# vim /etc/httpd24/extra/httpd-vhosts.conf //编写主机格式示例
[root@server apache]# vim /etc/httpd24/httpd.conf
//设置监听端口
#Listen 12.34.56.78:80
Listen 80

//在文本最后添加主机配置

<VirtualHost 192.168.163.128:80>
    ServerName cljhfy.example.com
    DocumentRoot "/usr/local/apache/htdocs/cljhfy"
    ErrorLog "/usr/local/apache/logs/cljhfy_error_log"
    ErrorLog "/usr/local/apache/logs/cljhfy_error_log"
    CustomLog "/usr/local/apache/logs/cljhfy_access_log" combined
    <Directory /usr/local/apache/htdocs/cljhfy>
        Require all granted
    </Directory>
</VirtualHost>

<VirtualHost 192.168.163.128:80>
    ServerName chenliang.example.com
    DocumentRoot "/usr/local/apache/htdocs/chenliang"
    ErrorLog "/usr/local/apache/logs/chenliang_error_log"
    CustomLog "/usr/local/apache/logs/chenliang_access_log" combined
    <Directory /usr/local/apache/htdocs/cljhfy>
        Require all granted
    </Directory>
</VirtualHost>

[root@server htdocs]# mkdir cljhfy
[root@server htdocs]# mkdir chenliang
[root@server htdocs]# echo "cljhfy" > cljhfy/index.html
[root@server htdocs]# echo "chenliang" > chenliang/index.html
[root@server htdocs]# apachectl -t
Syntax OK
[root@server htdocs]# apachectl restart

客户端验证:

[root@cl129 ~]# vim /etc/hosts
127.0.0.1   localhost localhost.localdomain localhost4 localhost4.localdomain4
::1         localhost localhost.localdomain localhost6 localhost6.localdomain6
192.168.163.128 cljhfy.example.com  //添加域名解析
192.168.163.128 chenliang.example.com

[root@cl129 ~]# curl chenliang.example.com
chenliang
[root@cl129 ~]# curl cljhfy.example.com
cljhfy
6.https的配置
6.1配置https步骤:
6.1.1 生成证书
证书签发的服务端:
[root@cl129 ~]# cd /etc/pki/CA/
(umask 077;openssl genrsa -out private/cakey.pem 2048)    #生成密钥,括号必须要

openssl rsa -in private/cakey.pem -pubout    #提取公钥

openssl req -new -x509 -key private/cakey.pem -out cacert.pem -days 365    #生成自签署证书
openssl x509 -text -in cacert.pem    #读出cacert.pem证书的内容
mkdir certs newcerts crl
touch index.txt && echo 01 > serial

部署网站的客户端:
[root@server ssl]# mkdir /etc/httpd24/ssl

[root@server httpd24]# cd /etc/httpd24/ssl
//生成密钥
[root@server ssl]# (umask 077;openssl genrsa -out httpd.key 2048)
//客户端生成证书签署请求
[root@server ssl]# openssl req -new -key httpd.key -days 365 -out httpd.csr
客户端把证书签署请求文件发送给服务端
[root@server ssl]# scp httpd.csr root@192.168.163.129:/root/

证书签发机构:
签署客户端提交上来的证书
[root@cl129 CA]# openssl ca -in /root/httpd.csr -out httpd.crt -days 365
把签署好的证书httpd.crt发给客户端
[root@cl129 CA]# scp httpd.crt root@192.168.163.128:/etc/httpd24/ssl
6.2配置https相关配置文件
6.2.1配置httpd.conf文件
[root@server ssl]# vim /etc/httpd24/httpd.conf 将以下内容取消注释
    LoadModule ssl_module modules/mod_ssl.so

    Include /etc/httpd24/extra/httpd-vhosts.conf
    Include /etc/httpd24/extra/httpd-ssl.conf
6.2.2在httpd-ssl.conf中配置证书的位置
[root@server ssl]# vim /etc/httpd24/extra/httpd-ssl.conf

SSLCertificateFile "/etc/httpd24/ssl/httpd.crt"
SSLCertificateKeyFile "/etc/httpd24/ssl/httpd.key"
//填写证书的正确路径

//重读配置时可能会报错,根据报错提示修改文件的内容或将其注释掉即可
6.2.3配置vhost
[root@server ssl]# vim /etc/httpd24/extra/httpd-ssl.conf
//在这里配置https的虚拟主机地址
<VirtualHost 192.168.163.128:443>

#   General setup for the virtual host
DocumentRoot "/usr/local/apache/htdocs/cljhfy"
ServerName cljhfy.example.com:443
ServerAdmin you@example.com  //可以删除或不填写
ErrorLog "/usr/local/apache/logs/cljhfy_error_log"
TransferLog "/usr/local/apache/logs/cljhfy_access_log"

[root@server extra]# apachectl -t
Syntax OK
[root@server extra]# apachectl restart
验证:

注意:SSL会话是基于IP地址创建;所以单IP的主机上,仅可以使用一个https虚拟主机
