

本专栏参考的原作者文章声明如下。
PS:本专栏对原作者的文章存在适当的修改与补充,使之更适合本作者所阐述的训练要求!如有侵权,请联系13512076879@163.com。
————————————————
版权声明:本文为CSDN博主「欣欣以向荣」的原创文章,遵循 CC 4.0 BY-SA 版权协议,转载请附上原文出处链接及本声明。
原文链接:https://blog.csdn.net/qq_37783617/article/details/96866163
————————————————
1. caffe框架下openmv的训练步骤
目前 OPenMV 只提供Caffe模型到network网络的转换,未来可能会支持TensorFlow,但目前不行。通过Caffe框架学习,我们最终的目标肯定是得到 ******.network 的网络库文件
训练网络的主要步骤如下:
- 配置环境,安装Caffe
- 采集数据集
- 训练网络
- 量化模型
- 将模型转换为二进制格式
- 在OPenMV上部署模型
- 运行网络
- 故障排除
2.caffe环境的搭建(以本文环境为例介绍)
- windows 10
- python 2.7
- pycharm
- vs2013
- openmv cam h4
- openmv ide
3.vs2013 编译caffe
本专题请参考我的另一篇文章:https://www.cnblogs.com/clayyjh/p/12630126.html
4.制作数据集
由于原文章之前训练使用的数据集为64*64,然而这种方法训练得到的network模型对于openmv来说太大,会造成堆内存溢出,无法运行。
故本文使用数据集为32*32.
本文使用的数据集为使用画图板制作,并经过一些数据处理方法,使得数据集更加丰富。
制作步骤:
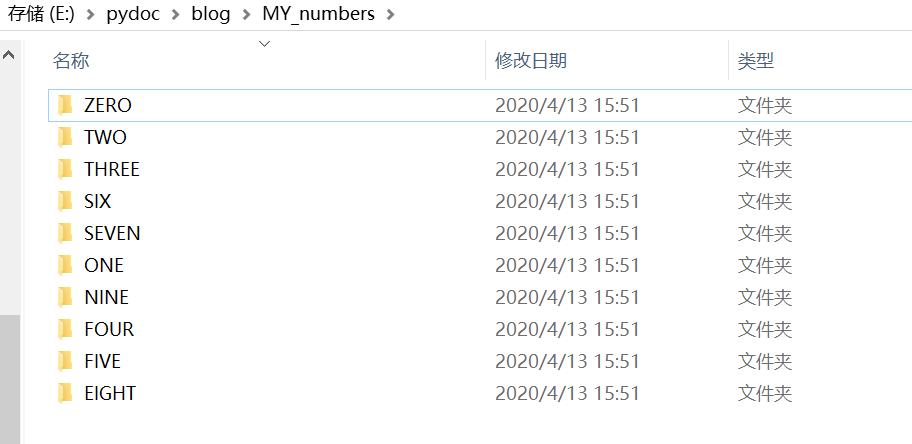
4.1.使用以下代码新建文件夹保存原始数据(E:/pydoc/blog/为本文程序根目录 E:/pydoc/blog/为本文程序根目录 E:/pydoc/blog/为本文程序根目录)

import os, sys
def genDir():
    base = 'E:/pydoc/blog/MY_numbers/'
    i = 0
    name=['ZERO','ONE','TWO','THREE','FOUR','FIVE','SIX','SEVEN','EIGHT','NINE']
    for j in range(10):
        file_name = base+name[i]
        os.mkdir(file_name)
        i=i+1
genDir()
结果如图:
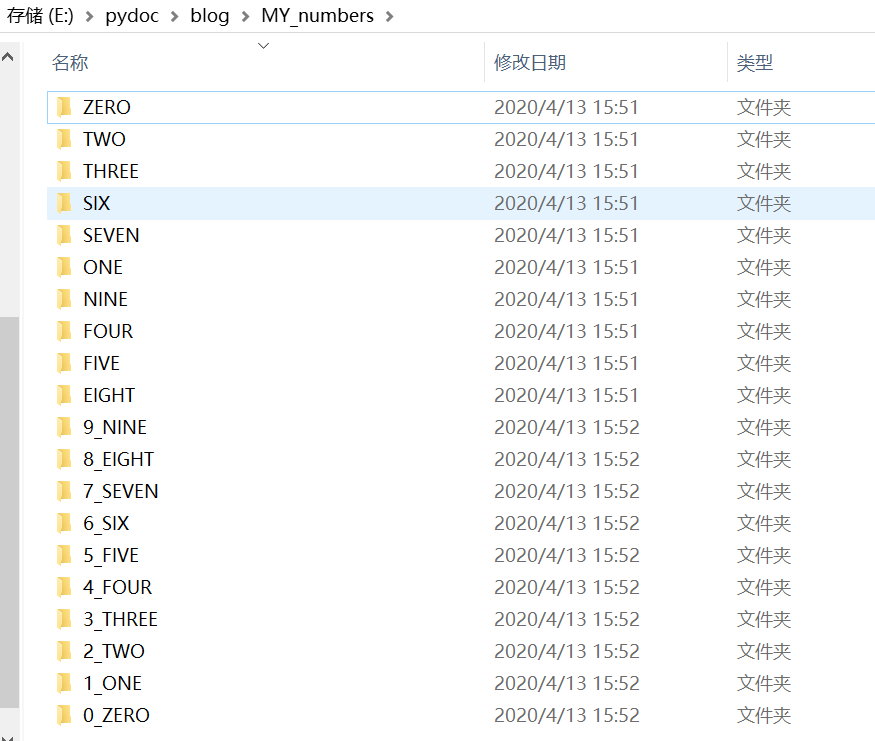
4.2. 使用以下代码新建文件夹保存扩展数据:
import os, sys
def genDir():
    base = 'E:/pydoc/blog/MY_numbers/'
    i = 0
    name=['ZERO','ONE','TWO','THREE','FOUR','FIVE','SIX','SEVEN','EIGHT','NINE']
    for j in range(10):
        file_name = base+str(i)+'_'+name[i]
        os.mkdir(file_name)
        i=i+1
genDir()
结果如图:
4.3 制作原始数据集.
利用画图板制作手写体数据集,0-9每个5张图片,大小为32*32.
打开画图板
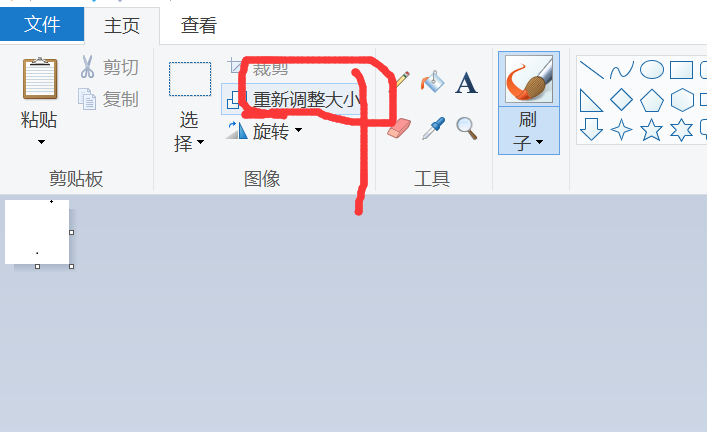
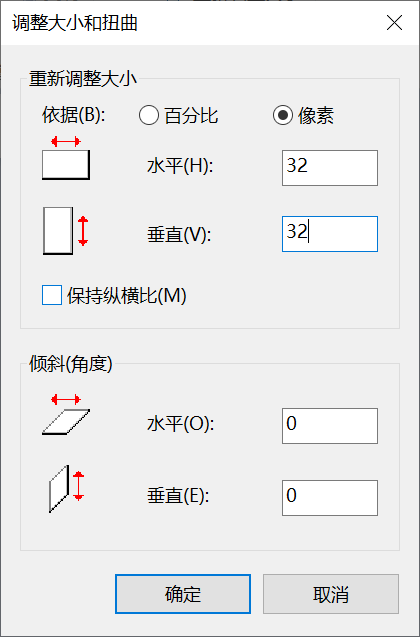
将这些图片对应地保存到./MY_numbers/ZERO(ONE,TWO,···,NINE)
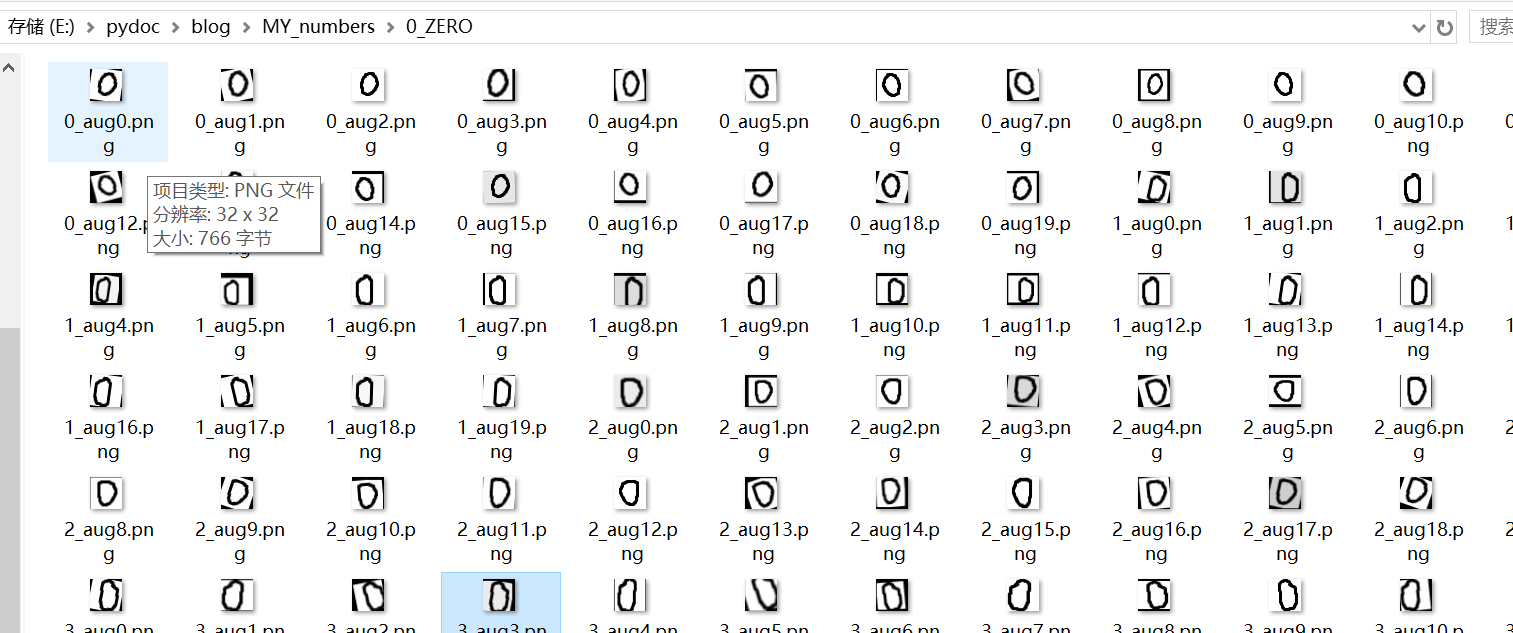
4.4.使用以下代码扩展数据集,代码保存到根目录,命名为augment_images.py。
import os, sys
import argparse
import random
import cv2
import numpy as np
import imgaug as ia
from imgaug import augmenters as iaa
from tqdm import tqdm

def main():
    # CMD args parser
    parser = argparse.ArgumentParser(description='Augment image datasets')
    parser.add_argument("--input",   action = "store", help = "Input images dir")
    parser.add_argument("--output",  action = "store", help = "Output images dir")
    parser.add_argument("--count",   action = "store", help = "Number of augmented sets to make", type=int, default=1)

    # Parse CMD args
    args = parser.parse_args()
    if (args.input == None or args.output == None):
        parser.print_help()
        sys.exit(1)

    ia.seed(1)
    paths = os.listdir(args.input)

    for x in range(args.count):
        seq = iaa.Sequential([
            iaa.Fliplr(0.5), # horizontal flips

            # Small gaussian blur with random sigma between 0 and 0.5.
            # But we only blur about 50% of all images.
            iaa.Sometimes(0.5,
                iaa.GaussianBlur(sigma=(0, 0.2))
            ),

            # Add gaussian noise.
            # For 50% of all images, we sample the noise once per pixel.
            # For the other 50% of all images, we sample the noise per pixel AND
            # channel. This can change the color (not only brightness) of the pixels.
            iaa.Sometimes(0.5,
                iaa.AdditiveGaussianNoise(
                    loc=0, scale=(0.0, 0.005*255), per_channel=0.5
                )
            ),

            # Make some images brighter and some darker.
            # In 20% of all cases, we sample the multiplier once per channel,
            # which can end up changing the color of the images.
            iaa.Sometimes(0.5,
                iaa.Multiply((0.8, 1.2), per_channel=0.0),
            ),

            # Apply affine transformations to each image.
            # Scale/zoom images.
            iaa.Sometimes(0.5,
                iaa.Affine(
                     rotate=(-20, 20),
                ),
            ),

            # Translate/move images.
            iaa.Sometimes(0.5,
                iaa.Affine(
                     scale={"x": (0.8, 1.2), "y": (0.8, 1.2)},
                ),
            ),

            # Rotate images.
            iaa.Sometimes(0.5,
                iaa.Affine(
                    translate_percent={"x": (-0.1, 0.1), "y": (-0.1, 0.1)},
                ),
            ),
        ], random_order=True) # apply augmenters in random order

        print("Augmenting images set %d/%d"%(x+1, args.count))
        for i in tqdm(xrange(len(paths))):
            img = cv2.imread(args.input+'/'+paths[i], cv2.IMREAD_GRAYSCALE)
            img = seq.augment_image(img)
            f = os.path.splitext(paths[i])
            cv2.imwrite(args.output+'/'+f[0] + '_aug%d'%(x) + f[1], img)

    print('Finished processing all images\n')

if __name__ == '__main__':
    main()
4.5. 使用批处理脚本运行augment_images.py,命名为augment_pic.bat。
python augment_images.py --input MY_numbers/ZERO/ --output MY_numbers/0_ZERO/ --count 20
echo.
python augment_images.py --input MY_numbers/ONE/ --output MY_numbers/1_ONE/ --count 20
echo.
python augment_images.py --input MY_numbers/TWO/ --output MY_numbers/2_TWO/ --count 20
echo.
python augment_images.py --input MY_numbers/THREE/ --output MY_numbers/3_THREE/ --count 20
echo.
python augment_images.py --input MY_numbers/FOUR/ --output MY_numbers/4_FOUR/ --count 20
echo.
python augment_images.py --input MY_numbers/FIVE/ --output MY_numbers/5_FIVE/ --count 20
echo.
python augment_images.py --input MY_numbers/SIX/ --output MY_numbers/6_SIX/ --count 20
echo.
python augment_images.py --input MY_numbers/SEVEN/ --output MY_numbers/7_SEVEN/ --count 20
echo.
python augment_images.py --input MY_numbers/EIGHT/ --output MY_numbers/8_EIGHT/ --count 20
echo.
python augment_images.py --input MY_numbers/NINE/ --output MY_numbers/9_NINE/ --count 20
pause
结果如下:
4.6 根目录新建文件./blog/data.将扩展数据文件夹拷贝到data文件夹下。
4.7 在./blog目录下,按住shift,鼠标右键打开powershell窗口,输入tree命令,文件结构如下:
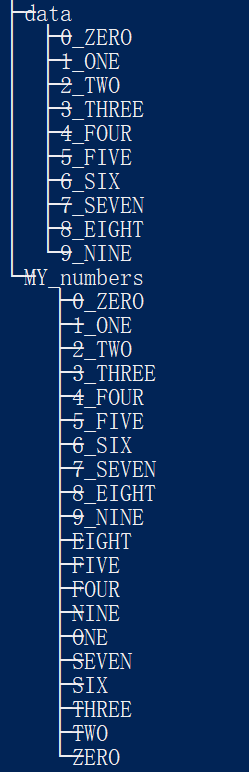
4.8 至此,数据集制作完毕。
5. 制作数据标签。
5.1 制作lmdb标签
5.1.1 新建create_labels.py 文件,代码如下:
# coding=utf-8
import os, sys
import argparse
import random
import numpy as np
from tqdm import tqdm

import time
import shutil

def shuffle_in_unison(a, b):
    assert len(a) == len(b)
    shuffled_a = np.empty(a.shape, dtype=a.dtype)
    shuffled_b = np.empty(b.shape, dtype=b.dtype)
    permutation = np.random.permutation(len(a))
    for old_index, new_index in enumerate(permutation):
        shuffled_a[new_index] = a[old_index]
        shuffled_b[new_index] = b[old_index]
    return shuffled_a, shuffled_b

def move_files(input, output):
    '''
        Input: 数据集文件夹,不同分类的数据存储在不同子文件夹中
        Output: 输出的所有文件,文件命名格式为 class_number.jpg; 输出必须是绝对路径
    '''
    index = -1
    for root, dirs, files in os.walk(input):
        if index != -1:
            print 'Working with path', root
            print 'Path index', index
        filenum = 0
        for file in (files if index == -1 else tqdm(files)):
            fileName, fileExtension = os.path.splitext(file)
            if fileExtension == '.jpg' or fileExtension == '.JPG' or fileExtension == '.png' or fileExtension == '.PNG':
                full_path = os.path.join(root, file)
                # print full_path
                if (os.path.isfile(full_path)):
                    file = os.path.basename(os.path.normpath(root)) + str(filenum) + fileExtension
                    try:
                        test = int(file.split('_')[0])
                    except:
                        file = str(index) + '_' + file
                    # print os.path.join(output, file)
                    shutil.copy(full_path, os.path.join(output, file))
                filenum += 1
        index += 1

def create_text_file(input_path, percentage):
    '''
        为 Caffe 创建 train.txt 和 val.txt 文件
    '''

    images, labels = [], []
    os.chdir(input_path)

    for item in os.listdir('.'):
        if not os.path.isfile(os.path.join('.', item)):
            continue
        try:
            label = int(item.split('_')[0])
            images.append(item)
            labels.append(label)
        except:
            continue

    images = np.array(images)
    labels = np.array(labels)
    images, labels = shuffle_in_unison(images, labels)

    X_train = images[0:int(len(images) * percentage)]
    y_train = labels[0:int(len(labels) * percentage)]

    X_test = images[int(len(images) * percentage):]
    y_test = labels[int(len(labels) * percentage):]

    os.chdir('..')

    trainfile = open("train.txt", "w")
    for i, l in zip(X_train, y_train):
        trainfile.write(i + " " + str(l) + "\n")

    testfile = open("test.txt", "w")
    for i, l in zip(X_test, y_test):
        testfile.write(i + " " + str(l) + "\n")

    trainfile.close()
    testfile.close()

def main():
    # CMD 指令参数
    parser = argparse.ArgumentParser(description='Create label files for an image dataset')
    parser.add_argument("--input",      action = "store", help = "Input images dir")
    parser.add_argument("--output",     action = "store", help = "Output images dir")
    parser.add_argument("--percentage", action = "store", help = "Test/Train split", type=float, default=0.85)
    #测试数据占训练数据的比重
    # Parse CMD args
    args = parser.parse_args()
    if (args.input == None or args.output == None):
        parser.print_help()
        sys.exit(1)

    move_files(args.input, args.output)
    create_text_file(args.output, args.percentage)

    print('Finished processing all images\n')

if __name__ == '__main__':
    main()
5.1.2 新建文件夹./blog/lmdbin,制作批处理脚本create_lists.bat.
1 2 | python create_labels.py --input data/ --output lmdbin/pause |
运行脚本,根目录会生成两个文件 train.txt 和 test.txt:
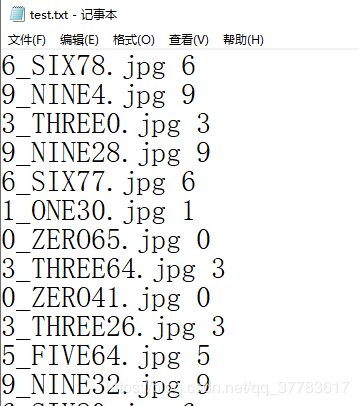
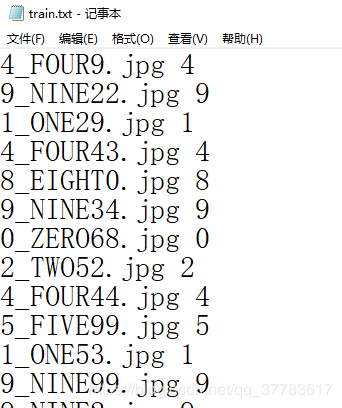
现在已经得到了训练数据的清单
5.1.3 生成lmdb
生成LMDB格式数据需要使用Caffe自带的函数 convert_imageset,所以这些函数运行需要在编译好地caffe文件夹下运行,否则会报错!!!
函数介绍:
convert_imageset [FLAGS] ROOTFOLDER/ LISTFILE DB_NAME
FLAGS这个参数组的内容:

-gray: 是否以灰度图的方式打开图片。程序调用opencv库中的imread()函数来打开图片,默认为false

-shuffle: 是否随机打乱图片顺序。默认为false

-backend:需要转换成的db文件格式,可选为leveldb或lmdb,默认为lmdb

-resize_width/resize_height: 改变图片的大小。在运行中,要求所有图片的尺寸一致,因此需要改变图片大小。 程序调用opencv库的resize()函数来对图片放大缩小,默认为0,不改变

-check_size: 检查所有的数据是否有相同的尺寸。默认为false,不检查

-encoded: 是否将原图片编码放入最终的数据中,默认为false

-encode_type: 与前一个参数对应,将图片编码为哪一个格式:‘png','jpg'......
————————————————
版权声明:本文为CSDN博主「欣欣以向荣」的原创文章,遵循 CC 4.0 BY-SA 版权协议,转载请附上原文出处链接及本声明。
原文链接:https://blog.csdn.net/qq_37783617/article/details/96841981
ROOTFOLDER/: 图片存放的绝对路径,lmdbin的路径
LISTFILE: 图片文件列表清单,一般为一个txt文件,一行一张图片
DB_NAME: 最终生成的db文件存放目录
执行脚本文件:(脚本需要在./caffe-master/Build/x64/Release/下)
convert_imageset --shuffle E:/pydoc/blog/lmdbin/ E:/pydoc/blog/train.txt E:/pydoc/blog/train_lmdb
echo.
convert_imageset --shuffle E:/pydoc/blog/lmdbin/ E:/pydoc/blog/test.txt E:/pydoc/blog/test_lmdb
根目录里生成了test_lmdb文件夹和train_lmdb文件夹

上述两个文件夹下各生成两个数据包:

到此,lmdb的数据集准备完成!
如果有需要,可以执行脚本生成均值文件:
优点:图片减去均值再训练,会提高训练速度和精度。因此,一般都会有这个操作。
但是必须保证所有图片的规格大小一致
执行脚本:(脚本需要在./caffe-master/Build/x64/Release/下)
compute_image_mean -backend=lmdb E:/pydoc/blog/train_lmdb mean.binaryproto
pause
6.训练神经网络
6.1 准备prototxt文件
下载openmv-master,解压到./blog文件夹下。
打开openmv-master\ml\cmsisnn\models\lenet,可以看到:
lenet.network (适用于OPenMV的神经网络,是一个二进制文件)
lenet_solver.prototxt (供Caffe使用的配置训练参数的文件)
lenet_train_test.prototxt (网络各层训练和测试的参数)
test.sh (Linux脚本文件,用于测试模型)
train.sh(Linux脚本文件,用于训练模型)
我们把后四个文件拷贝到要网络的根目录下备用!!!
6.2 修改训练参数
6.2.1打开lenet_solver.prototxt文件
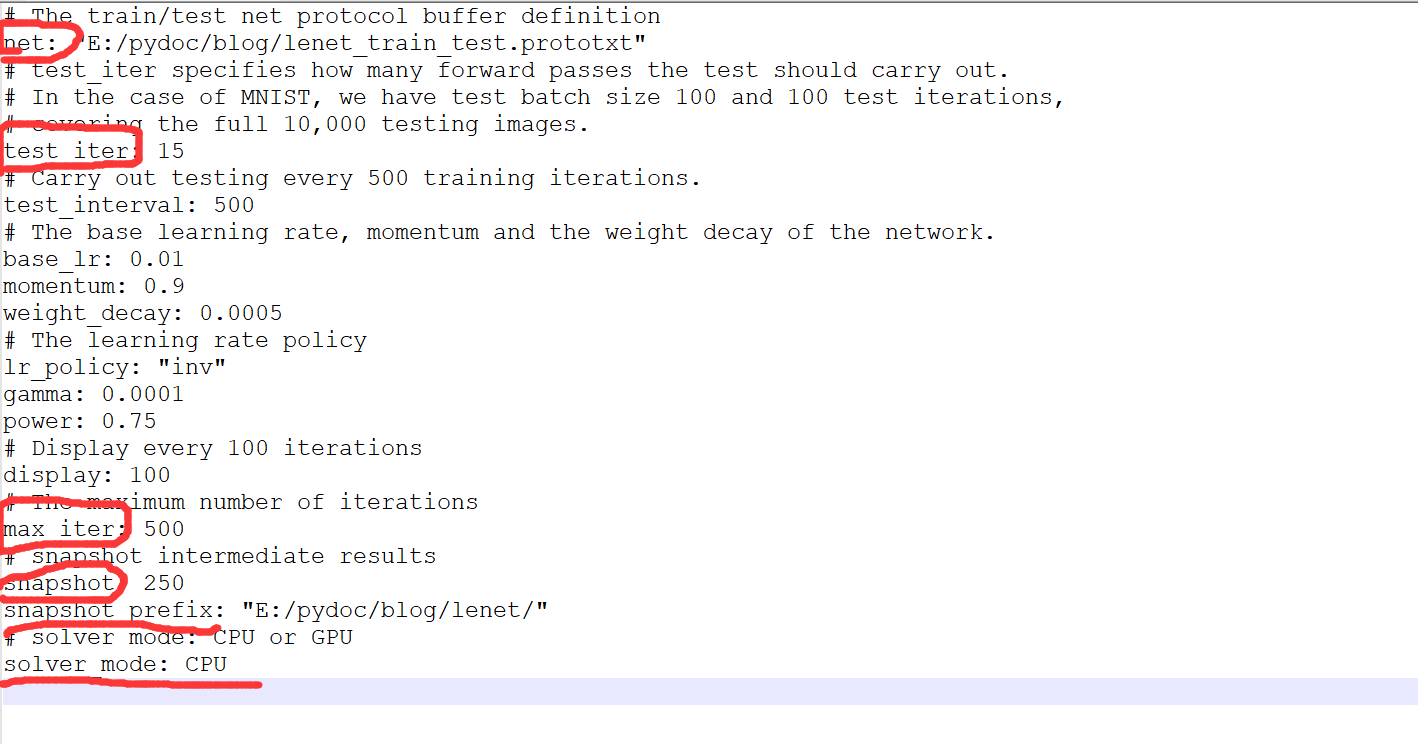
修改红圈的几处地方:
第一处:net: "[lenet_train_test.prototxt文件的存放路径]"
第二处:test_iter: [该数值表示测试每次数据的量]=测试数据总量/batch_size
比如我们有150个测试数据,每次测试10个就只需要测试15次,修改test_iter:15
第三处:最大迭代次数(根据数据集大小设定) 过小精度低,过大会导致震荡
第四处:快照次数,根据训练数据集大小设定
第五处:快照保存的地址
第六处:如果之前caffe编译是在CPU环境下,此处改为CPU。
6.2.2打开lenet_train_test.prototxt文件
name: "LeNet"
layer {
  name: "data"
  type: "Data"
  top: "data"
  top: "label"
  include {
    phase: TRAIN
  }
  transform_param {
    scale: 0.00390625
    mean_file: "mean.binaryproto"    //没有均值文件的删除该行
  }
  data_param {
    source: "train_lmdb"             //训练用lmdb文件夹的相对地址
    batch_size: 32                   //训练间隔,一般为64,我的数据集小,使用32
    backend: LMDB
  }
}
layer {
  name: "data"
  type: "Data"
  top: "data"
  top: "label"
  include {
    phase: TEST
  }
  transform_param {
    scale: 0.00390625
    mean_file: "mean.binaryproto"   //没有均值文件的删除该行
  }
  data_param {
    source: "test_lmdb"            //测试用lmdb文件夹的相对地址
    batch_size: 10   //测试间隔,与前一个文件中的test_iter有对应关系 10*15=150(测试数量)
    backend: LMDB    //数据集存储结构
  }
}
layer {
  name: "conv1"
  type: "Convolution"
  bottom: "data"
  top: "conv1"
  param {
    lr_mult: 1
  }
  param {
    lr_mult: 2
  }
  convolution_param {
    num_output: 20
    kernel_size: 5          //如果图片规格小,可以适当减小卷积核的大小
    stride: 1
    weight_filler {
      type: "xavier"
    }
    bias_filler {
      type: "constant"
    }
  }
}
layer {
  name: "pool1"
  type: "Pooling"
  bottom: "conv1"
  top: "pool1"
  pooling_param {
    pool: MAX
    kernel_size: 2
    stride: 2
  }
}
layer {
  name: "conv2"
  type: "Convolution"
  bottom: "pool1"
  top: "conv2"
  param {
    lr_mult: 1
  }
  param {
    lr_mult: 2
  }
  convolution_param {
    num_output: 50
    kernel_size: 5         //如果图片规格小,可以适当减小卷积核的大小
    stride: 1
    weight_filler {
      type: "xavier"
    }
    bias_filler {
      type: "constant"
    }
  }
}
layer {
  name: "pool2"
  type: "Pooling"
  bottom: "conv2"
  top: "pool2"
  pooling_param {
    pool: MAX
    kernel_size: 2
    stride: 2
  }
}
layer {
  name: "ip1"
  type: "InnerProduct"
  bottom: "pool2"
  top: "ip1"
  param {
    lr_mult: 1
  }
  param {
    lr_mult: 2
  }
  inner_product_param {
    num_output: 100
    weight_filler {
      type: "xavier"
    }
    bias_filler {
      type: "constant"
    }
  }
}
layer {
  name: "relu1"
  type: "ReLU"
  bottom: "ip1"
  top: "ip1"
}
layer {
  name: "ip2"
  type: "InnerProduct"
  bottom: "ip1"
  top: "ip2"
  param {
    lr_mult: 1
  }
  param {
    lr_mult: 2
  }
  inner_product_param {
    num_output: 10
    weight_filler {
      type: "xavier"
    }
    bias_filler {
      type: "constant"
    }
  }
}
layer {
  name: "accuracy"
  type: "Accuracy"
  bottom: "ip2"
  bottom: "label"
  top: "accuracy"
  include {
    phase: TEST
  }
}
layer {
  name: "loss"
  type: "SoftmaxWithLoss"
  bottom: "ip2"
  bottom: "label"
  top: "loss"
}
6.3 训练模型
6.3.1 编写 train.bat : (脚本需要在./caffe-master/Build/x64/Release/下)
caffe train --solver=E:/pydoc/blog/lenet_solver.prototxt
pause
6.3.2 编写 test.bat:(脚本需要在./caffe-master/Build/x64/Release/下)
caffe test --model=E:/pydoc/blog/lenet_train_test.prototxt --weights=E:/pydoc/blog/lenet/_iter_500.caffemodel
pause
输出:

可见,模型准确率为:87.8%。
7.生成openmv二进制文件。
7.1 打开./openmv-master/openmv-master/ml/cmsisnn,nn_quantizer.py 和 nn_convert.py ,我们将这两个脚本拷贝到根目录./blog下
7.2 编写批处理文件:
python nn_quantizer.py --cpu --model E:/pydoc/blog/lenet_train_test.prototxt --weights  E:/pydoc/blog/lenet/_iter_500.caffemodel --save E:/pydoc/blog/lenet/output.pkl
pause
7.3 生成二进制文件
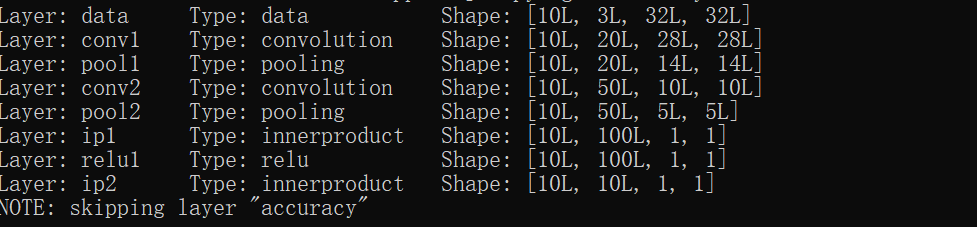
使用 OpenMV NN 转换器脚本将模型转换为二进制格式,可由 OpenMV Cam 运行。该转换器脚本会输出每个层类型的代码,后跟该层的维度和权重。
在 OpenMV Cam 上,固件读取该二进制文件,并使用链表数据结构在内存中构建网络。
编写批处理脚本
python nn_convert.py --model E:/pydoc/blog/lenet/output.pkl --mean E:/pydoc/blog/mean.binaryproto --output E:/pydoc/blog/lenet/output.network
pause
输出:
至此:全部结束!!!
生成network后如何在openmv上运行,请参考openmv视频教程:https://singtown.com/learn/50543/
本文来自博客园,作者:Clay,转载请注明原文链接:https://www.cnblogs.com/clayyjh/p/12688921.html


【推荐】国内首个AI IDE,深度理解中文开发场景,立即下载体验Trae
【推荐】编程新体验,更懂你的AI,立即体验豆包MarsCode编程助手
【推荐】抖音旗下AI助手豆包,你的智能百科全书,全免费不限次数
【推荐】轻量又高性能的 SSH 工具 IShell:AI 加持,快人一步
· AI与.NET技术实操系列:向量存储与相似性搜索在 .NET 中的实现
· 基于Microsoft.Extensions.AI核心库实现RAG应用
· Linux系列:如何用heaptrack跟踪.NET程序的非托管内存泄露
· 开发者必知的日志记录最佳实践
· SQL Server 2025 AI相关能力初探
· 震惊!C++程序真的从main开始吗?99%的程序员都答错了
· winform 绘制太阳,地球,月球 运作规律
· 【硬核科普】Trae如何「偷看」你的代码?零基础破解AI编程运行原理
· 上周热点回顾(3.3-3.9)
· 超详细:普通电脑也行Windows部署deepseek R1训练数据并当服务器共享给他人