第十六 django进一步了解
一、关于django 的URLS
1.配置固定访问
1.1.配置fly views
from django.shortcuts import render,HttpResponse

# Create your views here.

def About_1999(request):
    print("Nothing in 1999")
    return HttpResponse("We will win in 1999!")
1.2.配置总的urls
from django.conf.urls import url
from django.contrib import admin
from fly import views

urlpatterns = [
    url(r'^admin/', admin.site.urls),
    url(r'^fly/1999',views.About_1999),
]
1.3.启动程序
python manage.py runserver 127.0.0.1:8000
1.4.查看页面

如上是固定模式访问,不可能一直写固定匹配吧,如果我想100个这样的,那岂不是要写100个,所以模糊匹配
2.配置模糊匹配年
2.1.配置fly views
from django.shortcuts import render,HttpResponse

# Create your views here.

def About_1999(request):
    print("Nothing in 1999")
    return HttpResponse("We will win in 1999!")

def About_Cen19(request,year):
    print("We all in century ")
    return HttpResponse("We all in century 19") #这里必须加上year,否则会报错,因为url里面加了此别名
2.2.配置总的urls
from django.conf.urls import url
from django.contrib import admin
from fly import views

urlpatterns = [
    url(r'^admin/', admin.site.urls),
    url(r'^fly/1999',views.About_1999),
    url(r'^fly/(?P<year>[0-9]{4})/$',views.About_Cen19), #year是一个别名参数,可以随意指定
]
2.3.查看结果


如果匹配1999呢?

如果匹配到了,1999,那么就不会继续向下匹配了
3.匹配年月日
3.1.配置fly views
from django.shortcuts import render,HttpResponse

# Create your views here.

def About_1999(request):
    print("Nothing in 1999")
    return HttpResponse("We will win in 1999!")

def About_Cen19(request,year):
    print("We all in century ")
    return HttpResponse("We all in century 19")

def About_Ym(request,year,month):
    print("we will met each other in 7 1992")
    return HttpResponse("we will met each other in %s %s" %(month,year))
3.2.配置urls
from django.conf.urls import url
from django.contrib import admin
from fly import views

urlpatterns = [
    url(r'^admin/', admin.site.urls),
    url(r'^fly/1999',views.About_1999),
    url(r'^fly/(?P<year>[0-9]{4})/$',views.About_Cen19),
    url(r'^fly/(?P<year>[0-9]{4})/(?P<month>[0-9]{2})/$',views.About_Ym),  #增加别名参数
]
3.3.查看结果

同样,如果匹配到1999,则不继续匹配

4.继续匹配年月日
4.1.配置fly views
from django.shortcuts import render,HttpResponse

# Create your views here.

def About_1999(request):
    print("Nothing in 1999")
    return HttpResponse("We will win in 1999!")

def About_Cen19(request,year):
    print("We all in century ")
    return HttpResponse("We all in century 19")

def About_Ym(request,year,month):
    print("we will met each other in 7 1992")
    return HttpResponse("we will met each other in %s %s" %(month,year))

def About_Ymd(request,year,month,day):
    print("we can find ya mei die")
    return HttpResponse("we we can find ya mei die %s %s %s" %(day,month,year))
4.2.配置urls
from django.conf.urls import url
from django.contrib import admin
from fly import views

urlpatterns = [
    url(r'^admin/', admin.site.urls),
    url(r'^fly/1999',views.About_1999),
    url(r'^fly/(?P<year>[0-9]{4})/$',views.About_Cen19),
    url(r'^fly/(?P<year>[0-9]{4})/(?P<month>[0-9]{2})/$',views.About_Ym),
    url(r'^fly/(?P<year>[0-9]{4})/(?P<month>[0-9]{2})/(?P<day>[0-9]{2})/$',views.About_Ymd),
]
4.3.查看结果

匹配1999相关:

5.配置子项目urls
5.1.配置子项目app01 views
from django.shortcuts import render,HttpResponse

# Create your views here.

def AboutFight(request):
    print("we must fight")
    return HttpResponse("We Must fight right now !")
5.2.配置子项目urls
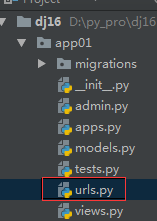
from django.conf.urls import url
from app01 import views as fight

urlpatterns = [
    url(r'$',fight.AboutFight),
]
5.3.配置总urls 导入子项目的urls
from django.conf.urls import url,include
from django.contrib import admin
from fly import views

urlpatterns = [
    url(r'^admin/', admin.site.urls),
    url(r'^fly/1999',views.About_1999),
    url(r'^fly/(?P<year>[0-9]{4})/$',views.About_Cen19),
    url(r'^fly/(?P<year>[0-9]{4})/(?P<month>[0-9]{2})/$',views.About_Ym),
    url(r'^fly/(?P<year>[0-9]{4})/(?P<month>[0-9]{2})/(?P<day>[0-9]{2})/$',views.About_Ymd),
    url('^dig/$',include('app01.urls')),
]
5.4.访问页面

6.配置子项目的其它路径
6.1.配置app01 views
from django.shortcuts import render,HttpResponse

# Create your views here.

def AboutFight(request):
    print("we must fight")
    return HttpResponse("We Must fight right now !")

def NotOnlyF(request,do):
    print("Not only Fight")
    return HttpResponse("The Word not only fight,we can lear how to %s" %(do))
6.2.配置子项目app01 urls
from django.conf.urls import url
from app01 import views as fight

urlpatterns = [
    url(r'(?P<do>)/$',fight.NotOnlyF),  #先匹配精确
    url(r'$',fight.AboutFight),  #匹配没有参数,一般首页
]
6.3.配置总urls
from django.conf.urls import url,include
from django.contrib import admin
from fly import views

urlpatterns = [
    url(r'^admin/', admin.site.urls),
    url(r'^fly/1999',views.About_1999),
    url(r'^fly/(?P<year>[0-9]{4})/$',views.About_Cen19),
    url(r'^fly/(?P<year>[0-9]{4})/(?P<month>[0-9]{2})/$',views.About_Ym),
    url(r'^fly/(?P<year>[0-9]{4})/(?P<month>[0-9]{2})/(?P<day>[0-9]{2})/$',views.About_Ymd),
    url('^dig/',include('app01.urls')),  #引入所有app01 的urls
]
6.4.查看结果

没有获取到参数,奇怪
7.全局引入参数
某些情况下,在子页面会引入全局的参数
7.1.全局urls
from django.conf.urls import url,include
from django.contrib import admin
from fly import views

urlpatterns = [
    url(r'^admin/', admin.site.urls),
    url(r'^fly/1999',views.About_1999),
    url(r'^fly/(?P<year>[0-9]{4})/$',views.About_Cen19),
    url(r'^fly/(?P<year>[0-9]{4})/(?P<month>[0-9]{2})/$',views.About_Ym),
    url(r'^fly/(?P<year>[0-9]{4})/(?P<month>[0-9]{2})/(?P<day>[0-9]{2})/$',views.About_Ymd),
    url('^dig/',include('app01.urls'),{'gold':'coin'}),
]
7.2.必须在子项目的views 里面引入参数
from django.shortcuts import render,HttpResponse

# Create your views here.

def AboutFight(request):
    print("we must fight")
    return HttpResponse("We Must fight right now !")

def NotOnlyF(request,sm,gold):
    print("Not only Fight %s %s" %(sm,gold))
    return HttpResponse("The Word not only fight,we can lear how to %s" %(sm))
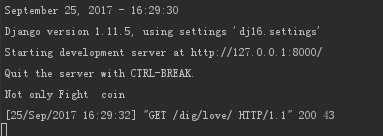
7.3.运行结果

二、django Template
1.基本模板语法
from django.template import Context, Template
t = Template('My name is {{ name }}.')
c = Context({'name': 'ckl'})
t.render(c)
'My name is ckl.'
注意,应该是django环境运行

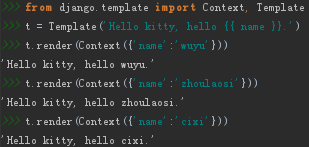
2.同一个模板,渲染多个context
from django.template import Context, Template
t = Template('Hello kitty, hello {{ name }}.')
t.render(Context({'name':'wuyu'}))
'Hello kitty, hello wuyu.'
t.render(Context({'name':'zhoulaosi'}))
'Hello kitty, hello zhoulaosi.'
t.render(Context({'name':'cixi'}))
'Hello kitty, hello cixi.'
3.深度的dict内容访问
from django.template import Context, Template
nihhgehh = {'name':'shenxing','age':'23'}
t = Template('{{ man.name }} is {{ man.age }} years old')
c = Context({'man':nihhgehh})
t.render(c)
'shenxing is 23 years old'
4.其它模块引入
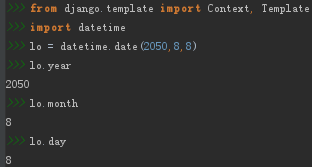
from django.template import Context, Template
import datetime
lo = datetime.date(2050,8,8)
lo.year
2050
lo.month
8
lo.day
8
三、配置访问动态数据
1.配置views
from django.shortcuts import render,HttpResponse

# Create your views here.def KanYeMian(request):
    print("just do it!")
    songdic = {
        'weather':'rain',
        'feel':'cold',
        'color':'charming',
    }
    return render(request, 'app01/index.html',{'songObj':songdic})
2.配置html
<!DOCTYPE html>
<html lang="en">
<head>
    <meta charset="UTF-8">
    <title>SuoHa</title>
</head>
<body>
    <h1>Just SuoHa</h1>
    {% for i in songObj.values %}
        {% if i == 'rain' %}
            <p style="background-color: darkslategray;color: whitesmoke">it is {{ i }}</p>
        {% elif i == 'cold' %}
            <p style="background-color: dodgerblue;">would you  feel {{ i }}?</p>
        {% elif i == 'charming' %}
            <p style="background-color: black;color: whitesmoke;">can you see the {{ i }} blank.</p>
        {% endif %}

    {% endfor %}
</body>
</html>
3.配置url
from django.conf.urls import url
from app01 import views as fight

urlpatterns = [
    url(r'suoha/',fight.KanYeMian),
    #url(r'(?P<sm>)/',fight.NotOnlyF),
    #url(r'$',fight.AboutFight),
]
4.查看结果:

四、配置模板嵌套
1.原始代码及页面
1.1.原始代码
<!DOCTYPE html>
<html lang="en">
<head>
    <meta charset="UTF-8">
    <title>SuoHa</title>
</head>
<body>

    <p style="color: mediumvioletred">I LOVE A QUITE NIGHT AT HOME</p>
    <hr/>
    <h1>Just SuoHa</h1>
    {% for i in songObj.values %}
        {% if i == 'rain' %}
            <p style="background-color: darkslategray;color: whitesmoke">it is {{ i }}</p>
        {% elif i == 'cold' %}
            <p style="background-color: dodgerblue;">would you  feel {{ i }}?</p>
        {% elif i == 'charming' %}
            <p style="background-color: black;color: whitesmoke;">can you see the {{ i }} blank.</p>
        {% endif %}

    {% endfor %}
    <hr/>
    <p style="color: mediumvioletred;">A SAD MAN THE SENCE ON HIS FACE</p>

</body>
</html>
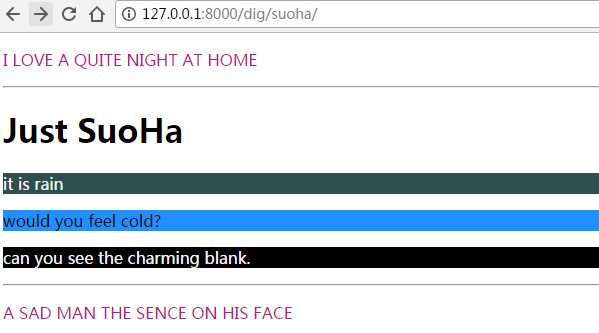
1.2.原始页面
2.配置新页面
2.1.配置views
def obsc(request):
    return render(request,'app01/obscure.html')
2.2.配置urls
from django.conf.urls import url
from app01 import views as fight

urlpatterns = [
    url(r'suoha/',fight.KanYeMian),
    url(r'obs/',fight.obsc),
    #url(r'(?P<sm>)/',fight.NotOnlyF),
    #url(r'$',fight.AboutFight),
]
2.3.配置html
<!DOCTYPE html>
<html lang="en">
<head>
    <meta charset="UTF-8">
    <title>Title</title>
</head>
<body>
    <p>obsure,we can not fond anything......</p>
</body>
</html>
2.4.启动服务,查看新页面

3.配置嵌套
3.1.继承原始模板
{% extends "app01/index.html" %}
    <p>obsure,we can not fond anything......</p>
3.2.查看页面

页面继承了父模板的全部,没有自己的内容
3.3.配置继承并重写
3.3.1.父类定义
<!DOCTYPE html>
<html lang="en">
<head>
    <meta charset="UTF-8">
    <title>SuoHa</title>
</head>
<body>

    <p style="color: mediumvioletred">I LOVE A QUITE NIGHT AT HOME</p>
    <hr/>
    {% block kara %} //重写开始部分
    <h1>Just SuoHa</h1>
    {% for i in songObj.values %}
        {% if i == 'rain' %}
            <p style="background-color: darkslategray;color: whitesmoke">it is {{ i }}</p>
        {% elif i == 'cold' %}
            <p style="background-color: dodgerblue;">would you  feel {{ i }}?</p>
        {% elif i == 'charming' %}
            <p style="background-color: black;color: whitesmoke;">can you see the {{ i }} blank.</p>
        {% endif %}

    {% endfor %}
    {% endblock %} //重写结束
    <hr/>
    <p style="color: mediumvioletred;">A SAD MAN THE SENCE ON HIS FACE</p>

</body>
</html>
3.3.2.继承重写
{% extends "app01/index.html" %}
{% block kara %}
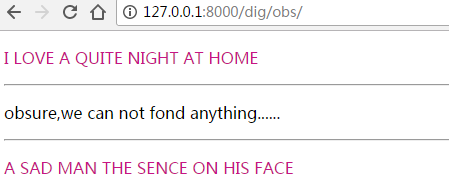
    <p>obsure,we can not fond anything......</p>
{% endblock %}
3.3.4.查看页面
4.如果继承重写顶部
4.1.父类模板定义
<!DOCTYPE html>
<html lang="en">
<head>
    <meta charset="UTF-8">
    <title>SuoHa</title>
</head>
<body>
    {% block top %} //定义模板开始,名称自定义
    <p style="color: mediumvioletred">I LOVE A QUITE NIGHT AT HOME</p>
    {% endblock %} //定义结束
    <hr/>
    {% block kara %}
    <h1>Just SuoHa</h1>
    {% for i in songObj.values %}
        {% if i == 'rain' %}
            <p style="background-color: darkslategray;color: whitesmoke">it is {{ i }}</p>
        {% elif i == 'cold' %}
            <p style="background-color: dodgerblue;">would you  feel {{ i }}?</p>
        {% elif i == 'charming' %}
            <p style="background-color: black;color: whitesmoke;">can you see the {{ i }} blank.</p>
        {% endif %}

    {% endfor %}
    {% endblock %}
    <hr/>
    <p style="color: mediumvioletred;">A SAD MAN THE SENCE ON HIS FACE</p>

</body>
</html>
4.2.子模板重写
{% extends "app01/index.html" %}
{% block top %}
    THIS IS TOP
{% endblock %}
{% block kara %}
    <p>obsure,we can not fond anything......</p>
{% endblock %}
4.3.查看页面

5.模板include
5.1.增加新的页面
<!DOCTYPE html>
<html lang="en">
<head>
    <meta charset="UTF-8">
    <title>register</title>
</head>
<body>
    <form action="" method="post" style="background-color: deepskyblue;">
        用户名:<input type="text" name="username"/>
        密码:<input type="password" name="pwd"/>
    </form>
</body>
</html>
5.2.引入新增页面
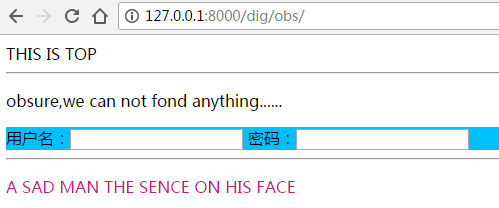
{% extends "app01/index.html" %}
{% block top %}
    THIS IS TOP
{% endblock %}
{% block kara %}
    <p>obsure,we can not fond anything......</p>
    {% include "app01/register.html" %}
{% endblock %}
5.3.查看页面
6.多层继承
6.1.配置sunzi页面
{% extends "app01/obscure.html" %}
继承父亲obs的页面
6.2.配置views
def Gs(request):
    return render(request,'app01/grandson.html')
6.3.配置urls
from django.conf.urls import url
from app01 import views as fight

urlpatterns = [
    url(r'suoha/',fight.KanYeMian),
    url(r'obs/',fight.obsc),
    url(r'sunzi/',fight.Gs),
    #url(r'(?P<sm>)/',fight.NotOnlyF),
    #url(r'$',fight.AboutFight),
]
6.4.查看结果
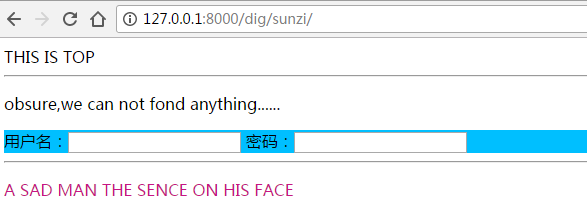
同父模板完全一样
7.多层继承
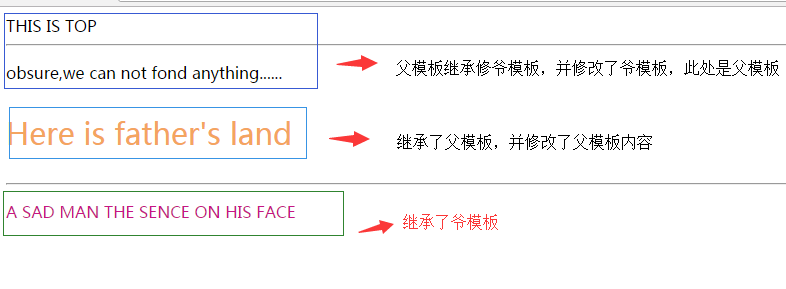
如上继承了剁成,在父模板进行定义,自己修改
原始页面:

7.1.定义父模板继承
{% extends "app01/index.html" %}
{% block top %}
    THIS IS TOP
{% endblock %}
{% block kara %}
    <p>obsure,we can not fond anything......</p>
    {% block father %}  //父模板定义修改开始
        {% include "app01/register.html" %}
    {% endblock %} //父模板修改结束
{% endblock %}
7.2.子页面进行修改
{% extends "app01/obscure.html" %}
{% block father %}
    <p style="color: sandybrown;font-size: 30px;">Here is father's land</p>  //修改继承父模板的内容
{% endblock %}
7.3.修改后页面
五、数据库连接及表创建
1.配置django settings
1.1.配置apps
INSTALLED_APPS = [
    'django.contrib.admin',
    'django.contrib.auth',
    'django.contrib.contenttypes',
    'django.contrib.sessions',
    'django.contrib.messages',
    'django.contrib.staticfiles',
    'app01.apps.App01Config',
    'fly',  //此处增加自己的项目
]
1.2.配置mysql连接
1.2.1.注意:mysqldb 默认不知python3的,所以要使用,安装pymysql
在项目__init__.py 里增加:
import pymysql
pymysql.install_as_MySQLdb()
1.2.2.配置mysql连接参数
DATABASES = {
    'default': {
        'ENGINE': 'django.db.backends.mysql',
        'NAME':'dj16',
        'HOST':'192.168.1.1',
        'PORT':'',
        'USER':'sayyou',
        'PASSWORD':'16893',
    }
}
1.3.创建表,此处模拟的是书、作者、出版社
1.3.1.配置models.py
from django.db import models

# Create your models here.

class Publisher(models.Model):
    name = models.CharField(max_length=32),
    address = models.CharField(max_length=50)
    city = models.CharField(max_length=60)
    stat_province = models.CharField(max_length=50)
    country = models.CharField(max_length=50)
    websit = models.URLField()

class Author(models.Model):
    first_name = models.CharField(max_length=30)
    last_name = models.CharField(max_length=40)
    email = models.EmailField()

class Book(models.Model):
    name = models.CharField(max_length=30)
    authors = models.ManyToManyField(Author)  #作者和书多对多
    publisher = models.ForeignKey(Publisher)  #书和出版商一对多
    publication_date = models.DateField()
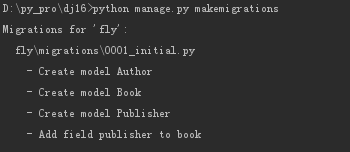
1.4.运行生成创建表文件
python manage.py makemigrations
查看文件:
# -*- coding: utf-8 -*-
# Generated by Django 1.11.5 on 2017-10-09 02:20
from __future__ import unicode_literals

from django.db import migrations, models
import django.db.models.deletion


class Migration(migrations.Migration):

    initial = True

    dependencies = [
    ]

    operations = [
        migrations.CreateModel(
            name='Author',
            fields=[
                ('id', models.AutoField(auto_created=True, primary_key=True, serialize=False, verbose_name='ID')),
                ('first_name', models.CharField(max_length=30)),
                ('last_name', models.CharField(max_length=40)),
                ('email', models.EmailField(max_length=254)),
            ],
        ),
        migrations.CreateModel(
            name='Book',
            fields=[
                ('id', models.AutoField(auto_created=True, primary_key=True, serialize=False, verbose_name='ID')),
                ('name', models.CharField(max_length=20)),
                ('publication_date', models.DateField()),
                ('authors', models.ManyToManyField(to='fly.Author')),
            ],
        ),
        migrations.CreateModel(
            name='Publisher',
            fields=[
                ('id', models.AutoField(auto_created=True, primary_key=True, serialize=False, verbose_name='ID')),
                ('name', models.CharField(max_length=32)),
                ('address', models.CharField(max_length=50)),
                ('city', models.CharField(max_length=60)),
                ('stat_province', models.CharField(max_length=50)),
                ('country', models.CharField(max_length=50)),
                ('websit', models.URLField()),
            ],
        ),
        migrations.AddField(
            model_name='book',
            name='publisher',
            field=models.ForeignKey(on_delete=django.db.models.deletion.CASCADE, to='fly.Publisher'),
        ),
    ]
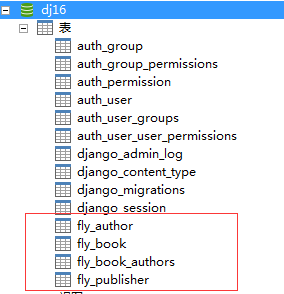
1.5.创建数据库表
python manage.py migrate

查看表:
2.配置admin 添加数据
2.1.配置admin.py
from django.contrib import admin

# Register your models here.
from fly import models
admin.site.register(models.Publisher)
admin.site.register(models.Author)
admin.site.register(models.Book)
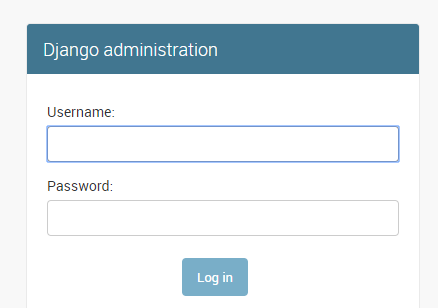
2.2.登录页面
2.3.创建登录用户
python manage.py createsuperuser
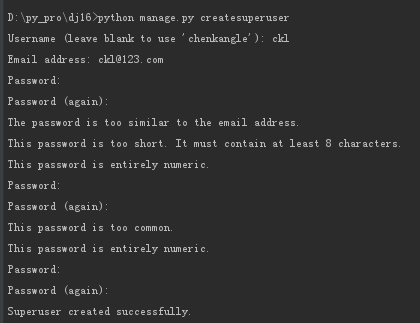
密码要复杂度要求
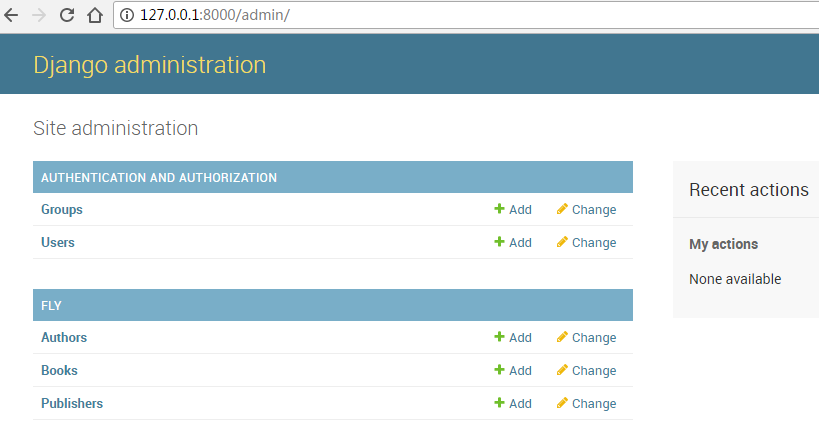
2.4.登录页面
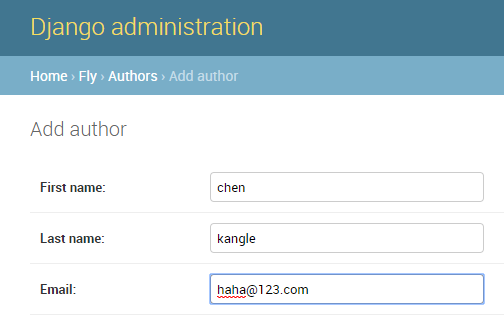
2.5.创建数据
2.5.1.创建作者
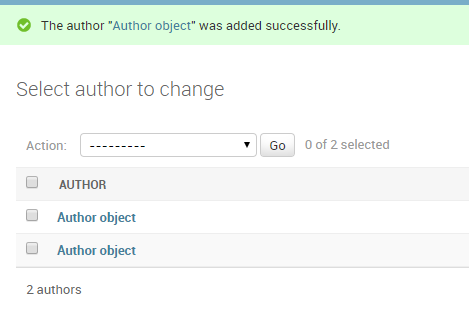
2.5.2.查看作者名称
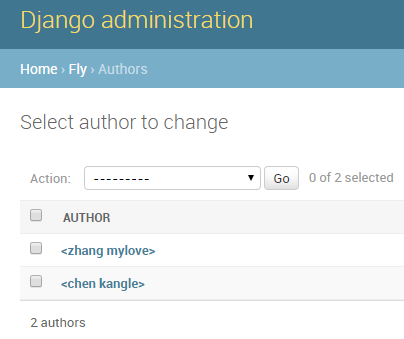
创建了两个作者,却无法查看作者名称,解决如下
from django.db import models

# Create your models here.

class Publisher(models.Model):
    name = models.CharField(max_length=32)
    address = models.CharField(max_length=50)
    city = models.CharField(max_length=60)
    stat_province = models.CharField(max_length=50)
    country = models.CharField(max_length=50)
    websit = models.URLField()
    def __str__(self):
        return "<%s>" %(self.name)

class Author(models.Model):
    first_name = models.CharField(max_length=30)
    last_name = models.CharField(max_length=40)
    email = models.EmailField()
    def __str__(self):
        return "<%s %s>" %(self.first_name,self.last_name)

class Book(models.Model):
    name = models.CharField(max_length=20)
    authors = models.ManyToManyField(Author)
    publisher = models.ForeignKey(Publisher)
    publication_date = models.DateField()
    def __str__(self):
        return "<%s>" %(self.name)
重启服务,查看进程:
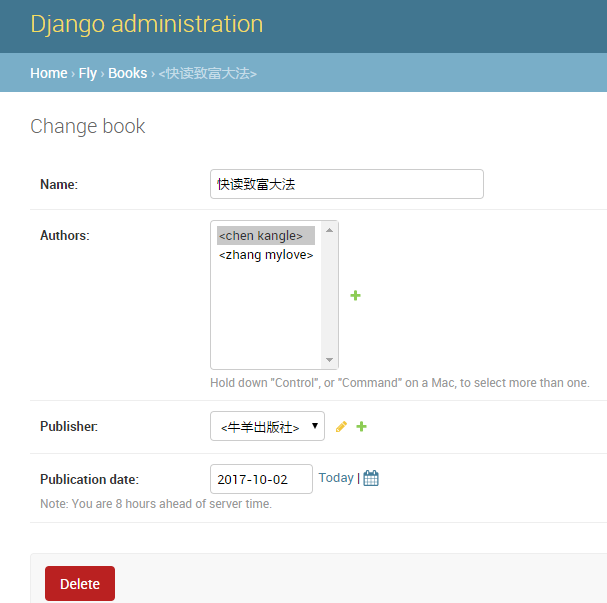
继续添加信息:
