
目标检测:1幅海上SAR图像和1幅近海光学图像,选择其中一幅检测出图像上的舰船(包括停靠码头)目标。
检测步骤
-
图像裁剪:把原图裁剪成 448 * 640 的 patch,检测每个小 patch 中的舰船目标。
-
读取图像:读取每个图像,并将其转换为灰度图。为了方便处理边缘区域,用补零的方式对图像进行填充。
初始化参数:设置 虚警率、保护区边长、杂波区环形宽度 等参数。
-
遍历图像中的每个点:对于每个点,计算其周围区域的均值和标准差,然后用这两个值来计算一个阈值。如果该点的值大于阈值,就认为该点是目标(用1表示);否则,认为该点是背景(用0表示)。
-
形态学处理:对结果进行闭运算、腐蚀和膨胀操作,这些操作可以帮助消除小的噪声,连接断裂的部分,平滑边缘等。使用 ndimage.label 函数标记结果中的连通区域。
-
保存结果:将步骤2中添加的填充删除,得到和原图像同样大小的结果并保存。
将图像裁剪成小块
class crop_stitch_images():
    def __init__(self, overlap=0.1, crop_H=448, crop_W=640, crop_path='./detect/crop_images/'):
        super(crop_stitch_images, self).__init__()
        self.overlap = overlap
        self.crop_path = crop_path
        self.crop_num = 0
        self.crop_H = crop_H
        self.crop_W = crop_W

    # 裁剪图片
    def crop_image(self, image_path):
        # 读取图像
        img = cv2.imread(image_path)
        H0, W0, C = img.shape
        if C != 1:
            img = cv2.cvtColor(img, cv2.COLOR_BGR2GRAY)
        # 裁剪成几张 H x W
        H = self.crop_H
        W = self.crop_W
        if H0 < H or W0 < W:
            print('The image is too small, please check the input parameters')
            return
        # 计算裁剪后的图像
        os.makedirs(self.crop_path, exist_ok=True)
        for i in range(0, H0, H):
            for j in range(0, W0, W):
                start_r = max(0, i - int(H * self.overlap))
                start_c = max(0, j - int(W * self.overlap))
                end_r = min(H0, start_r + H)
                end_c = min(W0, start_c + W)
                roi = img[start_r:end_r, start_c:end_c]
                # 不够 H x W 的部分用 0 填充
                if roi.shape[0] < H or roi.shape[1] < W:
                    roi = cv2.copyMakeBorder(roi, 0, H - roi.shape[0], 0, W - roi.shape[1], cv2.BORDER_CONSTANT, value=0)
                cv2.imwrite(os.path.join(self.crop_path, image_path[:-4] + '_{}_{}.jpg'.format(start_r, start_c)), roi)
                self.crop_num += 1
cfar 目标检测的代码如下
class CfarDetector():
    def __init__(self, width=40, height=45):

        _width = width
        _height = height

        self.tMaxLength = max(_width, _height)
        self.proLength = self.tMaxLength * 2 + 1
        self.cLength = 1
        self.cfarHalfLength = self.tMaxLength+self.cLength
        self.cfarLength = self.proLength + 2 * self.cLength

        self.g = None
        self.resultArray = None

    def densfilt(self, r, c, width, height, densGate):
        a = np.ceil(height/2)
        b = np.ceil(width/2)
        rStart = r - a
        rEnd = r + a
        cStart = c - b
        cEnd = c + b
        densSection = self.resultArray[int(rStart):int(rEnd), int(cStart):int(cEnd)]
        num = np.sum(densSection)
        if num >= densGate:
            value = 1
        else:
            value = 0
        return value

    def getEstSec(self, r, c, method):
        cs1 = [r - self.cfarHalfLength, c - self.cfarHalfLength, self.cfarLength, self.cLength]
        cs2 = [r + self.tMaxLength+1, c - self.cfarHalfLength, self.cfarLength, self.cLength]
        cs3 = [r - self.tMaxLength, c - self.cfarHalfLength, self.cLength, self.proLength]
        cs4 = [r - self.tMaxLength, c + self.tMaxLength + 1, self.cLength, self.proLength]
        csIndex1 = [cs1[0], cs1[0]+cs1[3]-1, cs1[1], cs1[1]+cs1[2]-1]
        csIndex2 = [cs2[0], cs2[0]+cs2[3]-1, cs2[1], cs2[1]+cs2[2]-1]
        csIndex3 = [cs3[0], cs3[0]+cs3[3]-1, cs3[1], cs3[1]+cs3[2]-1]
        csIndex4 = [cs4[0], cs4[0]+cs4[3]-1, cs4[1], cs4[1]+cs4[2]-1]
        return csIndex1, csIndex2, csIndex3, csIndex4

    def cfarEstPra(self, csIn1, csIn2, csIn3, csIn4):
        sec1 = self.g[int(csIn1[0]):int(csIn1[1])+1, int(csIn1[2]):int(csIn1[3])+1]
        sec2 = self.g[int(csIn2[0]):int(csIn2[1])+1, int(csIn2[2]):int(csIn2[3])+1]
        sec3 = self.g[int(csIn3[0]):int(csIn3[1])+1, int(csIn3[2]):int(csIn3[3])+1]
        sec4 = self.g[int(csIn4[0]):int(csIn4[1])+1, int(csIn4[2]):int(csIn4[3])+1]
        sec1 = sec1.flatten()
        sec2 = sec2.flatten()
        sec3 = sec3.flatten()
        sec4 = sec4.flatten()
        sec = np.concatenate((sec1, sec2, sec3, sec4))
        u = np.mean(sec)
        e2 = np.mean(np.square(sec))
        delta = np.sqrt(e2 - np.square(u))
        return u, delta

    def detect(self, img_path):
        #读取图像
        src = cv2.imread(img_path, cv2.IMREAD_GRAYSCALE)
        print("src shape: ", src.shape)

        pf = 0.001
        src = src.astype(np.float64)
        f_size = src.shape
        padLength = self.cfarHalfLength

        self.g = np.pad(src, padLength, mode='symmetric')
        self.resultArray = np.zeros(self.g.shape)
        numPix = 2*self.cLength * (2 * self.cLength + self.proLength + self.proLength)
        print('CFAR检测器保护区边长:{},杂波区环形宽度:{},用于杂波的像素数:{}'.format
              (self.proLength, self.cLength, numPix))

        th = (2*np.sqrt(-np.log(pf))-np.sqrt(np.pi))/(np.sqrt(4-np.pi))

        # 遍历图像中的每个点
        for i in range(padLength, f_size[0]+padLength):
            for j in range(padLength, f_size[1]+padLength):
                csIndex1, csIndex2, csIndex3, csIndex4 = self.getEstSec(i, j, 1)
                u, delta = self.cfarEstPra(csIndex1, csIndex2, csIndex3, csIndex4)
                temp = (self.g[i,j]-u)/delta
                if temp > th:
                    self.resultArray[i,j] = 1
                else:
                    self.resultArray[i,j] = 0

        self.resultArray = self.resultArray[padLength:-padLength, padLength:-padLength]
        se = morphology.disk(1)
        resultArray2 = ndimage.binary_closing(self.resultArray, structure=se)
        resultArray3 = ndimage.binary_erosion(resultArray2, structure=se)
        resultArray4 = ndimage.binary_dilation(resultArray3, structure=se)

        resultArray5, num = ndimage.label(resultArray4)
        # plt.imshow(resultArray5)
        # plt.show()
        cv2.imwrite(img_path[:-4] + '_mask.png', resultArray5*255)
近海光学图像 的几个图像区域的检测结果如下:
在海中行驶的船只检测效果较好,而停靠在码头的目标检测比较困难,尤其是一些大型船只。


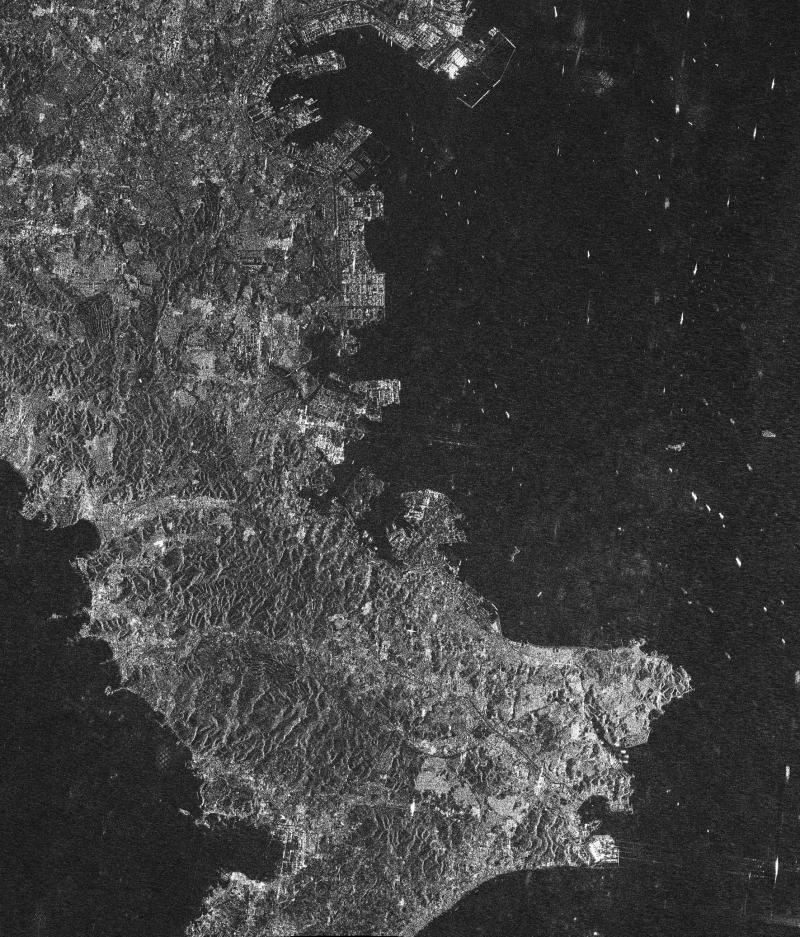
**海上 SAR 图像 **的几个图像区域的检测结果如下:
同样的,在海中行驶的船只检测效果较好,而停靠在码头的目标由于背景相对比较复杂,检测比较困难,但是这种检测方法可以避免杂波背景起伏变化的干扰,几乎可以检测到所有海洋中的目标。
为了提高检测的精度,可以尝试调节参数,在开阔海域增大虚警率,增大检测率的同时虚警率不会有较大改变;对岸边的 patch 小的虚警率效果较好。


最后在原始的大图上绘制检测框
def draw_box(ori_img, bw, h, w, start_h, start_w):
    # 找到所有连续的白色区域
    bw = bw > 0
    labels = measure.label(bw)
    regions = measure.regionprops(labels)

    # 获取每个区域的边界框
    bounding_boxes = [region.bbox for region in regions]
    bounding_boxes = [(x1, y1, x2, y2) for (y1, x1, y2, x2) in bounding_boxes]

    # 在图像上画出每个边界框
    for bbox in bounding_boxes:
        x1, y1, x2, y2 = bbox
        if abs(x1-x2) * abs(y1-y2) < 10:	# 可见光图像设为 30
            continue
        ori_img = cv2.rectangle(ori_img, (start_w+x1, start_h+y1), (start_w+x2, start_h+y2), (0, 255, 0), 2)

    return ori_img


 浙公网安备 33010602011771号