微信小程序-自定义组件
自定义一个swiper轮播.

index
index.wxml
1 <!--logs.wxml-->
2  <swiperBanner Height="450rpx" imgList="{{banners}}" url="picUrl"></swiperBanner>
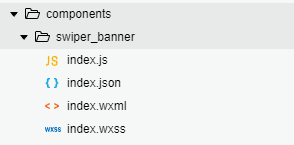
components文件夹中的swiper_banner/index
index.json
导入路径为上两层的components文件夹中的swiper_banner/index
components/swiper_banner/index.js
 1 Component({
 2   properties: {
 3     imgList: {
 4       type: Array,
 5       value: [],
 6       observer: function (newVal, oldVal) {
 7         this.setData({
 8           imgList: newVal
 9         })
10       }
11     },
12     url:{
13       type:String,
14       value:''
15     },
16     Height:{
17       type:String,
18       value:''
19     },
20     Width:{
21       type:String,
22       value:''
23     }
24   }
25 })
components/swiper_banner/index.json
1 {
2   "component": true
3 }
components/swiper_banner/index.wxml
1 <view class='swiper'>
2   <swiper indicator-dots="true" autoplay="true" interval="5000" duration="1000" style="height:{{Height}};">
3     <block wx:for="{{imgList}}" wx:key="prototype">
4       <swiper-item>
5         <image src="{{item[url]}}" class="slide-image" mode="aspectFill" />
6       </swiper-item>
7     </block>
8   </swiper>
9 </view>
components/swiper_banner/index.wxss
1 .swiper image{
2   width: 100%;
3   height: 100%;
4 }
1 {
2   "enablePullDownRefresh": true,
3   "backgroundColor": "#FB5D5D",
4   "onReachBottomDistance": 10,
5   "usingComponents": {
6     "swiperBanner": "../../components/swiper_banner/index"
7   },
8   "navigationBarTitleText": "log"
9 }
示例代码如下:点击获取

 浙公网安备 33010602011771号