docsify - 怎么搭建UI演示
可以看到我上篇文章介绍了docsify搭建,本篇介绍如何搭建UNIAPP UI演示
1.最简单的方法就是你在index.html写入以下样式
1 2 3 4 5 6 7 8 9 10 11 12 13 14 15 16 17 18 19 20 21 22 23 24 25 26 27 28 29 30 31 32 33 34 35 36 37 38 39 40 41 42 | .simulator { position: fixed; top: 90px; right: 90px; z-index: 1; box-sizing: border-box; width: 360px; min-width: 360px; overflow: hidden; background: #f7f7f7; border-radius: 12px; box-shadow: #ebedf0 0 4px 12px;}.simulator iframe { display: block; width: 100%; border: none;}@media (max-width: 1100px) { .simulator { display: none; }}@media (min-width: 1680px) { .content { right: 410px; } .app-nav { position: fixed; top: 0; right: 0; } .markdown-section { max-width: 1070px; }} |
2.在markdown文件导入iframe (这一种是手动,非常麻烦!)
2.1 单个页面导入定制
准备工作就是将UI内容演示打包成H5,然后利用ifarme导入每个页面的链接地址
比如说上传图片组件所在的页面我们就在upload-img.md的iframe src导入:https://xxx.com/#/pages/components/upimg

<div class="simulator">
  <iframe src="这里放链接地址" height="640px"></iframe>
</div>
2.2 自动导入UI演示地址(在index.html操作)
  1 <!DOCTYPE html>
  2 <html lang="en">
  3     <head>
  4         <meta charset="UTF-8">
  5         <title>Document</title>
  6         <meta http-equiv="X-UA-Compatible" content="IE=edge,chrome=1" />
  7         <meta name="description" content="Description">
  8         <meta name="viewport" content="width=device-width, initial-scale=1.0, minimum-scale=1.0">
  9         <link rel="stylesheet" href="//cdn.jsdelivr.net/npm/docsify@4/lib/themes/vue.css">
 10         <style>
 11             /* 模拟器 */
 12             .simulator {
 13                 position: fixed;
 14                 top: 90px;
 15                 right: 90px;
 16                 z-index: 1;
 17                 box-sizing: border-box;
 18                 width: 360px;
 19                 min-width: 360px;
 20                 overflow: hidden;
 21                 background: #f7f7f7;
 22                 border-radius: 12px;
 23                 box-shadow: #ebedf0 0 4px 12px;
 24             }
 25
 26             .simulator iframe {
 27                 display: block;
 28                 width: 100%;
 29                 border: none;
 30             }
 31
 32             @media (max-width: 1100px) {
 33                 .simulator {
 34                     display: none;
 35                 }
 36             }
 37
 38             @media (min-width: 1680px) {
 39
 40                 .content {
 41                     right: 410px;
 42                 }
 43
 44                 .app-nav {
 45                     position: fixed;
 46                     top: 0;
 47                     right: 0;
 48                 }
 49
 50                 .markdown-section {
 51                     max-width: 1070px;
 52                 }
 53             }
 54         </style>
 55     </head>
 56     <body>
 57         <div class="simulator">
 58             <iframe id="simulator-iframe" src="http://localhost:2021" frameborder="0" style="height: 640px"></iframe>
 59         </div>
 60         <div id="app">加载中</div>
 61         <script>
 62             var simulatorIframe = null
 63             window.$docsify = {
 64                 // 文档标题
 65                 name: '',
 66                 // 配置了地址以后指向地址
 67                 repo: 'https://github.com/xxx',
 68                 // 更换页面以后是否自动回到顶部
 69                 auto2top: true,
 70                 // 是否要封面页
 71                 coverpage: false,
 72                 // 执行文档里的 script 标签里的脚本
 73                 executeScript: true,
 74                 // 加载自定义侧边栏
 75                 loadSidebar: true,
 76                 // 加载自定义导航栏
 77                 loadNavbar: true,
 78                 // 小屏设备下合并导航栏到侧边栏
 79                 mergeNavbar: true,
 80                 // 最大层级
 81                 maxLevel: 4,
 82                 // 侧栏最大层级
 83                 subMaxLevel: 2,
 84                 // 主题颜色
 85                 // themeColor: '#0475fd',
 86                 // 全局顶部配置
 87                 plugins: [
 88                     function(hook, vm) {
 89                         // 路由钩子前进行操作
 90                         hook.beforeEach(function(content) {
 91                             var url = 'https://github.com/xxxxx/docs/' + vm.route.file
 92                             var editHtml = '> 🧐发现错误,想一起完善?[在 Github 编辑此页](' + url + ')!\n'
 93
 94                             var footer = [
 95                                 '----',
 96                                 '> 上次修改时间 {docsify-updated} ',
 97                                 '> [By SUN](https://github.com/xxx)',
 98                             ].join('\n')
 99
100                             return editHtml + '\n----\n' + content + '\n\n' + footer
101                         })
102                         // 每次路由切换时数据全部加载完成后调用,没有参数
103                         hook.doneEach(function() {
104                             const path = vm.route.path.split('/');
105                             const port = location.port;
106                             const filter = path.filter(item => {
107                                 return item;
108                             });
109
110                             if (!simulatorIframe) {
111                                 simulatorIframe = document.getElementById('simulator-iframe');
112                             }
113                             if (port == 3000) {
114                                 simulatorIframe.src =
115                                     `http://localhost:2021/#/pages/${filter[0]}/${filter[1]}?pageTitle=${filter[1]}`
116                             } else {
117                                 simulatorIframe.src =
118                                     `https://xxx.com/#/pages/${filter[0]}/${filter[1]}?pageTitle=${filter[1]}`
119                             }
120
121                         })
122                     }
123                 ]
124
125             }
126         </script>
127         <!-- Docsify v4 -->
128         <script src="//cdn.jsdelivr.net/npm/docsify@4"></script>
129     </body>
130 </html>
131
3000端口是我这边的本地默认端口,其余的都指向线上地址
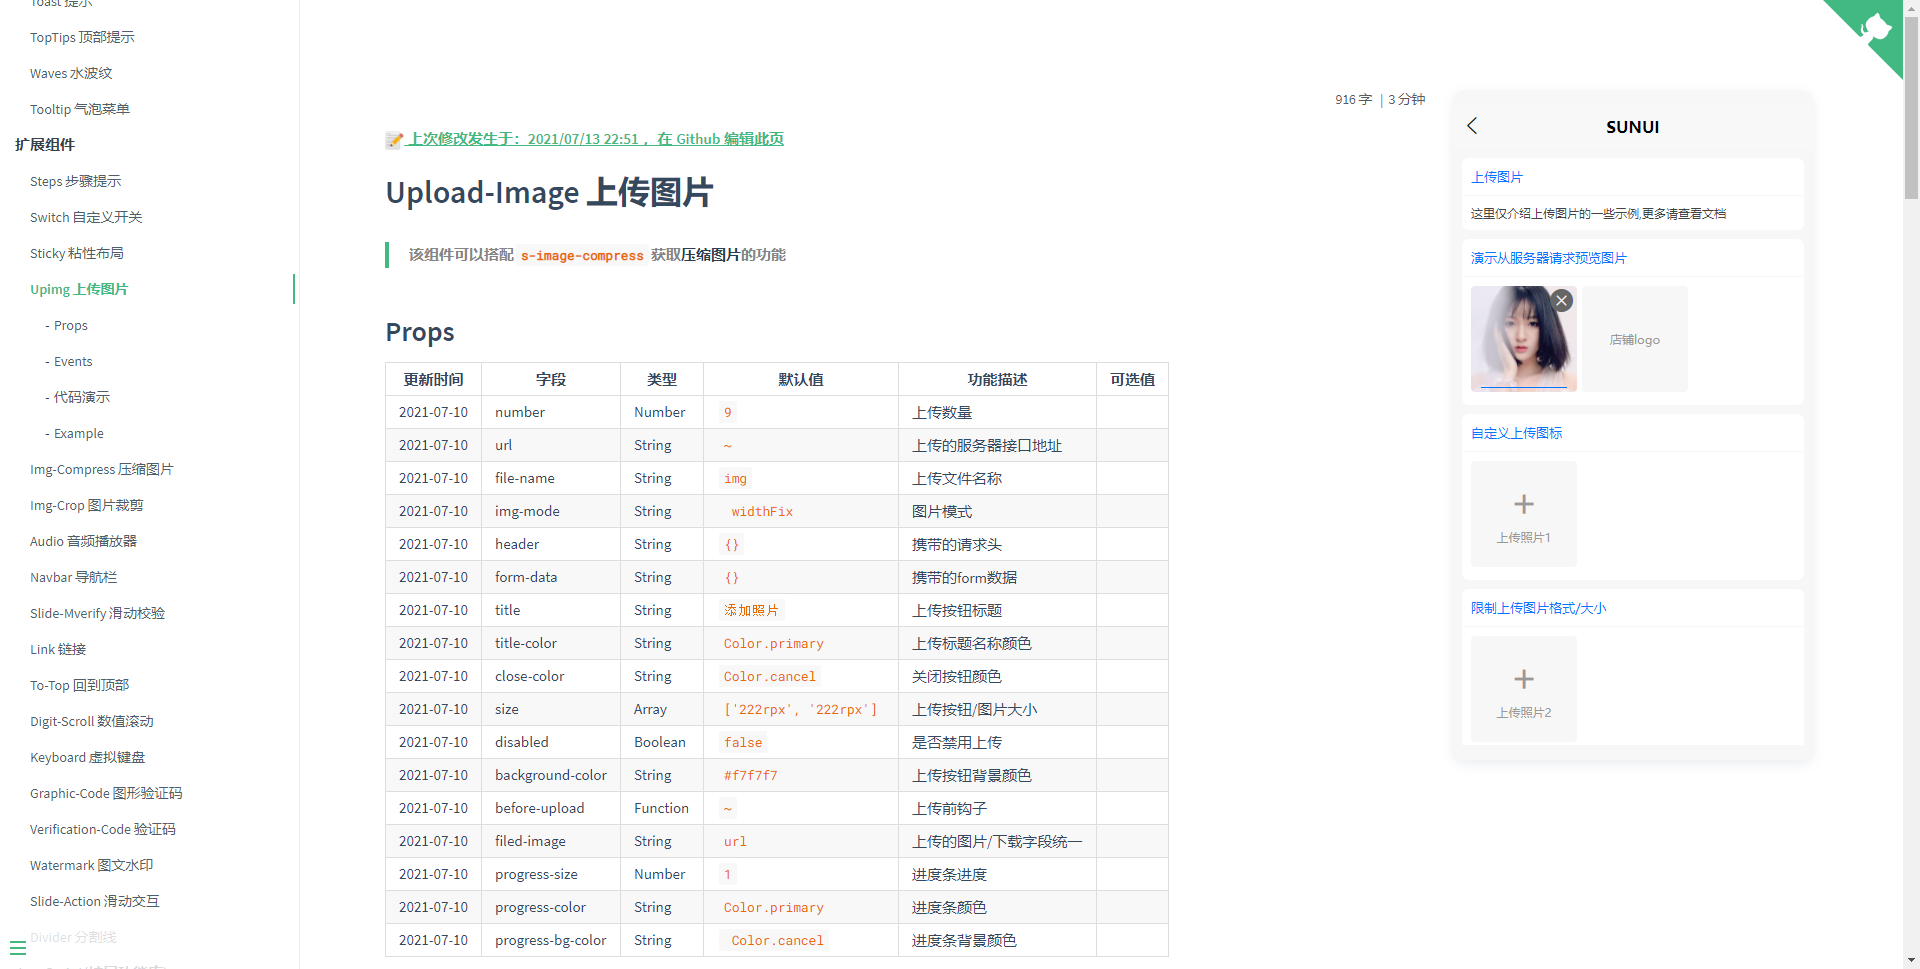
3. 最终UI演示效果


【推荐】国内首个AI IDE,深度理解中文开发场景,立即下载体验Trae
【推荐】编程新体验,更懂你的AI,立即体验豆包MarsCode编程助手
【推荐】抖音旗下AI助手豆包,你的智能百科全书,全免费不限次数
【推荐】轻量又高性能的 SSH 工具 IShell:AI 加持,快人一步
· 10年+ .NET Coder 心语,封装的思维:从隐藏、稳定开始理解其本质意义
· .NET Core 中如何实现缓存的预热?
· 从 HTTP 原因短语缺失研究 HTTP/2 和 HTTP/3 的设计差异
· AI与.NET技术实操系列:向量存储与相似性搜索在 .NET 中的实现
· 基于Microsoft.Extensions.AI核心库实现RAG应用
· 10年+ .NET Coder 心语 ── 封装的思维:从隐藏、稳定开始理解其本质意义
· 地球OL攻略 —— 某应届生求职总结
· 提示词工程——AI应用必不可少的技术
· Open-Sora 2.0 重磅开源!
· 周边上新:园子的第一款马克杯温暖上架