
Flutter 路由库fluro快速入门——从库自带的示例上手
Flutter 路由库fluro快速入门——从库自带的示例上手
笔者喜欢Flutter的一点就是其各种库的example读起来都很清晰、很好懂,在上手从来没用过的复杂三方库时基本上看看README+example就可以了。
最近笔者参与的大创项目要开始做App开发了,之前定的开发框架是flutter。在准备为项目搭建框架的时候,笔者首先查找了一下flutter中流行的路由框架,经过比较感觉fluro还不错,就开始准备学习和使用fluro了。而昨天在学习fluro库的时候,看了一下其README中的介绍,作者在其中介绍了核心的几个API,包括初始化、配置路由、路由切换API、参数传递等,但是就一个flutter项目如何组织和使用这些API、如何将API和应用组合并没有直接给出说明。经验丰富的flutter开发者想必能在脑海中根据这些API构建出使用路由的最佳实践,但是对刚刚上手flutter的人来说还是需要看看example是怎么写的。幸而作者在仓库中提供了一个被他称作“pretty sweet”的example,那么我们就看看这个example是怎么写的吧。
克隆、打开项目
首先自然是把项目及其example下载下来了。笔者建议读者也一起克隆fluro的项目,因为只有亲自到example里看看,才能理解作者是怎么设计的、为什么要这样用。
git clone https://github.com/lukepighetti/fluro.git
用IDEA或者其他什么编辑器打开。
IDEA会提示我们运行flutter pub get,但是运行之后就马上收到警报了:

显然这个example有点旧了。不过,在笔者写文的时候,只需要改一下AndroidManifest.xml里的android:name"字段就可以正常编译运行了,至于改成什么还请参见官方的指南:Upgrading-pre-1.12-Android-projects。
App架构
在处理完Android里面的麻烦事之后,我们可以考虑启动模拟器,然后运行一下看看。笔者写文的时候正在用Mac电脑,所以就用iOS来运行了:
性能很棒,动画(渐变)也很流畅。那么,我们该如何在项目(或新项目)里用上这个路由库呢?
首先看看main.dart吧:
void main() {
  runApp(AppComponent());
}
非常短小精悍,只有一行runApp。
AppComponent定义在components/app/app_component.dart下,它的内容也很精悍:
class AppComponent extends StatefulWidget {
  @override
  State createState() {
    return AppComponentState();
  }
}

class AppComponentState extends State<AppComponent> {
  AppComponentState() {
    final router = FluroRouter();
    Routes.configureRoutes(router);
    Application.router = router;
  }

  @override
  Widget build(BuildContext context) {
    final app = MaterialApp(
      title: 'Fluro',
      debugShowCheckedModeBanner: false,
      theme: ThemeData(
        primarySwatch: Colors.blue,
      ),
      onGenerateRoute: Application.router.generator,
    );
//    print("initial route = ${app.initialRoute}");
    return app;
  }
}
绝大部分都和标准的MaterialApp大差不差,不过在构造函数里它做了这件事情:
final router = FluroRouter();
Routes.configureRoutes(router);
Application.router = router;
三行代码里似乎做完了路由的初始化和配置,让我们看看它们具体做了什么吧。
第一行:final router = FluroRouter();。这没有什么好说的,它就只是新建了一个FluroRouter对象。
第二行:Routes.configureRoutes(router);。看起来调用了一个叫做Routes的类里面的静态方法,router在里面被进行了配置。
第三行:Application.router = router;。看起来,router被赋给了一个叫做Application的类中。
让我们先看看这个叫做Application的类吧。作为之前经常写Java的人,笔者刚开始误以为这个Application是dart里的一个API(或者其他类似的东西),按住Ctrl点了它之后才发现这原来是作者定义的一个类。这个类定义在config目录下的application.dart里,内容不过寥寥几行:
class Application {
  static late final FluroRouter router;
}
router的三个修饰符static late final很有趣,它们表示router是一个静态的成员(不需要实例化Application类就能调用),具有延迟初始化的特点(虽然标记了final但可以被赋值一次)。
作者在example中配置完路由之后,把路由对象保存在了这里,接下来我们就可以访问这个对象来使用路由功能了。
其他值得注意的地方还有在AppComponent中,作者为MaterialApp配置了onGenerateRoute属性:
final app = MaterialApp(
  title: 'Fluro',
  debugShowCheckedModeBanner: false,
  theme: ThemeData(
    primarySwatch: Colors.blue,
  ),
  onGenerateRoute: Application.router.generator,
);
路由配置
接下来看看作者怎么配置路由的。在上一部分中,我们提到作者调用了类Routes里面的静态方法,router在里面被进行了配置。接下来,我们看看这个类(位于config目录下的routes.dart中):
class Routes {
  static String root = "/";
  static String demoSimple = "/demo";
  static String demoSimpleFixedTrans = "/demo/fixedtrans";
  static String demoFunc = "/demo/func";
  static String deepLink = "/message";

  static void configureRoutes(FluroRouter router) {
    router.notFoundHandler = Handler(
        handlerFunc: (BuildContext? context, Map<String, List<String>> params) {
      print("ROUTE WAS NOT FOUND !!!");
      return;
    });
    router.define(root, handler: rootHandler);
    router.define(demoSimple, handler: demoRouteHandler);
    router.define(demoSimpleFixedTrans,
        handler: demoRouteHandler, transitionType: TransitionType.inFromLeft);
    router.define(demoFunc, handler: demoFunctionHandler);
    router.define(deepLink, handler: deepLinkHandler);
  }
}
这个类主要由两个部分组成:定义各个路由的路径,并把他们和路由处理器关联。值得注意的是,未匹配到路由时的行为也被进行了配置。
路由处理器(Handler)在另外一个文件(route_handlers.dart)中被定义。以主页为例:
var rootHandler = Handler(
    handlerFunc: (BuildContext? context, Map<String, List<String>> params) {
  return HomeComponent();
});
看起来,这个Handler的构造函数接受一个叫做handlerFunc(处理函数)的参数,它的类型是一个返回Widget(可选)的函数,并且具有两个参数:context(上下文)和params(参数)。上下文目前笔者还不太熟悉,只是在使用Provider来做状态管理时用到过;params则应该是可以接受诸如/demo/func?message=$result中的message的query参数。开发过uniapp、传统Vue和React的开发者估计对它都不会陌生。
handlerFunc中返回的东西估计大家就不会感到陌生了吧,这就是代表这个路由页面的Widget。
除了这种简单的路由之外,还可以读取和处理参数:
var demoRouteHandler = Handler(
    handlerFunc: (BuildContext? context, Map<String, List<String>> params) {
  String? message = params["message"]?.first;
  String? colorHex = params["color_hex"]?.first;
  String? result = params["result"]?.first;
  Color color = Color(0xFFFFFFFF);
  if (colorHex != null && colorHex.length > 0) {
    color = Color(ColorHelpers.fromHexString(colorHex));
  }
  return DemoSimpleComponent(
      message: message ?? 'Testing', color: color, result: result);
});
API设计得很清晰,大家想必并不需要笔者做太多赘述就能理解它的用法。
它甚至可以直接在handlerFunc中显示组件,然后返回一个空值:
var demoFunctionHandler = Handler(
    type: HandlerType.function,
    handlerFunc: (BuildContext? context, Map<String, List<String>> params) {
      String? message = params["message"]?.first;
      showDialog(
        context: context!,
        builder: (context) {
          return AlertDialog(
            title: Text(
              "Hey Hey!",
              style: TextStyle(
                color: const Color(0xFF00D6F7),
                fontFamily: "Lazer84",
                fontSize: 22.0,
              ),
            ),
            content: Text("$message"),
            actions: <Widget>[
              Padding(
                padding: EdgeInsets.only(bottom: 8.0, right: 8.0),
                child: TextButton(
                  onPressed: () {
                    Navigator.of(context).pop(true);
                  },
                  child: Text("OK"),
                ),
              ),
            ],
          );
        },
      );
      return;
    });
}
最后,根据它的说明,路由工具支持处理deep link:
/// Handles deep links into the app
/// To test on Android:
///
/// `adb shell am start -W -a android.intent.action.VIEW -d "fluro://deeplink?path=/message&mesage=fluro%20rocks%21%21" com.theyakka.fluro`
var deepLinkHandler = Handler(
    handlerFunc: (BuildContext? context, Map<String, List<String>> params) {
  String? colorHex = params["color_hex"]?.first;
  String? result = params["result"]?.first;
  Color color = Color(0xFFFFFFFF);
  if (colorHex != null && colorHex.length > 0) {
    color = Color(ColorHelpers.fromHexString(colorHex));
  }
  return DemoSimpleComponent(
      message: "DEEEEEP LINK!!!", color: color, result: result);
});
handlerFunc中并没有进行特殊的设置,想必按照注释里的那个deep link的格式就能直接访问到这个路由。
路由操作
定义了路由其实只是完成了一半;不能去任何地方的路由毫无意义。所以,接下来我们看看example项目中是怎么使用路由对象来进行跳转和其他操作的。
首先看看最基础的navigateTo功能怎么用:
Application.router.navigateTo(context, "/demo/func?message=$result");
很清晰,很简单。router是刚刚讨论过的Application类中来的,调用的方法是navigateTo。第一个参数是当前的context,直接传就好了;第二个是路由的路径,并且如读者所见,可以带params。
高级用法:
Application.router.navigateTo(
  context,
  "/demo?message=$message&color_hex=$hexCode",
  transition: TransitionType.custom,
  transitionBuilder: transition,
  transitionDuration: const Duration(milliseconds: 600),
);
作者在这里定义了渐变的类型(TransitionType.custom),渐变的提供者:(transition),渐变的时长(600ms)。
渐变提供者的定义在这里,可以看到组合了ScaleTransition和RotationTransition:
var transition = (BuildContext context, Animation<double> animation,
          Animation<double> secondaryAnimation, Widget child) {
  return ScaleTransition(
    scale: animation,
    child: RotationTransition(
      turns: animation,
      child: child,
    ),
  );
};
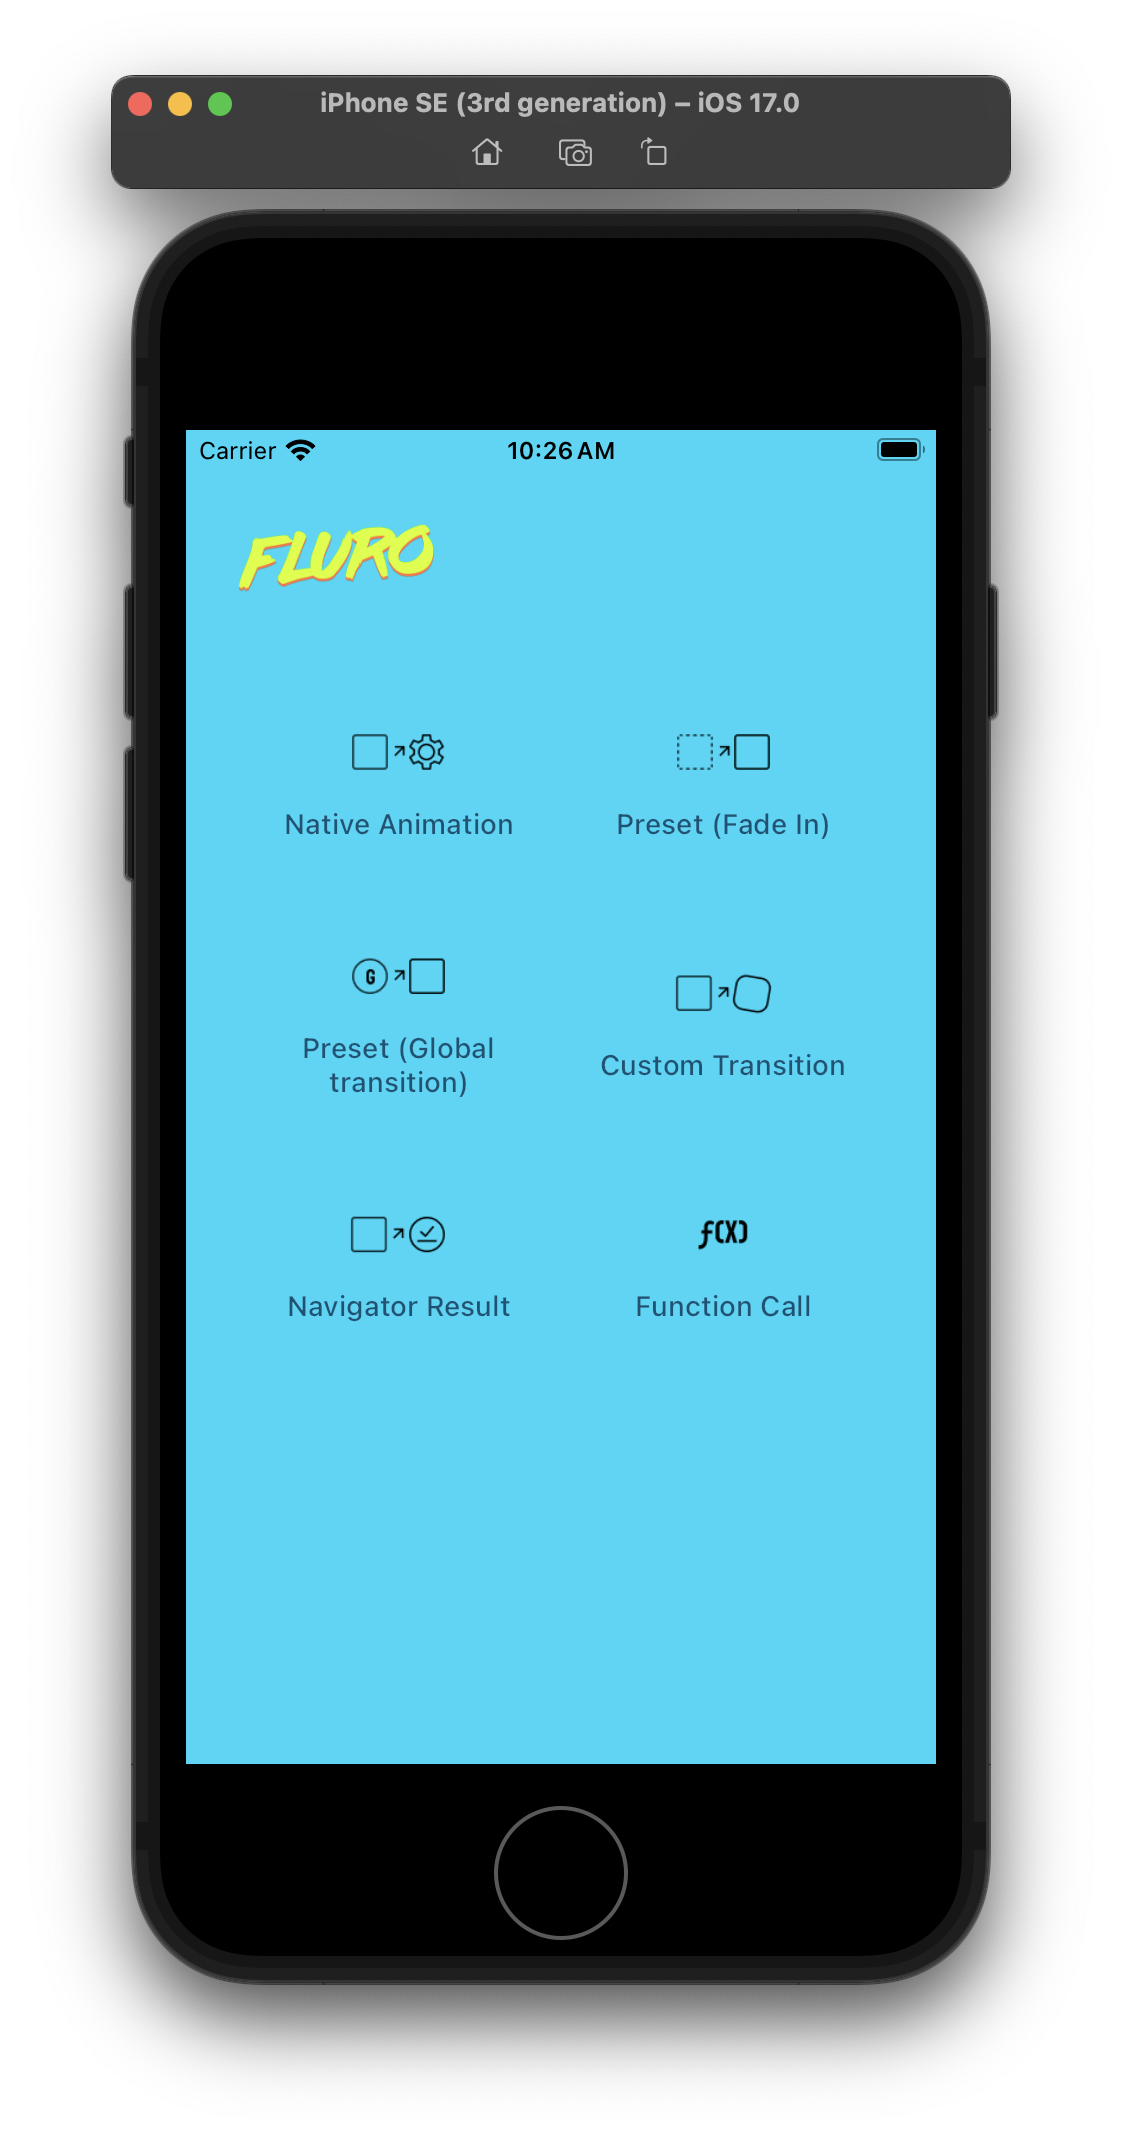
最后,值得一提的是,example项目中用到的渐变类型还有这几种:
TransitionType.native // 顾名思义,就是native的渐变类型
TransitionType.inFromLeft
TransitionType.fadeIn
读者阅读到这里,想必已经能够大体掌握这个项目的用法,包括它的最佳实践、项目结构等。希望这篇文章对你有帮助。

 浙公网安备 33010602011771号