
Vue中使用echarts
Vue 中使用echarts
1.安装echarts
npm install echarts --save
2.在Vue中引入(全局引入) main.js
//全局引入echarts
import * as echarts from 'echarts';
//需要挂载到Vue原型上
Vue.prototype.$echarts = echarts
3.组件中使用
<template>
  <div class="home">
    <!-- 为 ECharts 准备一个定义了宽高的 DOM -->
    <div id="main" style="width: 600px;height:400px;"></div>
  </div>
</template>


'''

    id可以随便取

'''


<script>
//通过this.$echarts来使用
  export default {
    name: "page",
    mounted(){
        // 在通过mounted调用即可
        this.echartsInit()
    },
    methods: {
        //初始化echarts
        echartsInit() {
            //柱形图
            //因为初始化echarts 的时候,需要指定的容器 id='main'
            //使用时只需要把setOption里的对象换成echarts中的options(官网实例中复制)或者自己的参数即可
            this.$echarts.init(document.getElementById('main')).setOption({
                xAxis: {
                    type: 'category',
                    data: ['Mon', 'Tue', 'Wed', 'Thu', 'Fri', 'Sat', 'Sun']
                },
                yAxis: {
                    type: 'value'
                },
                series: [{
                    data: [120, 200, 150, 80, 70, 110, 130],
                    type: 'bar',
                    showBackground: true,
                    backgroundStyle: {
                        color: 'rgba(220, 220, 220, 0.8)'
                    }
                }]
            })
        }

    }
  }
</script>
4.案例
以官网的饼图为例
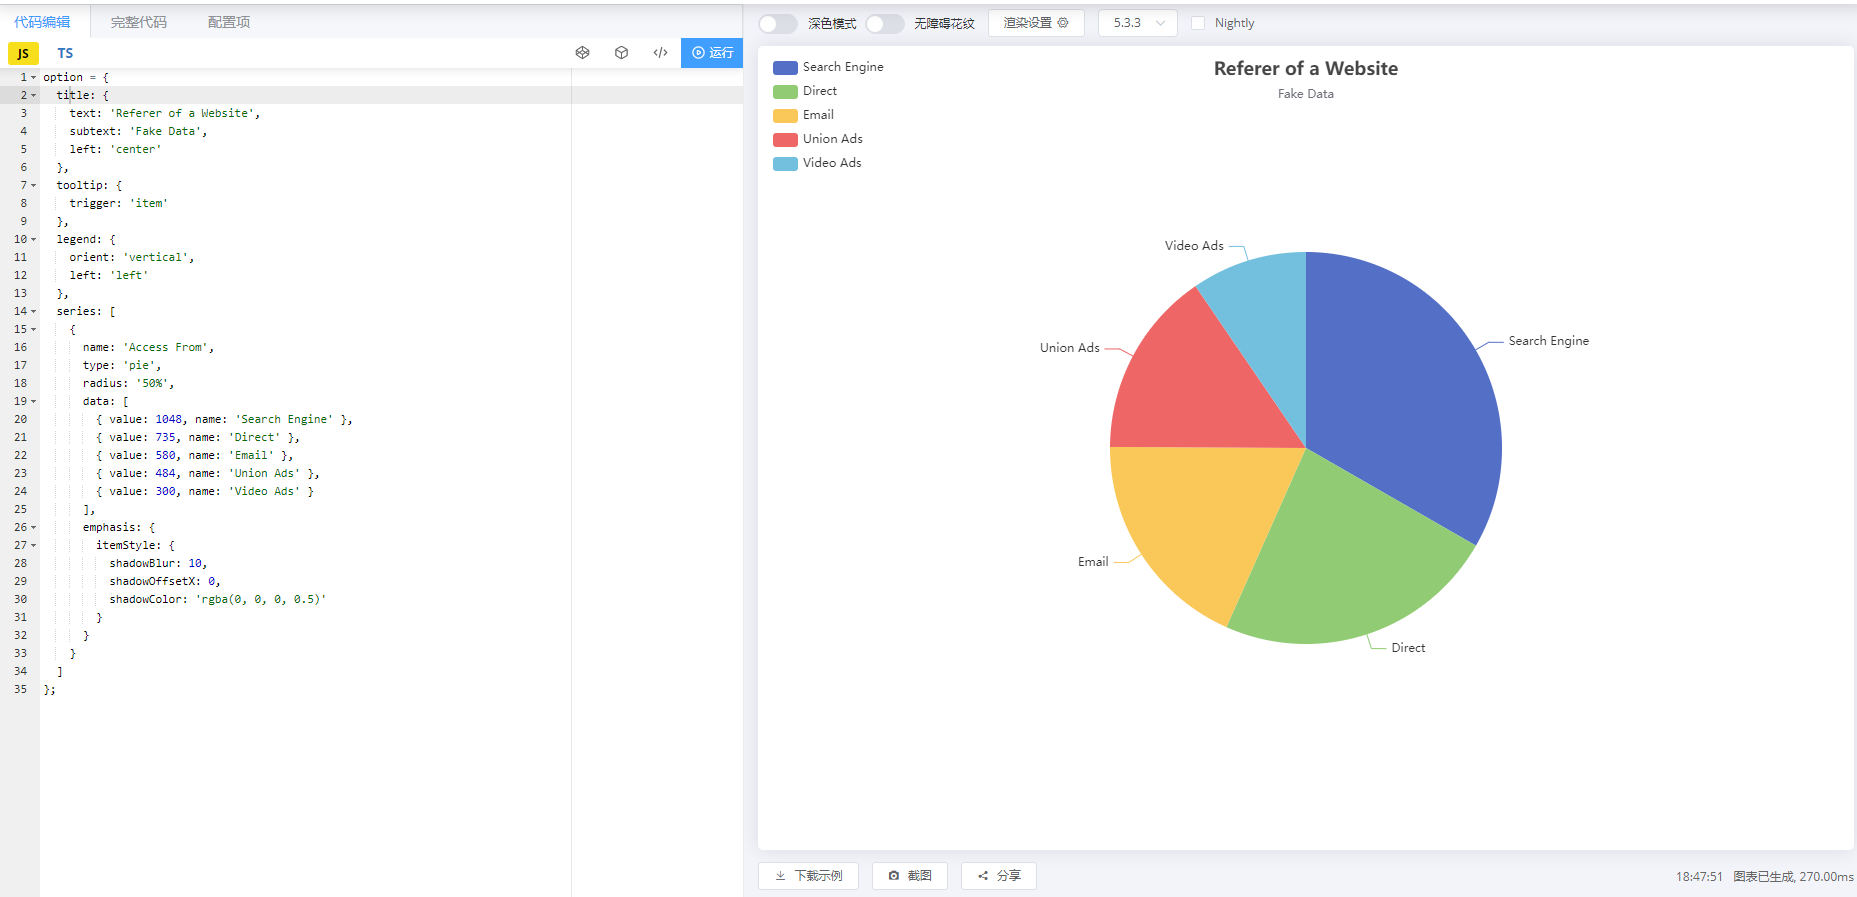
1.安装echarts
npm install echarts --save
2.全局引用
//全局引入echarts
import * as echarts from 'echarts';
//全局引入axios
import axios from 'axios'
//需要挂载到Vue原型上
Vue.prototype.$echarts = echarts
Vue.prototype.$axios = axios
3.组件中使用
<template>
  <div class="home">
    <!-- 为 ECharts 准备一个定义了宽高的 DOM -->
    <div id="main" style="width: 600px;height:400px;"></div>
  </div>
</template>


<script>
// @ is an alias to /src
import * as echarts from 'echarts';


export default {
  name: 'HomeView',
  mounted() {
      '''

      		向后端发送请求,拿到数据

      '''
    this.$axios.get('http://127.0.0.1:8000/useragent/').then(respones => {
      for (var i = 0; i < respones.data.length; i++) {
        console.log(i)
        this.data_d.push({'value': respones.data[i].value, 'name': respones.data[i].name})
      }
      this.echartsInit() //在第一次渲染时执行函数
    })
      '''

      	 // this.echartsInit() 如果放在外面则不生效,必须放在回调函数中

      '''

  },
  data() {
    return {
      data_d: [],
    }
  },
  methods: {
    echartsInit() {
      //柱形图
      //因为初始化echarts 的时候,需要指定的容器 id='main'
      this.$echarts.init(document.getElementById('main')).setOption({
        title: {
          text: 'Referer of a Website',
          subtext: 'Fake Data',
          left: 'center'
        },
        tooltip: {
          trigger: 'item'
        },
        legend: {
          orient: 'vertical',
          left: 'left'
        },
        series: [
          {
            name: 'Access From',
            type: 'pie',
            radius: '50%',
            data: this.data_d,
              '''

              	data的格式为{'value':... , 'name':....},我们可以在后端序列化时就处理成对应的格式

              '''
            emphasis: {
              itemStyle: {
                shadowBlur: 10,
                shadowOffsetX: 0,
                shadowColor: 'rgba(0, 0, 0, 0.5)'
              }
            }
          }
        ]
      })
    }

  },
}
</script>
5.其他的如何使用
如果想要使用其他的,我们只需要修改
	  this.$echarts.init(document.getElementById('main')).setOption({

          '''

          		内容

          '''

      })即可
案例(改成以下)
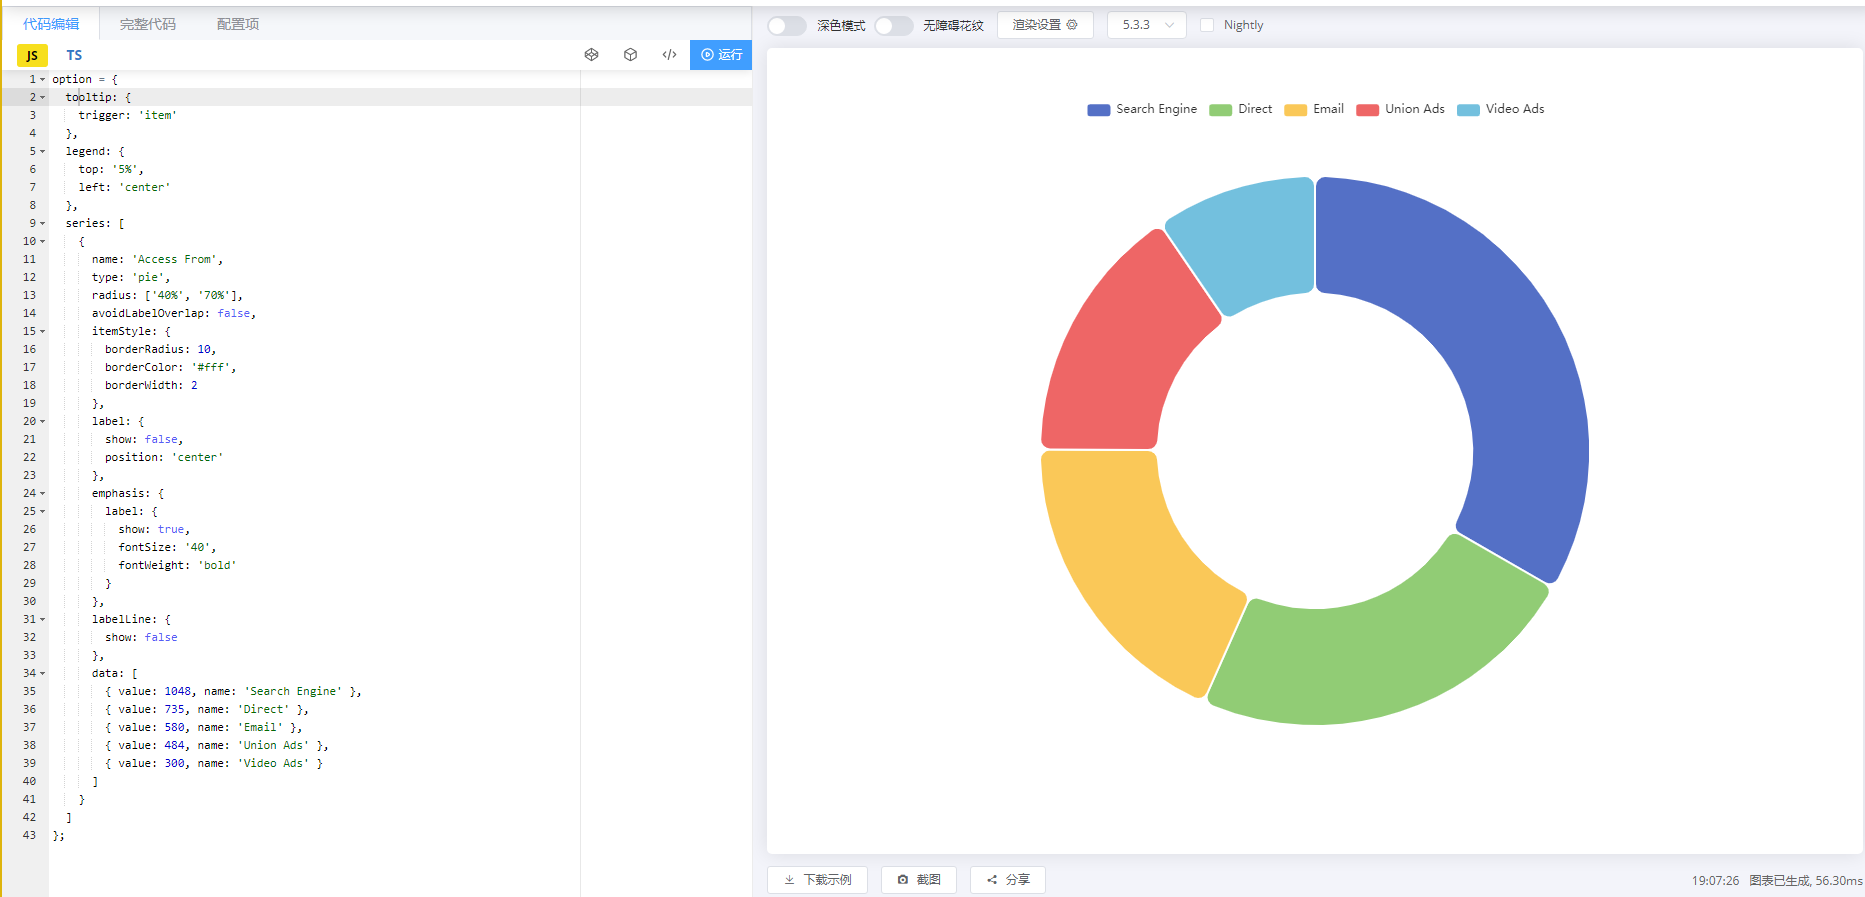
1.首先我们要复制option,option在左侧,也就是那些代码,都是我们不是全复制。具体复制内容如下图
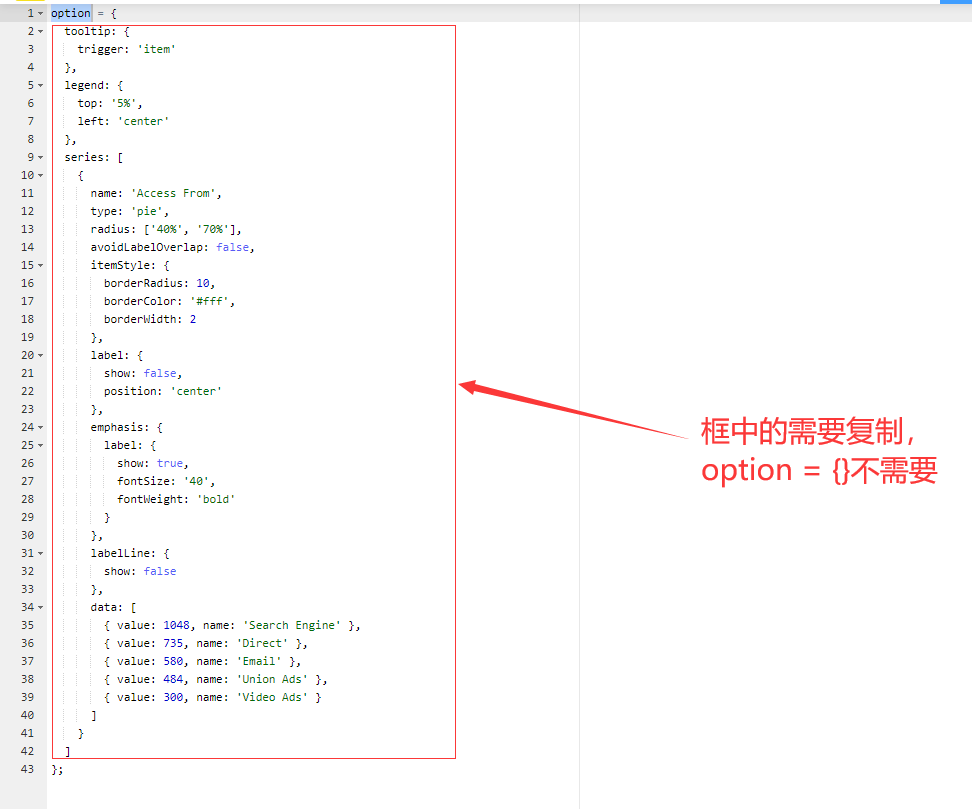
2.粘贴对应位置
 this.$echarts.init(document.getElementById('main')).setOption({

     		  tooltip: {
                trigger: 'item'
              },
              legend: {
                top: '5%',
                left: 'center'
              },
              series: [
                {
                  name: 'Access From',
                  type: 'pie',
                  radius: ['40%', '70%'],
                  avoidLabelOverlap: false,
                  itemStyle: {
                    borderRadius: 10,
                    borderColor: '#fff',
                    borderWidth: 2
                  },
                  label: {
                    show: false,
                    position: 'center'
                  },
                  emphasis: {
                    label: {
                      show: true,
                      fontSize: '40',
                      fontWeight: 'bold'
                    }
                  },
                  labelLine: {
                    show: false
                  },
                  data: [
                    { value: 1048, name: 'Search Engine' },
                    { value: 735, name: 'Direct' },
                    { value: 580, name: 'Email' },
                    { value: 484, name: 'Union Ads' },
                    { value: 300, name: 'Video Ads' }
                  ]
                }
              ]

      })即可

 浙公网安备 33010602011771号