MongoDB的使用
进入MongoDB
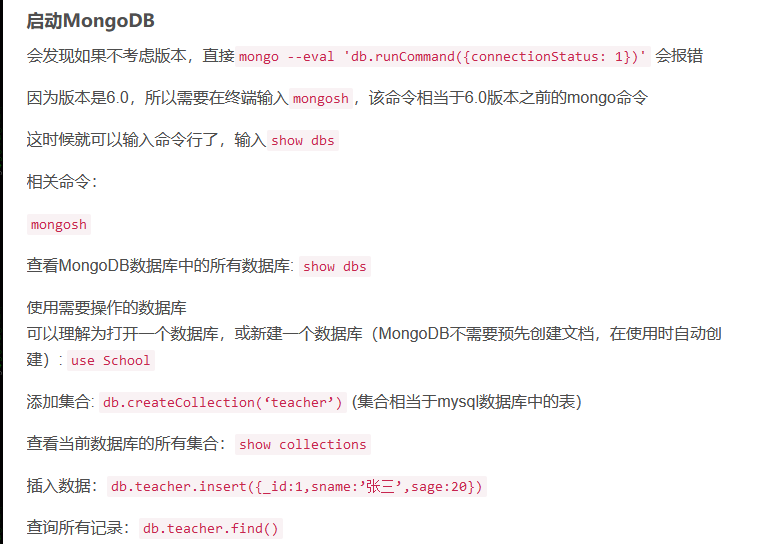
因为版本是6.0,所以需要在终端输入mongosh,该命令相当于6.0版本之前的mongo命令
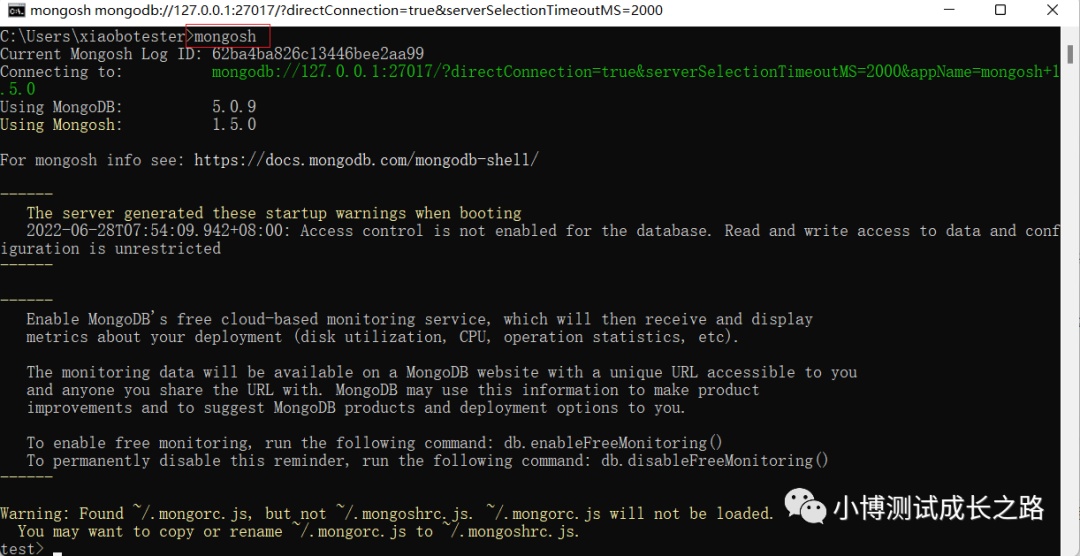
root@Mongodb:~# mongosh
Current Mongosh Log ID: 63f48e2e5d50ed0f2ed35d3c
Connecting to: mongodb://127.0.0.1:27017/?directConnection=true&serverSelectionTimeoutMS=2000&appName=mongosh+1.7.1
Using MongoDB: 6.0.4
Using Mongosh: 1.7.1
For mongosh info see: https://docs.mongodb.com/mongodb-shell/
To help improve our products, anonymous usage data is collected and sent to MongoDB periodically (https://www.mongodb.com/legal/privacy-policy).
You can opt-out by running the disableTelemetry() command.
------
The server generated these startup warnings when booting
2023-02-21T16:54:50.226+08:00: Using the XFS filesystem is strongly recommended with the WiredTiger storage engine. See http://dochub.mongodb.org/core/prodnotes-filesystem
2023-02-21T16:54:50.700+08:00: Access control is not enabled for the database. Read and write access to data and configuration is unrestricted
2023-02-21T16:54:50.700+08:00: vm.max_map_count is too low
------
------
Enable MongoDB's free cloud-based monitoring service, which will then receive and display
metrics about your deployment (disk utilization, CPU, operation statistics, etc).
The monitoring data will be available on a MongoDB website with a unique URL accessible to you
and anyone you share the URL with. MongoDB may use this information to make product
improvements and to suggest MongoDB products and deployment options to you.
To enable free monitoring, run the following command: db.enableFreeMonitoring()
To permanently disable this reminder, run the following command: db.disableFreeMonitoring()
------
test>
4.2 查看MongoDB数据库中的所有数据库
test> show dbs
admin 40.00 KiB
config 12.00 KiB
local 40.00 KiB
4.3 打开或者新建一个数据库
MongoDB不需要预先创建文档,在使用时自动创建
test> use fib
switched to db fib
fib>
4.4 添加集合
集合相当于mysql数据库中的表
fib> db.createCollection('teacher')
{ ok: 1 }
fib> show collections
teacher
4.5 插入数据
fib> db.teacher.insert({_id:1,sname:'张三',sage:20})
DeprecationWarning: Collection.insert() is deprecated. Use insertOne, insertMany, or bulkWrite.
{ acknowledged: true, insertedIds: { '0': 1 } }
4.6 查询所有记录
fib> db.teacher.find()
[ { _id: 1, sname: '张三', sage: 20 } ]
4.7 更新操作
fib> db.teacher.update({_id:1},{$set:{sname:'李四'}})
DeprecationWarning: Collection.update() is deprecated. Use updateOne, updateMany, or bulkWrite.
{
acknowledged: true,
insertedId: null,
matchedCount: 1,
modifiedCount: 1,
upsertedCount: 0
}
4.8 查询
4.8.1 查询sname='李四'的记录
fib> db.teacher.find({sname:'李四'})
[ { _id: 1, sname: '李四', sage: 20 } ]
4.8.2 查询指定列sname数据
fib> db.teacher.find({},{sname:1})
[ { _id: 1, sname: '李四' } ]
4.8.3 AND条件查询
fib> db.teacher.find({sname:'李四',sage:20})
[ { _id: 1, sname: '李四', sage: 20 } ]
4.8.4 OR条件查询
fib> db.teacher.find({$or:[{sage:20},{sage:21}]})
[ { _id: 1, sname: '李四', sage: 20 } ]
4.8.5 格式化输出
fib> db.teacher.find().pretty()
[ { _id: 1, sname: '李四', sage: 20 } ]
4.9 删除
4.9.1 删除数据
fib> db.teacher.remove({sname:'李四'})
DeprecationWarning: Collection.remove() is deprecated. Use deleteOne, deleteMany, findOneAndDelete, or bulkWrite.
{ acknowledged: true, deletedCount: 1 }
4.9.2 删除集合
fib> db.teacher.drop()
true
————————————————
相当于我们平常输入mongo的时候,默认连接的是本地的mongo且端口是27017的。当然,使用命令行连接的方式肯定还有其他很多可选参数,大家有需要的可以自己去官网查查资料研究研究。
2
使用mongosh命令
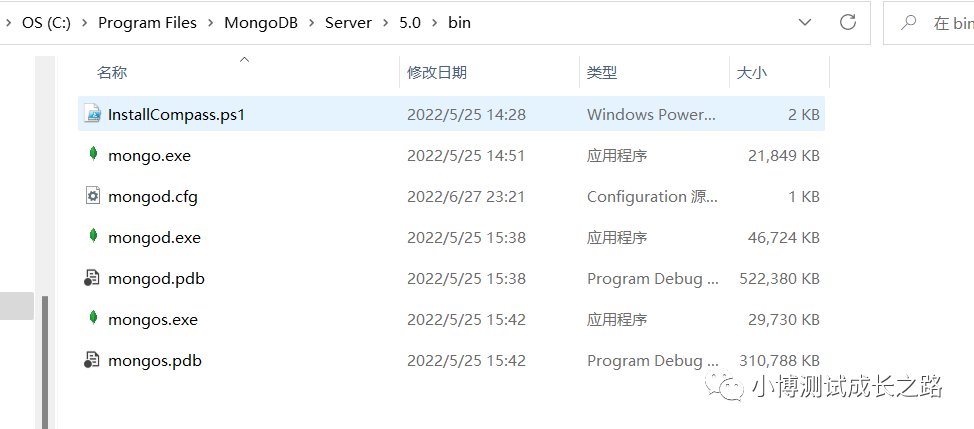
安装后,默认在bin目录下是没有mongosh的命令的:
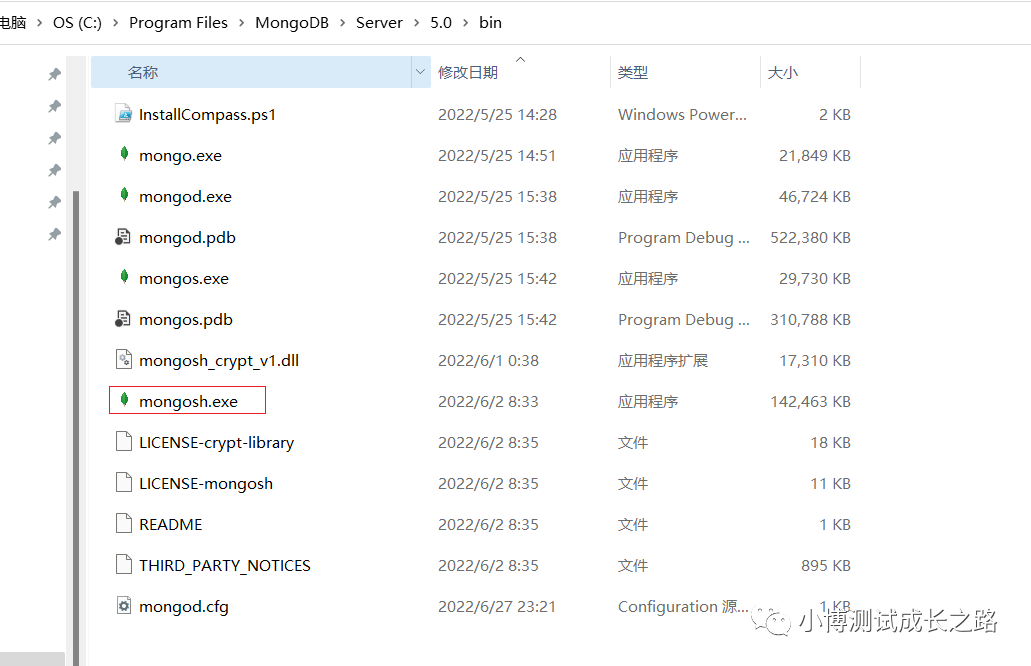
这个时候可以去官网下一个MongoDB Shell,下载地址:
https://www.mongodb.com/try/download/shell
下载完之后,建议安装到bin目录下 ,这样环境变量就不用再重新去额外配置了,安装完之后,我们再看一下bin目录下的内容:
安装好之后,连接本地默认的数据库的话,也可以使用mongosh的命令直接连接:
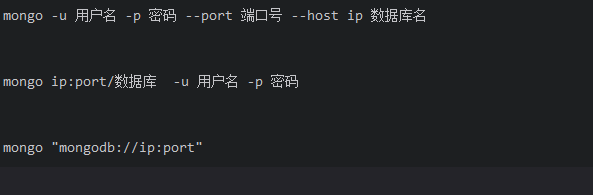
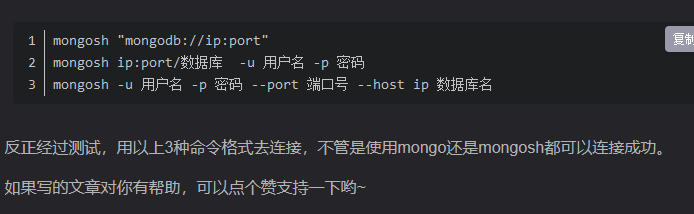
要连接其他服务器的数据库时,可以使用下面的命令:
mongosh "mongodb://ip:port"
mongosh ip:port/数据库 -u 用户名 -p 密码
mongosh -u 用户名 -p 密码 --port 端口号 --host ip 数据库名

 浙公网安备 33010602011771号