openGauss2.0安装教程
缘起:本人有缘参加了华为智能数据库课程,因在完成数据库课设设计的第一步,定义表的时候,意外发现openGauss不支持外键约束。无奈下,想通过各种方式(存储过程、触发器)来实现外键约束,在搜寻资料途中,发现openGauss2.0开始支持外键约束,故有了这篇文章。
本教程需要的环境为openEuler aarch64,其他版本可稍做参考。
注意:安装openEuler2.0前需要安装libnsl软件包,否则会报错。
配置yum源
首先我们对刚租下来的服务器先配置yum
mkdir /etc/yum.repos.d/bak
mv /etc/yum.repos.d/*.repo  /etc/yum.repos.d/bak/
wget -O /etc/yum.repos.d/openEuler_aarch64.repo https://repo.huaweicloud.com/repository/conf/openeuler_aarch64.repo
yum clean all

如果出现出错可以在华为镜像找到适合自己的镜像
安装依赖包
yum install -y bzip2 libaio-devel flex bison ncurses-devel glibc-devel patch readline-devel libnsl
关闭安全设置
## 关闭防火墙
systemctl status firewalld
systemctl disable firewalld.service
systemctl stop firewalld.service

 ## 关闭SELinux
sed -i '/SELINUX=/d' /etc/selinux/config
echo "SELINUX=disabled" >> /etc/selinux/config
cat /etc/selinux/config|grep -v ^#|grep -v '^$'
创建普通用户和目录,并授权
groupadd -g 1001 dbgrp
useradd -u 2001 -g dbgrp omm
mkdir -p /opt/software/openGauss
chown -R omm:dbgrp /opt
下载解压安装单机openGauss
su - omm
cd /opt/software/openGauss/
wget https://opengauss.obs.cn-south-1.myhuaweicloud.com/2.0.0/arm/openGauss-2.0.0-openEuler-64bit.tar.bz2
tar -jxf openGauss-2.0.0-openEuler-64bit.tar.bz2

## 一键式脚本安装
cd /opt/software/openGauss/simpleInstall/
sh install.sh -w Bigdata@123  -p 26000
说明: - -w:初始化数据库密码(gs_initdb指定),安全需要必须设置。 - -p:指定的openGauss端口号, 如不指定,默认为5432。 - -h|–help 打印使用说明。 - 安装后,数据库的名称为sgnode。 - 安装后,数据库目录安装路径/opt/software/openGauss/data/single_node,其中/opt/software/openGauss为解压包路径,data/single_node为新创建的数据库节点目录。

注意,由于我们的openEuler为鲲鹏架构,aarch64,因此我们下载openeuler_aarch64版本

安装过程中会提示是否创建demo数据库,这里随意,我输入了yes

到这一步恭喜你,基本安装成功了
You can start or stop the database server using:
    gs_ctl start|stop|restart -D $GAUSSHOME/data/single_node -Z single_node
以上的提示是我们日后开启、关闭、重启数据时输入的命令。
配置数据库远程连接
我们进入数据库后,首先需要创建一个database和一个用户供我们远程连接使用。
输入以下命令进入数据库
gsql -d postgres -p 26000 -r
创建数据库和用户
create database test;
create user chris password 'bigdata@123';
# 为了避免不必要的麻烦,建议给用户赋予所有权限
GRANT ALL PRIVILEGES TO chris;
配置远程连接
关闭防火墙
配置远程连接需要关闭防火墙,但是如果按照本教程进行,可以省略这一步
此操作须在root下进行
systemctl status firewalld
systemctl stop firewalld
systemctl disable firewalld
setenforce 0
sed -i 's/SELINUX=enforcing/SELINUX=disabled/g' /etc/selinux/config
切换omm用户
su - omm
配置pg_hba.conf
vim /opt/software/openGauss/data/single_node/pg_hba.conf
在pg_hba.conf中添加以下内容
host all all 0.0.0.0/0 md5

配置postgresql.conf
vim /opt/software/openGauss/data/single_node/postgresql.conf
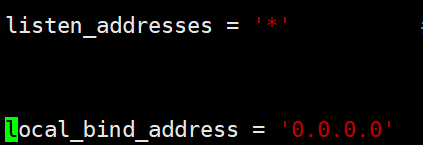
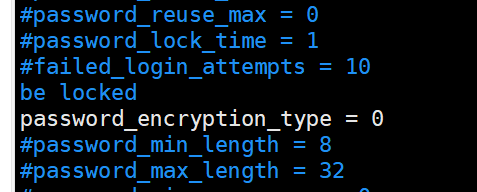
我们在文件中找到相应的行,对其取消注释或修改
listen_addresses = '*'
local_bind_address = '0.0.0.0'
password_encryption_type = 0
重启数据库
# 重启数据库
gs_ctl restart -D $GAUSSHOME/data/single_node -Z single_node
修改用户密码
登录数据库须切换omm用户,在omm用户下
gsql -p 26000 -d test -U chris -W bigdata@123 -r
在数据库的命令行输入以下命令修改密码
test=> ALTER USER chris identified by 'admin@123' replace 'bigdata@123';

提示用了MD5进行加密,成功。
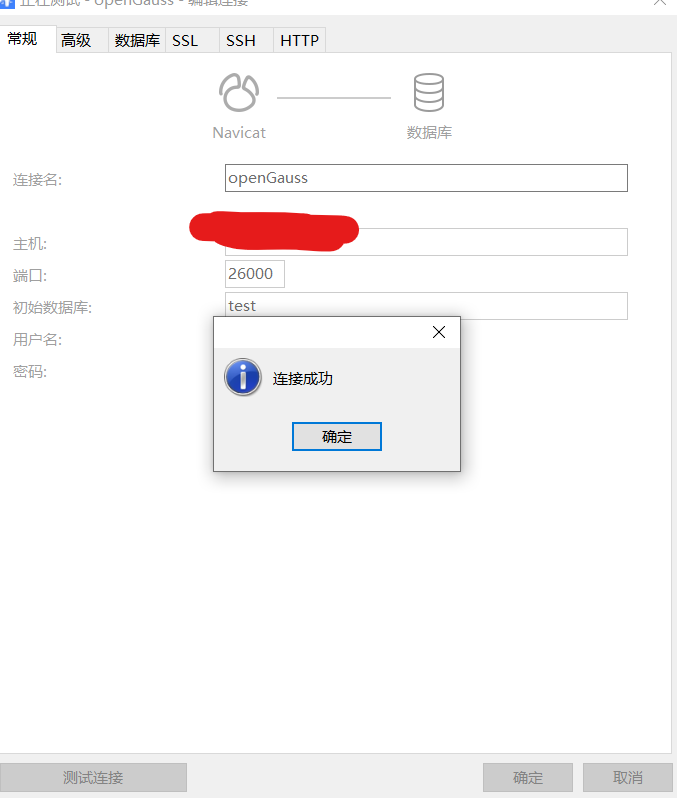
Navicat远程连接
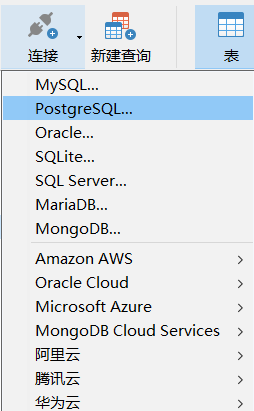
左上角连接选择PostgreSQL连接
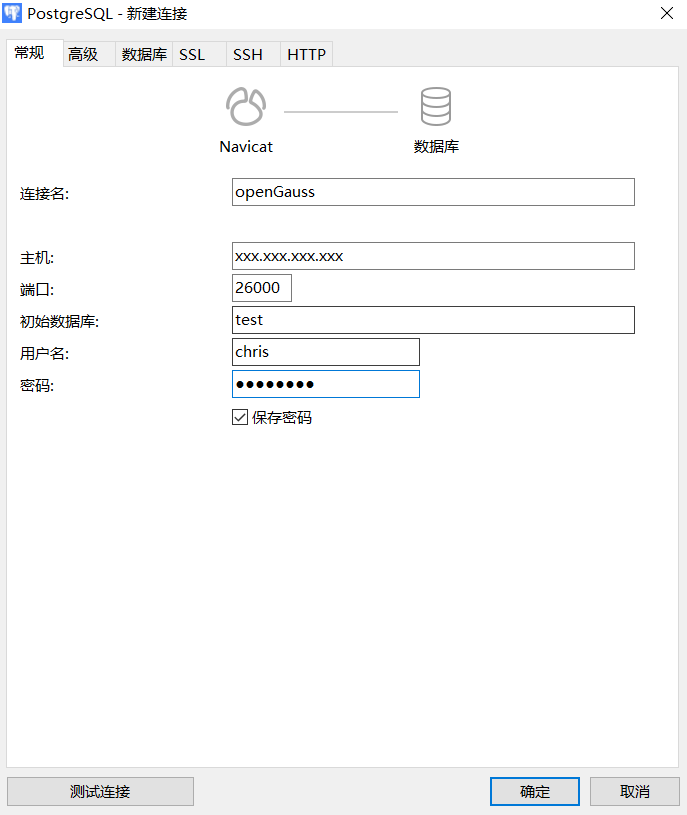
按测试连接,来测试是否能成功连接
附:openGauss外键约束语法
drop table if exists employee;
create table employee(
	e_id char(10) not null primary key,
	e_name varchar(50) not null
)

drop table if exists company;
create table company(
	c__id char(10) not null primary key,
	e_id char(10) not null references employee(e_id),
	c_name varchar(50) not null
)
Python 远程连接
python远程连接使用的是psycopg2
如果电脑没有安装psycopg2,可以才命令行使用pip install psycopg2来安装。
使用方法
import psycopg2
conn = psycopg2.connect(dbname="test",
                            user="chris",
                            password="admin@123",
                            host="xxx.xxx.xxx.xxx",
                            port="26000")
conn.set_client_encoding('utf8')
cur = conn.cursor()

# 创建表
cur.execute('''CREATE TABLE COMPANY
       (ID INT PRIMARY KEY     NOT NULL,
       NAME           TEXT    NOT NULL,
       AGE            INT     NOT NULL,
       ADDRESS        CHAR(50),
       SALARY         REAL);''')
conn.commit()

# 插入数据
cur.execute("INSERT INTO COMPANY (ID,NAME,AGE,ADDRESS,SALARY) \
      VALUES (1, 'Paul', 32, 'California', 20000.00 )");
cur.execute("INSERT INTO COMPANY (ID,NAME,AGE,ADDRESS,SALARY) \
      VALUES (2, 'Allen', 25, 'Texas', 15000.00 )");
cur.execute("INSERT INTO COMPANY (ID,NAME,AGE,ADDRESS,SALARY) \
      VALUES (3, 'Teddy', 23, 'Norway', 20000.00 )");
cur.execute("INSERT INTO COMPANY (ID,NAME,AGE,ADDRESS,SALARY) \
      VALUES (4, 'Mark', 25, 'Rich-Mond ', 65000.00 )");
conn.commit()

# 数据查询
cur.execute("SELECT id, name, address, salary  from COMPANY")
rows = cur.fetchall()
for row in rows:
   print("ID = ", row[0])
   print("NAME = ", row[1])
   print("ADDRESS = ", row[2])
   print("SALARY = ", row[3])

conn.close()
本文作者:ChrisNg
本文链接:https://www.cnblogs.com/chrisng/p/16324861.html
版权声明:本作品采用知识共享署名-非商业性使用-禁止演绎 2.5 中国大陆许可协议进行许可。


【推荐】国内首个AI IDE,深度理解中文开发场景,立即下载体验Trae
【推荐】编程新体验,更懂你的AI,立即体验豆包MarsCode编程助手
【推荐】抖音旗下AI助手豆包,你的智能百科全书,全免费不限次数
【推荐】轻量又高性能的 SSH 工具 IShell:AI 加持,快人一步