nginx总结
使用auth_basic控制访问
- nginx代理的网站,直接访问如果需要添加安全性,如需要输入用户名+密码才能访问页面,可以通过nginx的auth_baisc配置来实现
检查htpasswd
一般nginx的安装之后会自带或者nginx容器镜像自带
root@ea6255db9f51:/config/nginx/site-confs# htpasswd
Usage:
        htpasswd [-cimBdpsDv] [-C cost] passwordfile username
        htpasswd -b[cmBdpsDv] [-C cost] passwordfile username password

        htpasswd -n[imBdps] [-C cost] username
        htpasswd -nb[mBdps] [-C cost] username password
 -c  Create a new file.
 -n  Don't update file; display results on stdout.
 -b  Use the password from the command line rather than prompting for it.
 -i  Read password from stdin without verification (for script usage).
 -m  Force MD5 encryption of the password (default).
 -B  Force bcrypt encryption of the password (very secure).
 -C  Set the computing time used for the bcrypt algorithm
     (higher is more secure but slower, default: 5, valid: 4 to 17).
 -d  Force CRYPT encryption of the password (8 chars max, insecure).
 -s  Force SHA encryption of the password (insecure).
 -p  Do not encrypt the password (plaintext, insecure).
 -D  Delete the specified user.
 -v  Verify password for the specified user.
On other systems than Windows and NetWare the '-p' flag will probably not work.
The SHA algorithm does not use a salt and is less secure than the MD5 algorithm.
如果没有htpasswd,可以通过安装httpd-tools来安装
sudo yum install httpd-tools
生成.htpasswd文件
htpasswd -c /config/nginx/.htpasswd chq
之后提示输入密码,输入两次密码即可,查看生成的文件:
root@ea6255db9f51:/config/nginx/site-confs# cat /config/nginx/.htpasswd
chq:$apr1$ixyuvJF1$XQyqpMz96JDYHFWfCqB0U0
可以看到是加密的,修改nginx配置:
server {
    listen 19091 default_server;
    listen [::]:19091 default_server;

    #listen 443 ssl http2 default_server;
    #listen [::]:443 ssl http2 default_server;

    server_name _;

    index index.html index.htm index.php;

    location / {
        # enable for basic auth
        auth_basic "Restricted";
        auth_basic_user_file /config/nginx/.htpasswd;
        proxy_pass http://192.168.2.101:3002;

        proxy_set_header Host $host;
        proxy_set_header X-Real-IP $remote_addr;
        proxy_set_header X-Forwarded-For $proxy_add_x_forwarded_for;
    }
}
这里主要添加了auth_basic和auth_basic_user_file配置
验证效果
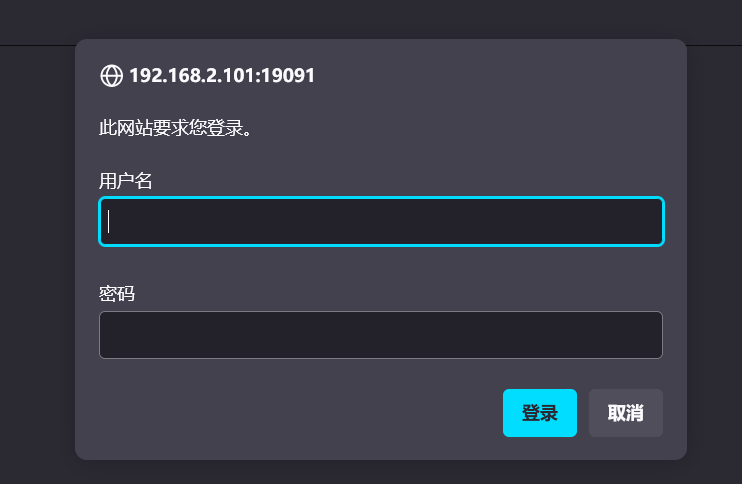
之后在浏览器输入网址,重新打开网页,会看到如下提示:

输入刚刚设置用户名和密码,进入了网页,说明配置auth_basic成功了。


