Windows下HG服务器的搭建
1.环境和所需工具安装
1. 安装python-2.7.9.exe
2. 安装mercurial-3.2.3.win32-py2.7.exe
3. 安装mercurial-3.2.3-x86.msi
4. 安装tortoisehg-3.3.2-x64或者tortoisehg-3.3.2-x86
5. 安装windows iis
2.操作步骤
1. 搭建网站,新建文件夹D:/hgweb
2. 在 IIS 中新建一个网站,名称是 hgweb,物理路径指向上一步的D:/hgweb
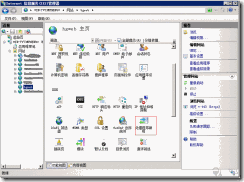
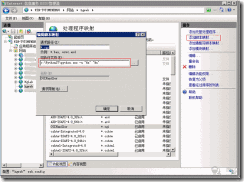
3. 在 IIS 中选择刚才新建的网站,右侧的功能视图中选择 “处理程序映射”,如下图
IIS 7.0以上的写法
IIS 6.0的写法
4. 在D:\hgweb下新建一个文本文件, 重命名为test.cgi (注意连同扩展名一起修改) , 编辑其内容如下:
print 'Status: 200 OK'
print 'Content-Type: text/html'
print '<html><body><h1>It Works!</h1></body></html>'
保存, 然后在IIS中浏览test.cgi:
url: http://localhost/hg/test.cgi
界面:
如果能看到上述界面, 说明初期配置成功,继续.
如果提示HTTP 错误 404.2 - Not Found
由于 Web 服务器上的“ISAPI 和 CGI 限制”列表设置,无法提供您请求的页面
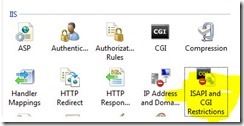
打开IIS管理器, 定位到服务器级别, 在其功能列表中找到ISAPI and CGI restrictions, 如图:
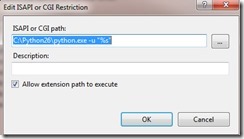
双击打开, 里面必须存在如下图所示的行:
如果不存在则按点击右侧的”add”, 按下图填写:
如果已存在, 但是被禁用, 将其启用即可.
完成后重试打开test.cgi, 应该可以看到it works字样.
5. 在D:\hgweb目录下新建一个文本文件, 重命名为hgweb.cgi, 编辑其内容为以下几句话:
|
#!/usr/bin/env python # # An example hgweb CGI script, edit as necessary # See also http://mercurial.selenic.com/wiki/PublishingRepositories # Path to repo or hgweb config to serve (see 'hg help hgweb') config = "D:/hgweb/hgweb.config" # Uncomment and adjust if Mercurial is not installed system-wide: #import sys; sys.path.insert(0, "/path/to/python/lib") # Uncomment to send python tracebacks to the browser if an error occurs: #import cgitb; cgitb.enable() from mercurial import demandimport; demandimport.enable() from mercurial.hgweb import hgweb, wsgicgi application = hgweb(config) wsgicgi.launch(application) |
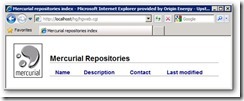
然后再在D:\Mercurial下新建一个文本文件, 重命名为hgweb.config, 不需要写入任何内容, 即可尝试浏览http://localhost:8080 /hgweb.cgi . 应该能看到如下界面:
6. 修改hgweb.config
|
[paths] /Repositories/ = E:/myweb/* [web] baseurl = /hgweb.cgi allow_push = * push_ssl = false |
7. 创建代码仓库
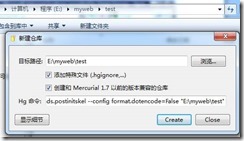
在D:/hgweb下面创建test文件夹,在文件夹中执行创建hg create
再次访问hgweb.cgi,可以看到如下图的画面:
8. 同步
在要同步的电脑上输入hg clone
9. 提交代码
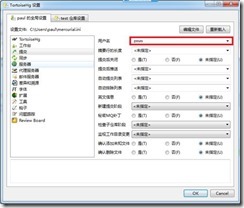
修改文件后,在设置中将用户名设置为提交用户名

