SpringBoot源码学习(零) 搭建Springboot源码调试环境
准备环境
若是想将git源码修改记录上传到github,需要将springboot源码fork到本人gitbub。此文是直接下载源码到本地的。
- git
- jdk1.8+
- gradle的压缩包
- maven,需配置阿里云仓库
- idea 2020.2.1
Springboot下载源码
源码地址
https://github.com/spring-projects/spring-boot
克隆源码
git clone -b 2.2.x https://github.com/spring-projects/spring-boot.git
开始构建
打开idea,【File】-->【Open...】,打开刚才拉取的Springboot源码。

检查环境
选择【File】->【project Structure…】
- 检查
Project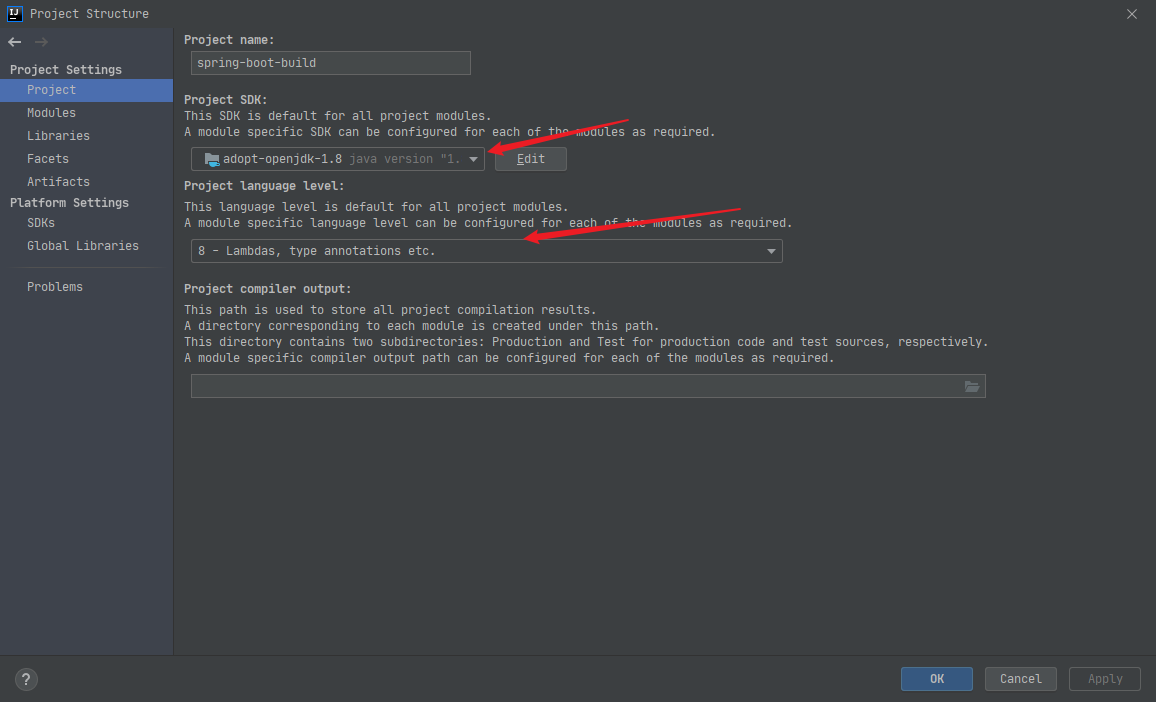
- 检查
Model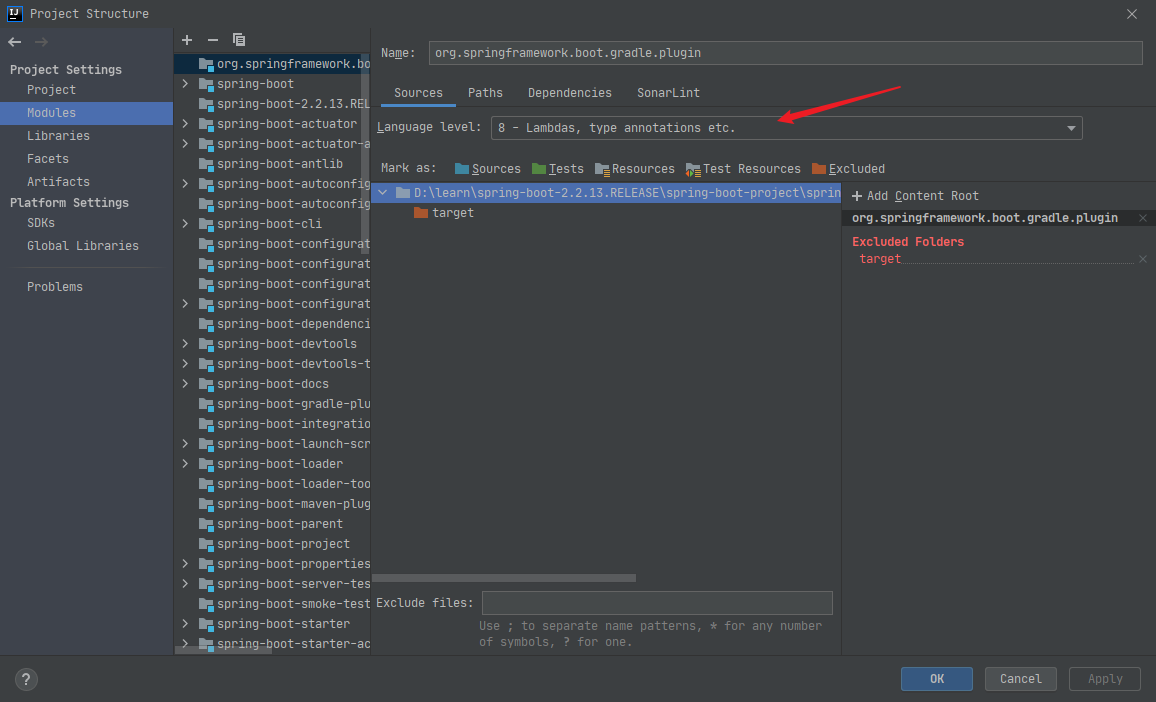
- 检查
SDKs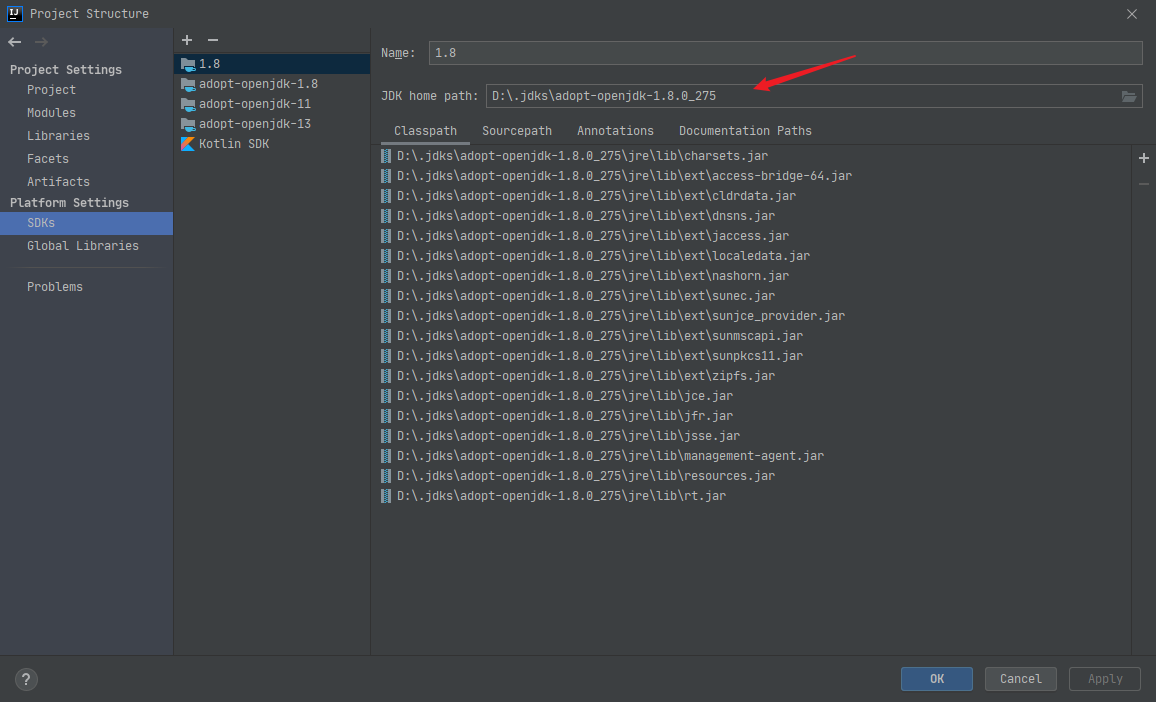
修改gradle相关配置
下载Gradle
下载地址: https://gradle.org/next-steps/?version=5.6.4&format=bin
修改配置
修改
spring-boot-project\spring-boot-tools\spring-boot-gradle-plugin\gradle\wrapper\gradle-wrapper.properties文件distributionUrl属性。
distributionUrl=file:///D:/gradle-5.6.4/gradle-5.6.4-bin.zip
注意: gradle版本,Springboot依赖spring5.2.12.RELEASE,spring依赖gradle-5.6.4-bin.zip,选择其他版本可能会导致不兼容问题。可参考此文档: https://docs.gradle.com/enterprise/compatibility
修改
spring-boot-project\spring-boot-tools\spring-boot-gradle-plugin\build.gradle文件。
buildscript {
   repositories {
      // 加上阿里云仓库, 记得将此行注释删除
      maven { url 'https://maven.aliyun.com/nexus/content/groups/public/' }
      maven { url 'https://maven.aliyun.com/nexus/content/repositories/jcenter' }
      maven { url "https://repo.spring.io/plugins-release" }
      mavenLocal()
      mavenCentral()
   }
   dependencies {
      classpath("io.spring.javaformat:spring-javaformat-gradle-plugin:0.0.15")
   }
}

repositories {
   // 加上阿里云仓库, 记得将此行注释删除
   maven { url 'https://maven.aliyun.com/nexus/content/groups/public/' }
   maven { url 'https://maven.aliyun.com/nexus/content/repositories/jcenter' }
   maven { url "https://repo.spring.io/plugins-release" }
   mavenLocal()
   mavenCentral()
}
源码编译
编译源码时测试及清理
找到
Spring Boot Build(root)
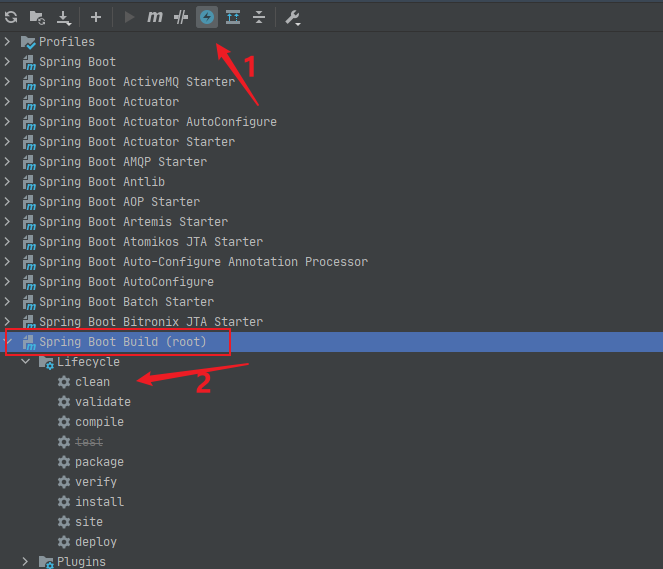
开始编译源码

此时会抛出异常Run spring-javaformat:apply to fix.
解决方案: 控制台执行mvn命令
mvn spring-javaformat:apply
关闭代码审查
编辑spring-boot-project\spring-boot-parent\pom.xml, 将<disable.checks>false</disable.checks>改为<disable.checks>true</disable.checks>
删除nohttp审查
- 删除
src下checkstyle文件夹 - 删除
pom.xml中
<plugin>
   <groupId>org.apache.maven.plugins</groupId>
   <artifactId>maven-checkstyle-plugin</artifactId>
   <version>3.1.0</version>
   <dependencies>
      <dependency>
         <groupId>com.puppycrawl.tools</groupId>
         <artifactId>checkstyle</artifactId>
         <version>8.29</version>
      </dependency>
      <dependency>
         <groupId>io.spring.javaformat</groupId>
         <artifactId>spring-javaformat-checkstyle</artifactId>
         <version>${spring-javaformat.version}</version>
      </dependency>
   </dependencies>
   <executions>
      <execution>
         <id>checkstyle-validation</id>
         <phase>validate</phase>
         <configuration>
            <skip>${disable.checks}</skip>
            <configLocation>src/checkstyle/checkstyle.xml</configLocation>
            <suppressionsLocation>src/checkstyle/checkstyle-suppressions.xml</suppressionsLocation>
            <includeTestSourceDirectory>true</includeTestSourceDirectory>
            <propertyExpansion>main.basedir=${main.basedir}</propertyExpansion>
            <encoding>UTF-8</encoding>
         </configuration>
         <goals>
            <goal>check</goal>
         </goals>
      </execution>
      <execution>
         <id>nohttp-checkstyle-validation</id>
         <phase>validate</phase>
         <configuration>
            <skip>${disable.checks}</skip>
            <configLocation>src/checkstyle/nohttp-checkstyle.xml</configLocation>
            <suppressionsLocation>src/checkstyle/nohttp-checkstyle-suppressions.xml</suppressionsLocation>
            <propertyExpansion>main.basedir=${main.basedir}</propertyExpansion>
            <encoding>UTF-8</encoding>
            <sourceDirectories>${basedir}</sourceDirectories>
            <includes>**/*</includes>
            <excludes>**/.git/**/*,**/target/**/,**/.flattened-pom.xml,**/*.class,**/spring-boot-gradle-plugin/build/**,**/spring-boot-gradle-plugin/bin/**</excludes>
         </configuration>
         <goals>
            <goal>check</goal>
         </goals>
         <inherited>false</inherited>
      </execution>
   </executions>
</plugin>
安装到本地仓库

给源码添加注释之后,记得重新install(按需install)下,要么debbug调试时会出现与源码行数对应不上的情况。
注意:关闭idea自动导包功能, 此功能会自动合并包,会被spring-javaformat插件拦截导致编译失败。
效果图

Spring源码下载
源码地址
https://github.com/spring-projects/spring-framework
克隆源码
git clone -b 5.2.x https://github.com/spring-projects/spring-framework.git
注意: Springboot依赖于Spring的5.2.12.RELEASE版本。
开始构建
打开idea,【File】-->【Open...】,打开刚才拉取的Spring源码。

修改gradle相关配置
修改配置
修改
spring-framework-5.2.12.RELEASE\gradle\wrapper\gradle-wrapper.properties文件distributionUrl属性。
distributionUrl=file:///D:/gradle-5.6.4/gradle-5.6.4-bin.zip
修改
spring-framework-5.2.12.RELEASE\buildSrc\build.gradle文件
repositories {
   // 加上阿里云仓库及本地仓库, 记得将此行注释删除
   maven { url 'https://maven.aliyun.com/nexus/content/groups/public/' }
   maven { url 'https://maven.aliyun.com/nexus/content/repositories/jcenter' }
   maven { url "https://repo.spring.io/plugins-release" }
   mavenLocal()
   mavenCentral()
   gradlePluginPortal()
}
修改
spring-framework-5.2.12.RELEASE\build.gradle文件
repositories {
   // 加上阿里云仓库及本地仓库, 记得将此行注释删除
   maven { url 'https://maven.aliyun.com/nexus/content/groups/public/' }
   maven { url 'https://maven.aliyun.com/nexus/content/repositories/jcenter' }
   maven { url "https://repo.spring.io/plugins-release" }
   mavenLocal()
   mavenCentral()
   maven { url "https://repo.spring.io/libs-spring-framework-build" }
}
修改
spring-framework-5.2.12.RELEASE\settings.gradle文件
pluginManagement {
   repositories {
      // 加上阿里云仓库及本地仓库, 记得将此行注释删除
      maven { url 'https://maven.aliyun.com/nexus/content/groups/public/' }
      maven { url 'https://maven.aliyun.com/nexus/content/repositories/jcenter' }
      mavenLocal()
      mavenCentral()
      gradlePluginPortal()
      maven { url 'https://repo.spring.io/plugins-release' }
   }
}
刷新maven依赖
排除依赖异常
Could not find javax.servlet-api.jar (javax.servlet:javax.servlet-api:4.0.1).
Searched in the following locations:
    file:/E:/.m2/repository/javax/servlet/javax.servlet-api/4.0.1/javax.servlet-api-4.0.1.jar
解决方案:按照路径删除此依赖重新刷新maven依赖。出现其他依赖包问题,重复此操作。
排除git异常
org.gradle.process.internal.ExecException: Process 'command 'git'' finished with non-zero exit value 128
解决方案: 添加git commit
排除spring-context:test异常
Execution failed for task ':spring-context:test'. > There were failing tests. See the report at: fill
解决方案: import-into-idea.md中已经提示,需先编译./gradlew :spring-oxm:compileTestJava模块,windows中执行gradlew :spring-oxm:compileTestJava。
_Within your locally cloned spring-framework working directory:_

1. Precompile `spring-oxm` with `./gradlew :spring-oxm:compileTestJava`
2. Import into IntelliJ (File -> New -> Project from Existing Sources -> Navigate to directory -> Select build.gradle)
3. When prompted exclude the `spring-aspects` module (or after the import via File-> Project Structure -> Modules)
4. Code away
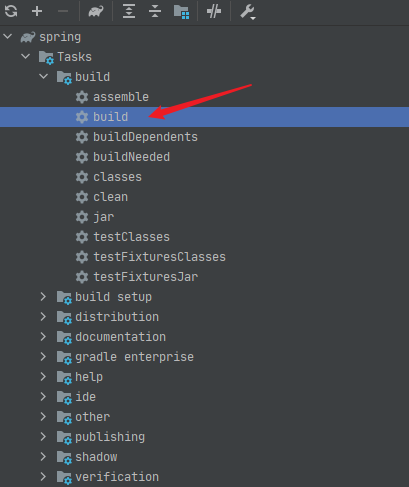
编译源码
build
删除代码审查
- 删除
spring-framework-5.2.12.RELEASE\src\nohttp文件夹。 - 删除
spring-framework-5.2.12.RELEASE\src\checkstyle文件夹。 - 删除
spring-framework-5.2.12.RELEASE\build.gradle文件中代码审查相关配置。
apply plugin: "checkstyle"
checkstyle {
   toolVersion = "8.38"
   configDir = rootProject.file("src/checkstyle")
}
checkstyle {
   toolVersion = "8.38"
   configDir = rootProject.file("src/checkstyle")
}
checkstyle("io.spring.javaformat:spring-javaformat-checkstyle:0.0.15")
id 'io.spring.nohttp' version '0.0.5.RELEASE'
apply plugin: "io.spring.nohttp"
nohttp {
   source.exclude "**/test-output/**"
   allowlistFile = project.file("src/nohttp/allowlist.lines")
   def rootPath = file(rootDir).toPath()
   def projectDirs = allprojects.collect { it.projectDir } + "${rootDir}/buildSrc"
   projectDirs.forEach { dir ->
      [ 'bin', 'build', 'out', '.settings' ]
         .collect { rootPath.relativize(new File(dir, it).toPath()) }
         .forEach { source.exclude "$it/**" }
      [ '.classpath', '.project' ]
         .collect { rootPath.relativize(new File(dir, it).toPath()) }
         .forEach { source.exclude "$it" }
   }
}
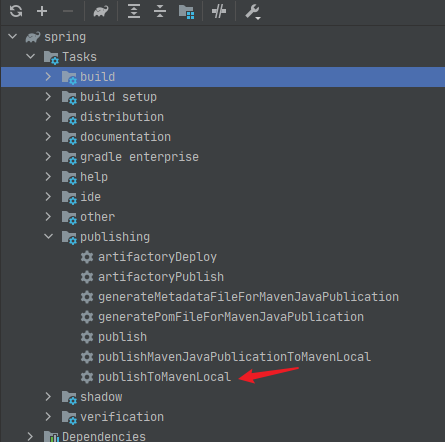
发布到本地maven仓库
关联源码
创建read-spring阅读源码时,需要关联源码,添加注释。添加注释后,需要重新打包发布加注释代码。按需关联。


