WPF入门教程系列二十八 ——DataGrid使用示例MVVM模式(5)
添加ClickAction的实现
通过上面两步,我们将准备工具全部做完了,现在需要在.xmal文件中给Button按钮的Command属性绑定了一个方法叫做ClickSaveAction,DataGrid控件的SelectItem绑定MainWindowVM(ViewModel)中的AreaVM属性。
1. 在Visual Studio 2022中打开MainWindows.xmal文件。
2. 对DataGrid的SelectItem进行了数据绑定。具体代码如下:
 <DataGrid x:Name="gridArea" Grid.Row="1" d:ItemsSource="{d:SampleData ItemCount=5}"
AutoGenerateColumns="False"
 HorizontalAlignment="Left" VerticalAlignment="Top" SelectedItem="{Binding Path=AreaVM,
                      Mode=TwoWay,UpdateSourceTrigger=PropertyChanged}">
3.将ClickSaveCommand绑定到Button按钮的Command属性上,这个ClickSaveCommand指令将代替保存按钮的click事件,将数据保存到数据库。具体代码如下:
<Button x:Name="btnSave" Height="22" Width="120" Command="{Binding ClickSaveAction}" >保存</Button>
注意:Command属性仅仅作为Click行为的绑定,其他行为,如鼠标移入、移出等事件,要使用另外的MVVM方式进行绑定。
4.MainWindow.xmal的全部代码如下:
<Window x:Class="WpfGridDemo.NET7.MainWindow"
        xmlns="http://schemas.microsoft.com/winfx/2006/xaml/presentation"
        xmlns:x="http://schemas.microsoft.com/winfx/2006/xaml"
        xmlns:d="http://schemas.microsoft.com/expression/blend/2008"
        xmlns:mc="http://schemas.openxmlformats.org/markup-compatibility/2006"
        xmlns:local="clr-namespace:WpfGridDemo.NET7"
        mc:Ignorable="d"
        Title="MainWindow" Height="600" Width="960">
    <Grid>
        <Grid.RowDefinitions>
            <RowDefinition Height="100"></RowDefinition>
            <RowDefinition Height="*"></RowDefinition>
            <RowDefinition Height="25"></RowDefinition>
        </Grid.RowDefinitions>

        <DataGrid x:Name="gridArea" Grid.Row="1" d:ItemsSource="{d:SampleData ItemCount=5}"
AutoGenerateColumns="False"
HorizontalAlignment="Left" VerticalAlignment="Top" SelectedItem="{Binding Path=AreaVM,
                                        Mode=TwoWay,UpdateSourceTrigger=PropertyChanged}">

            <DataGrid.Columns>
                <DataGridComboBoxColumn Header="城市" Width="120"  x:Name="cboCity"
ClipboardContentBinding="{x:Null}" SelectedValuePath="Code"
SelectedValueBinding="{Binding Path=CityCode,UpdateSourceTrigger=PropertyChanged}"
DisplayMemberPath="Name" SelectedItemBinding="{x:Null}" />

               <DataGridTextColumn Header="县区镇" Width="*" Binding="{Binding Name}"
ClipboardContentBinding="{x:Null}"/>
                <DataGridTextColumn Header="邮编" Width="100"  Binding="{Binding Code}"
 ClipboardContentBinding="{x:Null}"/>

                <DataGridTextColumn Header="创建时间" Width="160" Binding="{Binding Created}"
 ClipboardContentBinding="{x:Null}"/>

                <DataGridTextColumn Header="更新时间" Width="160" Binding="{Binding Updated}"
 ClipboardContentBinding="{x:Null}"/>
            </DataGrid.Columns>
        </DataGrid>
        <WrapPanel Grid.Row="2">
     <Button  x:Name="btnRefresh"  Height="22" Width="120" Click="btnRefresh_Click">刷新</Button>
 <Button  x:Name="btnSave" Height="22" Width="120" Command="{Binding ClickSaveAction}" >保存</Button>

        </WrapPanel>
    </Grid>
</Window>
5.在Visual Studio 2022中按F5键,启动WPF应用程序,使用鼠标左键点击“刷新”按钮,在数据呈现之后,使用鼠标左键选中DataGrid中的一条记录,进行修改,然后点击“保存”按钮。如下图。 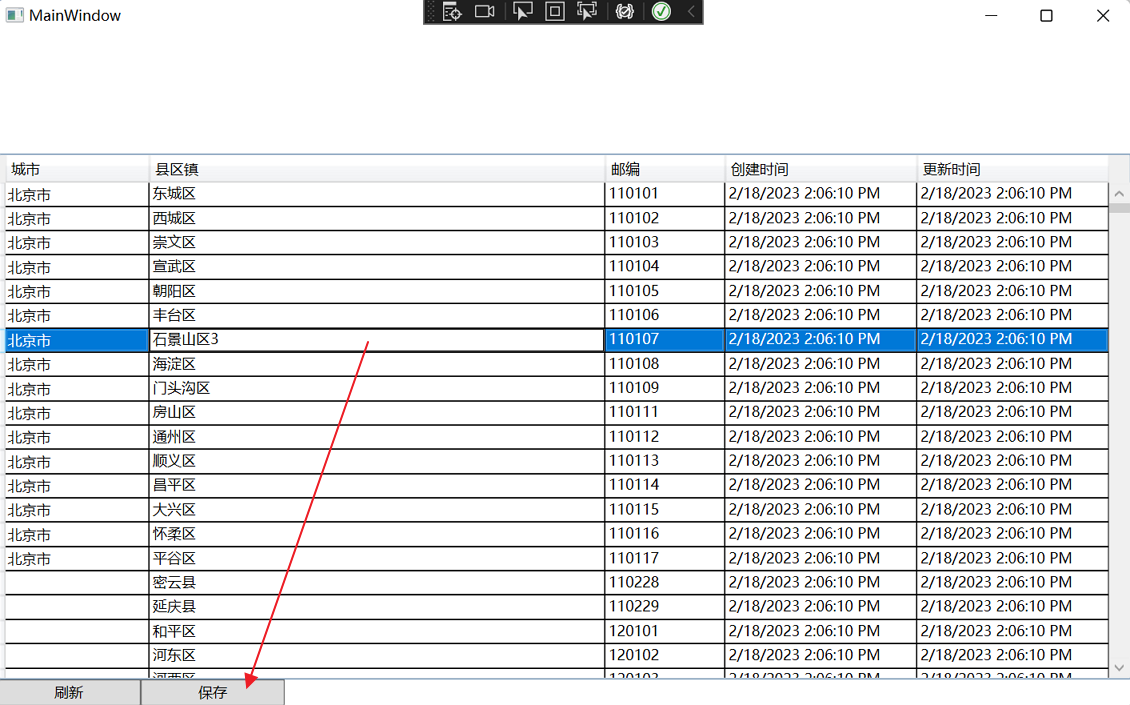
6. 使用鼠标左键点击“刷新”按钮,在数据呈现之后,我们发现,刚才所做的修改,已经保存到数据库了。如下图。 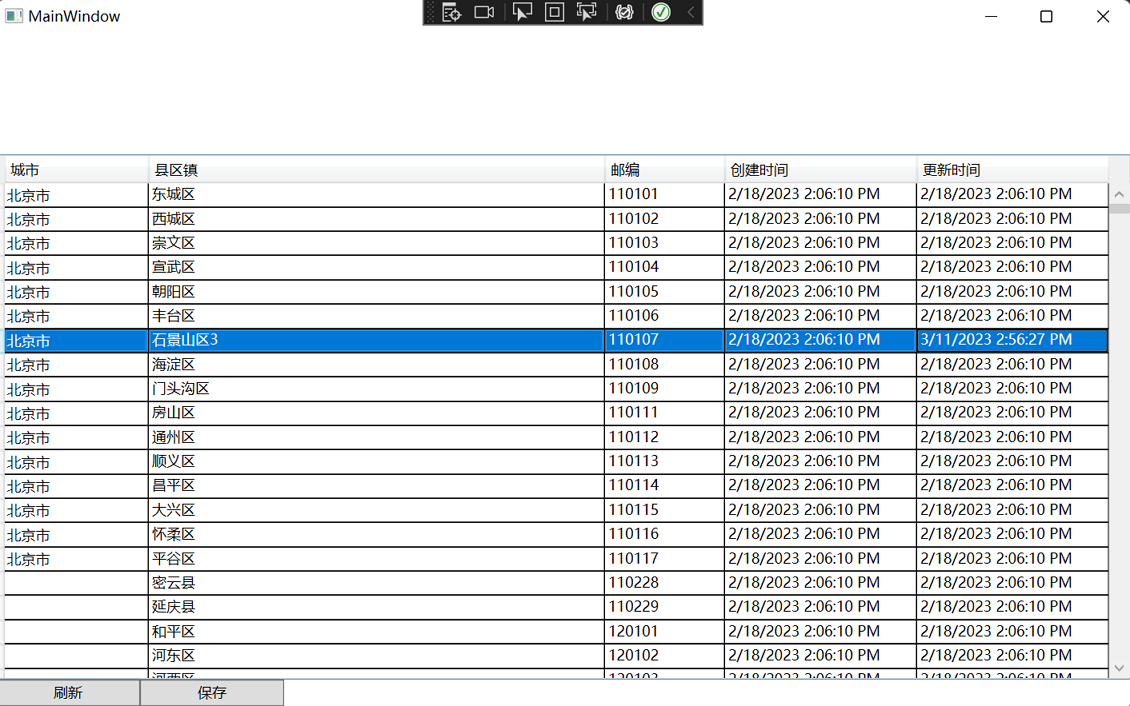
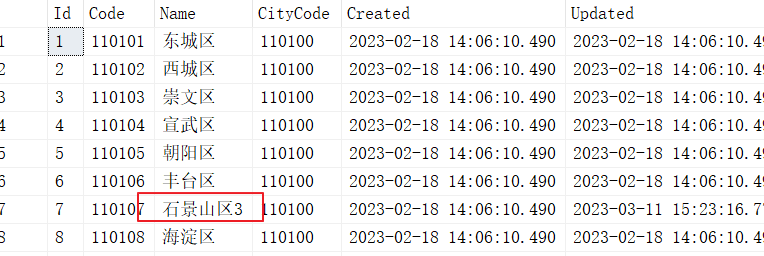
数据已经保存到数据库,如下图。
7.如果我们要让保存按钮禁用,可以将执行的方法返回为False,具体代码如下:
        /// <summary>

        /// 命令是否可以执行
        /// </summary>
        /// <returns></returns>
        bool CanSaveExecute()
        {
            return false;
        }
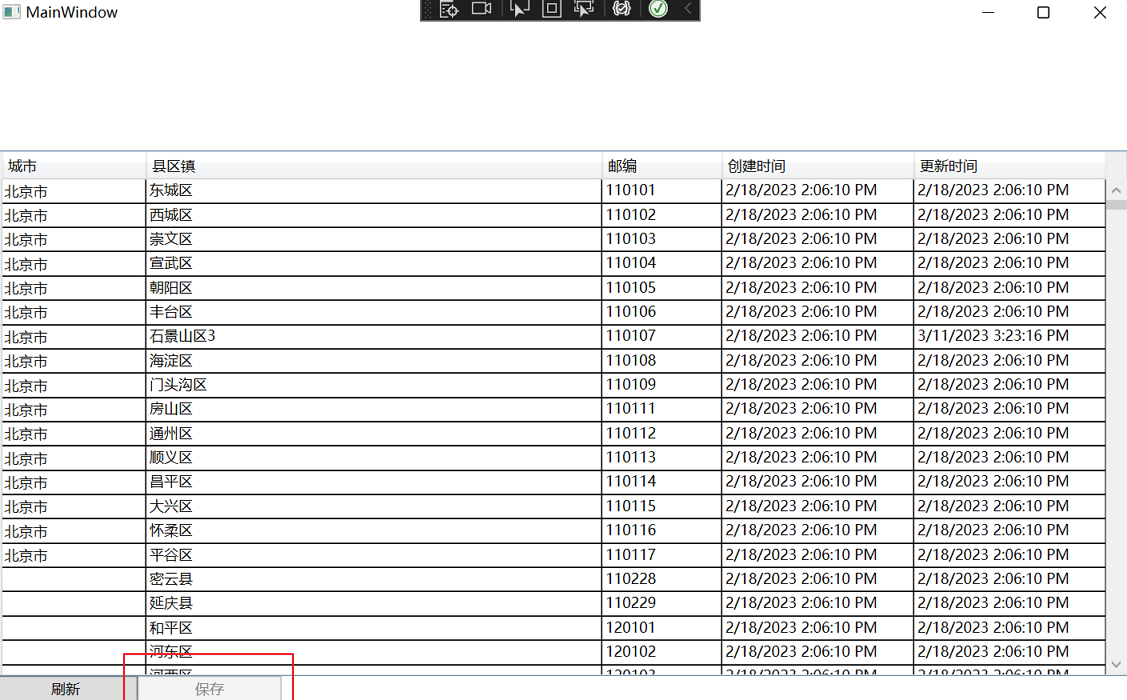
8. 在Visual Studio 2022中按F5键,启动WPF应用程序,能够看到,界面中按钮已经是禁用状态了,我们绑定的这个命令是否可以执行,是直接影响到按钮能否被点击的!这个值会直接作用在按钮的IsEnabled上。如下图。
七、ComboBox下拉事件转为Command命令
用于 DataGridComboBoxColumn 显示有一组项可供选择的数据,例如枚举。 DataGridComboBoxColumn 允许用户从下拉列表中选择项。本文通过将Command命令绑定到comboBox的SelectionChanged事件上,实现自动刷新用户选择的省份的相应城市信息。
在WPF中默认的Command绑定往往不能满足覆盖所有的事件,例如ComboBox的SelectionChanged事件,DataGrid的SelectionChanged事件等等,这时就可以用到一个扩展库,来实现事件绑定Command。
微软从WPF 4.0开始,引入了一个比较实用的库——Interactions,这个库主要是通过附加属性来对UI控件注入一些新的功能,除了内置了一系列比较好用的功能外,还提供了比较良好的扩展接口。
本文这里简单的介绍一下Behavior这个扩展,顾名思义,Behavior可以赋予控件新的行为能力。
事件绑定到Command需要用到Interaction.Triggers这个属性 ,在这个属性里面添加一个或多个EventTrigger并指定关注的的事件名称,在EventTrigger中通过InvokeCommandAction来绑定事件对应的command。
1. 在Visual Studio 2022中打开MainWindows.xmal文件,并在文件的开头添加如下命名空间。
xmlns:be="http://schemas.microsoft.com/xaml/behaviors"
2. 在MainWindows.xmal文件中添加一个ComboBox控件,具体代码如下:
<WrapPanel Grid.Row="0" HorizontalAlignment="Left">
            <ComboBox x:Name="cboProvince" DisplayMemberPath="Name" SelectedValuePath="Code" >
                <be:Interaction.Triggers>

                    <be:EventTrigger EventName="SelectionChanged">
                        <be:InvokeCommandAction Command="{Binding ProviceChangedAction}"/>

                    </be:EventTrigger>
                </be:Interaction.Triggers>
            </ComboBox>
        </WrapPanel>
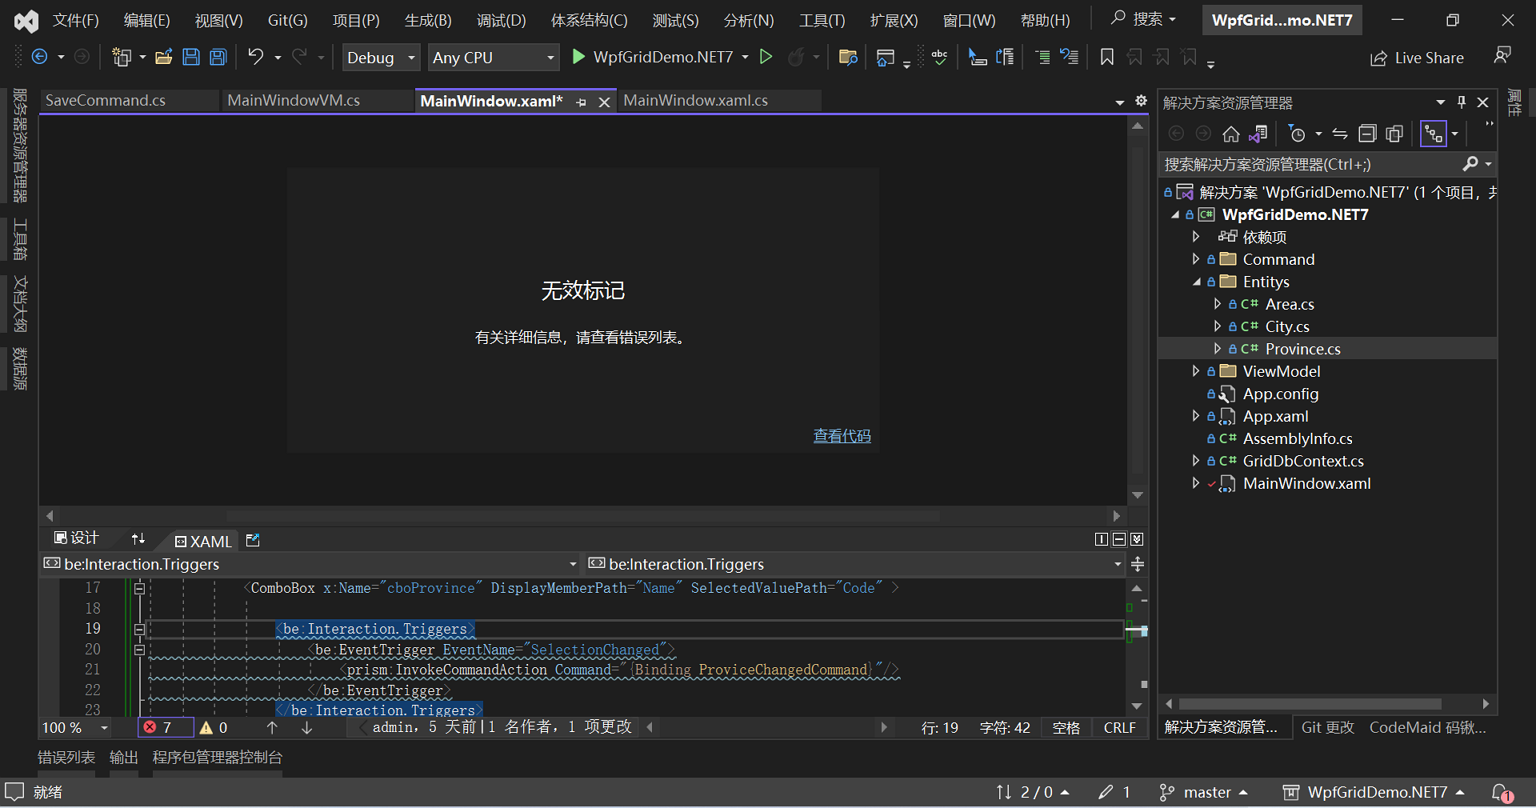
3. 在写完了以上代码之后,Visual Studio 2022的界面设计器中原来呈现的UI界面,消失了,显示“无效标记,有关详细信息,请查看错误列表”。如下图。
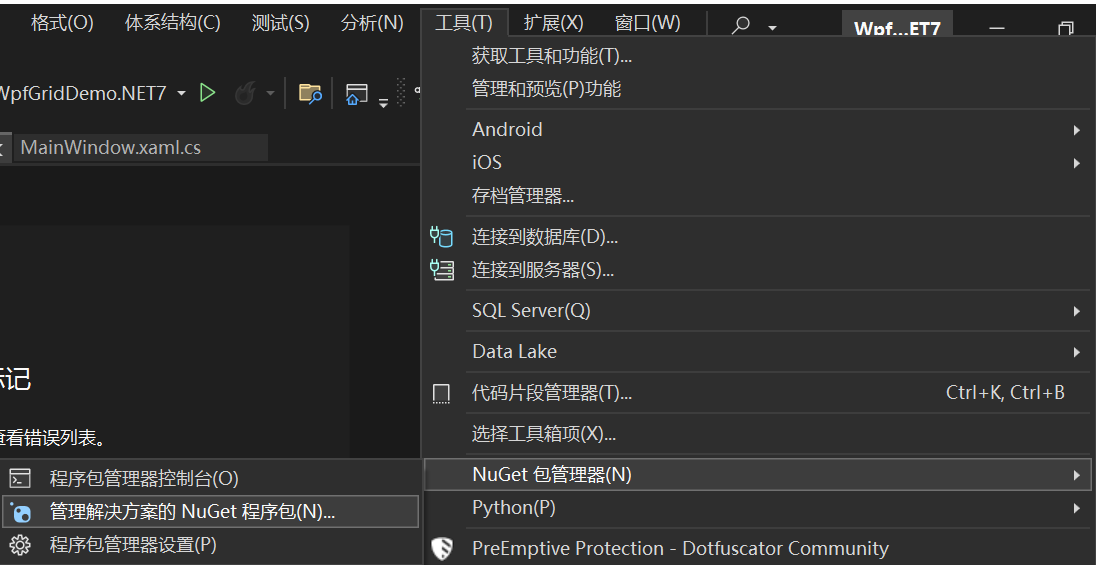
4.从错误信息中来查看,应用程序缺少程序集,没有安装相应的程序包。使用鼠标在菜单栏中选择“工具--》NuGet软件包管理器- -》 管理此解决方案的NuGet程序包”,如下图。
5. 在Visual Studio 2022的NuGet-解决方案标签页中,浏览页面的搜索框中输入“Microsoft.Xaml.Behaviors.Wpf”进行搜索,然后使用鼠标左键先选中要安装的项目名称,然后再点击“安装”按钮。如下图。 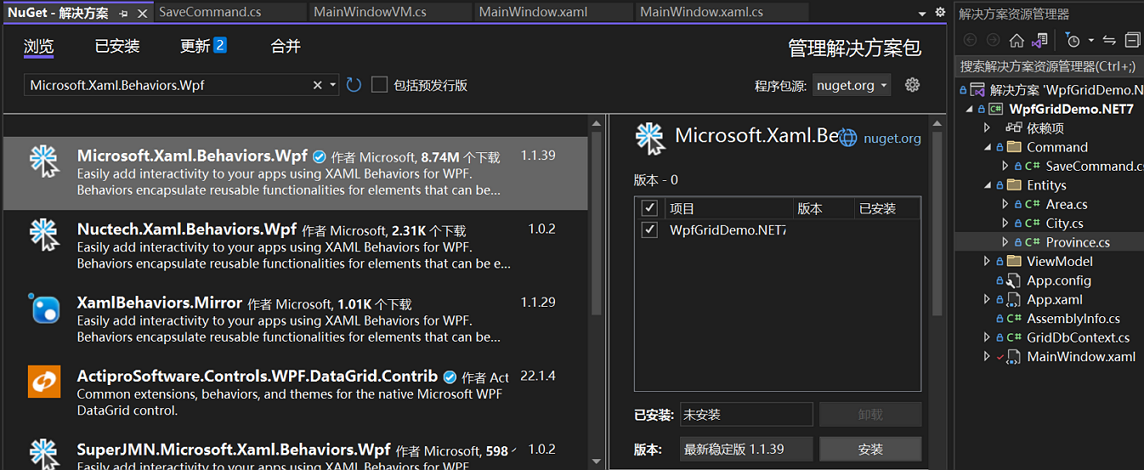
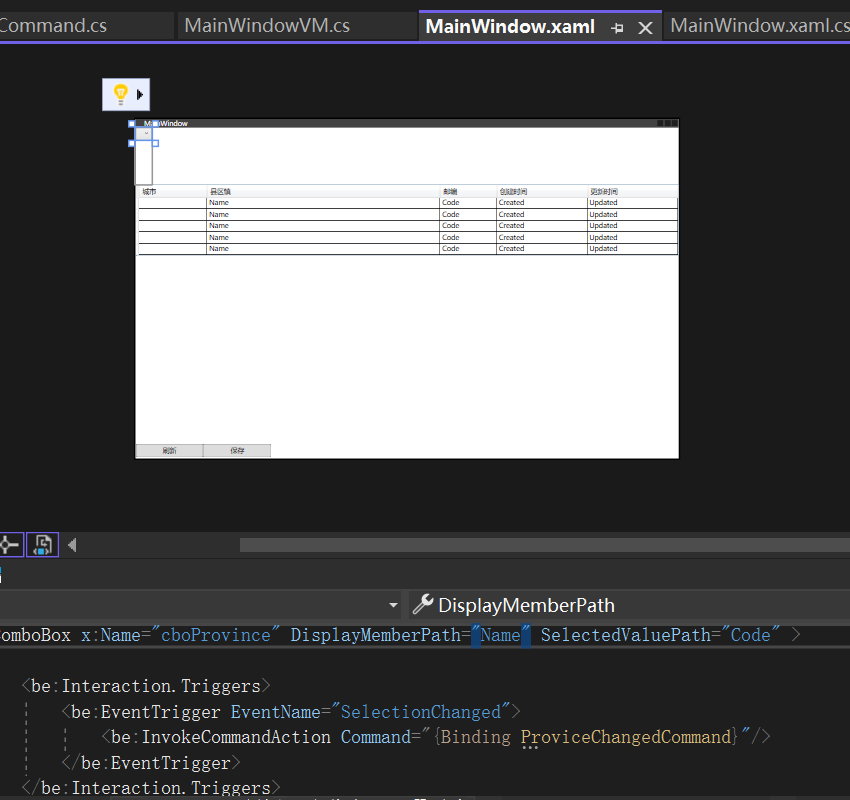
6.安装成功之后,错误列表中的错误信息消失了,UI设计器中的UI又回来了。如下图。


 浙公网安备 33010602011771号