ceph分布式存储的学习:
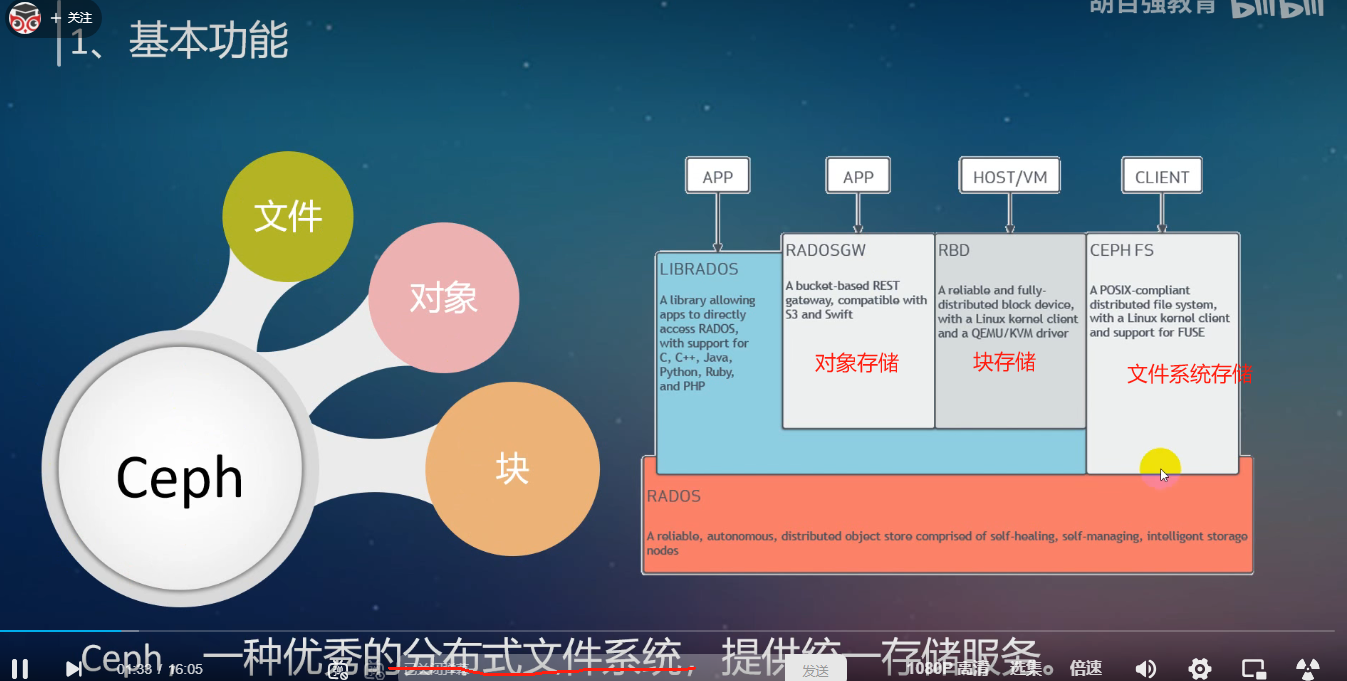
支持的存储类型:对象存储、块存储、文件系统存储
ceph版本

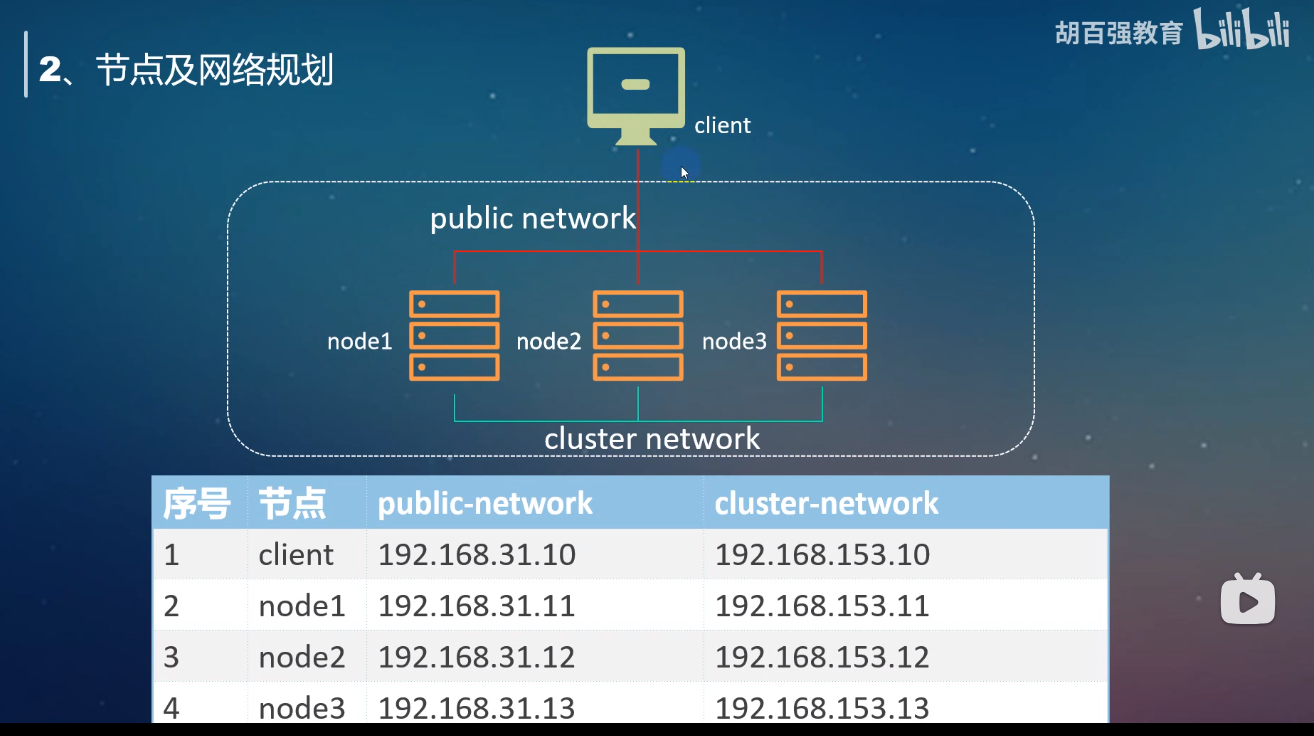
节点与网络规划:
硬件准备:四个节点都添加一样的硬件结构,就可以了
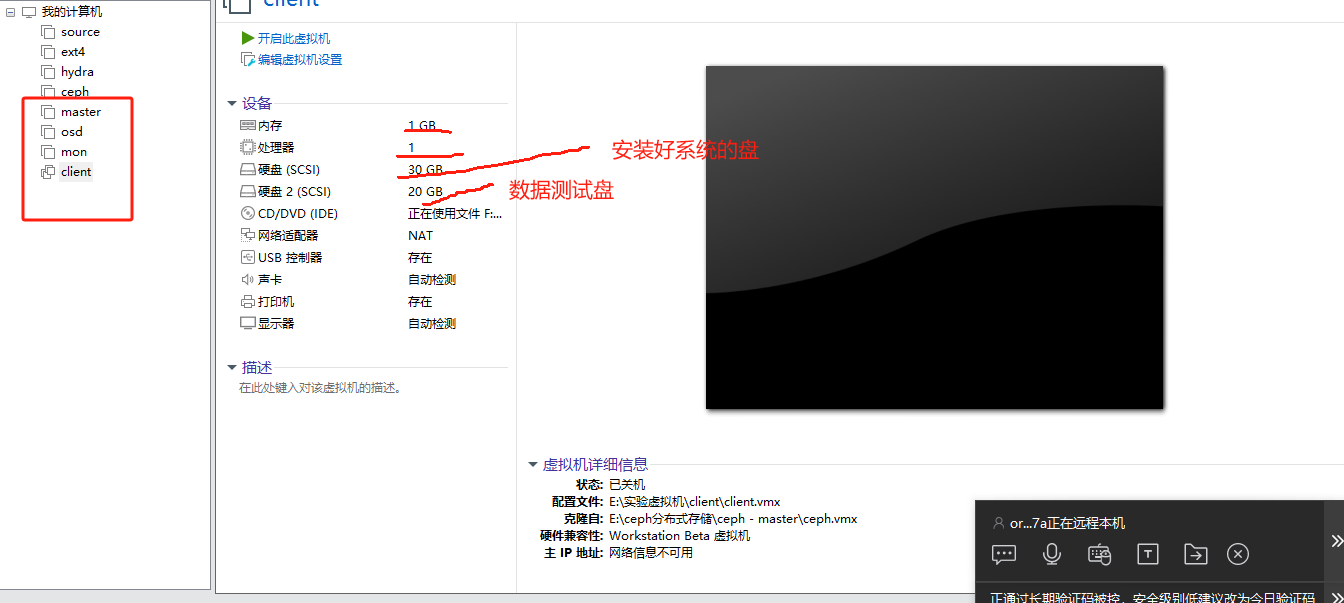
ceph的组件介绍:mon osd mgr mds
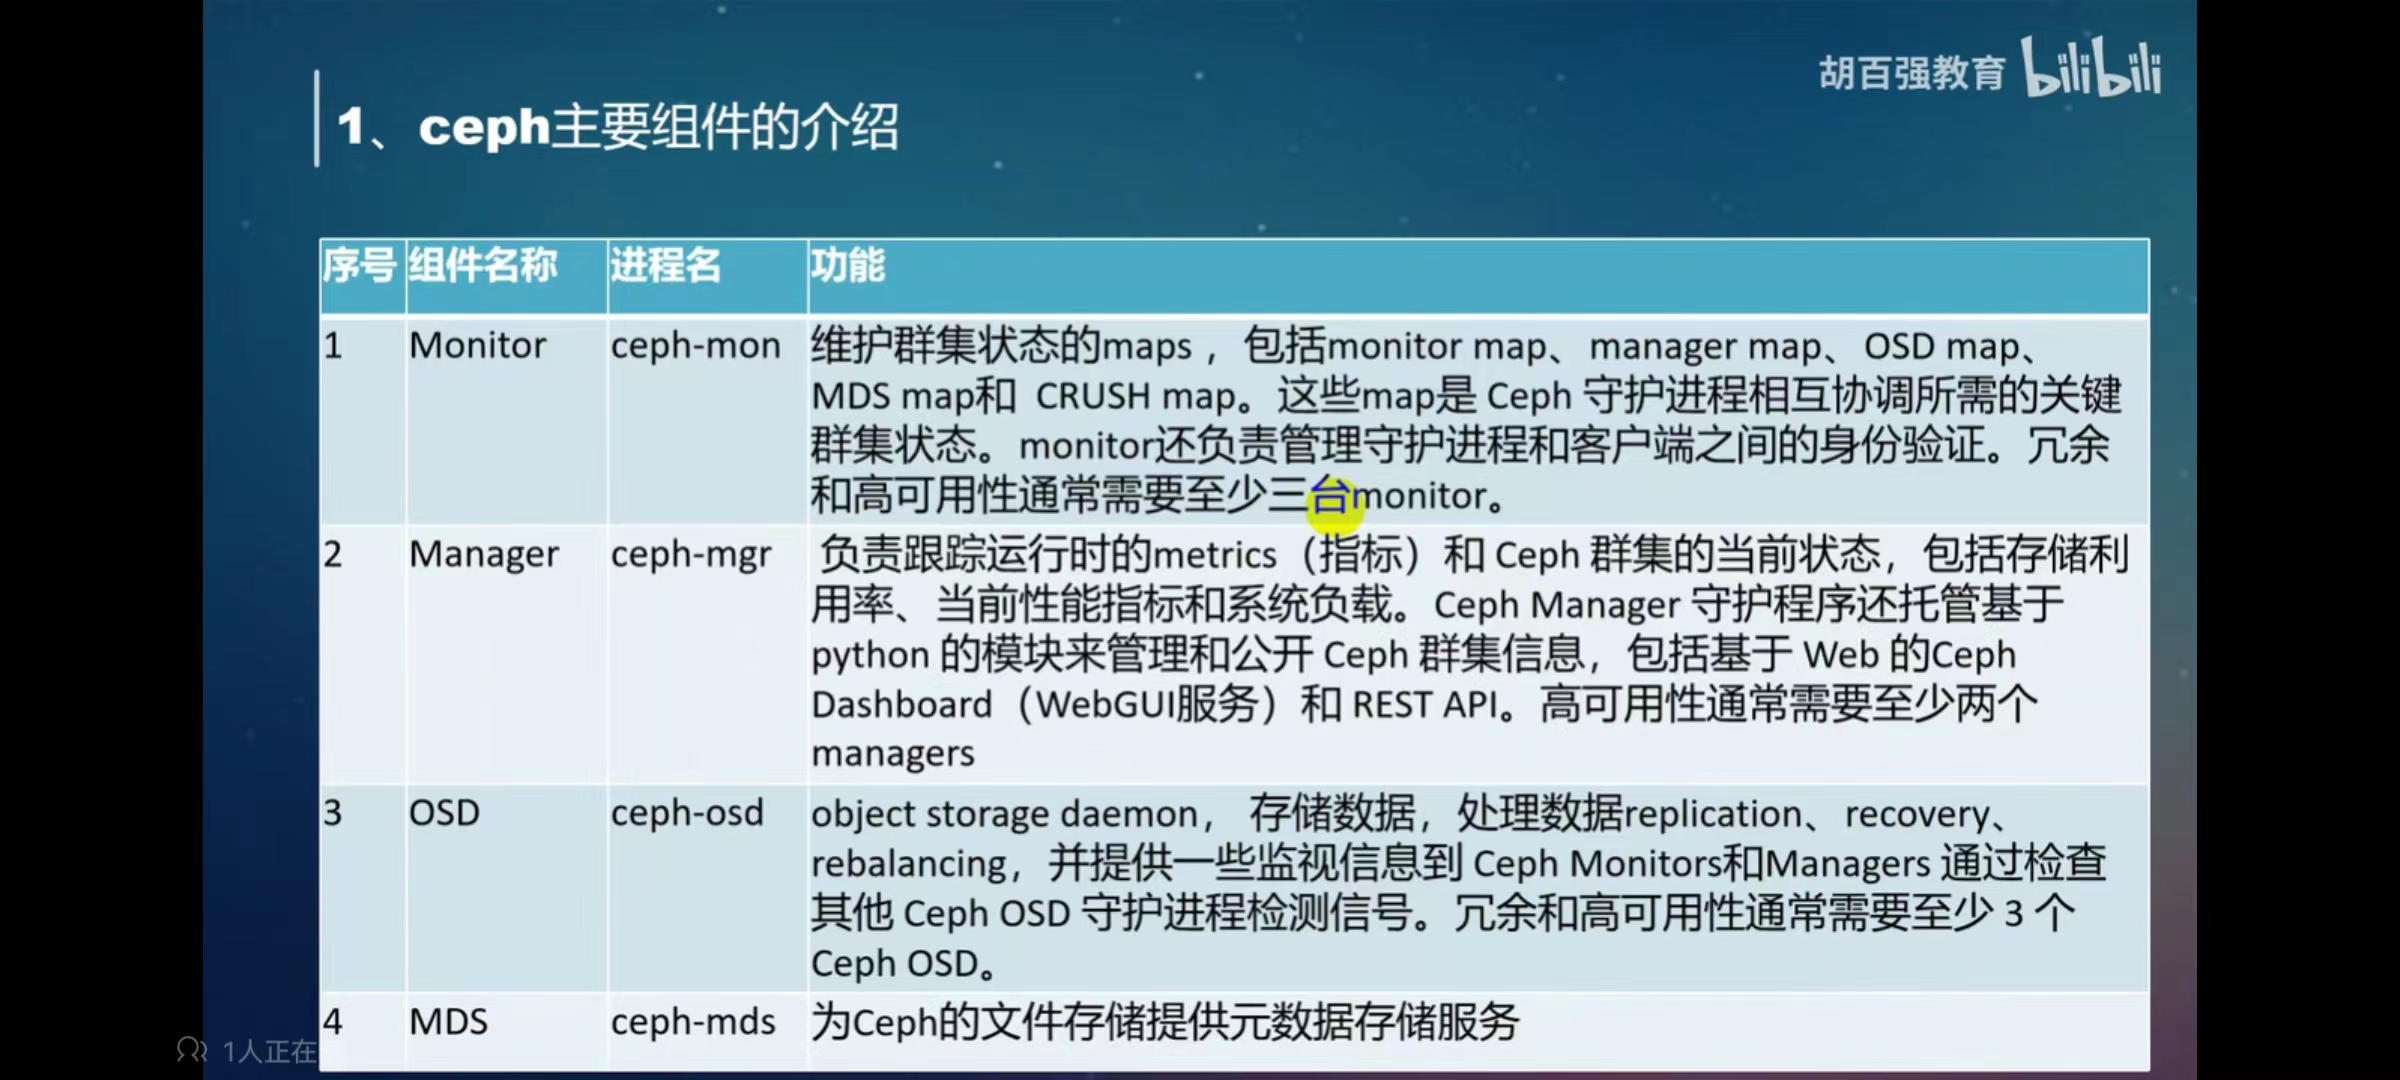
1.配置ssh免密登录:
直接远程登陆成功:
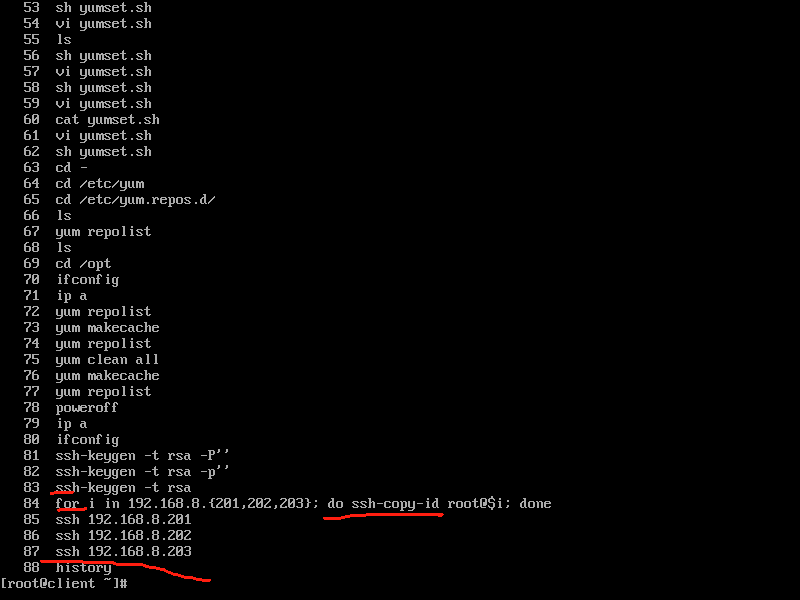
2.client配置域名解析:本机上设置hosts文件之后,再覆盖到每个分主机上面的hosts文件,进行统一
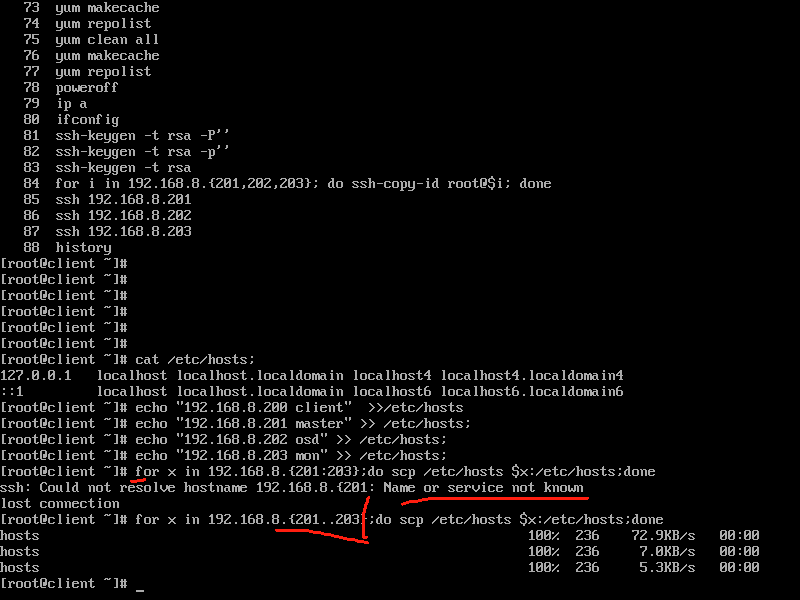
3配置主机名: 都配置成etc/hosts文件中的主机名称
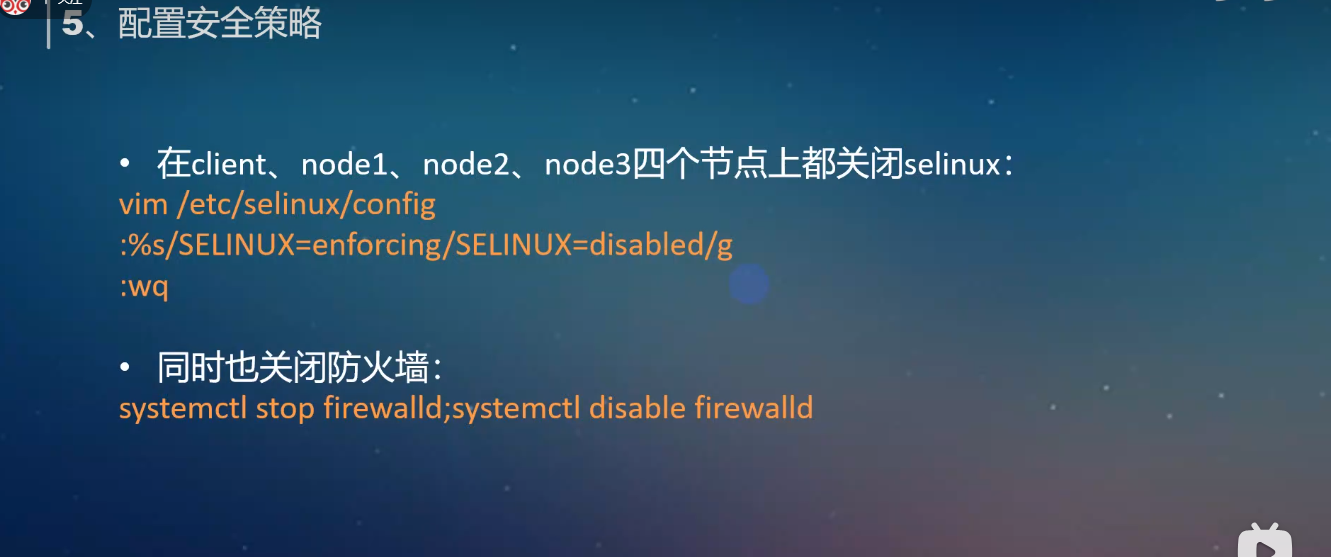
4.配置防火墙:
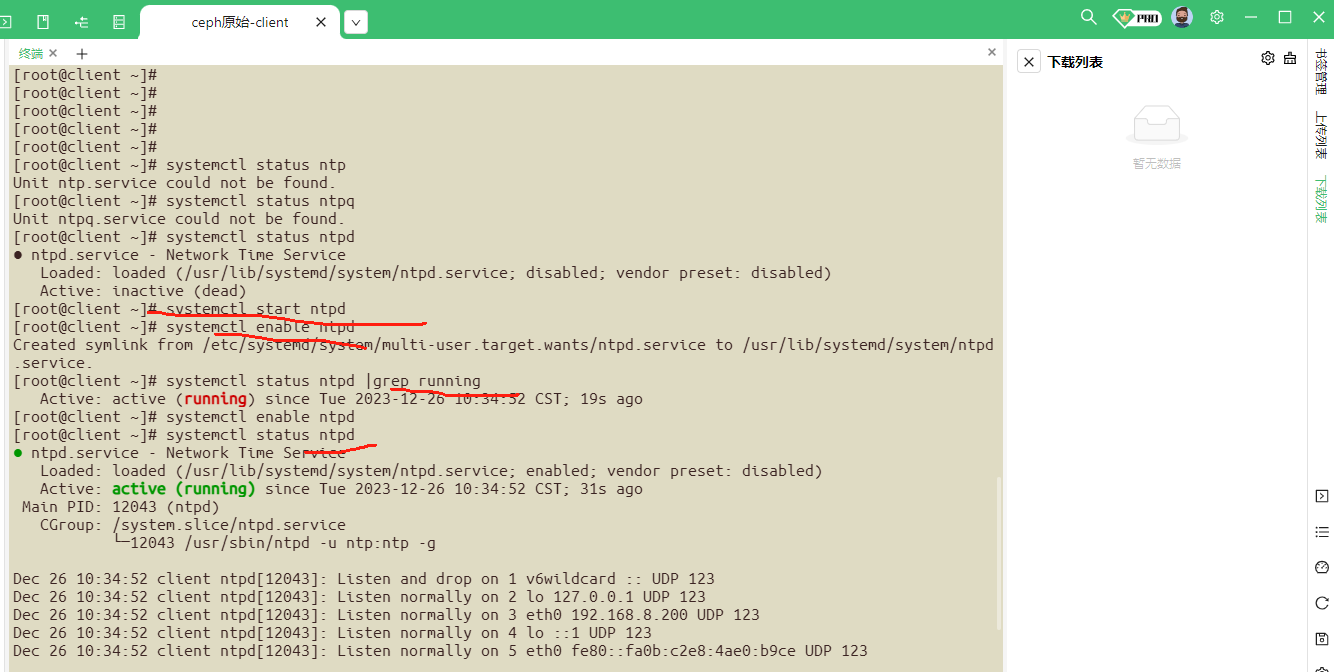
5.配置ntp时间同步 ,client作为ntp服务器,mon,osd,master作为客户端,四个服务器都安装ntp
yum -y install ntp
服务端启动ntpd
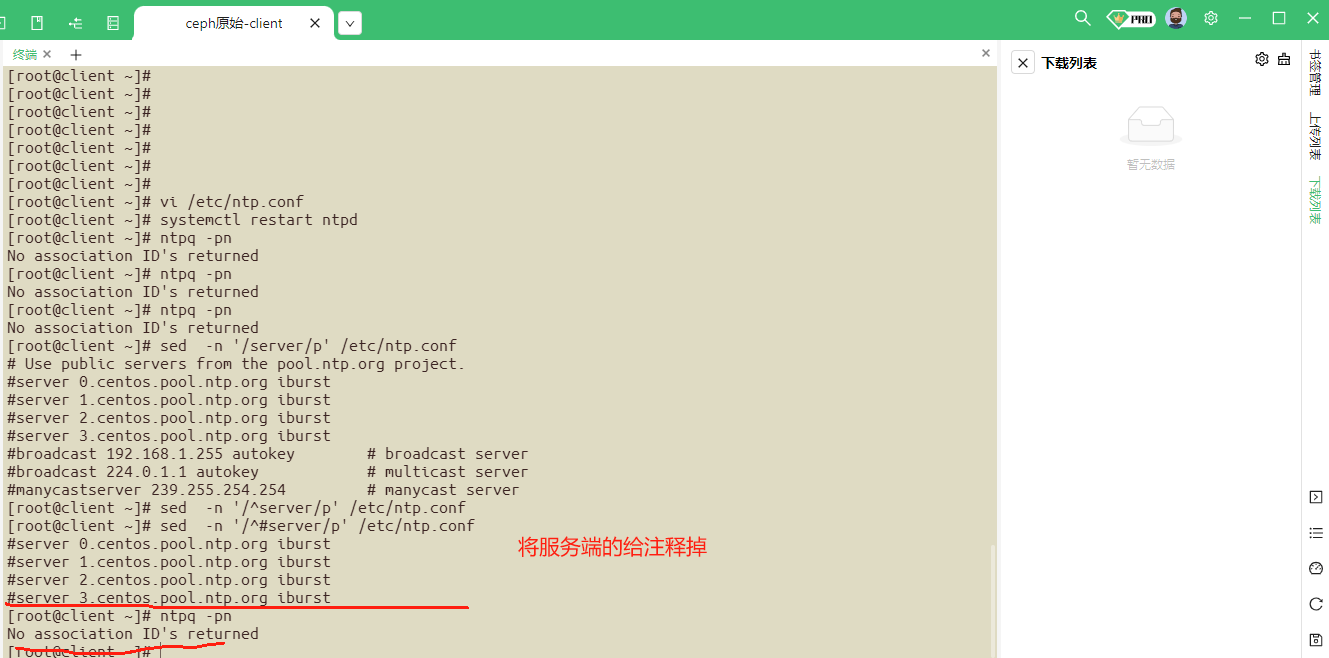
在客户端三台服务器上面,设置指向ntp服务器
server client iburst
ntp主配置文件:/etc/ntp.conf
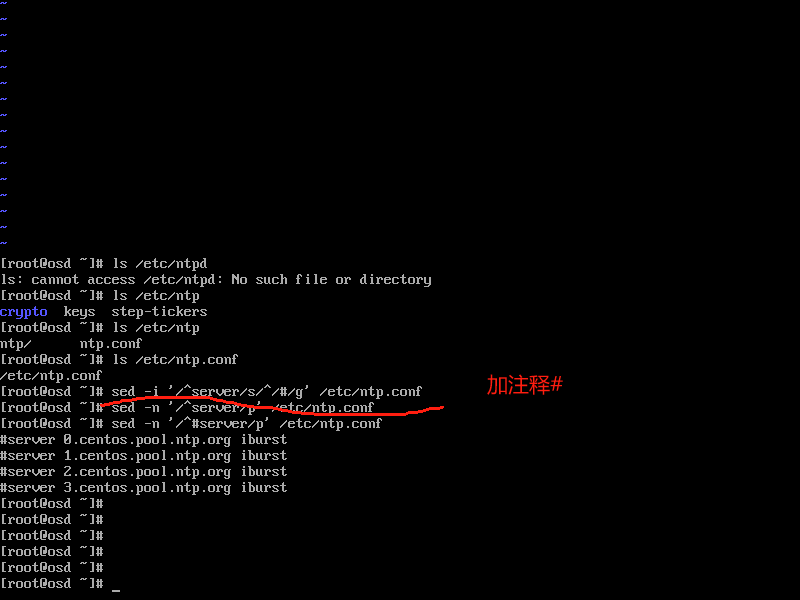
ntp.conf添加server client iburst
然后重启ntpd服务,使得配置文件生效
检查是否同步:
ntpq -pn
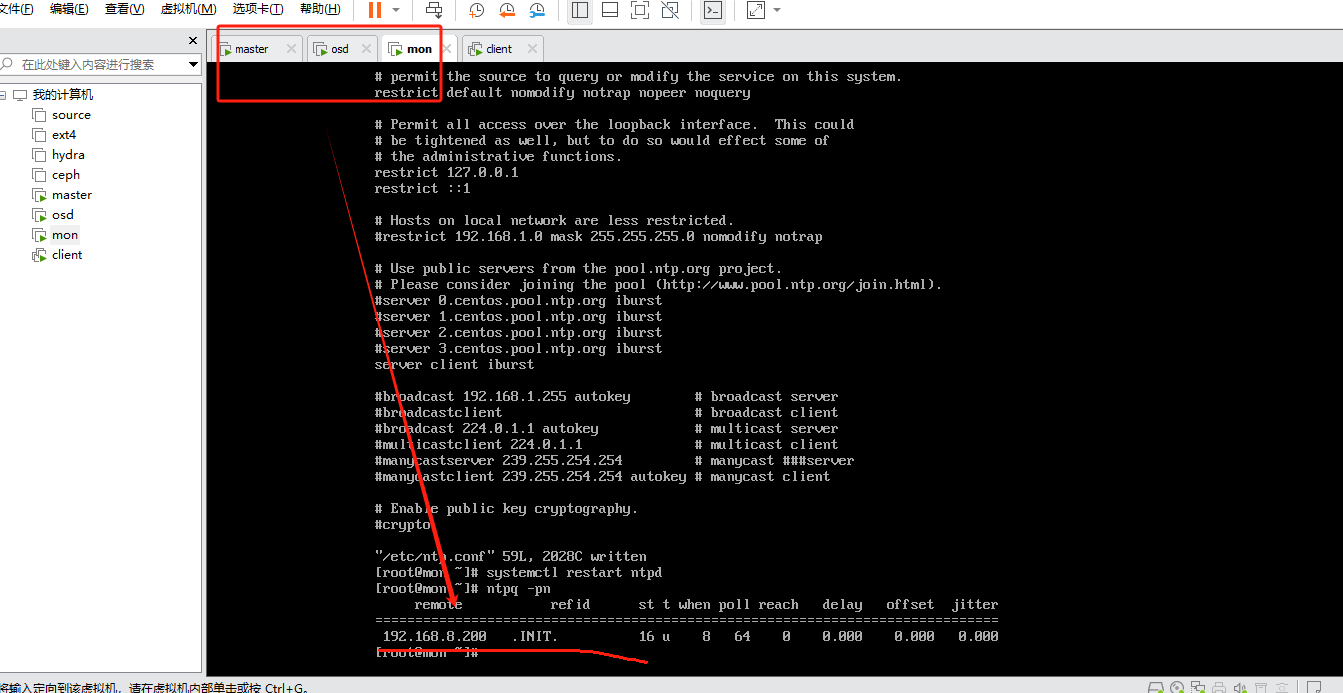
客户端已同步
6.配置yum源:
删除原有的yum源: rm /etc/yum.repos.d/* -rf
添加centos的yum源:
wget -O /etc/yum.repos.d/CentOS-Base.repo https://mirrors.aliyun.com/repo/Centos-7.repo
添加epel的yum源
wget -O /etc/yum.repos.d/epel.repo https://mirrors.aliyun.com/repo/epel-7.repo
添加ceph的yum源: 所有节点均操作
touch /etc/yum.repos.d/ceph.repo
添加以下文件内容:
[ceph_noarch]
name=noarch
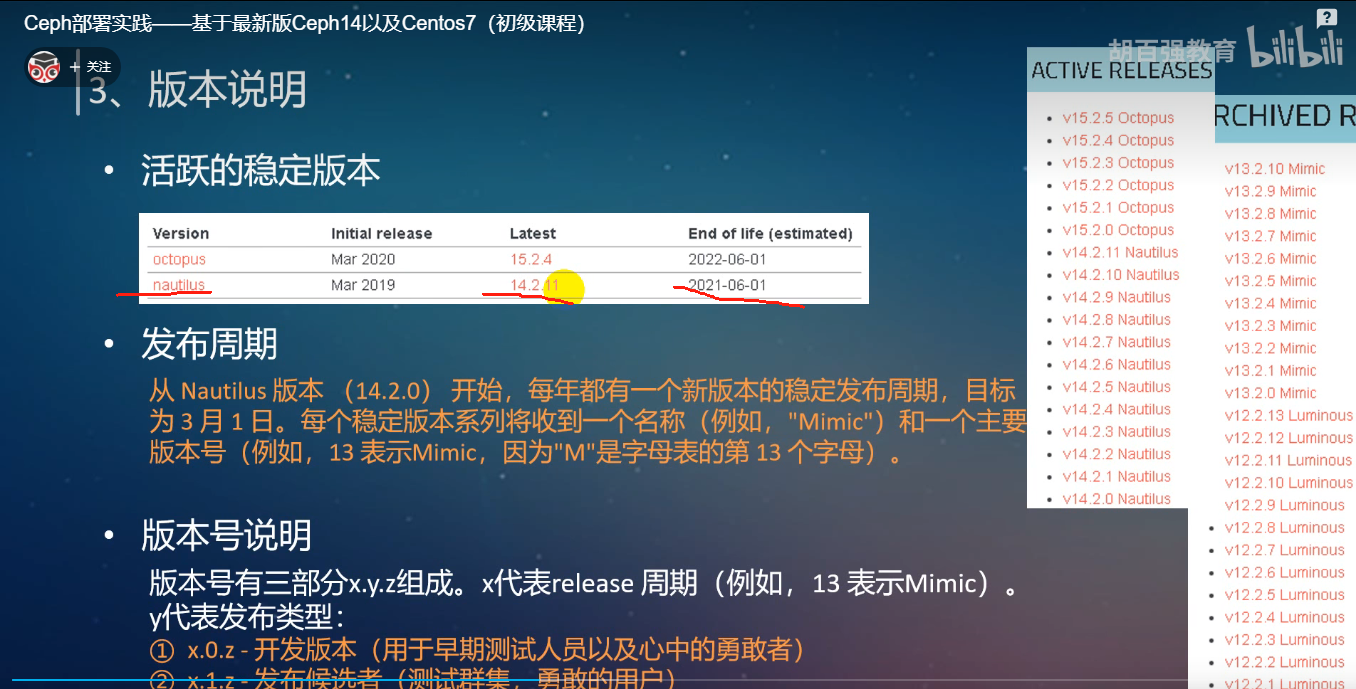
baseurl=https://mirrors.aliyun.com/ceph/rpm-nautilus/el7/noarch/
enabled=1
gpgcheck=0
[ceph_x86_64]
name=x86_64
baseurl=https://mirrors.aliyun.com/ceph/rpm-nautilus/el7/x86_64/
enabled=1
gpgcheck=0
7.开始安装ceph组件
client节点安装ceph的部署工具:
yum -y install python-setuptools
yum -y install ceph-deploy
ceph-deploy --version;
确保是2.0.1版本

在osd,mon,master节点安装ceph相关的包
yum -y install ceph ceph-mon ceph-osd ceph-mds ceph-radosgw ceph-mgr
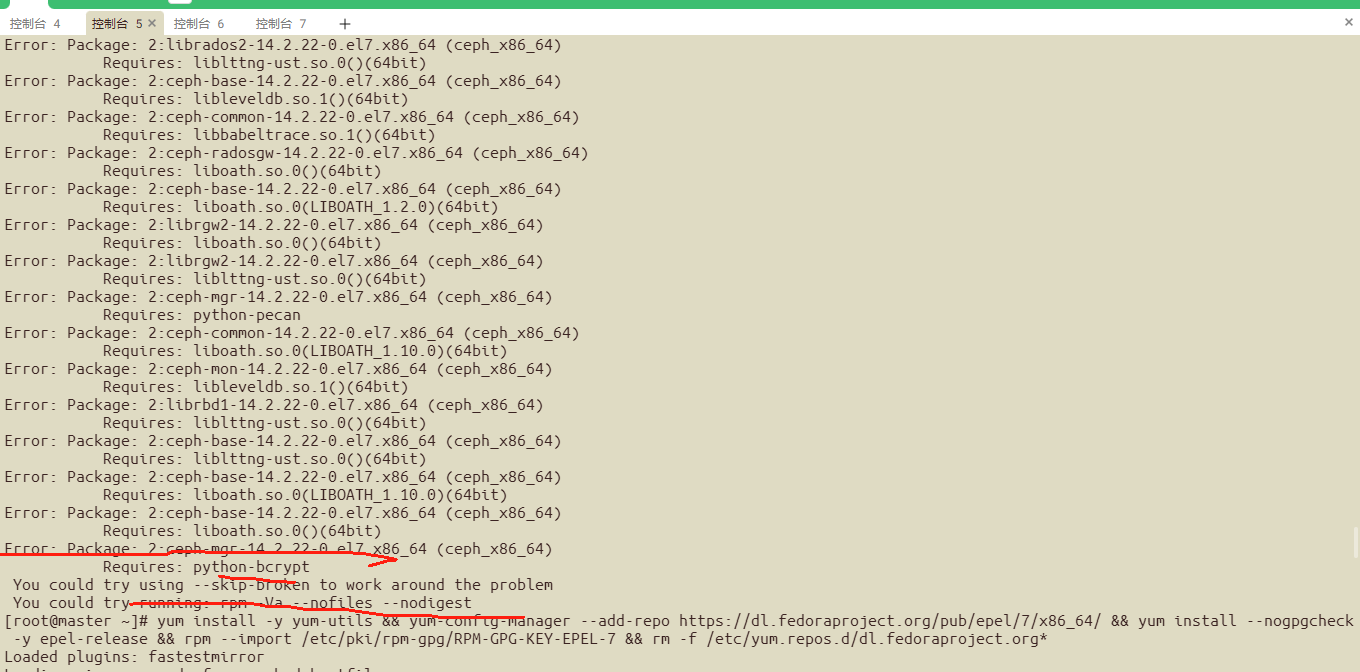
yum -y install ceph ceph-mon ceph-osd ceph-mds ceph-radosgw ceph-mgr 需要依赖报的错:
报错解决:
yum install -y yum-utils && yum-config-manager --add-repo https://dl.fedoraproject.org/pub/epel/7/x86_64/ && yum install --nogpgcheck -y epel-release && rpm --import /etc/pki/rpm-gpg/RPM-GPG-KEY-EPEL-7 && rm -f /etc/yum.repos.d/dl.fedoraproject.org*
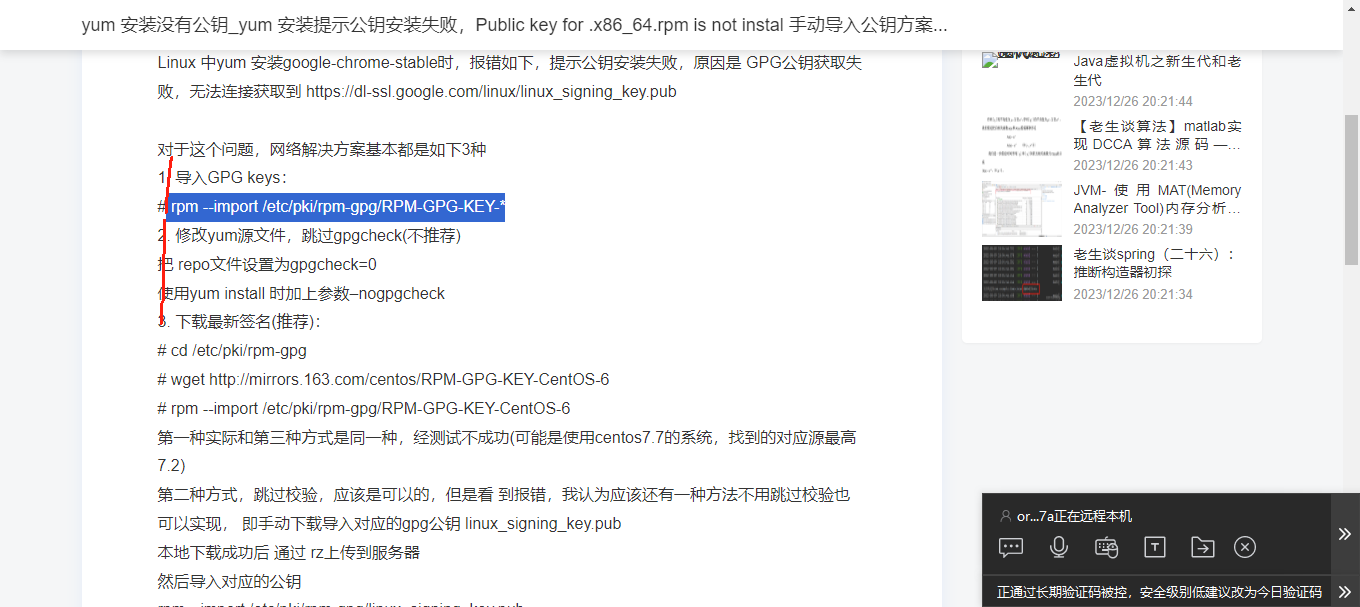
yum报错如下:
Public key for liboath-2.6.2-1.el7.x86_64.rpm is not installed
解决方法:加 --nogpgcheck
yum -y install ceph ceph-mon ceph-osd ceph-mds ceph-radosgw ceph-mgr --nogpgcheck 不对公钥进行检查
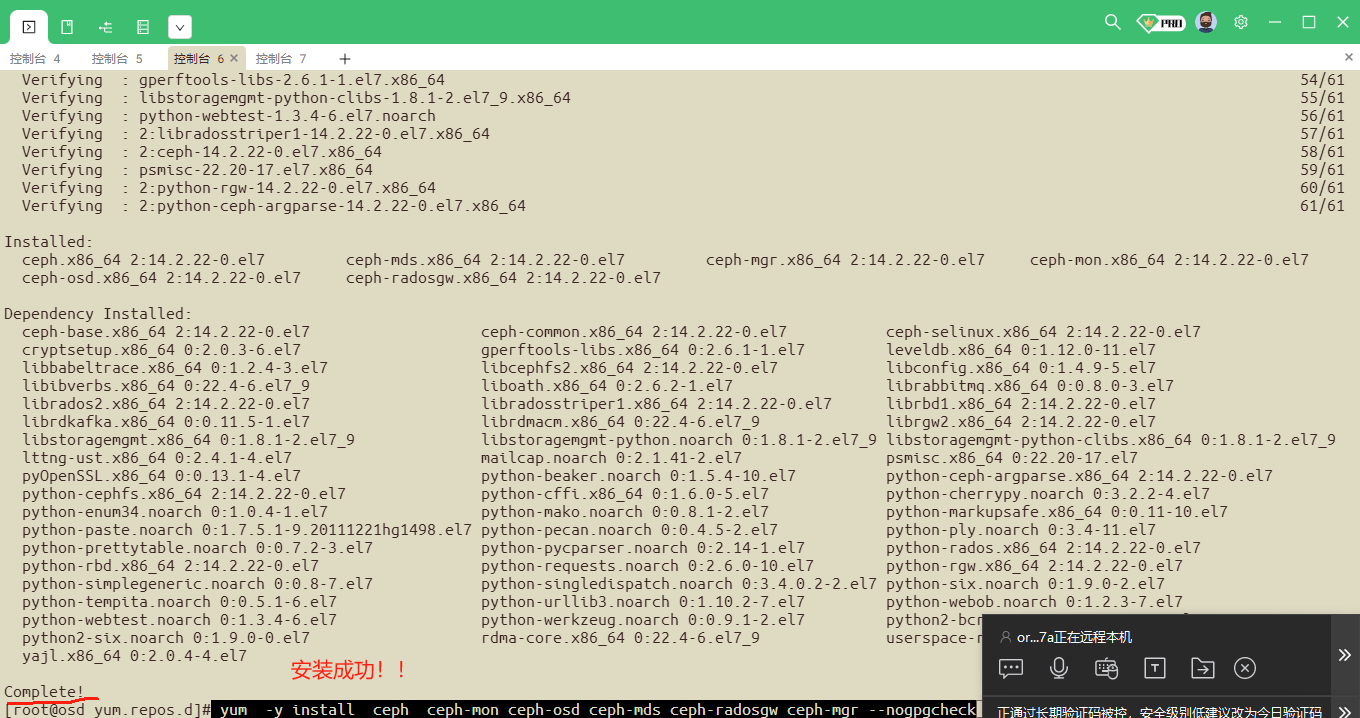
##检查以下安装的ceph包:
[root@mon yum.repos.d]# rpm -qa |grep ceph
python-ceph-argparse-14.2.22-0.el7.x86_64
ceph-selinux-14.2.22-0.el7.x86_64
libcephfs2-14.2.22-0.el7.x86_64
ceph-base-14.2.22-0.el7.x86_64
ceph-mon-14.2.22-0.el7.x86_64
ceph-osd-14.2.22-0.el7.x86_64
ceph-mgr-14.2.22-0.el7.x86_64
ceph-radosgw-14.2.22-0.el7.x86_64
python-cephfs-14.2.22-0.el7.x86_64
ceph-common-14.2.22-0.el7.x86_64
ceph-mds-14.2.22-0.el7.x86_64
ceph-14.2.22-0.el7.x86_64
[root@mon yum.repos.d]#
##第一个部署monitor
mon作为monitor节点,在client节点创建一个工作目录,后续的命令在该目录下执行,产生的配置文件保存在该目录中
mkdir ~/my-cluster
cd ~/my-cluster
ceph-deploy new-public-network 192.168.8.0/24 --cluster-network 192.168.8.0/24 mon
-
创建一个ceph集群,也就是Mon,三台都充当mon
[root@ceph-node0 ceph-install]# ceph-deploy new ceph-node0 ceph-node1 ceph-node2
ceph-deploy new osd mon master;
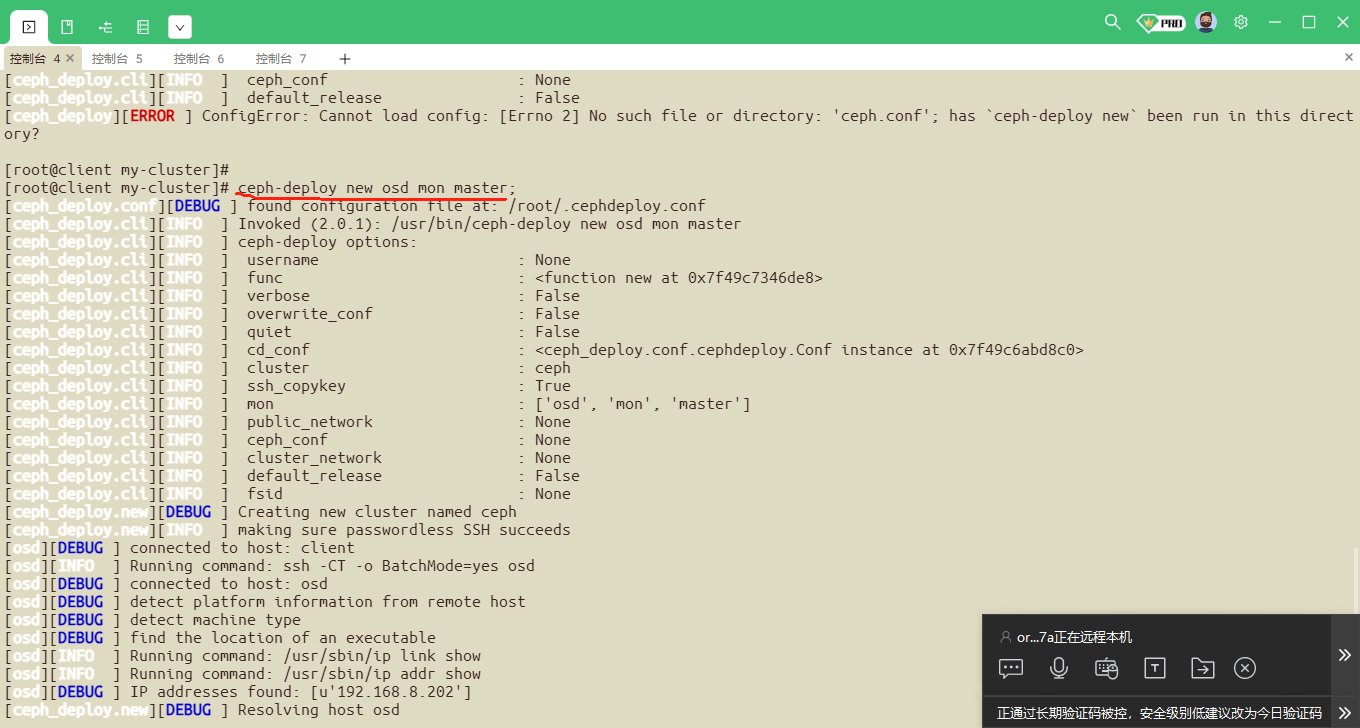
[root@client my-cluster]# ls ##产生的文件:
ceph.conf ceph-deploy-ceph.log ceph.mon.keyring
[root@client my-cluster]# cat ceph.conf
[global]
fsid = 1d94941b-e4d7-4767-a7f0-043c9c65dd6e
mon_initial_members = osd, mon, master
mon_host = 192.168.8.202,192.168.8.203,192.168.8.201
auth_cluster_required = cephx
auth_service_required = cephx
auth_client_required = cephx
[root@client my-cluster]#
##初始化monitor
ceph-deploy mon create-initial

##将配置文件推到其他节点上面
ceph-deploy admin mon osd master

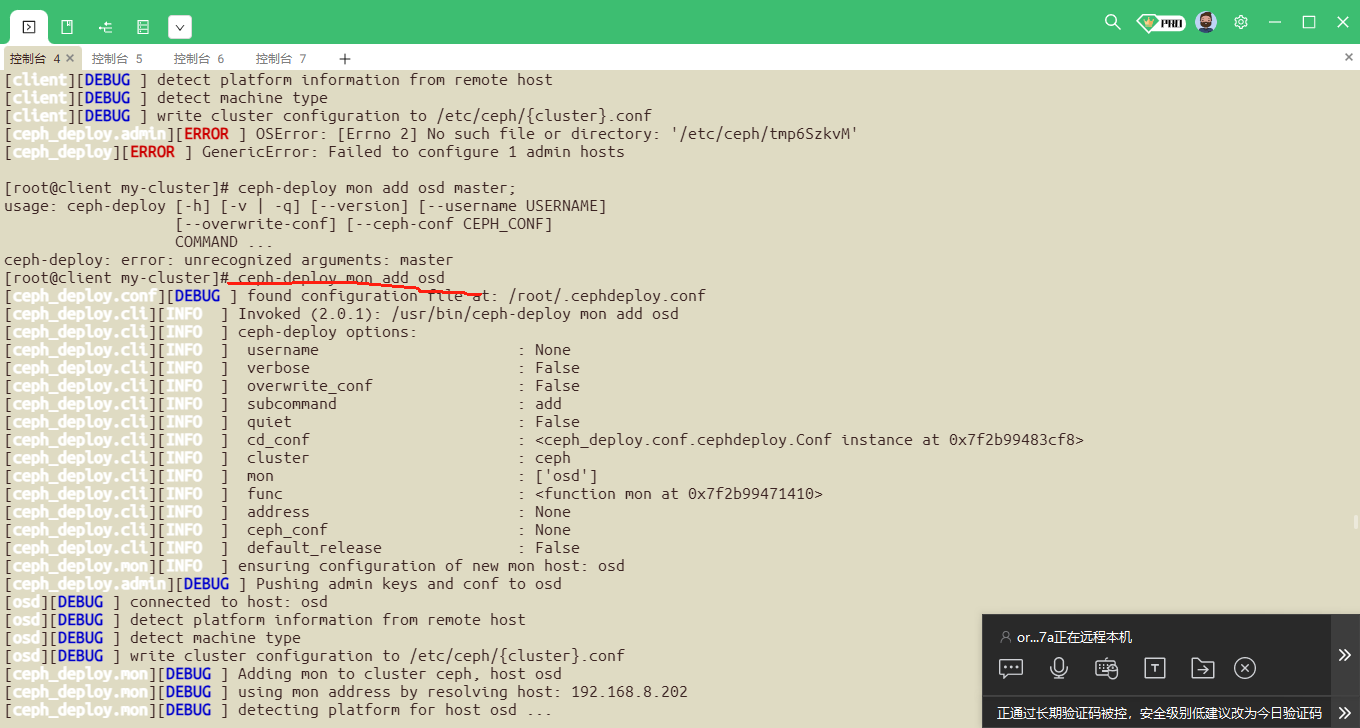
##如果想部署高可用monitor
ceph-deploy mon add node1
ceph-deploy mon add node2
ceph-deploy mon add node3
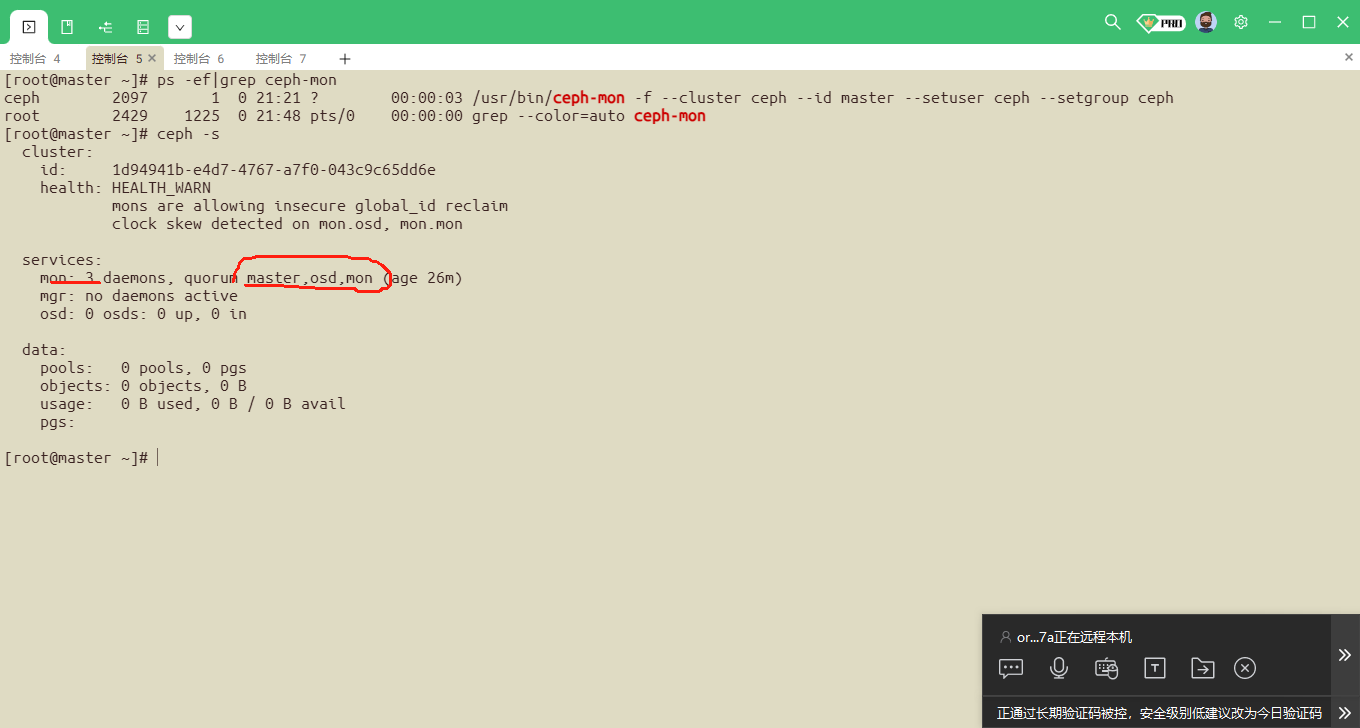
##查询monitor状态:
ceph -s
ps -ef|grep ceph-mon
###部署mgr组件
master作为mgr的节点,在部署节点client执行
cd ~/my-cluster
ceph-deploy mgr create master
[root@client my-cluster]# ceph-deploy mgr -h
usage: ceph-deploy mgr [-h] {create} ...
Ceph MGR daemon management
positional arguments:
{create}
create Deploy Ceph MGR on remote host(s)
optional arguments:
-h, --help show this help message and exit
[root@client my-cluster]#
ceph-deploy mgr create master
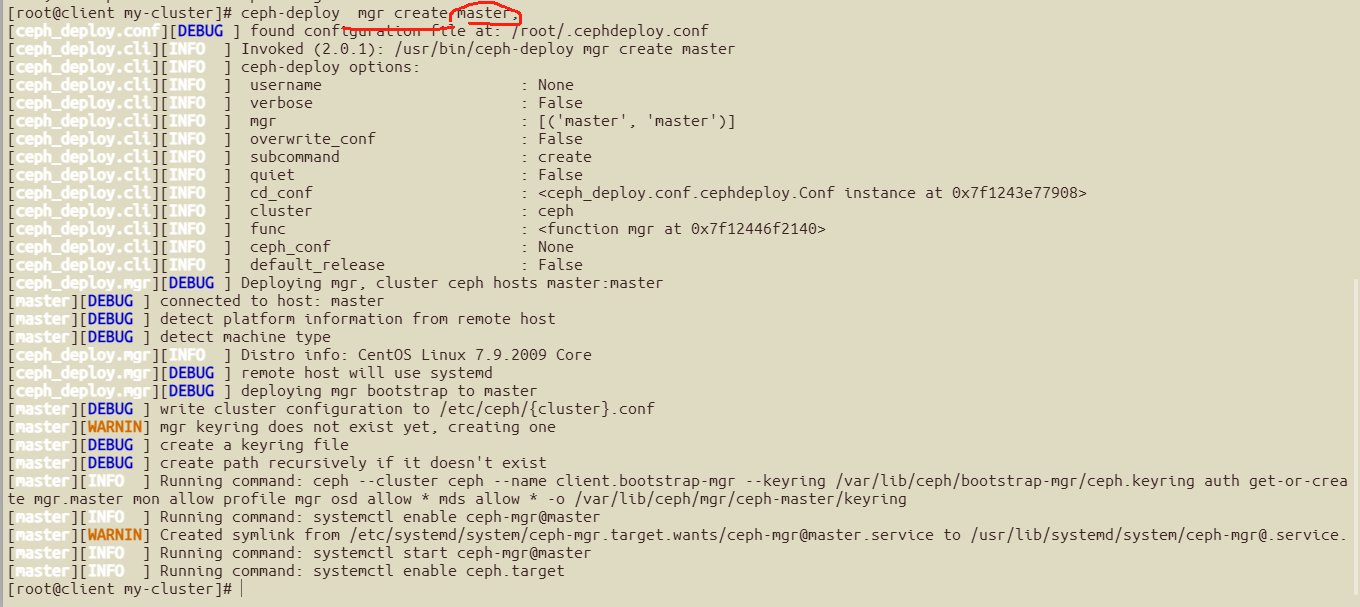
##查看mgr情况,master已经成为mgr了

##如果想部署高可用mgr,可以将osd,mon也加进来
ceph-deploy mgr create osd mon


###部署osd
##确认每个盘的硬盘情况:
ceph-deploy disk list master mon osd;
以master为例,其他也都是sda,sdb两块盘

##清空硬盘sdb上面的数据和文件系统
ceph-deploy disk zap master /dev/sdb

其他节点也一样:
root@client my-cluster]# ceph-deploy disk zap osd /dev/sdb^C
[root@client my-cluster]# ceph-deploy disk zap mon /dev/sdb^C
##进行部署osd
ceph-deploy osd create --data /dev/sdb1 --journal /dev/sdb2 --filestore master
ceph-deploy osd create --data /dev/sdb1 --journal /dev/sdb2 --filestore mon
ceph-deploy osd create --data /dev/sdb1 --journal /dev/sdb2 --filestore osd
ceph-deploy osd create master --data /dev/sdb


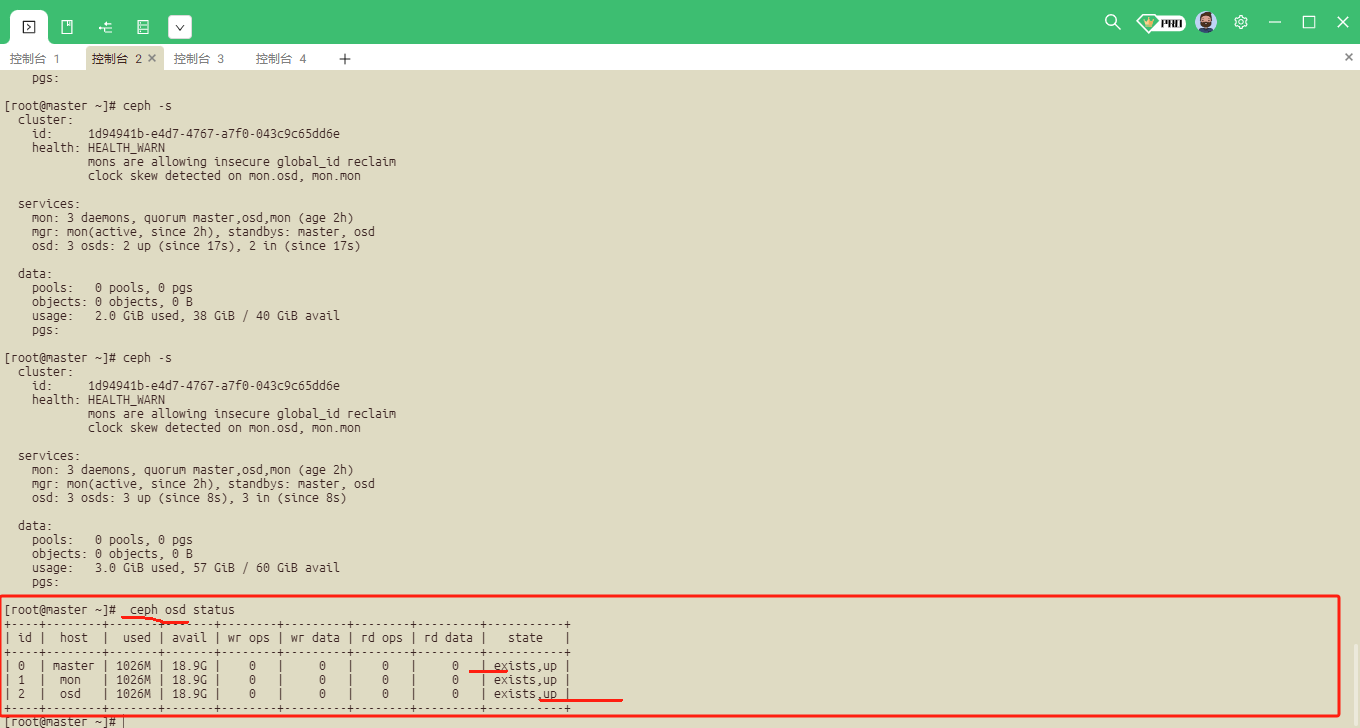
ceph osd status##查看状态:
#####systemctl管理ceph服务
##列出所有ceph服务
systemctl status ceph\*.service

systemctl status ceph\*.target

##启动所有服务的守护进程
systemctl start ceph.target
##停止所有服务的守护进程
systemctl stop ceph.target
##按服务类型启动所有守护进程
systemctl start ceph-osd.target
systemctl start ceph-mon.target
systemctl start ceph-mds.target
##按服务类型停止所有守护进程
systemctl stop ceph-osd.target
systemctl stop ceph-mon.target
systemctl stop ceph-mds.target
####存储池基本管理------------创建存储池
##列出已经创建的存储池
ceph osd lspools
ceph osd pool ls

##创建存储池
ceph osd pool create test 64 64
说明: 默认情况下创建的存储池是replicated类型的

##重命名存储池
ceph osd pool rename test ceph

####查看存储池属性
##查看对象的副本数
ceph osd pool get ceph size
[root@master ~]# ceph osd pool get ceph size
size: 3
##查看pg数
ceph osd pool get ceph pg_num
[root@master ~]# ceph osd pool get ceph pg_num
pg_num: 64
##查看pgp数,一般小于等于pg_num
ceph osd pool get ceph pgp_num
[root@master ~]# ceph osd pool get ceph pgp_num
pgp_num: 64
##查看协议类型为replicated
[root@master ~]# ceph osd pool get ceph crush_rule
crush_rule: replicated_rule
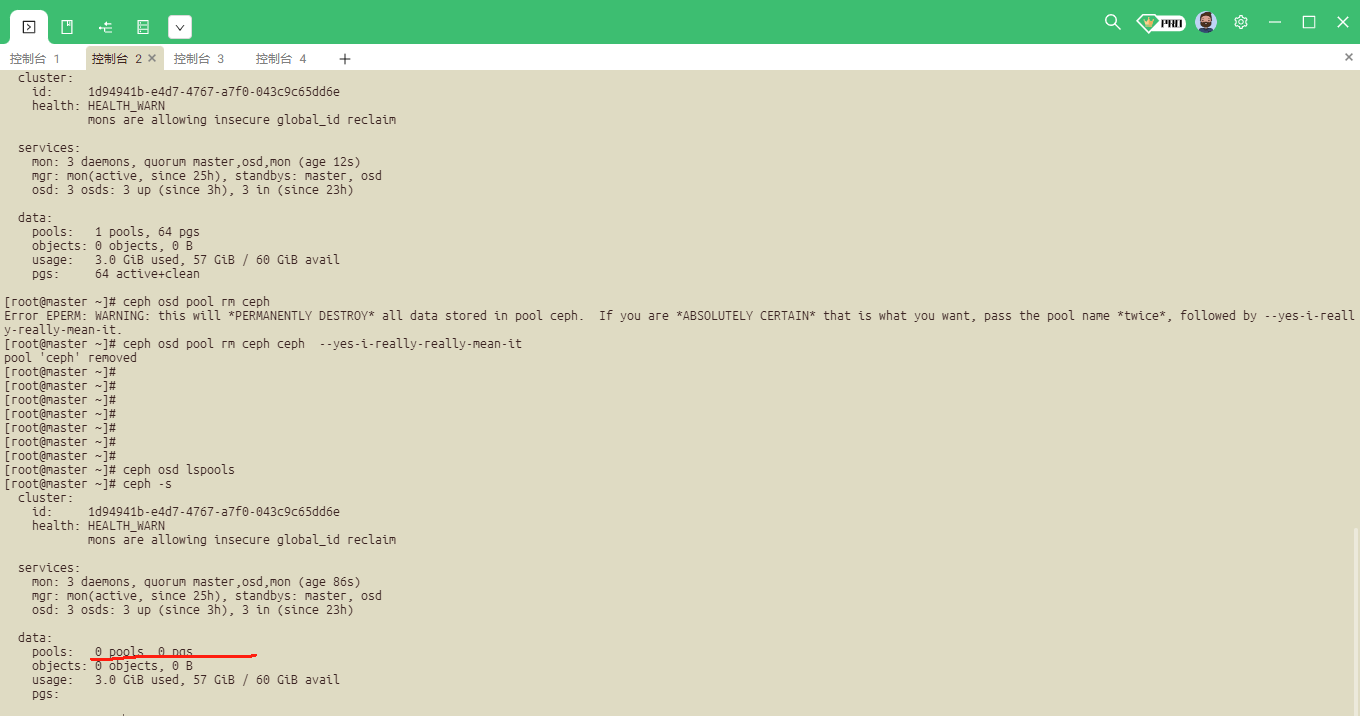
##删除存储池
[root@master ~]# ceph osd pool rm ceph
Error EPERM: WARNING: this will *PERMANENTLY DESTROY* all data stored in pool ceph. If you are *ABSOLUTELY CERTAIN* that is what you want, pass the pool name *twice*, followed by --yes-i-reall y-really-mean-it.
##加ceph --yes-i-really-really-mean-it
[root@master ~]# ceph osd pool rm ceph ceph --yes-i-really-really-mean-it
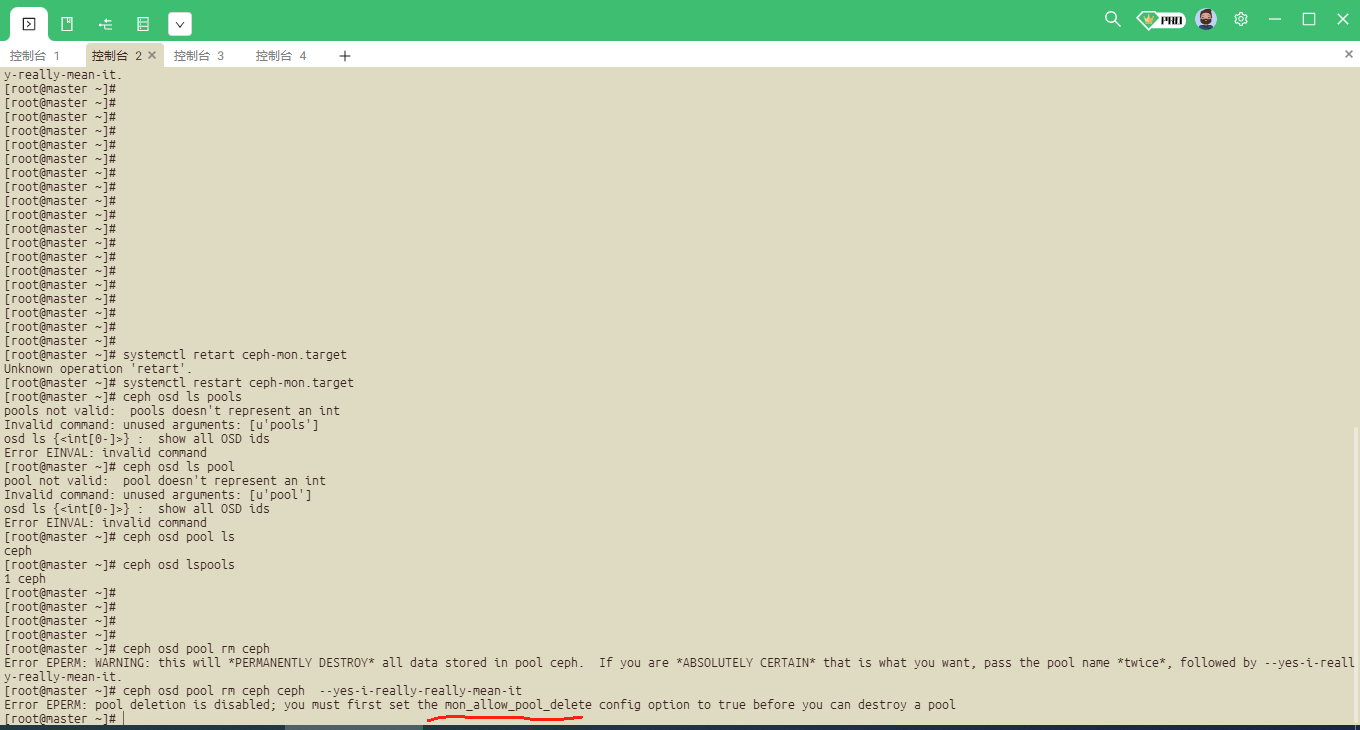
Error EPERM: pool deletion is disabled; you must first set the mon_allow_pool_delete config option to true before you can destroy a pool
##需要配置文件去设置权限,在client上面执行
[mon]
mon allow pool delete = true

然后重启ceph-mon.target 在三台节点上面执行

还是不行,需要将文件传到每个节点上面:
##上传文件
ceph-deploy config push master osd mon
ceph-deploy --overwrite-conf config push master osd mon ##进行覆盖

#删除

######状态检测
#检查集群的状态
ceph -s
ceph -w
ceph health
ceph health detail
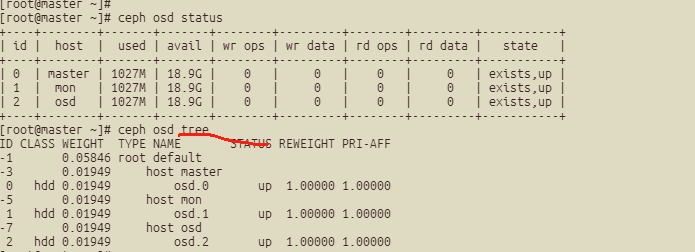
#检查osd状态
ceph osd status
ceph osd tree
#检查mon状态
ceph mon stat
ceph quorum_status

###为存储池指定ceph的应用类型
ceph osd pool application enable ceph <app>
说明:
app的可选择值是cephfs,rbd,rgw ,如果不指定类型,集群将显示HEALTH_WARN状态(使用ceph health detail 命令查看)

###指定存储池类型为rbd
ceph osd pool application enable test rbd
[root@master ~]# ceph osd pool application enable test rbd
enabled application 'rbd' on pool 'test'
[root@master ~]#
##存储池配额管理
#根据对象数配额
ceph osd pool set-quota test max_objects 10000
[root@master ~]# ceph osd pool set-quota test max_objects 10000
set-quota max_objects = 10000 for pool test
#根据容量配额
ceph osd pool set-quota test max_bytes 1048576

##########存储池对象访问:
##上传对象到存储池
echo "test ceph objectstore" >test.txt
rados -p ceph put test ./test.txt
##列出存储池中的对象
rados -p ceph ls
##c从存储池中下载对象
rados -p ceph get test ./test.txt.tmp
rados -p ceph rm test

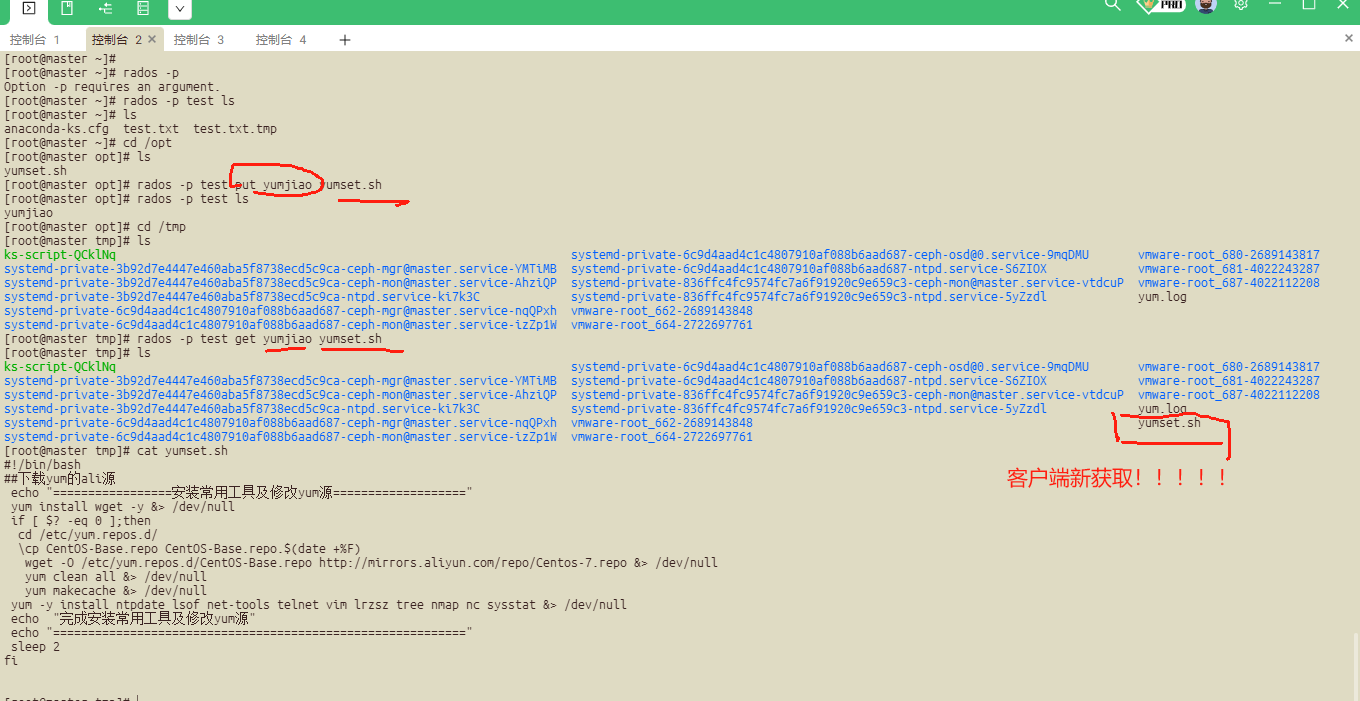
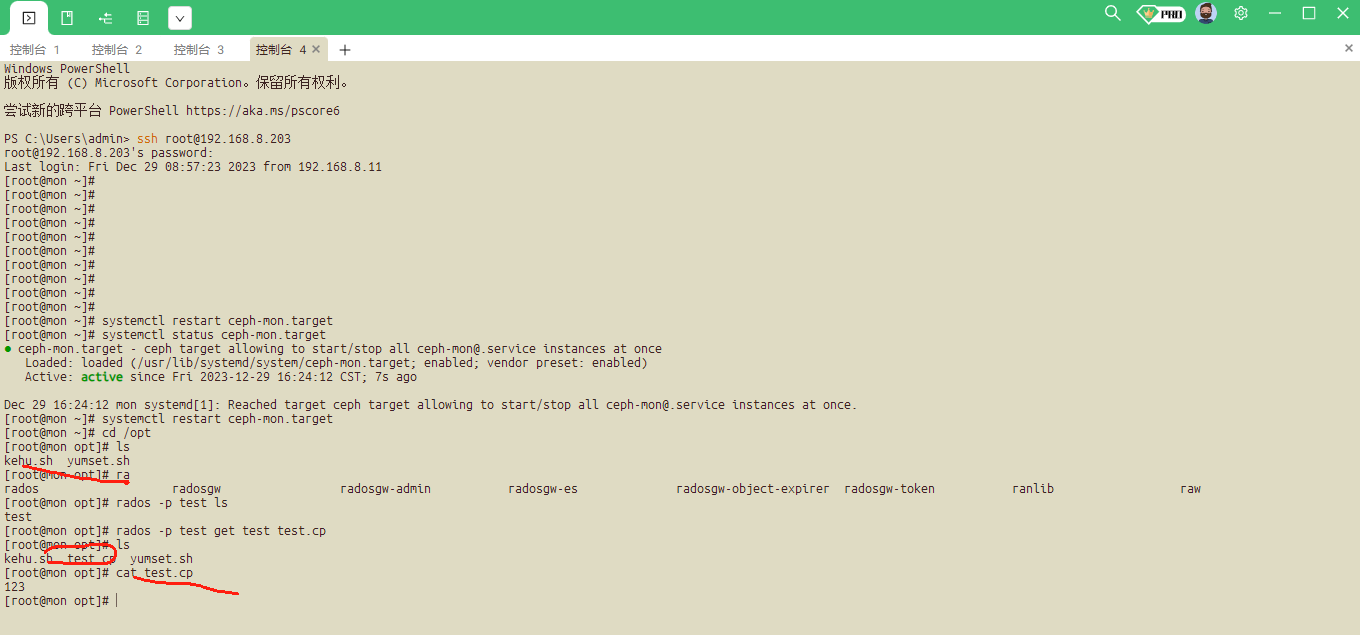
客户端从存储池获取并且重命名:

##删除存储池的测试内容:

测试以下:
