
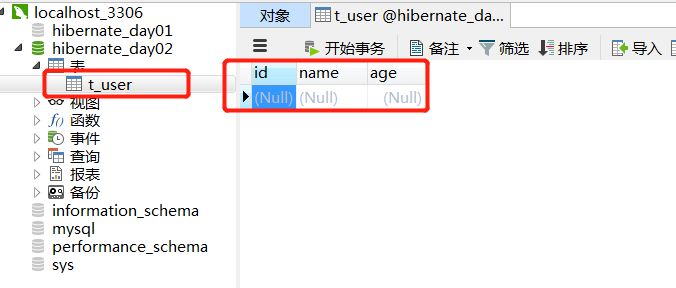
对象创建,表结构就会自动生成
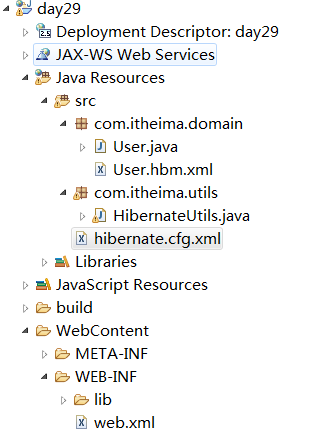
1.目录
2.User.java


 1 package com.itheima.domain;
 2
 3 public class User {
 4
 5     private Integer id;
 6     private String name;
 7     private Integer age;
 8     public Integer getId() {
 9         return id;
10     }
11     public void setId(Integer id) {
12         this.id = id;
13     }
14     public String getName() {
15         return name;
16     }
17     public void setName(String name) {
18         this.name = name;
19     }
20     public Integer getAge() {
21         return age;
22     }
23     public void setAge(Integer age) {
24         this.age = age;
25     }
26
27 }
3.User.hbm.xml
 1 <?xml version="1.0" encoding="UTF-8"?>
 2 <!DOCTYPE hibernate-mapping PUBLIC
 3     "-//Hibernate/Hibernate Mapping DTD 3.0//EN"
 4     "http://www.hibernate.org/dtd/hibernate-mapping-3.0.dtd">
 5 <hibernate-mapping>
 6     <class name="com.itheima.domain.User" table="t_user">
 7         <id name="id" column="id">
 8             <!--
 9                 increment:获取主键的最大值,进行+1,做为主键
10             -->
11             <generator class="native"/>
12         </id>
13         <property name="name" column="name" length="30"/>
14         <property name="age" column="age"/>
15     </class>
16 </hibernate-mapping>
4.Hibernate.cfg.xml配置文件
 1 <?xml version="1.0" encoding="UTF-8"?>
 2 <!DOCTYPE hibernate-configuration PUBLIC
 3     "-//Hibernate/Hibernate Configuration DTD 3.0//EN"
 4     "http://www.hibernate.org/dtd/hibernate-configuration-3.0.dtd">
 5
 6 <hibernate-configuration>
 7     <!-- 记住:先配置sessionFactoryy -->
 8
 9     <session-factory>
10         <!-- 必须的配置 -->
11         <!-- 配置连接数据库的基本的信息: -->
12         <property name="hibernate.connection.driver_class">com.mysql.jdbc.Driver</property>
13         <property name="hibernate.connection.url">jdbc:mysql:///hibernate_day02</property>
14         <property name="hibernate.connection.username">root</property>
15         <property name="hibernate.connection.password">123456</property>
16
17         <!-- 数据库的方言: -->
18         <property name="hibernate.dialect">org.hibernate.dialect.MySQLDialect</property>
19         <!-- 可选配置 -->
20         <!-- 显示SQL语句,在控制台显示 -->
21         <property name="hibernate.show_sql">true</property>
22         <!-- 格式化SQL语句 -->
23         <property name="hibernate.format_sql">true</property>
24         <!-- 生成数据库的表结构
25             update:如果没有表结构,创建表结构。如果存在,不会创建,添加数据
26         -->
27         <property name="hibernate.hbm2ddl.auto">update</property>
28
29         <!-- 设置数据库的隔离级别,就使用默认值就OK
30         <property name="hibernate.connection.isolation">4</property>
31         -->
32
33         <!-- 开启绑定本地的session -->
34         <property name="hibernate.current_session_context_class">thread</property>
35
36         <!-- 映射配置文件,需要引入映射的配置文件 -->
37         <mapping resource="com/itheima/domain/User.hbm.xml"/>
38
39
40     </session-factory>
41 </hibernate-configuration>
5.运行HibernateUtils.java的主方法,就可以直接通过对象在数据库中简历数据表
 1 package com.itheima.utils;
 2
 3 import javax.servlet.jsp.jstl.core.Config;
 4
 5 import org.hibernate.Session;
 6 import org.hibernate.SessionFactory;
 7 import org.hibernate.cfg.Configuration;
 8
 9 /*
10  * Hibernate框架的工具
11  * @author chenyanlong
12  */
13 public class HibernateUtils {
14
15     //Curl+shift+x
16     private static final Configuration CONFIG;
17     private static final SessionFactory FACTORY;
18
19     //编写静态代码
20     static {
21         //加载配置文件
22         CONFIG =new Configuration().configure();
23         //构造工厂
24         FACTORY=CONFIG.buildSessionFactory();
25     }
26
27     /*
28      * 从工厂获取Session对象
29      * @return
30      */
31     public static Session getSession() {
32         return FACTORY.openSession();
33
34     }
35
36
37     /**
38      * // 从ThreadLocal类中获取到session的对象
39      * @return
40      */
41     public static Session getCurrentSession(){
42         return FACTORY.getCurrentSession();
43     }
44     public static  void main(String[] args) {
45         //调用获取session的方法
46         getSession();
47     }
48 }
6.显示效果

 浙公网安备 33010602011771号