Nginx高级特性实操
导读
nginx从入门到精通,点我直达
下载nginx与安装

安装依赖
yum -y install gcc zlib zlib-devel pcre-devel openssl openssl-devel
上传nginx至服务器中
上传至:/usr/local/software/service

解压:
cd /usr/local/software/service/
tar -zxvf nginx-1.20.1.tar.gz

编译
cd /usr/local/software/service/nginx-1.20.1
./configure
make && make install

默认安装路径
/usr/local/nginx

启动nginx
cd /usr/local/nginx/sbin
./nginx
- 设置软连接
ln -n /usr/local/nginx/sbin/nginx /usr/local/sbin
访问
ip:80

购买阿里云域名
nginx目录
核心目录
默认安装位置:/usr/local/nginx
conf #所有配置文件目录
nginx.conf #默认的主要的配置文件
nginx.conf.default #默认模板
html # 这是编译安装时Nginx的默认站点目录
50x.html #错误页面
index.html #默认首页
logs # nginx默认的日志路径,包括错误日志及访问日志
error.log #错误日志
nginx.pid #nginx启动后的进程id
access.log #nginx访问日志
sbin #nginx命令的目录
nginx #启动命令
常用命令
./nginx #默认配置文件启动
./nginx -s reload #重启,加载默认配置文件
./nginx -c /usr/local/nginx/conf/nginx.conf #启动指定某个配置文件
./nginx -s stop #停止
#关闭进程,nginx有master process 和worker process,关闭master即可
ps -ef | grep "nginx"
kill -9 PID
nginx核心配置文件
nginx.conf
#user  nobody; # 指定nginx worker进程运行以及用户组
worker_processes  1;

#error_log  logs/error.log; # 错误日志的存放路径,和错误日志
#error_log  logs/error.log  notice;
#error_log  logs/error.log  info;

#pid        logs/nginx.pid; # 进程PID存放路径


events {
    use epoll;
    # 作为反向代理来说,最大并发数量应该是worker_connections * worker_processes/2。因为反向代理服务器,每个并发会建立与客户端的连接和后端服务的连接,会占用2个连接
    worker_connections  1024;
}


http {
    include       mime.types;
    default_type  application/octet-stream;

    # 自定义服务日志
    #log_format  main  '$remote_addr - $remote_user [$time_local] "$request" '
    #                  '$status $body_bytes_sent "$http_referer" '
    #                  '"$http_user_agent" "$http_x_forwarded_for"';

    #access_log  logs/access.log  main;

    # 是否开启高效传输模式 on开启 off关闭
    sendfile        on;

    # 减少网络报文段的数量
    #tcp_nopush     on;

    #keepalive_timeout  0;

    # 客户端连接保持活动的超时时间,超过这个时间之后,服务器会关闭该连接
    keepalive_timeout  65;

    #gzip  on;

    # 虚拟主机配置
    server {
        listen       80;    # 虚拟主机的服务端口号
        server_name  localhost; # 用来指定IP地址或域名,多个域名之间

        #charset koi8-r;

        #access_log  logs/host.access.log  main;

        # url地址匹配
        location / {
            root   html;    # 服务默认启动路径
            index  index.html index.htm;    # 默认访问文件,按照顺序找
        }

        #error_page  404              /404.html;    # 错误状态码的显示页面

        # redirect server error pages to the static page /50x.html
        #
        error_page   500 502 503 504  /50x.html;
        location = /50x.html {
            root   html;
        }

        # proxy the PHP scripts to Apache listening on 127.0.0.1:80
        #
        #location ~ \.php$ {
        #    proxy_pass   http://127.0.0.1;
        #}

        # pass the PHP scripts to FastCGI server listening on 127.0.0.1:9000
        #
        #location ~ \.php$ {
        #    root           html;
        #    fastcgi_pass   127.0.0.1:9000;
        #    fastcgi_index  index.php;
        #    fastcgi_param  SCRIPT_FILENAME  /scripts$fastcgi_script_name;
        #    include        fastcgi_params;
        #}

        # deny access to .htaccess files, if Apache's document root
        # concurs with nginx's one
        #
        #location ~ /\.ht {
        #    deny  all;
        #}
    }


    # another virtual host using mix of IP-, name-, and port-based configuration
    #
    #server {
    #    listen       8000;
    #    listen       somename:8080;
    #    server_name  somename  alias  another.alias;

    #    location / {
    #        root   html;
    #        index  index.html index.htm;
    #    }
    #}


    # HTTPS server
    #
    #server {
    #    listen       443 ssl;
    #    server_name  localhost;

    #    ssl_certificate      cert.pem;
    #    ssl_certificate_key  cert.key;

    #    ssl_session_cache    shared:SSL:1m;
    #    ssl_session_timeout  5m;

    #    ssl_ciphers  HIGH:!aNULL:!MD5;
    #    ssl_prefer_server_ciphers  on;

    #    location / {
    #        root   html;
    #        index  index.html index.htm;
    #    }
    #}

}
accessLog日志挖掘
access.log日志用处
- 统计站点访问ip来源、某个时间段的访问频率
- 查看访问最频的页面、Http响应状态码、接口性能
- 接口秒级访问量、分钟访问量、小时和天访问量
- ...
默认配置
nginx.conf文件中的配置!!!
    #log_format  main  '$remote_addr - $remote_user [$time_local] "$request" '
    #                  '$status $body_bytes_sent "$http_referer" '
    #                  '"$http_user_agent" "$http_x_forwarded_for"';
示例
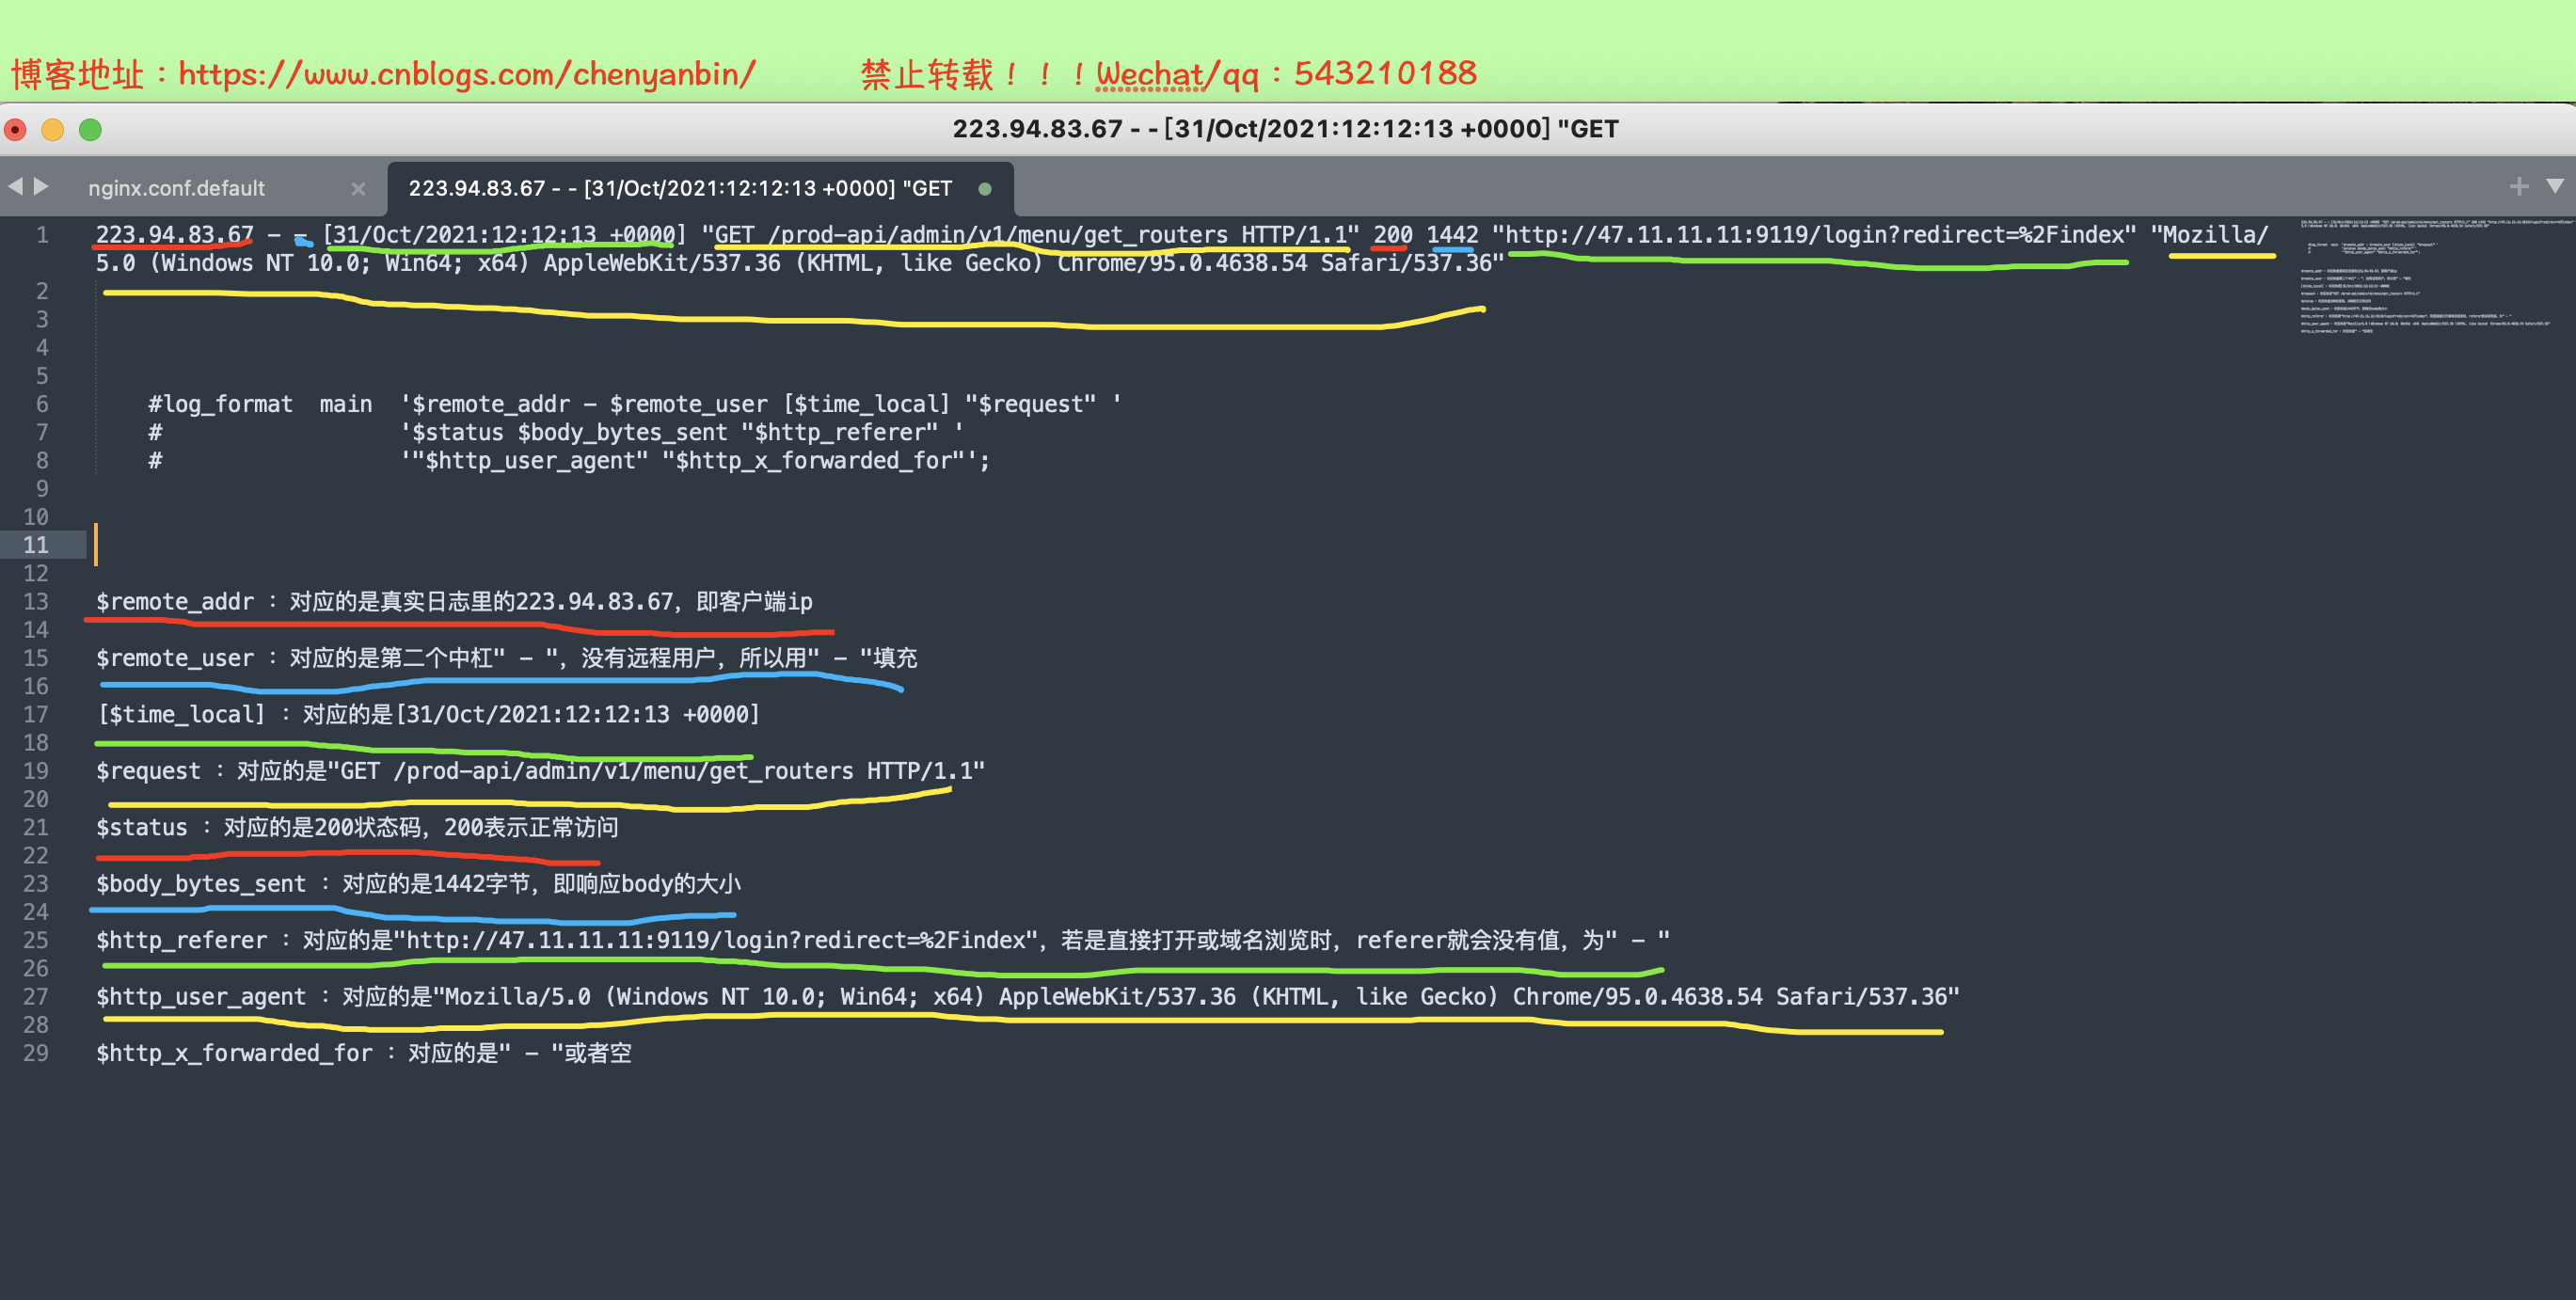
223.94.83.67 - - [31/Oct/2021:12:12:13 +0000] "GET /prod-api/admin/v1/menu/get_routers HTTP/1.1" 200 1442 "http://47.11.11.11:9119/login?redirect=%2Findex" "Mozilla/5.0 (Windows NT 10.0; Win64; x64) AppleWebKit/537.36 (KHTML, like Gecko) Chrome/95.0.4638.54 Safari/537.36"
解释
- $remote_addr :对应的是真实日志里的223.94.83.67,即客户端ip
- $remote_user :对应的是第二个中杠" - ",没有远程用户,所以用" - "填充
- [$time_local] :对应的是[31/Oct/2021:12:12:13 +0000]
- $request :对应的是"GET /prod-api/admin/v1/menu/get_routers HTTP/1.1"
- $status :对应的是200状态码,200表示正常访问
- $body_bytes_sent :对应的是1442字节,即响应body的大小
- $http_referer :对应的是"http://47.11.11.11:9119/login?redirect=%2Findex",若是直接打开或域名浏览时,referer就会没有值,为" - "
- $http_user_agent :对应的是"Mozilla/5.0 (Windows NT 10.0; Win64; x64) AppleWebKit/537.36 (KHTML, like Gecko) Chrome/95.0.4638.54 Safari/537.36"
- $http_x_forwarded_for :对应的是" - "或者空
自定义日志统计接口性能
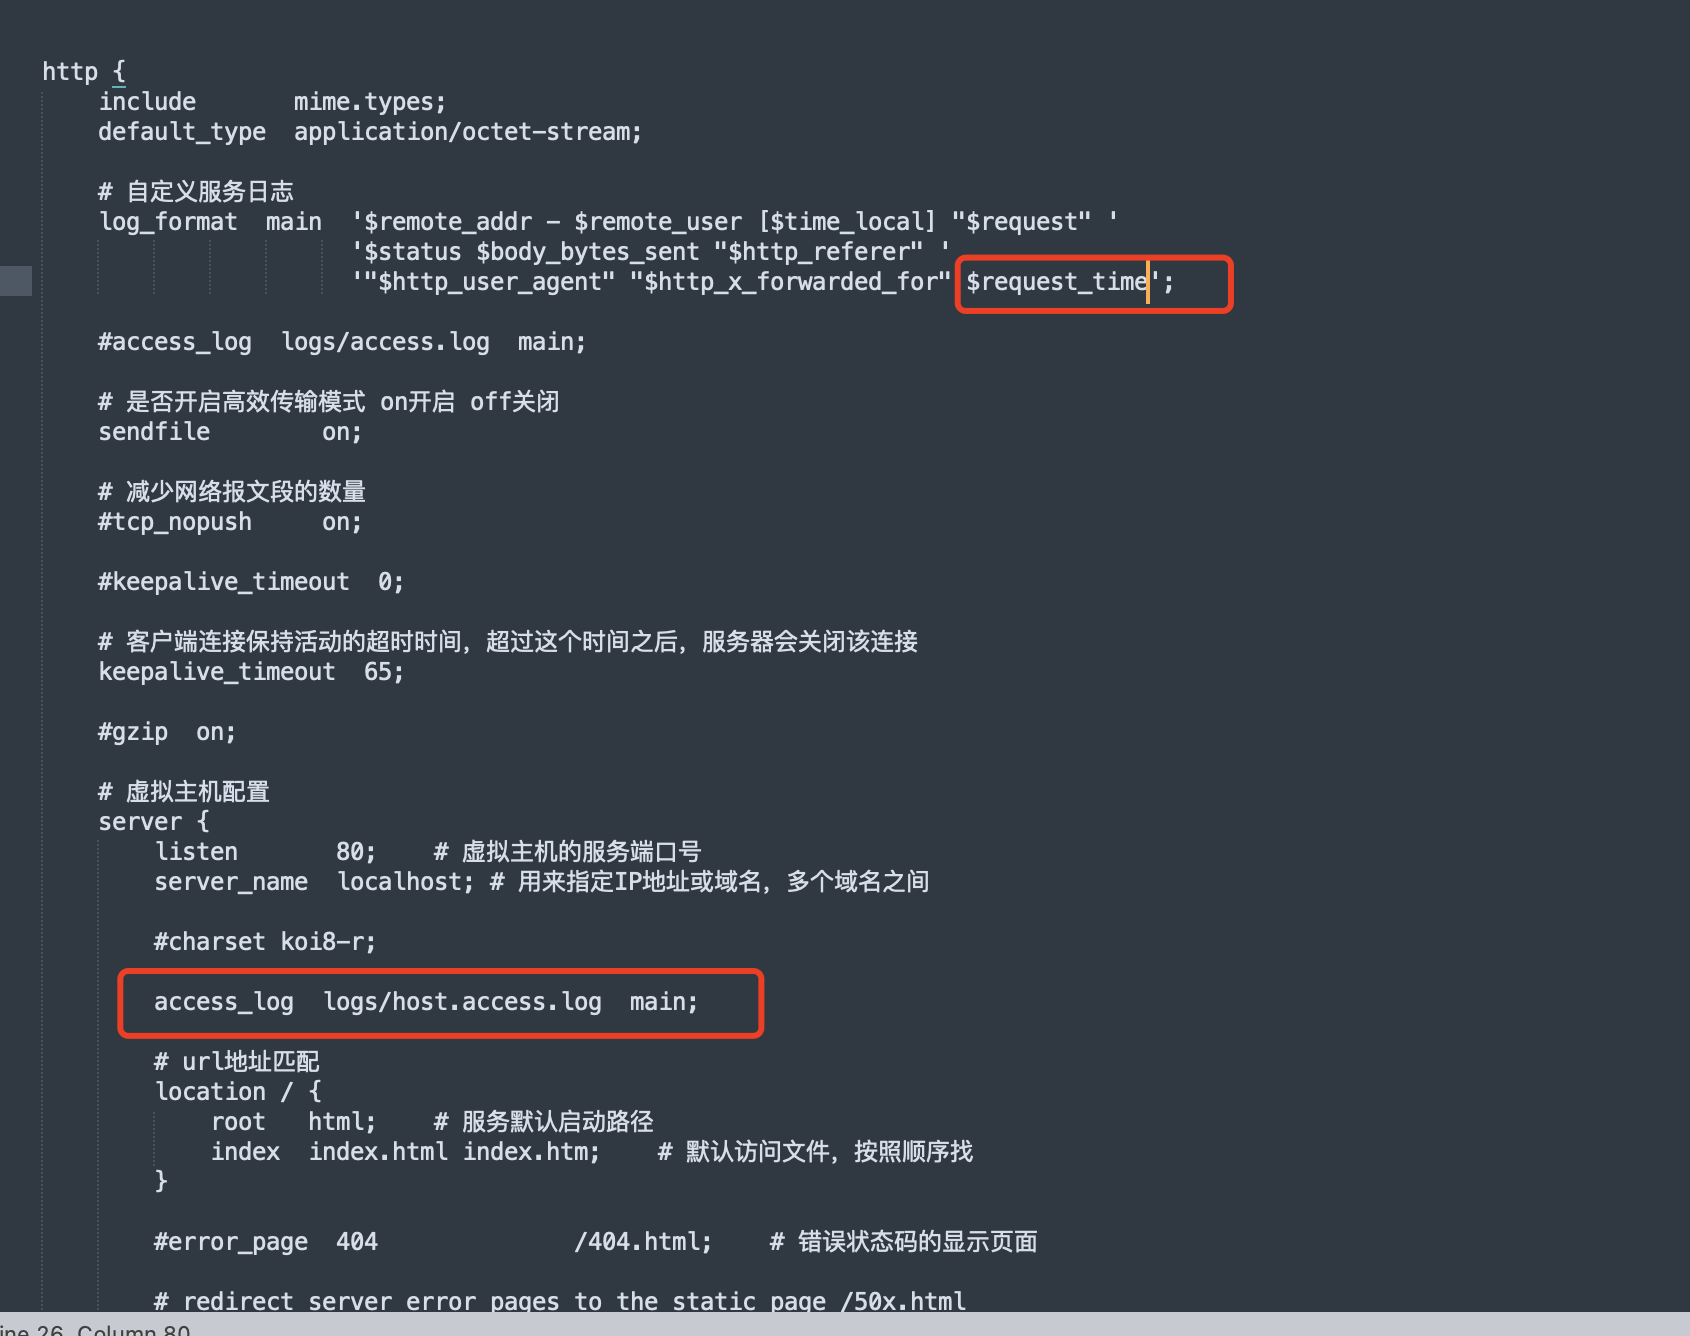
日志格式添加:$request_time
从接受用户请求的第一个字节到发送完响应数据的时间,即包括接收请求数据时间、程序响应时间、输出响应数据时间
$upstream_response_time:指从Nginx向后端建立连接开始到接受完数据然后关闭连接为止的时间
$request_time一般会比upstream_response_time大,因为用户网络较差,或者传递数据较大时,前者会耗时大很多
统计耗时接口,列出传输时间超过2秒的接口,显示前5条
cat time_temp.log|awk '($NF > 2){print $7}'|sort -n|uniq -c|sort -nr|head -5
备注:$NF 表示最后一列, awk '{print $NF}'
Nginx站点统计访问量、高频URL
查看访问最频繁的前100个IP
awk '{print $1}' access_temp.log | sort -n |uniq -c | sort -rn | head -n 100
统计访问最多的url前20名
cat access_temp.log |awk '{print $7}'| sort|uniq -c| sort -rn| head -20 | more
- awk 是文本处理工具,默认按照空格切分,$N 是第切割后第N个,从1开始
- sort命令用于将文本文件内容加以排序,-n 按照数值排,-r 按照倒序来排
- 案例的sort -n 是按照第一列的数值大小进行排序,从小到大,倒序就是 sort -rn
- uniq 去除重复出现的行列, -c 在每列旁边显示该行重复出现的次数
nginx负载均衡策略
环境准备
- 安装jdk,点我直达
- 准备2个jar包springboot项目
- demo1.jar 端口号:8888
- demo2.jar 端口号:9999
- 守护方式启动2个jar包:nohup java -jar demoX.jar &
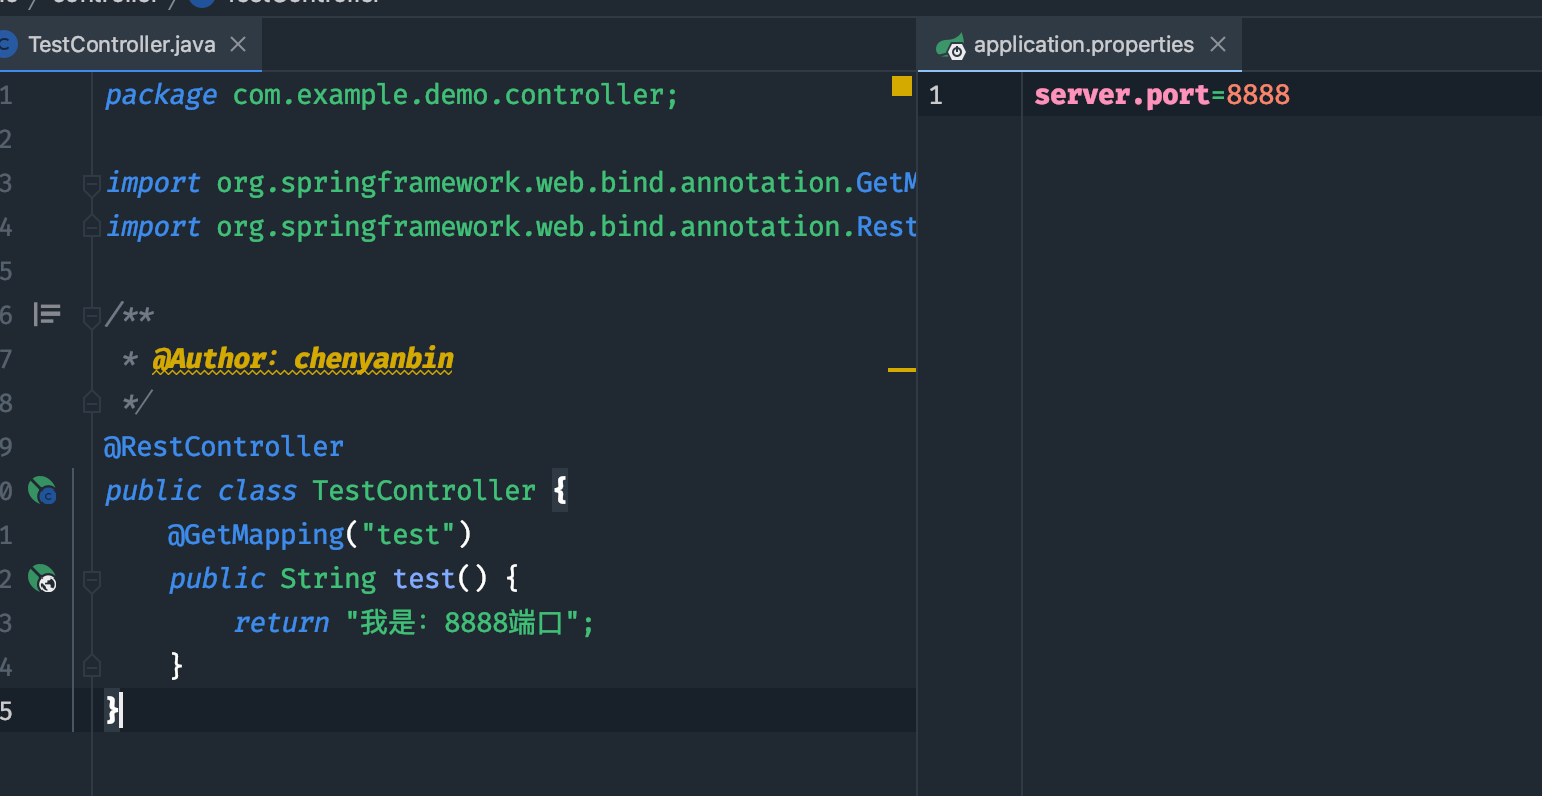
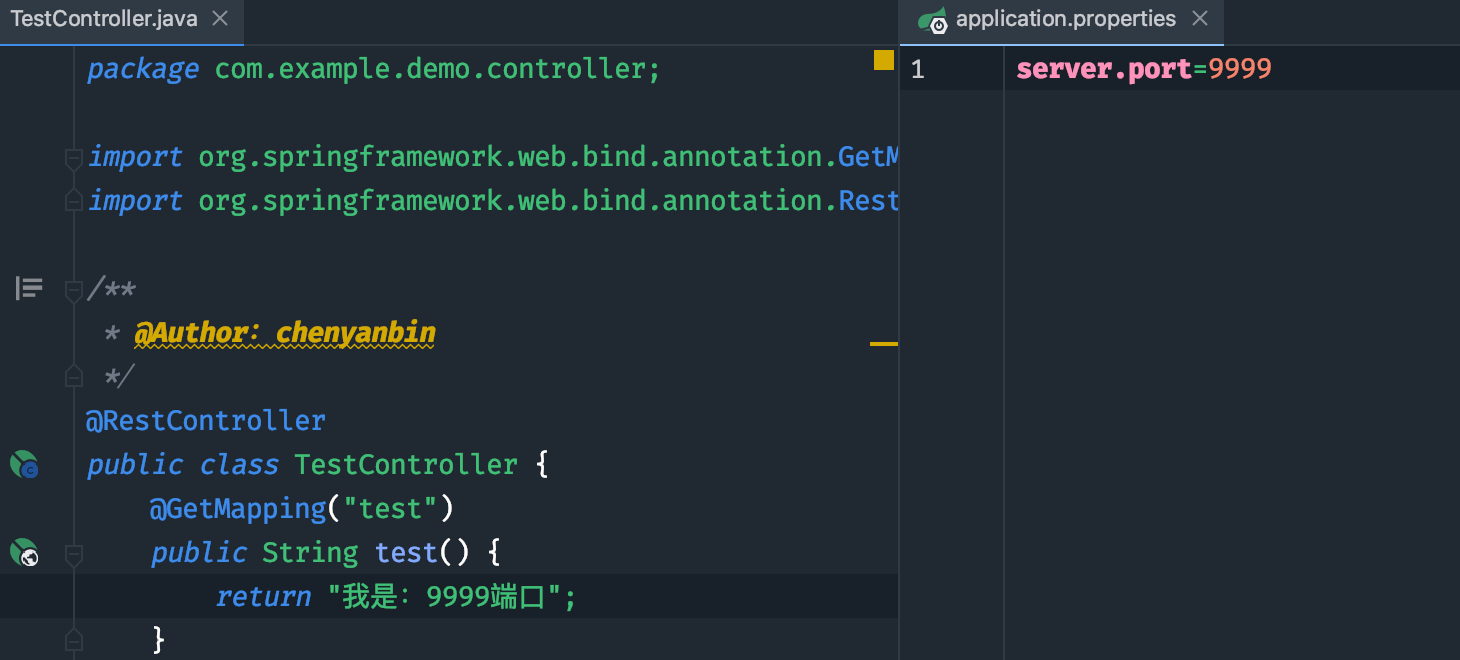

测试接口
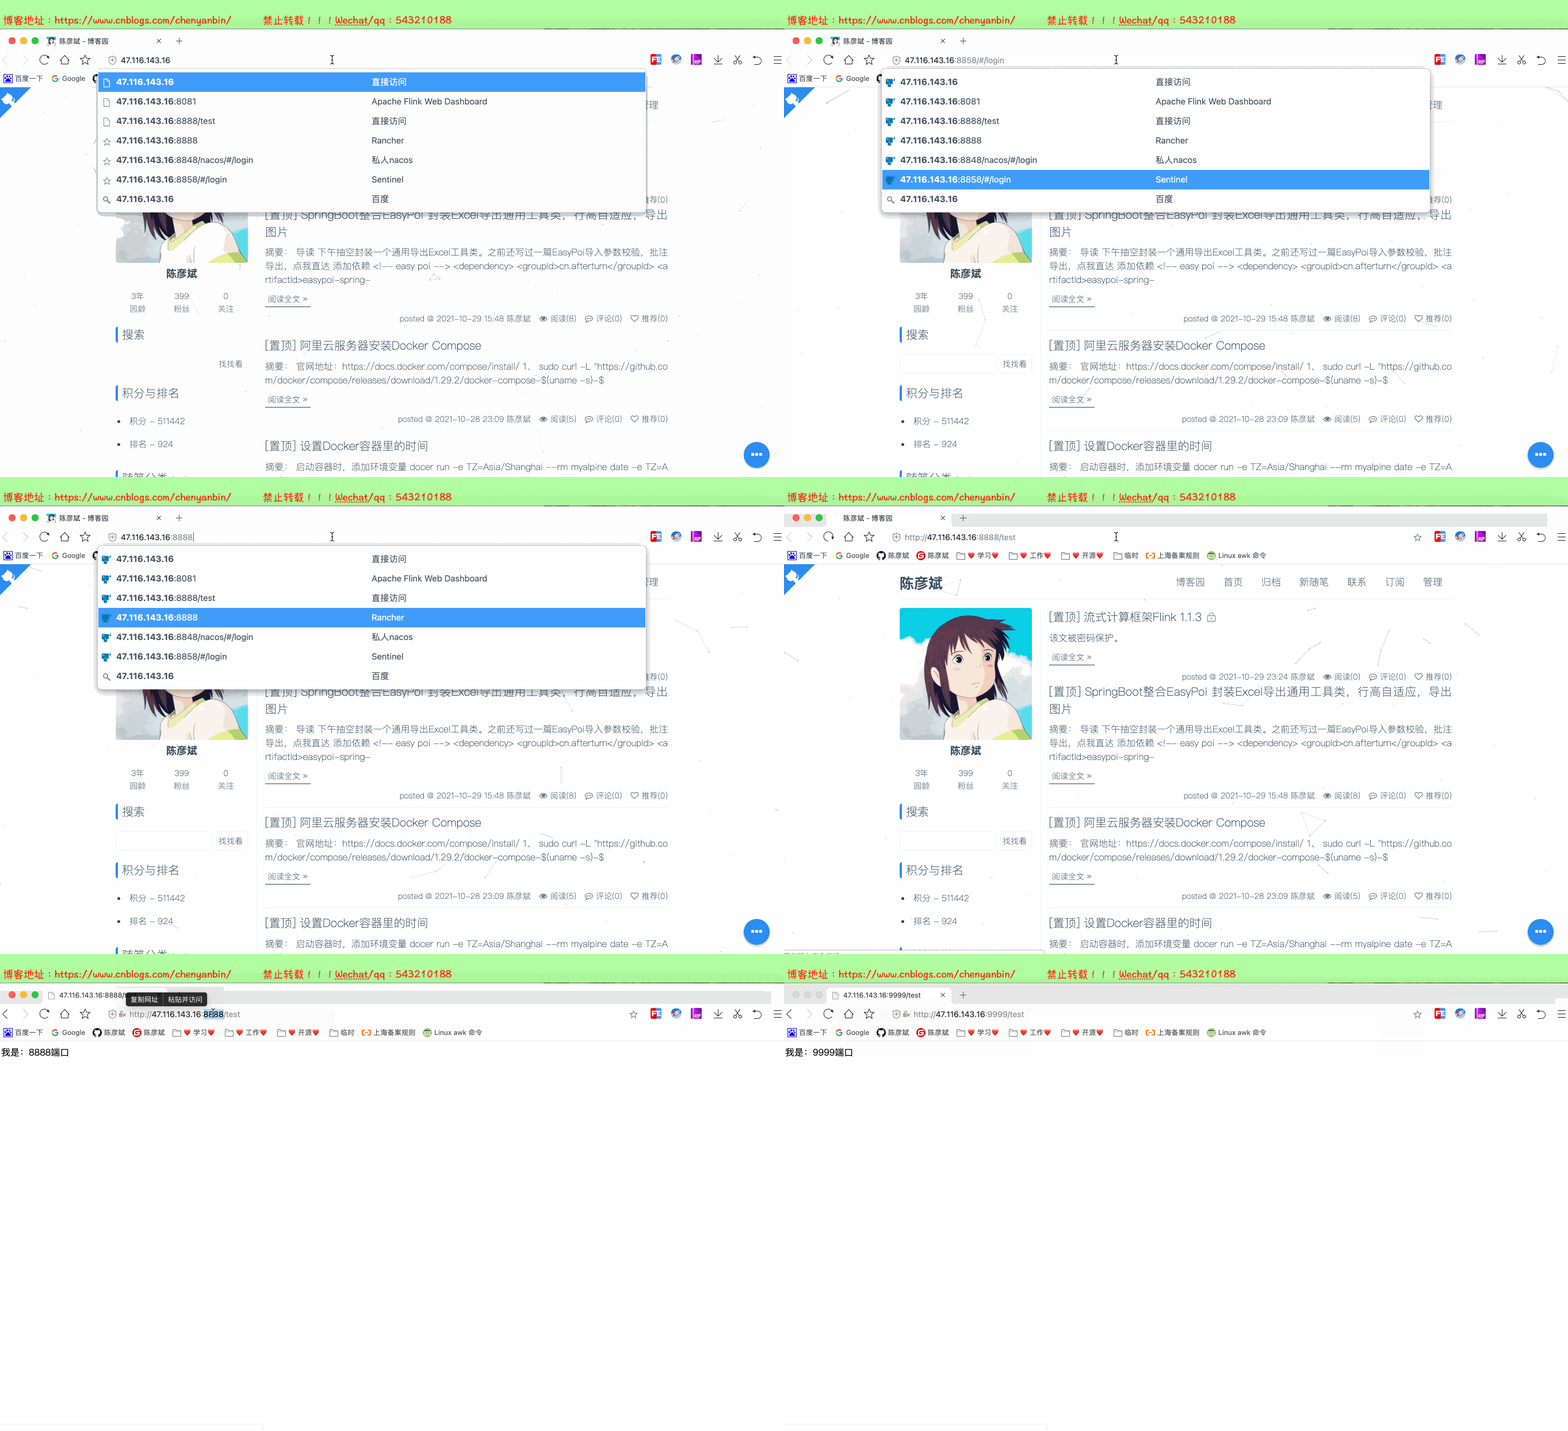
nginx配置负载均衡策略
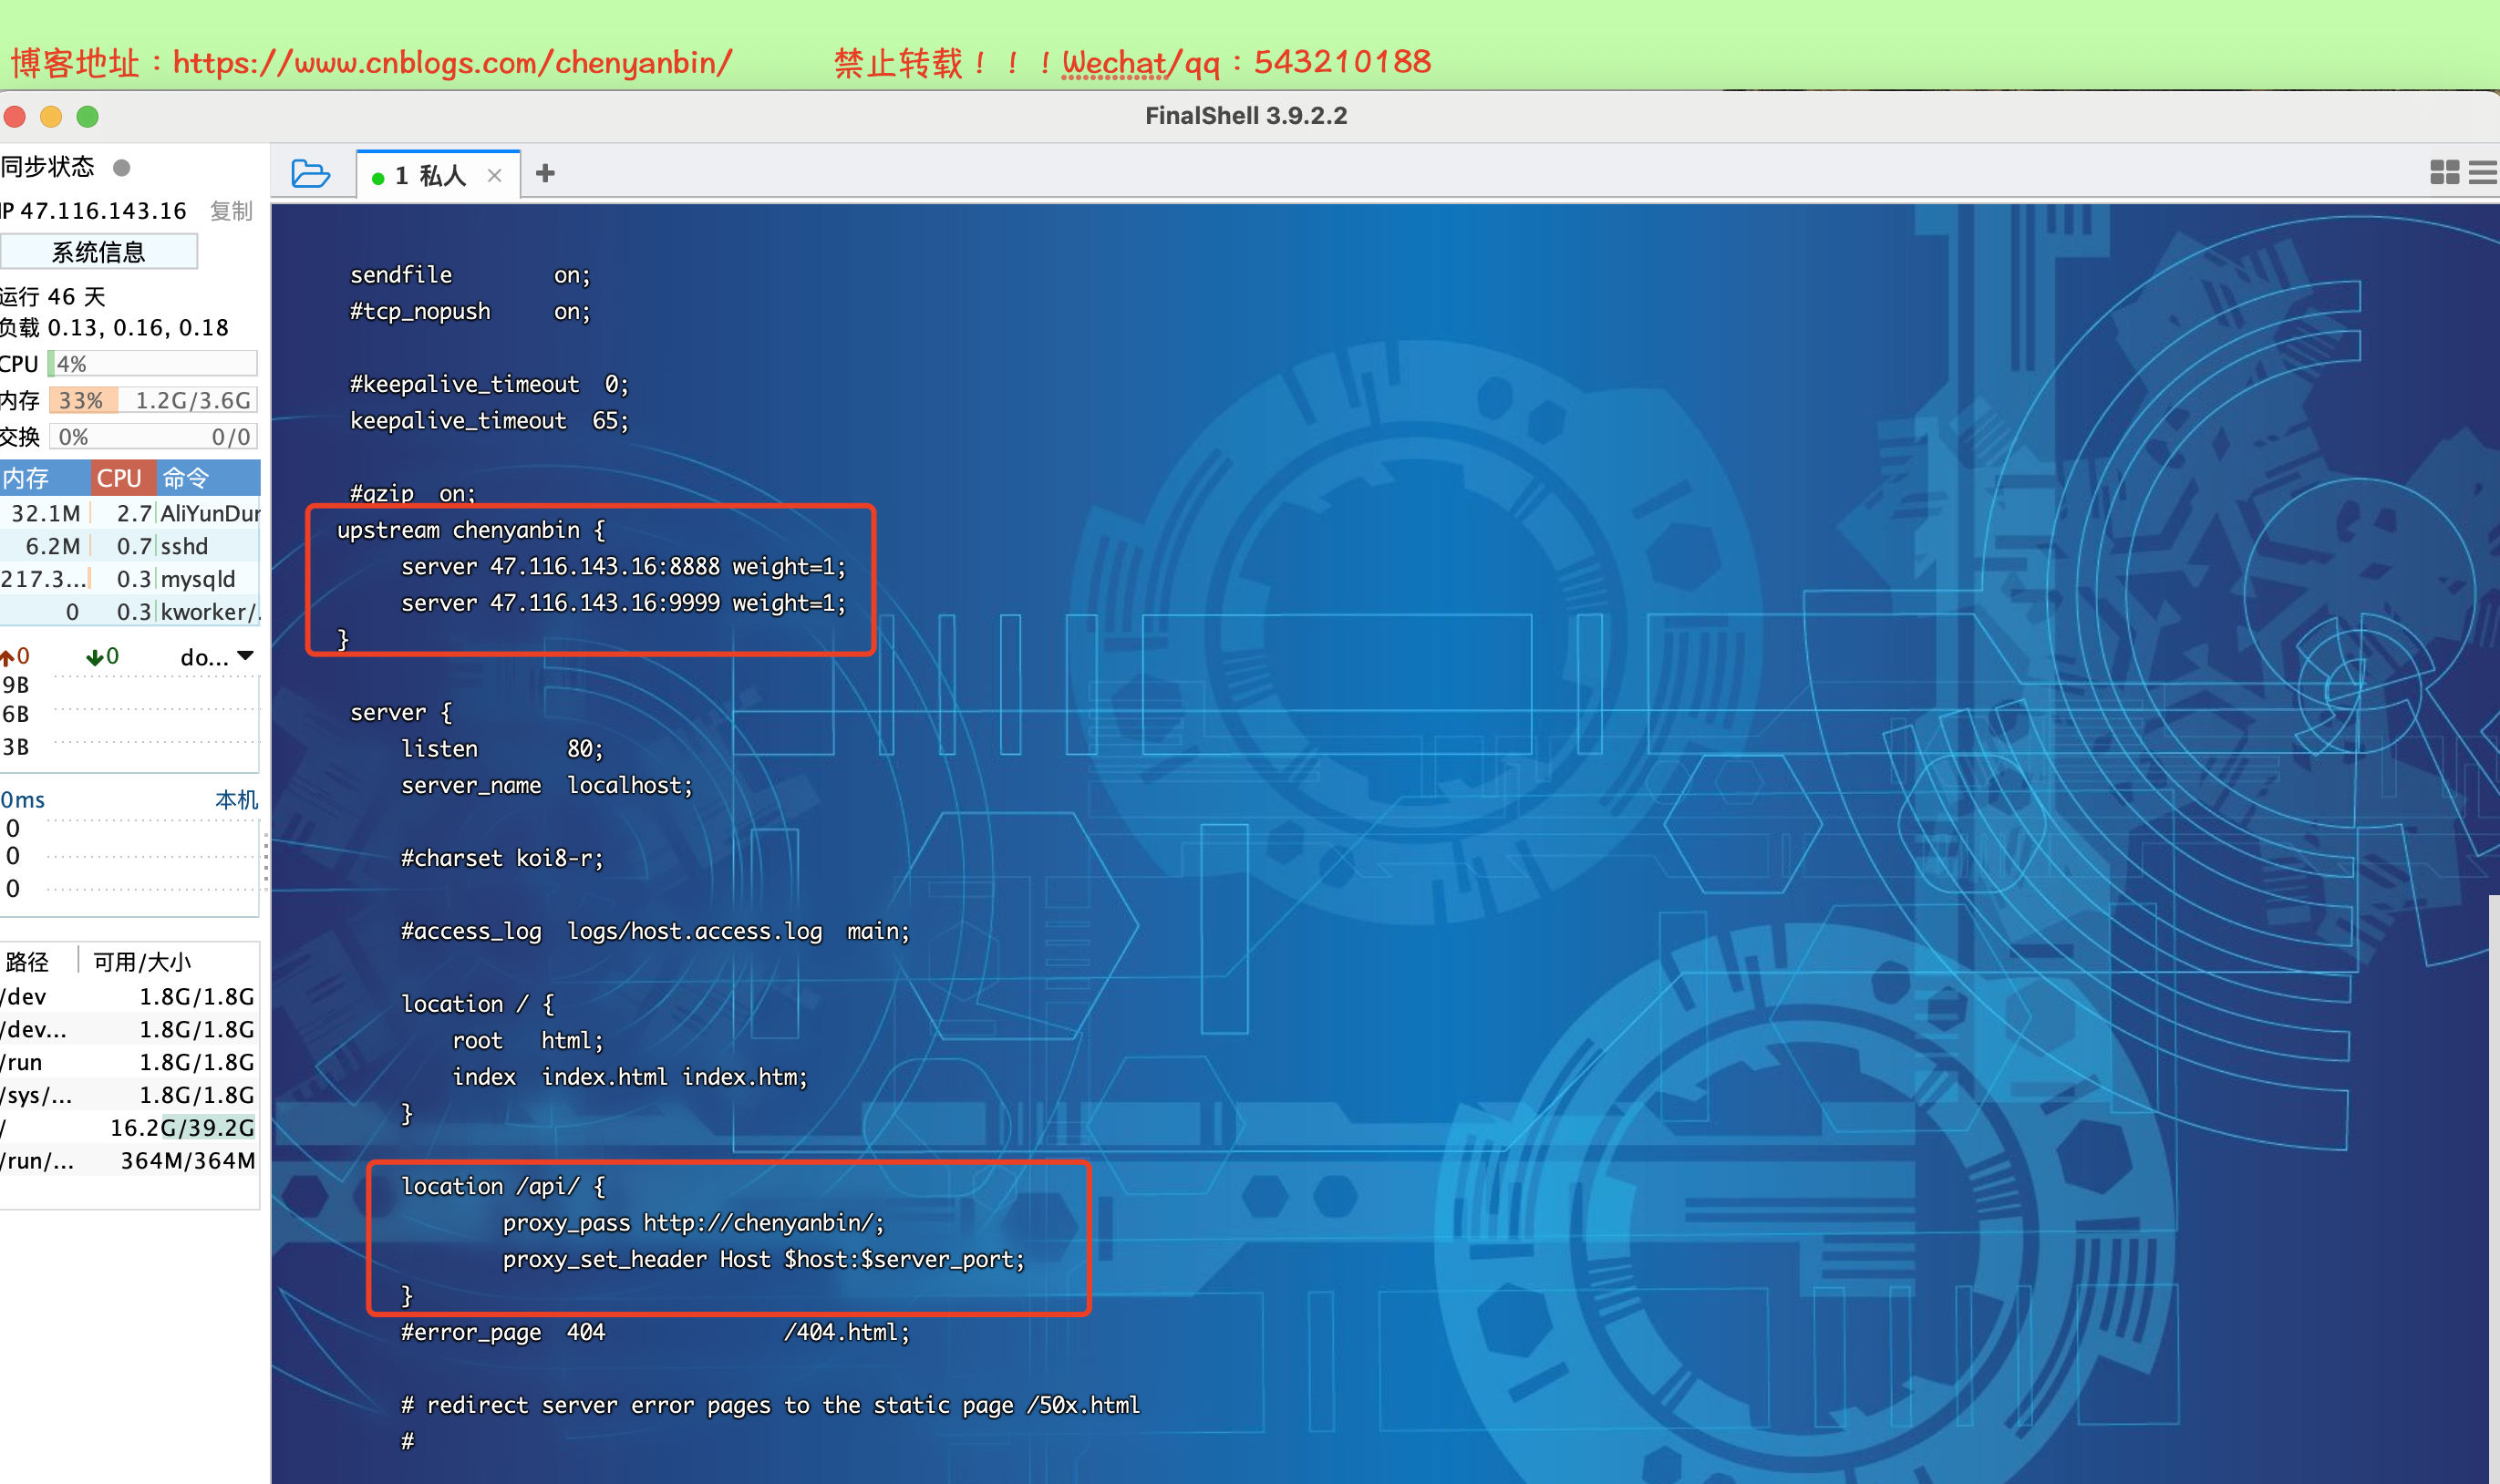
编辑nginx.conf
#user  nobody;
worker_processes  1;

#error_log  logs/error.log;
#error_log  logs/error.log  notice;
#error_log  logs/error.log  info;

#pid        logs/nginx.pid;


events {
    worker_connections  1024;
}


http {
    include       mime.types;
    default_type  application/octet-stream;

    #log_format  main  '$remote_addr - $remote_user [$time_local] "$request" '
    #                  '$status $body_bytes_sent "$http_referer" '
    #                  '"$http_user_agent" "$http_x_forwarded_for"';

    #access_log  logs/access.log  main;

    sendfile        on;
    #tcp_nopush     on;

    #keepalive_timeout  0;
    keepalive_timeout  65;

    #gzip  on;
   upstream chenyanbin {
    server 47.116.143.16:8888 weight=1;
    server 47.116.143.16:9999 weight=1;
   }

    server {
        listen       80;
        server_name  localhost;

        #charset koi8-r;

        #access_log  logs/host.access.log  main;

        location / {
            root   html;
            index  index.html index.htm;
        }

    location /api/ {
        proxy_pass http://chenyanbin;
        proxy_set_header Host $host:$server_port;
       }

    }
}
- 负载均衡策略
- 节点轮询(默认)
- 简介:每个请求按顺序分配到不同的后端服务器
- 场景:会造成可靠性低和负载分配不均衡,适合静态文件服务器
- weight 权重配置
- 简介:weight和访问比率成正比,数字越大,分配得到的流量越高
- 场景:服务器性能差异大的情况使用
- ip_hash(固定分发)
- 简介:根据请求按访问ip的hash结果分配,这样每个用户就可以固定访问一个后端服务器
- 场景:服务器业务分区、业务缓存、Session需要单点的情况
- 节点轮询(默认)
ip_hash示例
   upstream chenyanbin {
      ip_hash;
      server 47.116.143.16:8888 weight=1;
      server 47.116.143.16:9999 weight=1;
   }
- 标记节点状态
- down 表示当前的server暂时不参与负载
- backup 其它所有的非backup机器down的时候,会请求backup机器,这台机器压力会最轻,配置也会相对低(三市五中心机房,异地多活架构!!!!)
标记节点状态示例
   upstream chenyanbin {
      server 47.116.143.16:8888 weight=1 down;
      server 47.116.143.16:9999 weight=1 backup;
   }
重启nginx
cd /usr/local/nginx/sbin/
./nginx -s reload
演示
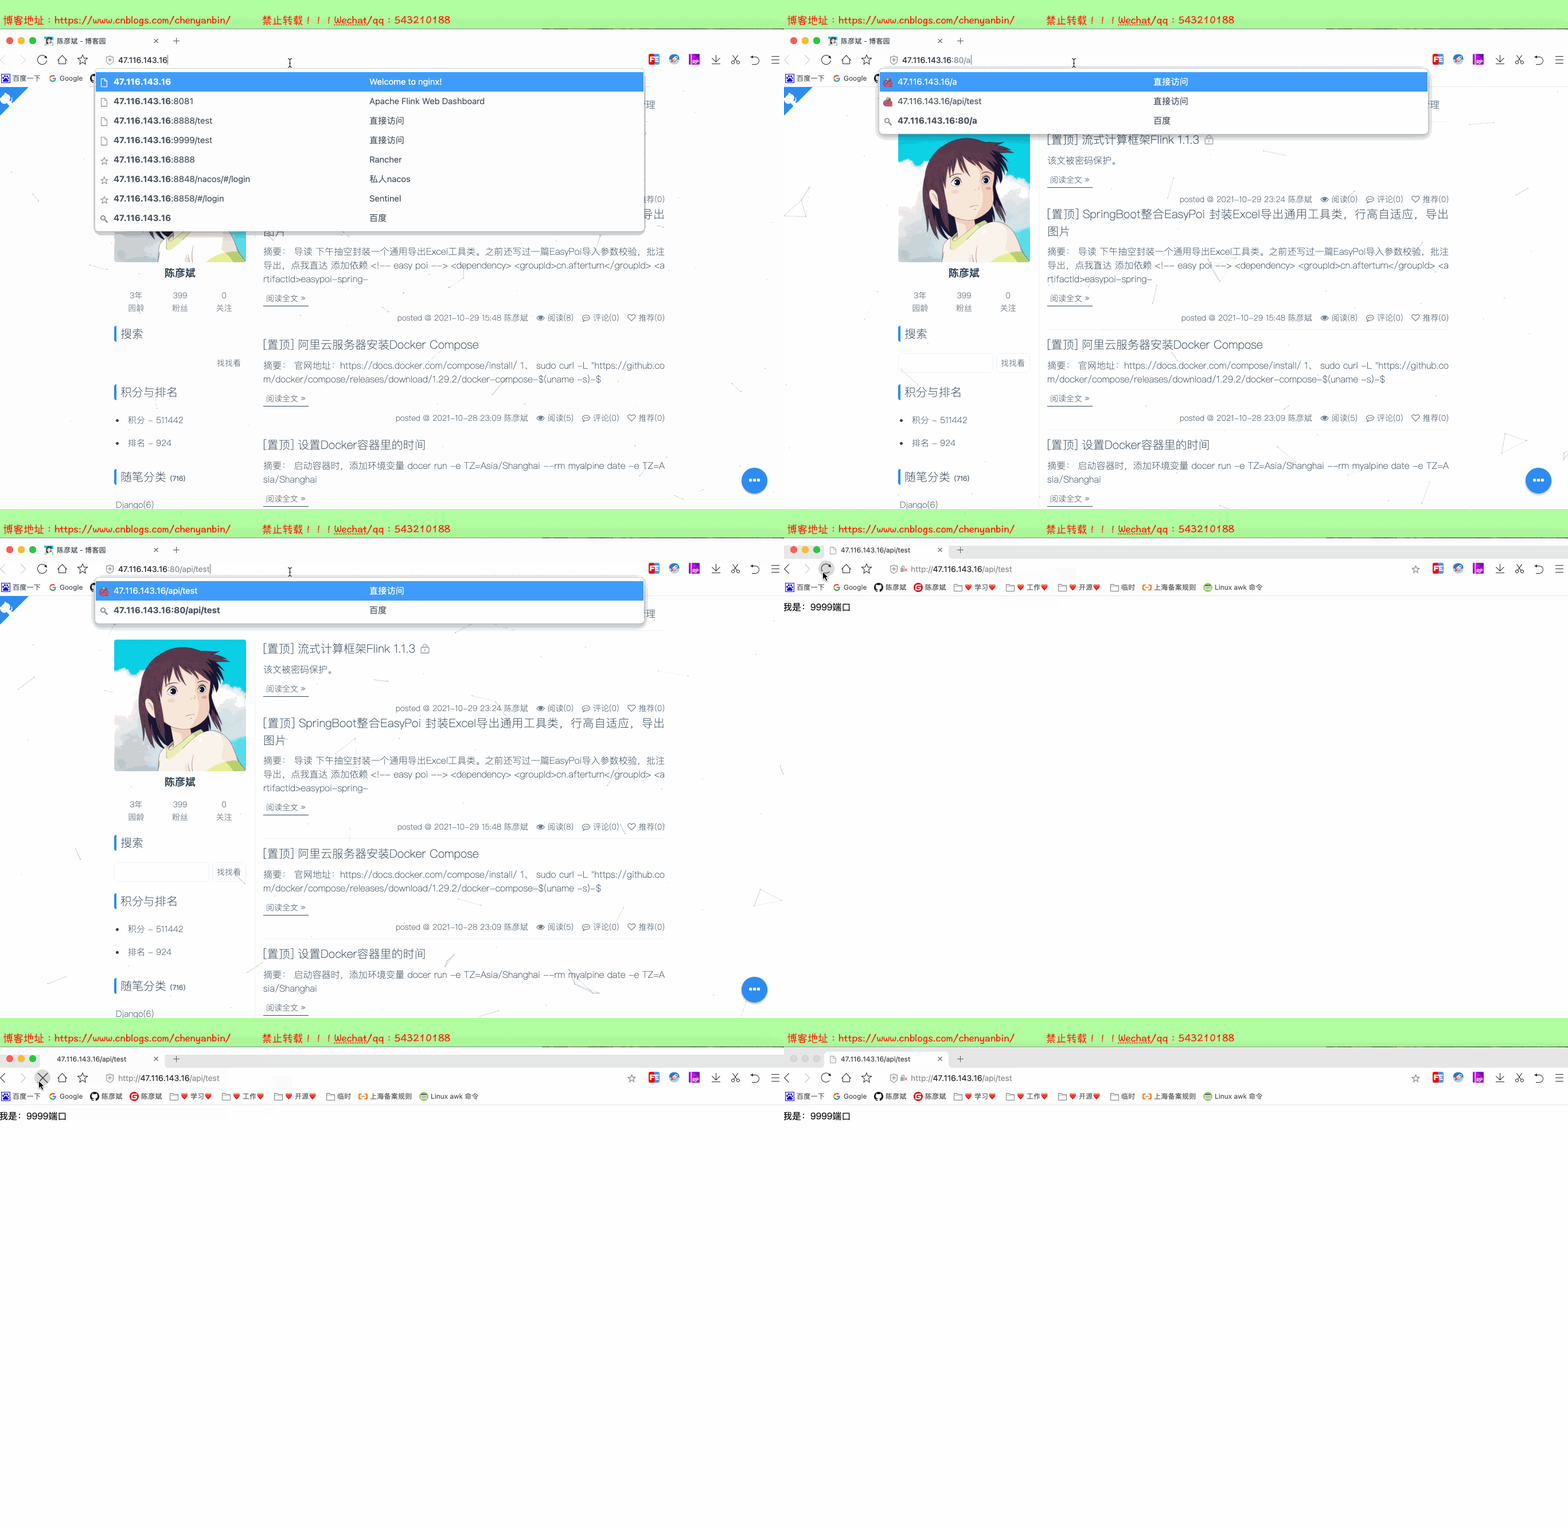
Nginx可用性探测
如果某个应用挂了,请求不应该继续分发过去
-
max_fails 允许请求失败的次数,默认为1.当超过最大次数时就不会请求
-
fail_timeout : max_fails次失败后,暂停的时间,默认:fail_timeout为10s
- 可以通过指令proxy_next_upstream来配置什么是失败的尝试
   upstream chenyanbin {
      server 47.116.143.16:8888 max_fails=2 fail_timeout=60s;
      server 47.116.143.16:9999 max_fails=2 fail_timeout=60s;
   }


    location /api/ {
        proxy_pass http://chenyanbin;
        proxy_set_header Host $host:$server_port;
        proxy_next_upstream error timeout http_500 http_503 http_404;
    }

备注:连续2次失败,在60秒内,nginx不会再将请求分发过去,第61秒时,会重试该节点是否可用!!!
nginx经典应用
nginx自定义全局异常json兜底数据
nginx.conf配置
    location /api/ {
        proxy_pass http://chenyanbin/;
        proxy_set_header Host $host:$server_port;
        proxy_next_upstream error timeout http_500 http_503 http_404;
        # 存放用户的真实ip
        proxy_set_header X-Real-IP $remote_addr;
        proxy_set_header X-Forwarded-For $proxy_add_x_forwarded_for;
        #开启错误拦截配置,一定要开启
        proxy_intercept_errors on;
    }


error_page   404 500 502 503 504  =200  /default_api;
        location = /default_api {
            default_type application/json;
            return 200 '{"code":"-1","msg":"invoke fail, not found "}';
        }
演示

Nginx封禁恶意IP
1、cd /usr/local/nginx/conf

2、touch blacklist.conf

3、vi blacklist.conf
# 写入如下内容
deny 101.93.218.231;

4、vi nginx.conf

# 全局其效果,放到http{}代码块中;针对某个网站起效果,放到server{}代码块中

http{
    #......
    include blacklist.conf;
}


server{
    #....
    include blacklist.conf;
}
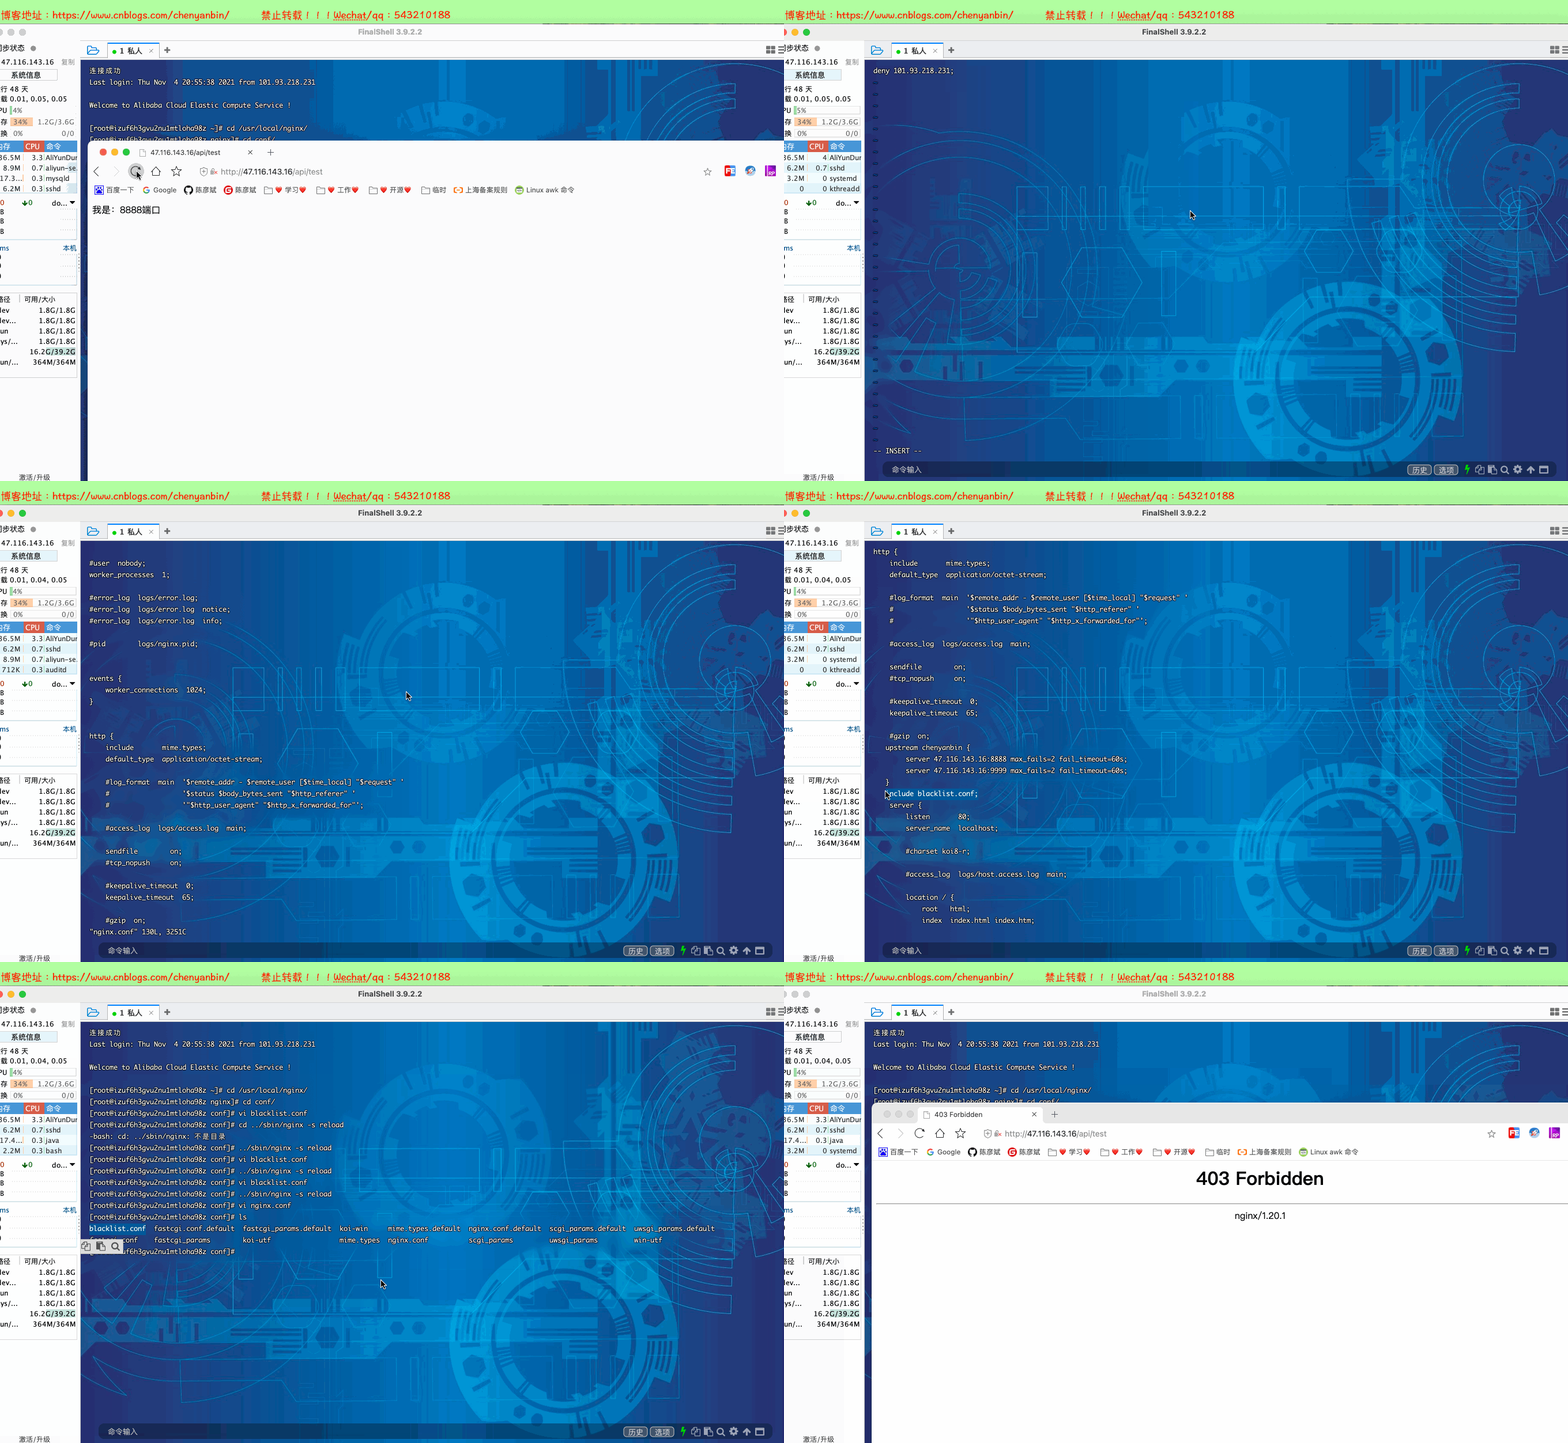
注意:从access.log日志中,查看访问ip列表(/usr/local/nginx/logs)
Nginx配置浏览器跨域
修改nginx.conf
location /api/ {
                proxy_pass http://chenyanbin/;
                proxy_set_header Host $host:$server_port;
                proxy_next_upstream error timeout http_500 http_503 http_404;
                proxy_set_header X-Real-IP $remote_addr;
                proxy_set_header X-Forwarded-For $proxy_add_x_forwarded_for;
                proxy_intercept_errors on;


                # 配置跨域
                add_header 'Access-Control-Allow-Origin' $http_origin;
                add_header 'Access-Control-Allow-Credentials' 'true';
                add_header 'Access-Control-Allow-Headers' 'DNT,web-token,app-token,Authorization,Accept,Origin,Keep-Alive,User-Agent,X-Mx-ReqToken,X-Data-Type,X-Auth-Token,X-Requested-With,If-Modified-Since,Cache-Control,Content-Type,Range';
                add_header Access-Control-Allow-Methods 'GET,POST,OPTIONS';

                if ($request_method = 'OPTIONS') {
                        add_header 'Access-Control-Max-Age' 1728000;
                        add_header 'Content-Type' 'text/plain; charset=utf-8';
                        add_header 'Content-Length' 0;
                        return 200;
                }
        }

Nginx配置websocket反向代理
    location /api/ {
        proxy_pass http://chenyanbin/;
        proxy_set_header Host $host:$server_port;
        proxy_read_timeout 300s; //websocket空闲保持时长
        proxy_set_header Host $host;
        proxy_set_header X-Real-IP $remote_addr;
        proxy_set_header X-Forwarded-For $proxy_add_x_forwarded_for;
        proxy_http_version 1.1;

        # 添加下面2句话
        proxy_set_header Upgrade $http_upgrade;
        proxy_set_header Connection $connection_upgrade;


    }
Nginx压缩配置(重要)
对文本、js和css文件等进行压缩,一般压缩后的大小是原始大小的25%
nginx.conf
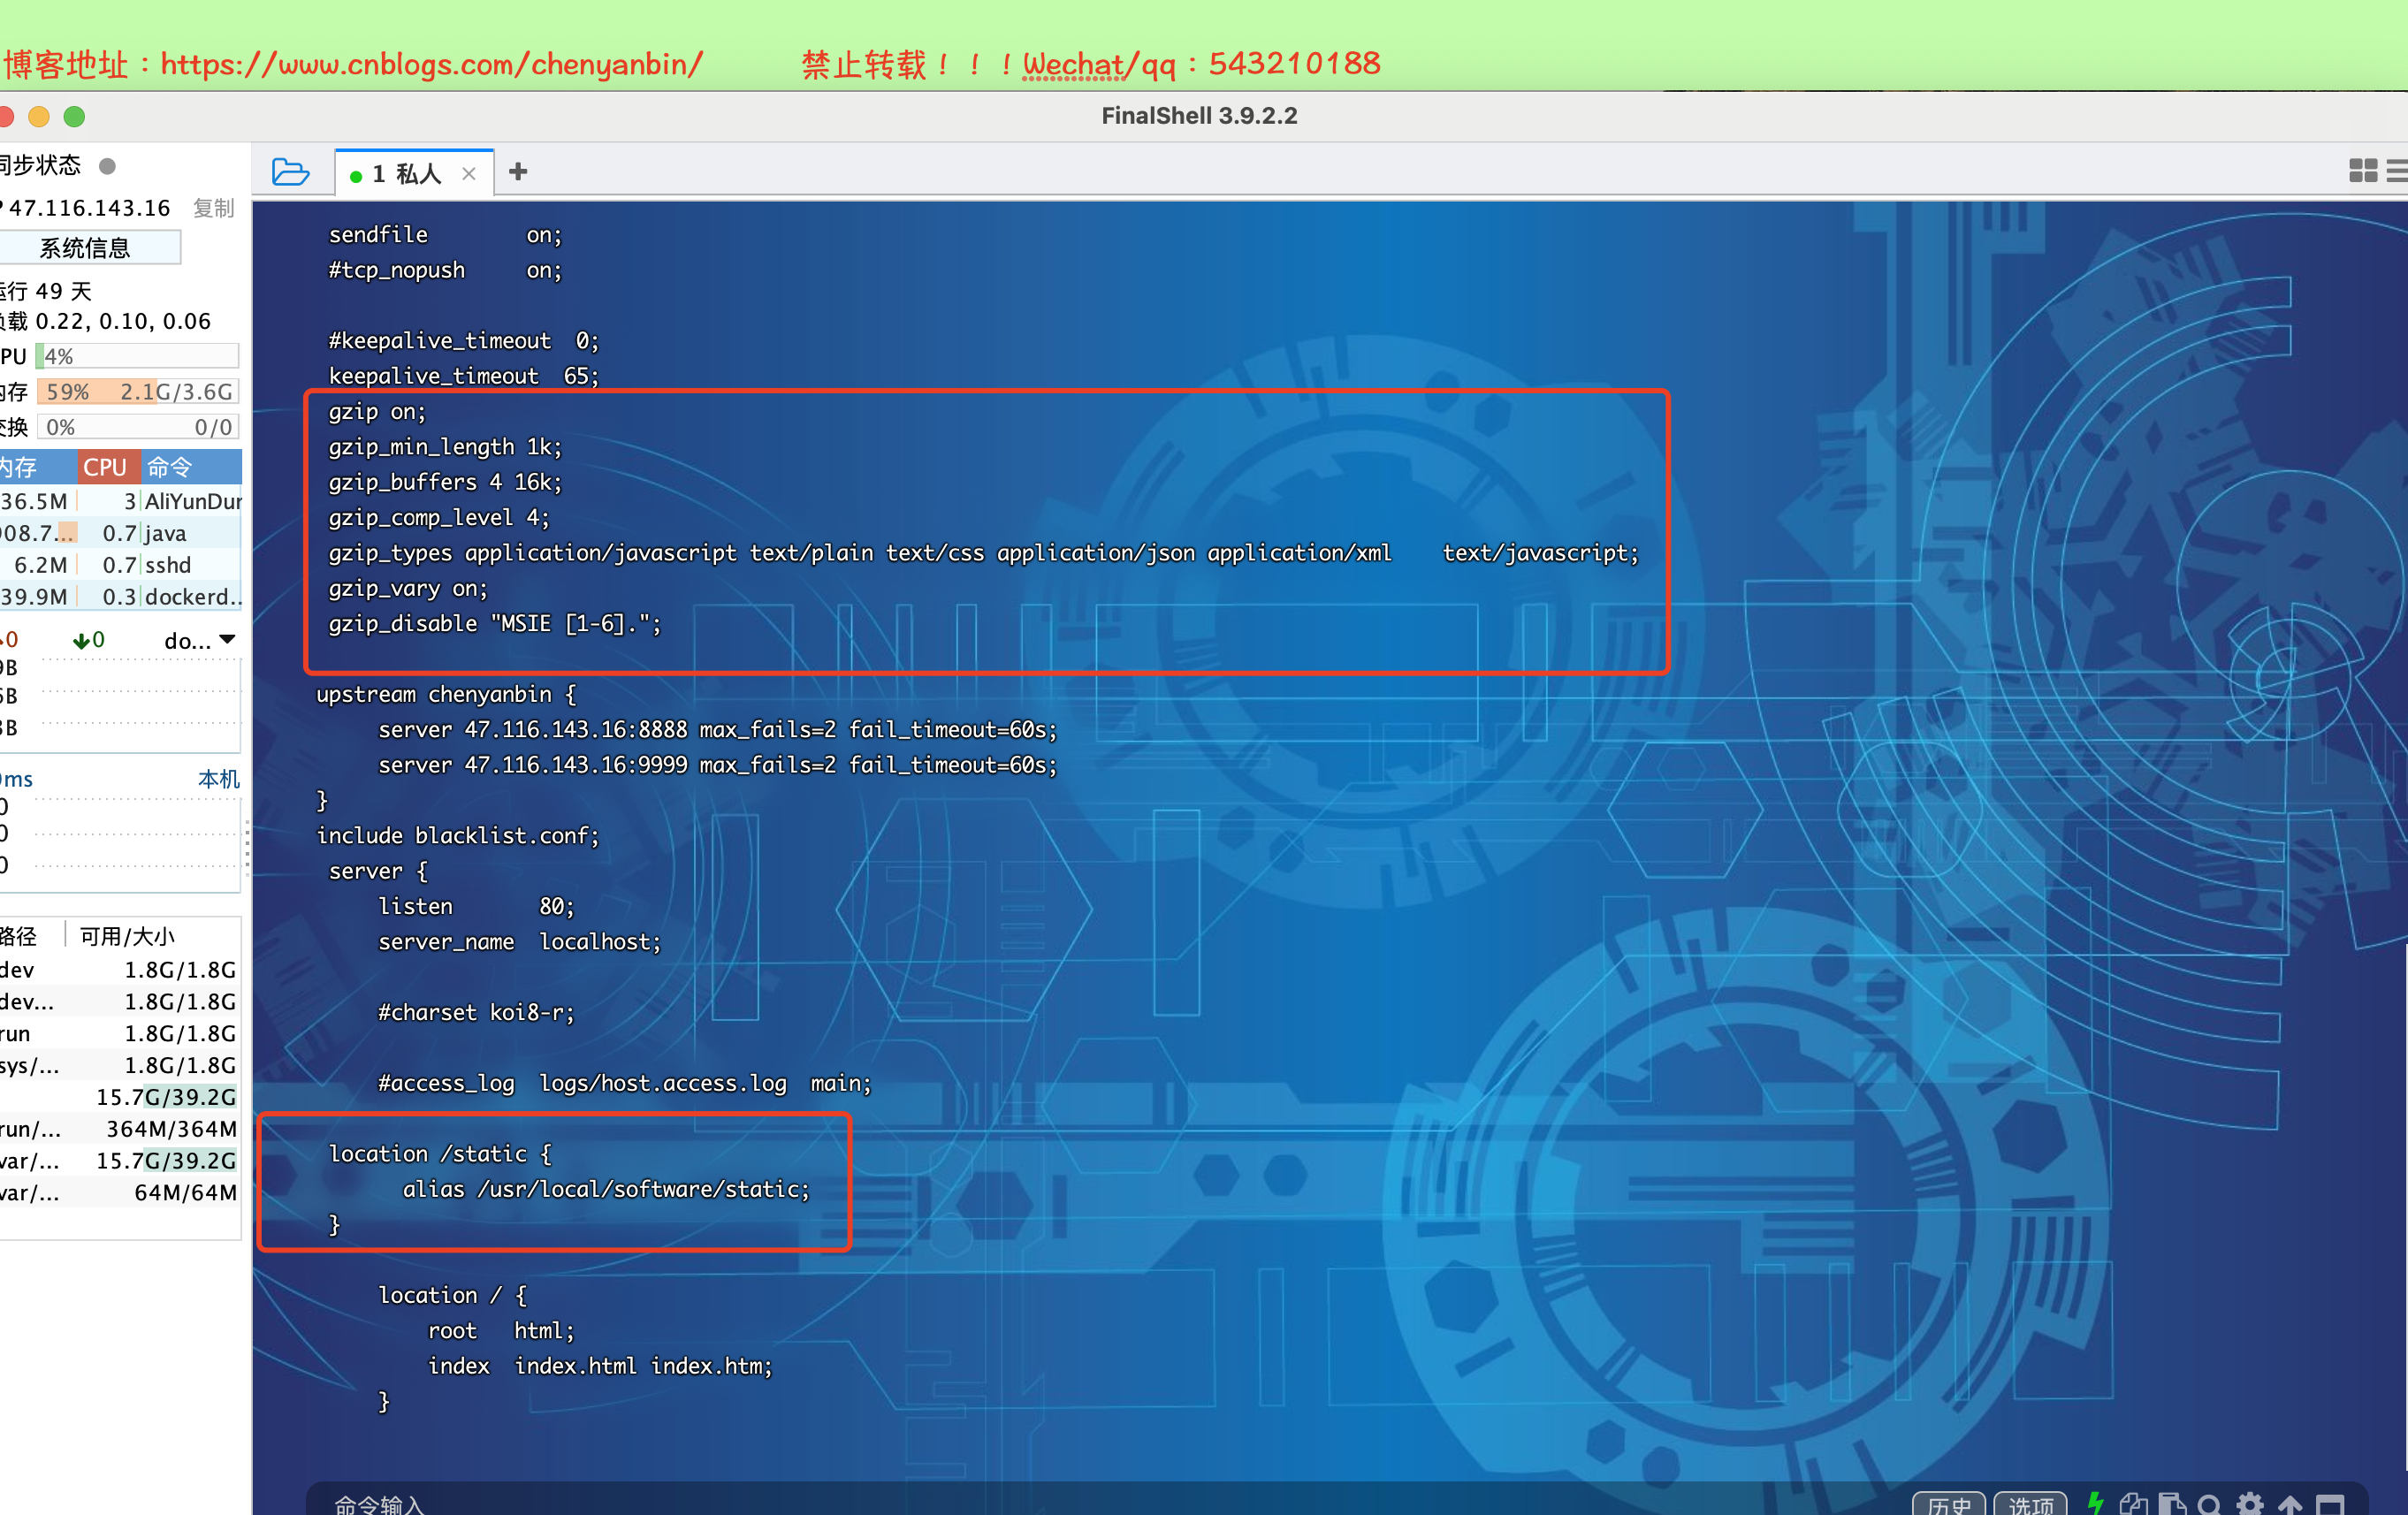
    #开启gzip,减少我们发送的数据量
    gzip on;
    gzip_min_length 1k;

    #4个单位为16k的内存作为压缩结果流缓存
    gzip_buffers 4 16k;

    #gzip压缩比,可在1~9中设置,1压缩比最小,速度最快,9压缩比最大,速度最慢,消耗CPU
    gzip_comp_level 4;

    #压缩的类型
    gzip_types application/javascript text/plain text/css application/json application/xml    text/javascript;

    #给代理服务器用的,有的浏览器支持压缩,有的不支持,所以避免浪费不支持的也压缩,所以根据客户端的HTTP头来判断,是否需要压缩
    gzip_vary on;

    #禁用IE6以下的gzip压缩,IE某些版本对gzip的压缩支持很不好
    gzip_disable "MSIE [1-6].";

    location /static {
          alias /usr/local/software/static;
    }

配置https
申请证书:点我直达


上传至服务器中

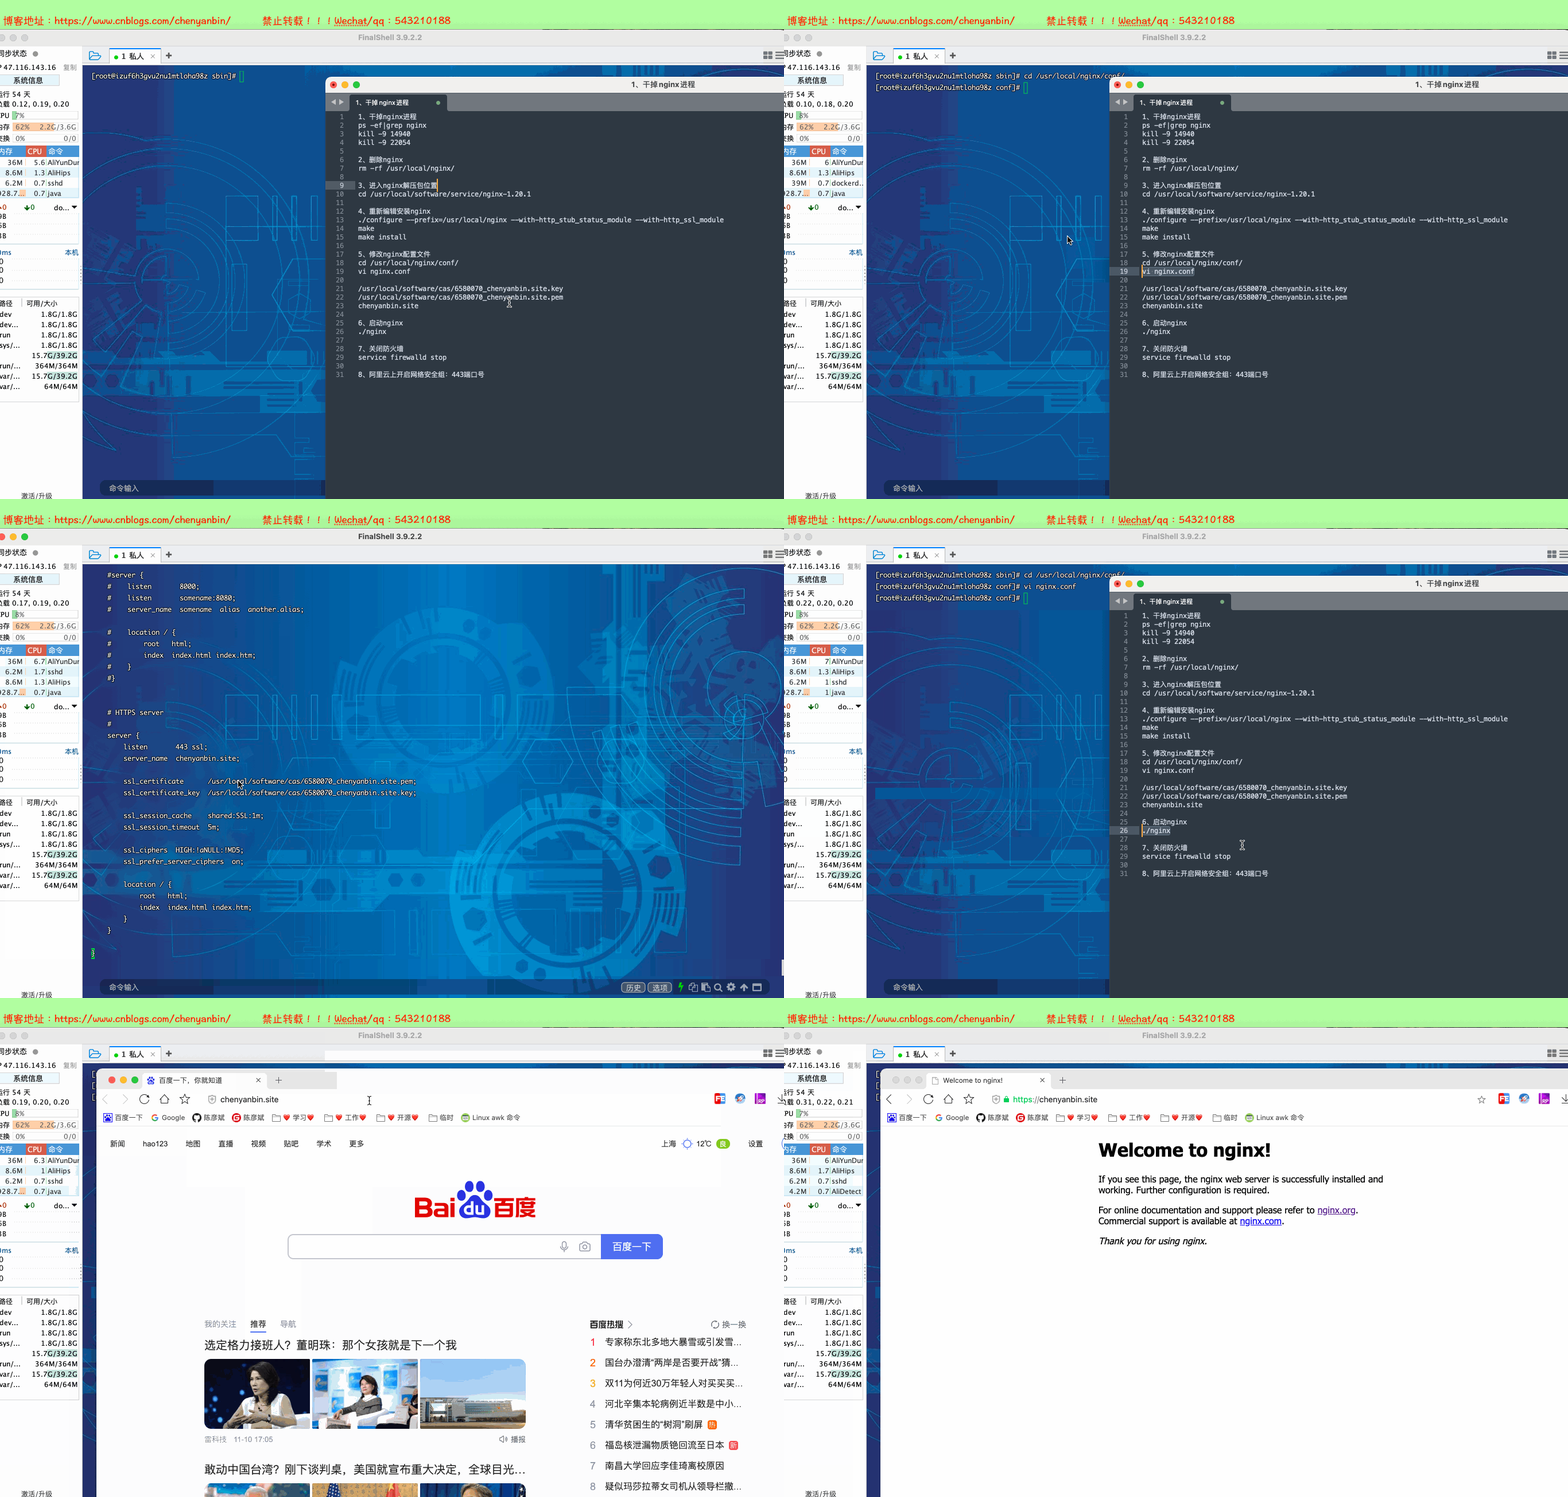
删除原先nginx,新增ssl模块
1、干掉nginx进程
ps -ef|grep nginx
kill -9 14940
kill -9 22054

2、删除nginx
rm -rf /usr/local/nginx/

3、进入nginx解压包位置
cd /usr/local/software/service/nginx-1.20.1

4、重新编辑安装nginx
./configure --prefix=/usr/local/nginx --with-http_stub_status_module --with-http_ssl_module
make
make install

5、修改nginx配置文件
cd /usr/local/nginx/conf/
vi nginx.conf

/usr/local/software/cas/6580070_chenyanbin.site.key
/usr/local/software/cas/6580070_chenyanbin.site.pem
chenyanbin.site

6、启动nginx
./nginx

7、关闭防火墙
service firewalld stop

8、阿里云上开启网络安全组:443端口号
完整nginx.conf配置如下, 只需要修改:server_name、ssl_certificate、ssl_certificate_key
#user  nobody;
worker_processes  1;

#error_log  logs/error.log;
#error_log  logs/error.log  notice;
#error_log  logs/error.log  info;

#pid        logs/nginx.pid;


events {
    worker_connections  1024;
}


http {
    include       mime.types;
    default_type  application/octet-stream;

    #log_format  main  '$remote_addr - $remote_user [$time_local] "$request" '
    #                  '$status $body_bytes_sent "$http_referer" '
    #                  '"$http_user_agent" "$http_x_forwarded_for"';

    #access_log  logs/access.log  main;

    sendfile        on;
    #tcp_nopush     on;

    #keepalive_timeout  0;
    keepalive_timeout  65;

    #gzip  on;

    server {
        listen       80;
        server_name  localhost;

        #charset koi8-r;

        #access_log  logs/host.access.log  main;

        location / {
            root   html;
            index  index.html index.htm;
        }

        #error_page  404              /404.html;

        # redirect server error pages to the static page /50x.html
        #
        error_page   500 502 503 504  /50x.html;
        location = /50x.html {
            root   html;
        }

        # proxy the PHP scripts to Apache listening on 127.0.0.1:80
        #
        #location ~ \.php$ {
        #    proxy_pass   http://127.0.0.1;
        #}

        # pass the PHP scripts to FastCGI server listening on 127.0.0.1:9000
        #
        #location ~ \.php$ {
        #    root           html;
        #    fastcgi_pass   127.0.0.1:9000;
        #    fastcgi_index  index.php;
        #    fastcgi_param  SCRIPT_FILENAME  /scripts$fastcgi_script_name;
        #    include        fastcgi_params;
        #}

        # deny access to .htaccess files, if Apache's document root
        # concurs with nginx's one
        #
        #location ~ /\.ht {
        #    deny  all;
        #}
    }


    # another virtual host using mix of IP-, name-, and port-based configuration
    #
    #server {
    #    listen       8000;
    #    listen       somename:8080;
    #    server_name  somename  alias  another.alias;

    #    location / {
    #        root   html;
    #        index  index.html index.htm;
    #    }
    #}


    # HTTPS server
    #
    server {
        listen       443 ssl;
        server_name  chenyanbin.site;

        ssl_certificate      /usr/local/software/cas/6580070_chenyanbin.site.pem;
        ssl_certificate_key  /usr/local/software/cas/6580070_chenyanbin.site.key;

        ssl_session_cache    shared:SSL:1m;
        ssl_session_timeout  5m;

        ssl_ciphers  HIGH:!aNULL:!MD5;
        ssl_prefer_server_ciphers  on;

        location / {
            root   html;
            index  index.html index.htm;
        }
    }

}
#user  nobody;
worker_processes  1;

#error_log  logs/error.log;
#error_log  logs/error.log  notice;
#error_log  logs/error.log  info;

#pid        logs/nginx.pid;


events {
    worker_connections  1024;
}

http {
    include       mime.types;
    default_type  application/octet-stream;

    #log_format  main  '$remote_addr - $remote_user [$time_local] "$request" '
    #                  '$status $body_bytes_sent "$http_referer" '
    #                  '"$http_user_agent" "$http_x_forwarded_for"';

    #access_log  logs/access.log  main;

    sendfile        on;
    #tcp_nopush     on;

    #keepalive_timeout  0;
    keepalive_timeout  65;

    #gzip  on;

upstream halo {
  server 127.0.0.1:8090;
}

    server {
        listen       80;
        server_name  localhost;

        #charset koi8-r;

        #access_log  logs/host.access.log  main;

        location / {

            proxy_pass http://halo;
            proxy_set_header HOST $host;
            proxy_set_header X-Forwarded-Proto $scheme;
            proxy_set_header X-Real-IP $remote_addr;
            proxy_set_header X-Forwarded-For $proxy_add_x_forwarded_for;
}

        #error_page  404              /404.html;

        # redirect server error pages to the static page /50x.html
        #
        error_page   500 502 503 504  /50x.html;
        location = /50x.html {
            root   html;
        }

    }


    # HTTPS server
    #
    server {
        listen       443 ssl;
        server_name  chenyanbin.site;

        ssl_certificate      /usr/local/software/cas/6580070_chenyanbin.site.pem;
        ssl_certificate_key  /usr/local/software/cas/6580070_chenyanbin.site.key;

        ssl_session_cache    shared:SSL:1m;
        ssl_session_timeout  5m;

        ssl_ciphers  HIGH:!aNULL:!MD5;
        ssl_prefer_server_ciphers  on;

        location / {
            proxy_pass http://halo;
            proxy_set_header HOST $host;
            proxy_set_header X-Forwarded-Proto $scheme;
            proxy_set_header X-Real-IP $remote_addr;
            proxy_set_header X-Forwarded-For $proxy_add_x_forwarded_for;
        }
    }

}
访问http自动跳转到https(80端口会自动转给443端口,这样就强制使用SSL证书加密了。访问http的时候会自动跳转到https上面)
server {
     listen 80;
     server_name chenyanbin.site;
     rewrite ^(.*) https://$server_name$1 permanent;
}
    server {
        listen       443 ssl;
        server_name  chenyanbin.site;

        ssl_certificate      /usr/local/software/cas/6580070_chenyanbin.site.pem;
        ssl_certificate_key  /usr/local/software/cas/6580070_chenyanbin.site.key;

        ssl_session_cache    shared:SSL:1m;
        ssl_session_timeout  5m;

        ssl_ciphers  HIGH:!aNULL:!MD5;
        ssl_prefer_server_ciphers  on;

        location / {
            proxy_pass http://halo;
            proxy_set_header HOST $host;
            proxy_set_header X-Forwarded-Proto $scheme;
            proxy_set_header X-Real-IP $remote_addr;
            proxy_set_header X-Forwarded-For $proxy_add_x_forwarded_for;
        }
    }


 浙公网安备 33010602011771号