jicmp 的编译 and 使用
CentOS7 下
CentOS 下编译过,但没使用 so 文件执行过代码
编译工具安装
yum -y install gcc automake libtool m4 autoconf dos2unix
dos2unix 主要是处理 win 下和 linux 换行不一致导致的编译报错。如果不是在 Win 下下载然后传输到 Linux 下的,不用执行
find . -type f -print0 | xargs -0 dos2unix
JDK安装
参考
yum install java-1.8.0-openjdk* -y
编译
然后按照官方流程执行即可
git clone https://github.com/OpenNMS/jicmp.git
cd jicmp
git submodule update --init --recursive
autoreconf -fvi
./configure
make
Win64下
win 的 lib 包如何在 Linux 下直接打包或者使用 MinGW,这里就不知道了,因此直接使用的是 vs 进行处理,同时,由于原仓库使用的 vs 版本较老 & 依赖上面处理得到的一个头文件(org_opennms_protocols_icmp_IcmpSocket.h),这里就使用 vs 2022 进行处理。
首先需要使用 vs 打开源码 win32 下的解决方案,因为有一些配置需要和它一样(跟着我处理就不用打开了)。
新建 【动态链接库】的解决方案,解决方案与项目直接放同一目录
vs 项目配置
ws2_32.lib;%(AdditionalDependencies)
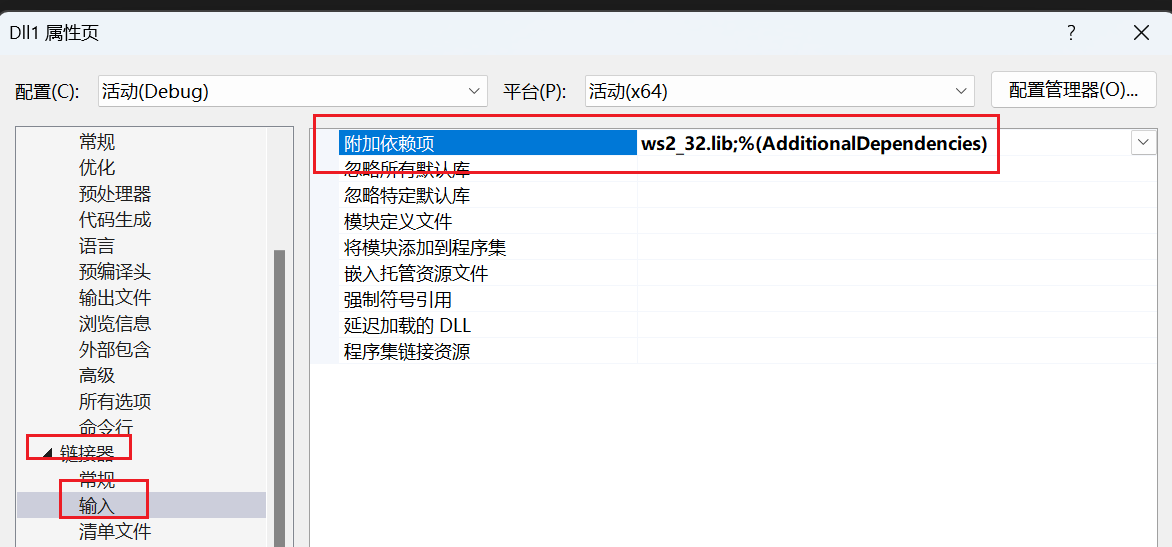
C:\Program Files\Java\jdk1.8.0_202\include\win32;C:\Program Files\Java\jdk1.8.0_202\include;%(AdditionalIncludeDirectories)

代码复制
jicmp\win32\config.h、icmp.h 复制到项目目录下
jicmp\org_opennms_protocols_icmp_IcmpSocket_Logger.h 、IcmpSocket.h 、IcmpSocket.c、byteswap.h 复制到项目目录下
再在项目中头文件和源文件添加现有项
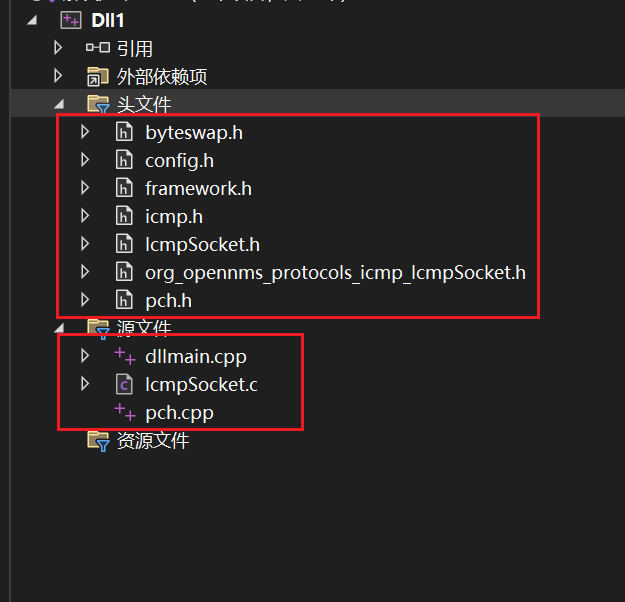
原来的:dllmain.cpp、framework.h、pch.h、pch.cpp 不用动
代码改动
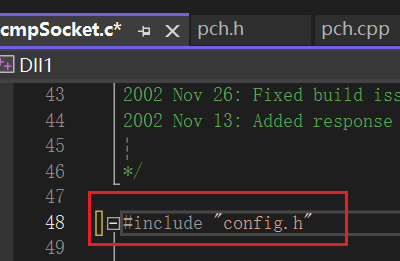
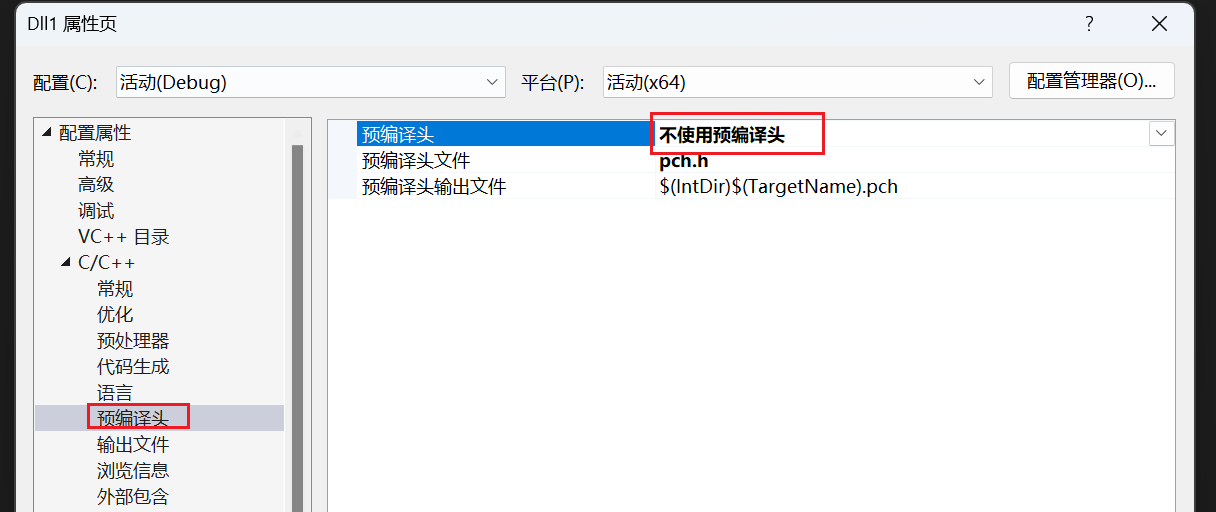
#define __WIN32__
#define HAVE_SETSOCKOPT
#define WIN32_LEAN_AND_MEAN
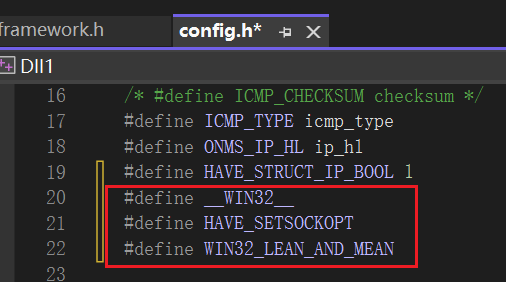
vs 解决方案项目上点击生成即可得到
Java Demo
<dependency>
  <groupId>org.opennms</groupId>
  <artifactId>jicmp-api</artifactId>
  <version>3.0.5</version>
</dependency>
public class TestInitialization {

    public static void main(final String[] args) {
        try {
            int id = (int)(Math.random()*Short.MAX_VALUE);
            long threadId = (long)(Math.random()*Integer.MAX_VALUE);

            final IcmpSocket socket = new IcmpSocket((short)id);

            Runnable r = new Runnable() {
                public void run() {
                    System.err.println("Starting receiver");
                    while(true) {
                        try {
                            processReply(socket);
                        } catch (IOException e) {
                            e.printStackTrace();
                            System.exit(1);
                        }
                    }
                }

                private void processReply(final IcmpSocket socket) throws IOException {
                    System.err.println("Waiting for packet");
                    DatagramPacket responsePacket = socket.receive();

                    ICMPEchoPacket icmpPacket = new ICMPEchoPacket(responsePacket.getData());
                    System.err.printf("Recieved packet of type %s\n", icmpPacket.getType());
                    double rtt = icmpPacket.getPingRTT()/1000.0;
                    String host = responsePacket.getAddress().getHostAddress();
                    System.err.printf("%d bytes from %s, icmp_seq=%d time=%f\n", responsePacket.getLength(), host, icmpPacket.getSequenceId(), rtt);
                }
            };

            Thread receiver = new Thread(r);
            receiver.start();

            System.err.println("id=" + id + ", threadId=" + threadId);
            for(int seqNum = 0; seqNum < 5; seqNum++) {
                ICMPEchoPacket request = new ICMPEchoPacket(threadId);

                byte[] bytes = request.toBytes();
                DatagramPacket packet = new DatagramPacket(bytes, 0, bytes.length, InetAddress.getByName("127.0.0.1"), id);

                System.err.println("Sending packet\n");
                socket.setTrafficClass(46); // expedited forwarding
                socket.dontFragment();
                socket.send(packet);

                Thread.sleep(1000);
            }


        } catch (final Exception e) {
            e.printStackTrace();
            System.exit(1);
        }
        System.exit(0);
    }

}
输出
[DEBUG] Attempting to load library using System.loadLibrary("jicmp").
[INFO] Successfully loaded jicmp library.
id=32548, threadId=437112714
Sending packet

Starting receiver
Waiting for packet
Recieved packet of type 0
56 bytes from 127.0.0.1, icmp_seq=11604 time=0.998000
Waiting for packet
Recieved packet of type 0
56 bytes from 127.0.0.1, icmp_seq=11605 time=20.999000
Waiting for packet
Sending packet

Recieved packet of type 0
56 bytes from 127.0.0.1, icmp_seq=11606 time=0.000000
Waiting for packet
Sending packet

Recieved packet of type 0
56 bytes from 127.0.0.1, icmp_seq=11607 time=0.000000
Waiting for packet
Sending packet

Recieved packet of type 0
56 bytes from 127.0.0.1, icmp_seq=11608 time=0.000000
Waiting for packet
Sending packet

Recieved packet of type 0
56 bytes from 127.0.0.1, icmp_seq=11609 time=0.000000
Waiting for packet
代码直接复制 tests 目录下的 TestInitialization.java
dll 文件复制到项目根目录下并更名为 jicmp.dll
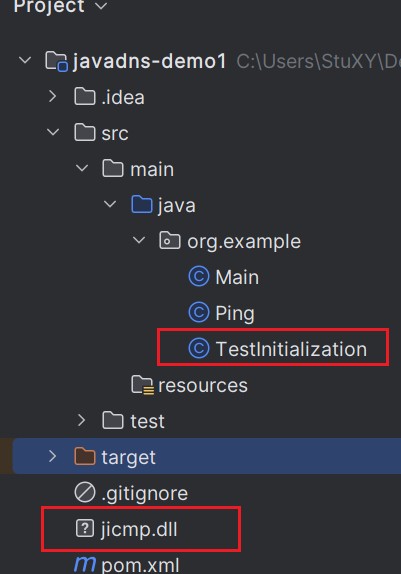
打包文件
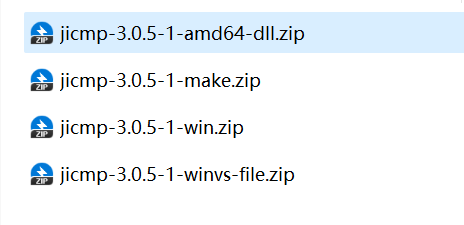
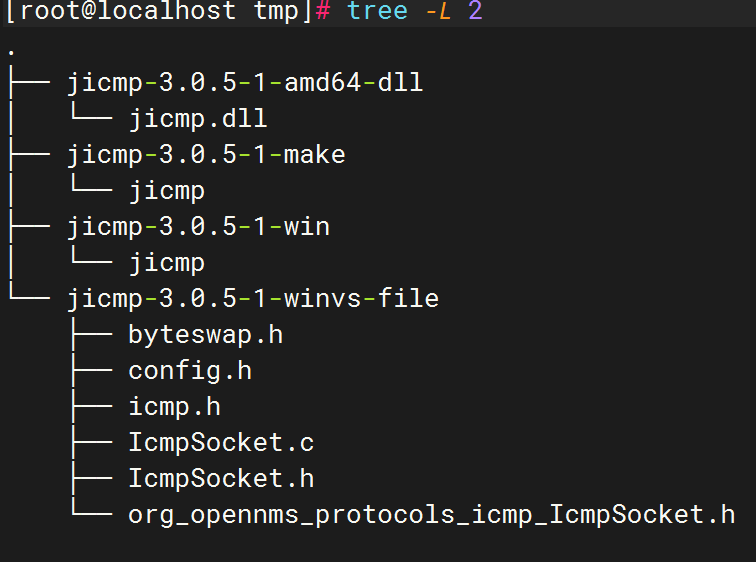
jicmp-3.0.5-1-win: win 上 git 下来的 tag 为 jicmp-3.0.5-1 的仓库数据
jicmp-3.0.5-1-make: CentOS7 上 make 后的数据
jicmp-3.0.5-1-amd64-dll:我自己在 win11 amd64 平台上打包后的 dll
jicmp-3.0.5-1-winvs-file: 复制到 vs 项目需要的几个jicmp的文件
链接:https://pan.baidu.com/s/1SJj5LjpeOCEhd2Gr4kxQLw?pwd=wqo1
提取码:wqo1


【推荐】国内首个AI IDE,深度理解中文开发场景,立即下载体验Trae
【推荐】编程新体验,更懂你的AI,立即体验豆包MarsCode编程助手
【推荐】抖音旗下AI助手豆包,你的智能百科全书,全免费不限次数
【推荐】轻量又高性能的 SSH 工具 IShell:AI 加持,快人一步
· Manus重磅发布:全球首款通用AI代理技术深度解析与实战指南
· 被坑几百块钱后,我竟然真的恢复了删除的微信聊天记录!
· 没有Manus邀请码?试试免邀请码的MGX或者开源的OpenManus吧
· 园子的第一款AI主题卫衣上架——"HELLO! HOW CAN I ASSIST YOU TODAY
· 【自荐】一款简洁、开源的在线白板工具 Drawnix