Unity 自定义鼠标指针图标
在开发PC游戏时我们可能会有这样的需求,当鼠标指针移动到某类游戏物件上,改变指针显示的图标,或者干脆一进入游戏就设置全局指针图标。在Unity中,有两种方法满足这种需求,先说一下第一种方法。
使用Unity的Cursor.SetCursor()接口
看一下这个接口的文档描述,
Description
Specify a custom cursor that you wish to use as a cursor.
Call this method with a Texture2D to change the appearance of the hardware pointer (mouse cursor).
这里我们大概知道,这个接口的作用是把一个Texture2D纹理作为硬件指针(鼠标指针)的显示。
再来看一下这个接口的参数,
Parameters
| texture | The texture to use for the cursor. To use a texture, you must first import it with `Read/Write`enabled. Alternatively, you can use the default cursor import setting. If you created your cursor texture from code, it must be in RGBA32 format, have alphaIsTransparency enabled, and have no mip chain. To use the default cursor, set the texture to `Null`. |
| hotspot | The offset from the top left of the texture to use as the target point (must be within the bounds of the cursor). |
| cursorMode | Allow this cursor to render as a hardware cursor on supported platforms, or force software cursor. |
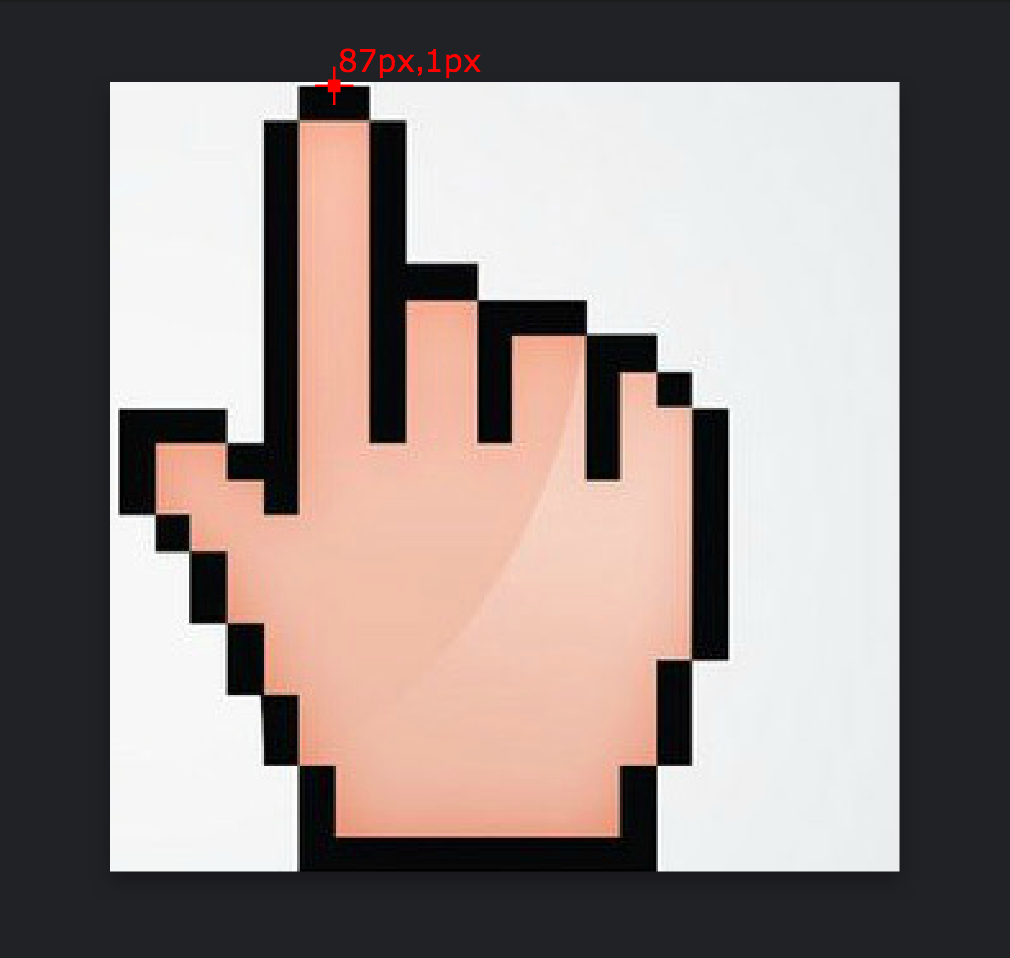
texture不用解释了,就是一张纹理。hotspot的意思是,鼠标目标点为相对纹理左上角偏移多少的点,这个位置点不能超出纹理本身边界。什么意思呢?如下图,我们想用这张308*308大小的_CursorTexture 图作为替换的鼠标指针纹理,则需要设置hotspot为 (87, 1),代码为
Cursor.SetCursor(_CursorTexture, new Vector2(87, 1), CursorMode.Auto);
如果不能正确设置hotspot坐标,那实际效果就会 鼠标指针显示的位置与我们期望点击的位置有偏差。
还有第三个参数,如果是CursorMode.Auto,则会在支持的平台上用硬件渲染,选择Auto模式的话,同一张大小的纹理,在不同硬件上渲染显示出来的效果可能不一样,受硬件影响。比如在MBP和普通PC上。如果选择CursorMode.ForceSoftward,则会强制软件渲染,不受硬件平台影响,但效率没Auto好。
好了,以上就是使用Cursor.SetCursor()方法设置鼠标指针的用法,注意hotspot和CursorMode这两个参数。
另一种方法,就是屏蔽系统Cursor,Screen.showCursor = false; 自己在鼠标位置画一个图标,也很简单。具体做法以后再补充。


 浙公网安备 33010602011771号