
nginx——安装部署vue项目
下载
下载nginx https://nginx.org/en/download.html

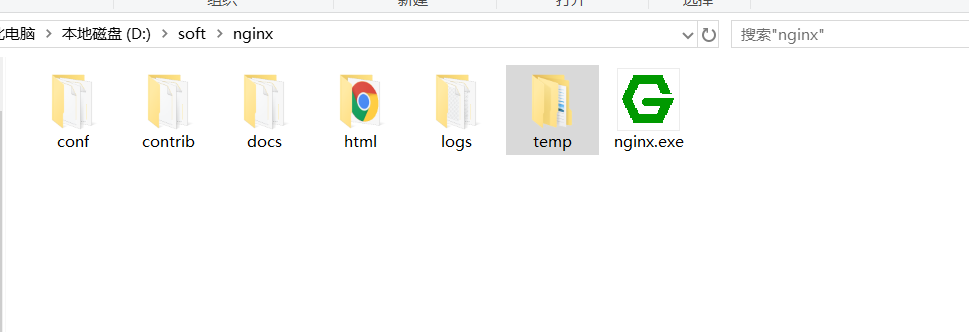
解压安装包即可使用,目录如下:
|-- conf               #这是nginx所有配置文件的目录,极其重要
    |-- fastcgi.conf
    |-- fastcgi_params
    |-- koi-utf
    |-- koi-win
    |-- mime.types     #媒体类型,
    |-- nginx.conf     #配置主文件,端口、路径映射都需要在这里配置
    |-- scgi_params
    |-- uwsgi_params
    `-- win-utf
|-- contrib            #fastcgi临时数据目录
|-- docs               #帮助文档,包括license、readme.md等
|-- html               #这是编译安装时Nginx的默认站点目录,类似Tomcat的webapp目录
    |--50x.html        #错误页面优雅替代显示文件,例如:出现502错误时会调用此页面
    |-- index.html     #默认的首页文件,首页文件名字是在nginx.conf中事先定义好的。
|-- logs               #这是Nginx默认的日志路径,包括错误日志及访问日志
    |-- access.log     #这是Nginx的默认访问日志文件,使用tail -f access.log,可以实时观看网站用户访问情况信息
    |-- error.log      #这是Nginx的错误日志文件,如果Nginx出现启动故障等问题,一定要看看这个错误日志
|-- temp               #临时目录
nginx.conf
下面例举了一些常用配置,原版文件中实际包含所有配置,取消前面的注释,即可启用
worker_processes  1;                              ← worker进程的数量,通常1个就够了
events {
    worker_connections  1024;                     ←每个worker进程支持的最大连接数
}
http {
    include       mime.types;                     ← Nginx支持的媒体类型库文件
    default_type  application/octet-stream;       ← 默认的媒体类型
    sendfile        on;                           ←开启高效传输模式
    keepalive_timeout  65;                        ←连接超时
    server {                                      ←可以同时存在多个Server
        listen       80;                          ←提供服务的端口,默认80
        server_name  localhost;                   ←提供服务的域名主机名
        location / {                              ←注意这里的斜杠,不是写错了,不要顺手删掉了
            root   html;                          ←指定安装路径(对于后端开发,类似于指定Tomcat的Webapp路径)
            index  index.html index.htm;          ←默认的首页文件,多个用空格分开
        }
        error_page   500 502 503 504  /50x.html;  ←出现对应的http状态码时,使用50x.html回应客户
        location = /50x.html {
            root   html;                          ←指定对应的站点目录为html
        }
    }
}
Vue项目打包
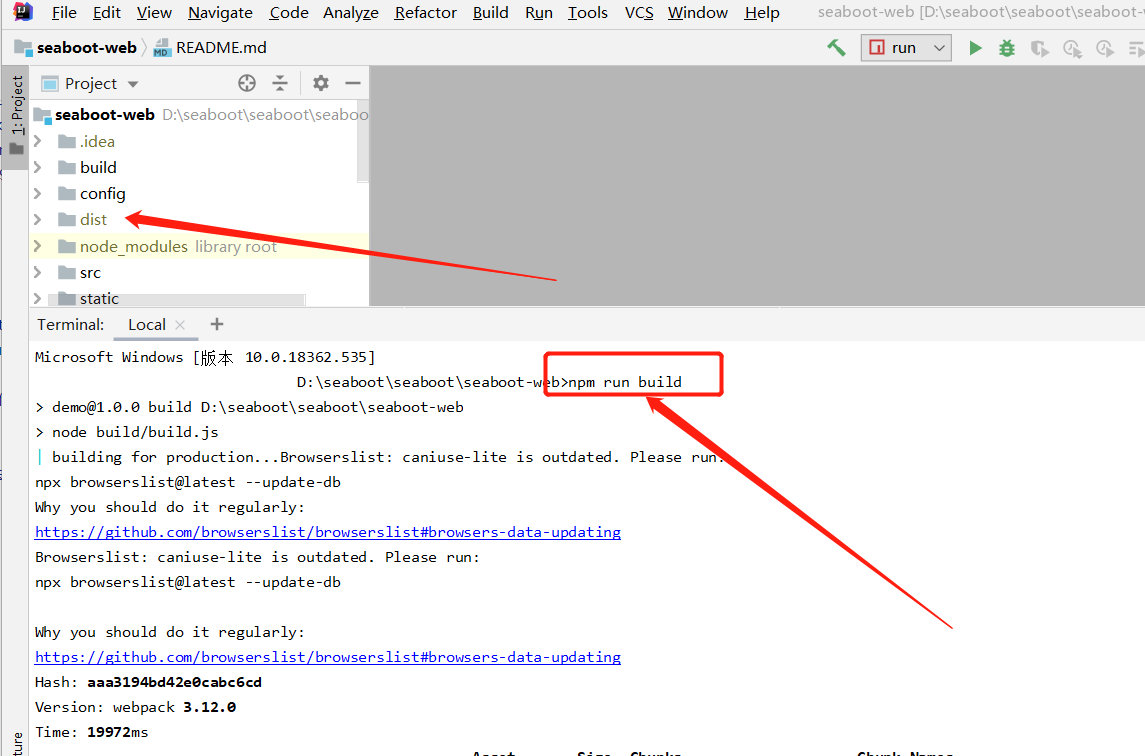
执行命令:npm run build,之后剪切dist下面全部内容,复制到nginx下的html文件夹(需要提前清空html文件夹),点击nginx.exe开始运行即可。
如果是默认,就访问:http://localhost:80/,如果调整过nginx.conf,按照配置文件中的端口进行访问
参考:https://www.cnblogs.com/liang-io/p/9340335.html
疯狂的妞妞 :每一天,做什么都好,不要什么都不做!

