

SpringCloud(二)服务治理
上一篇文章,已经解释了各个专有名词,并且确定了使用的框架:eureka、feign、hystrix、gateway,现在开始搭建完整的服务器。
SpringBoot与SpringCloud的版本号分别是: 2.1.13.RELEASE、Greenwich.SR5
SpringBoot与SpringCloud版本号是相互对应的,不了解的话,不要随意搭配,最新的SpringBoot已经是2.2,但是之前刚刚升级的2.1的SpringBoot,暂无升级计划。
EurekaServer
就像Spring的功能一样,我们用Spring管理项目中的所有Class。使用SpringCloud,也需要这样的一个容器,托管我们所有的服务,这个容器,就是EurekaServer。
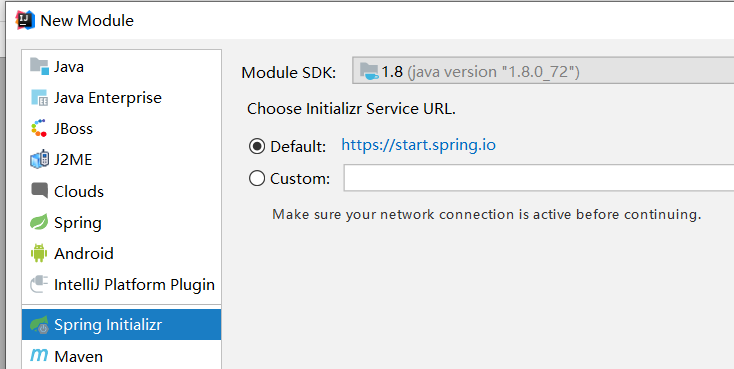
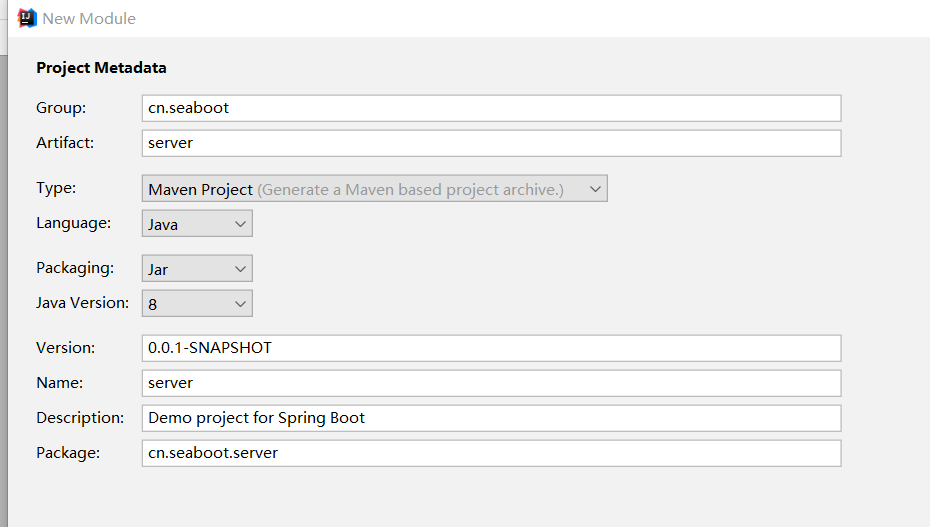
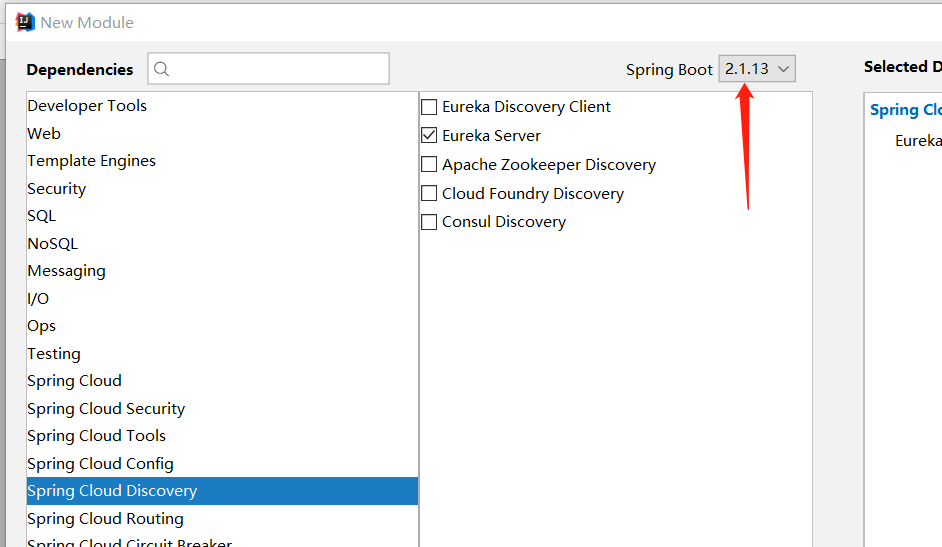
完整的创建流程如下:
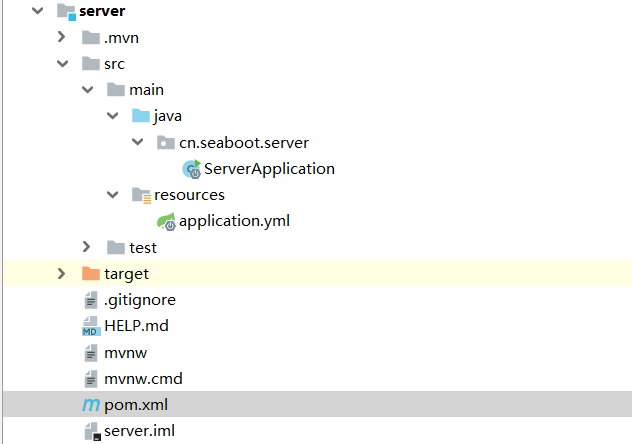
工程目录如下:
代码:

package cn.seaboot.server;

import org.springframework.boot.SpringApplication;
import org.springframework.boot.autoconfigure.SpringBootApplication;
import org.springframework.cloud.netflix.eureka.server.EnableEurekaServer;

@EnableEurekaServer
@SpringBootApplication
public class ServerApplication {

  public static void main(String[] args) {
    SpringApplication.run(ServerApplication.class, args);
  }
}
Yml配置:
server:
  port: 8761

eureka:
  instance:
    hostname: localhost
  client:
    registerWithEureka: false
    fetchRegistry: false
    serviceUrl:
      defaultZone: http://${eureka.instance.hostname}:${server.port}/eureka/
Maven依赖:
<?xml version="1.0" encoding="UTF-8"?>
<project xmlns="http://maven.apache.org/POM/4.0.0" xmlns:xsi="http://www.w3.org/2001/XMLSchema-instance"
         xsi:schemaLocation="http://maven.apache.org/POM/4.0.0 https://maven.apache.org/xsd/maven-4.0.0.xsd">
    <modelVersion>4.0.0</modelVersion>
    <parent>
        <groupId>org.springframework.boot</groupId>
        <artifactId>spring-boot-starter-parent</artifactId>
        <version>2.1.13.RELEASE</version>
        <relativePath/> <!-- lookup parent from repository -->
    </parent>
    <groupId>cn.seaboot</groupId>
    <artifactId>server</artifactId>
    <version>0.0.1-SNAPSHOT</version>
    <name>server</name>
    <description>Demo project for Spring Boot</description>

    <properties>
        <java.version>1.8</java.version>
        <spring-cloud.version>Greenwich.SR5</spring-cloud.version>
    </properties>

    <dependencies>
        <dependency>
            <groupId>org.springframework.cloud</groupId>
            <artifactId>spring-cloud-starter-netflix-eureka-server</artifactId>
        </dependency>

        <dependency>
            <groupId>org.springframework.boot</groupId>
            <artifactId>spring-boot-starter-test</artifactId>
            <scope>test</scope>
        </dependency>
    </dependencies>

    <dependencyManagement>
        <dependencies>
            <dependency>
                <groupId>org.springframework.cloud</groupId>
                <artifactId>spring-cloud-dependencies</artifactId>
                <version>${spring-cloud.version}</version>
                <type>pom</type>
                <scope>import</scope>
            </dependency>
        </dependencies>
    </dependencyManagement>

    <build>
        <plugins>
            <plugin>
                <groupId>org.springframework.boot</groupId>
                <artifactId>spring-boot-maven-plugin</artifactId>
            </plugin>
        </plugins>
    </build>

</project>
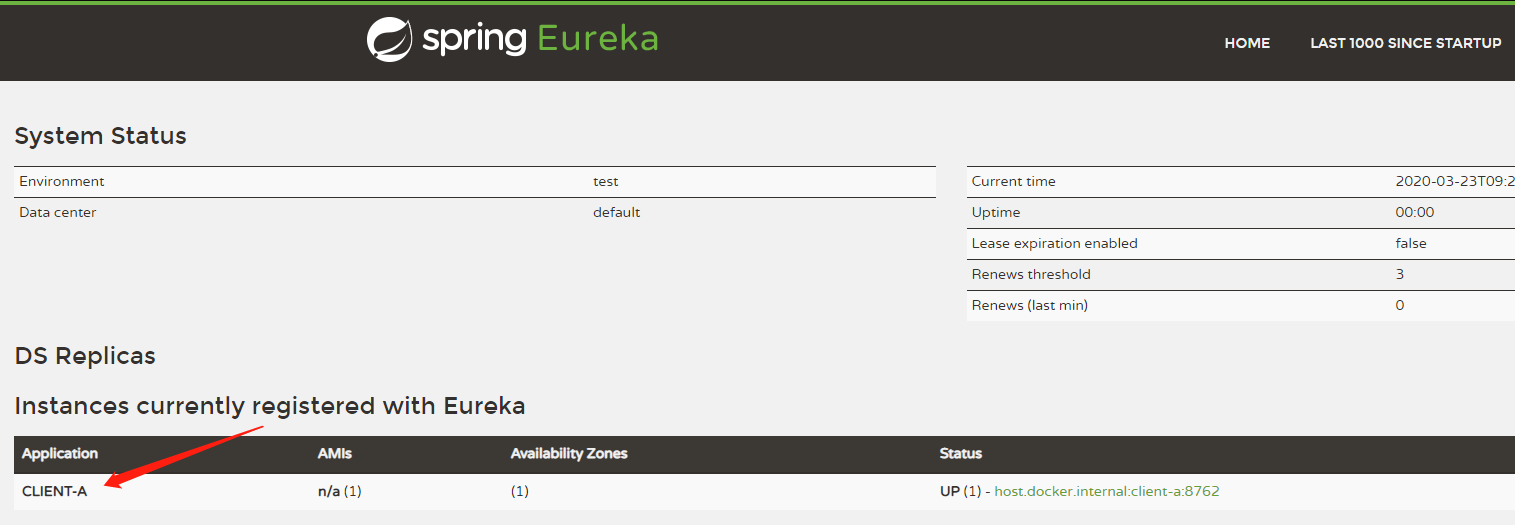
这样就创建了一个具备最基础功能的注册中心。访问:http://localhost:8761/ ;即可查看到Eureka的管理界面(截图最后面已经给出)。
EurekaClient
创建一个空的容器,似乎没什么意义,这里,我们创建我们的第一个服务,过程与Server基本相同。
EurekaClient就像Spring中托管的一个个Class,需要注册到容器中,才能被其它服务调用。
修改Maven依赖:
        <dependency>
            <groupId>org.springframework.cloud</groupId>
            <artifactId>spring-cloud-starter-netflix-eureka-client</artifactId>
        </dependency>
        <dependency>
            <groupId>org.springframework.boot</groupId>
            <artifactId>spring-boot-starter-web</artifactId>
        </dependency>
修改主函数的注解:
package cn.seaboot.client;

import org.springframework.boot.SpringApplication;
import org.springframework.boot.autoconfigure.SpringBootApplication;
import org.springframework.cloud.netflix.eureka.EnableEurekaClient;

@EnableEurekaClient
@SpringBootApplication
public class ClientApplication {

  public static void main(String[] args) {
    SpringApplication.run(ClientApplication.class, args);
  }
}
Yml配置:
这里,我们将第一个服务,命名为client-a,并且,配置了我们注册中心的地址。
eureka:
  client:
    serviceUrl:
      defaultZone: http://localhost:8761/eureka/
server:
  port: 8762
spring:
  application:
    name: client-a
写两个接口用于测试,可以添加其它函数,测试不同的功能:
package cn.seaboot.client.ctrl;

import cn.seaboot.client.service.HelloService;
import org.springframework.web.bind.annotation.GetMapping;
import org.springframework.web.bind.annotation.RequestParam;
import org.springframework.web.bind.annotation.RestController;

import javax.annotation.Resource;

/**
 * @author Mr.css
 * @date 2020-03-05
 */
@RestController
public class HelloController {

  @Resource
  HelloService helloService;

  @GetMapping(value = "/hi")
  public String hi(@RequestParam String name) {
    return helloService.hiService( name );
  }

  @GetMapping(value = "/hello")
  public String sayHello(@RequestParam String name) {
    return helloService.sayHello(name);
  }
}


package cn.seaboot.client.service;

import org.springframework.stereotype.Service;

/**
 * @author Mr.css
 * @date 2020-03-05
 */
@Service
public class HelloService {

  public String hiService(String name) {
    return "参数是:" + name;
  }

  public String sayHello(String name) {
    try {
      Thread.sleep(5000);
    } catch (InterruptedException e) {
      e.printStackTrace();
    }
    return "say hello";
  }
}
测试接口:
管理页面:http://localhost:8761/
接口测试:http://localhost:8762/hello?name=1
这篇文章的内容,相当于程序员的第一课,写一个HelloWorld,虽然不具备实用价值,却是我们拥抱Cloud的第一步。
现在只是注册了服务,还没调用起来,就像Spring,我们已经写好了@Service注解,还没调用它。
Cloud中不使用@Resource,而是通过Feign,下篇文章介绍一下Feign的基本用法。


【推荐】国内首个AI IDE,深度理解中文开发场景,立即下载体验Trae
【推荐】编程新体验,更懂你的AI,立即体验豆包MarsCode编程助手
【推荐】抖音旗下AI助手豆包,你的智能百科全书,全免费不限次数
【推荐】轻量又高性能的 SSH 工具 IShell:AI 加持,快人一步
· 开发者必知的日志记录最佳实践
· SQL Server 2025 AI相关能力初探
· Linux系列:如何用 C#调用 C方法造成内存泄露
· AI与.NET技术实操系列(二):开始使用ML.NET
· 记一次.NET内存居高不下排查解决与启示
· 开源Multi-agent AI智能体框架aevatar.ai,欢迎大家贡献代码
· Manus重磅发布:全球首款通用AI代理技术深度解析与实战指南
· 被坑几百块钱后,我竟然真的恢复了删除的微信聊天记录!
· 没有Manus邀请码?试试免邀请码的MGX或者开源的OpenManus吧
· 园子的第一款AI主题卫衣上架——"HELLO! HOW CAN I ASSIST YOU TODAY