Multiboot烧写文件制作说明书
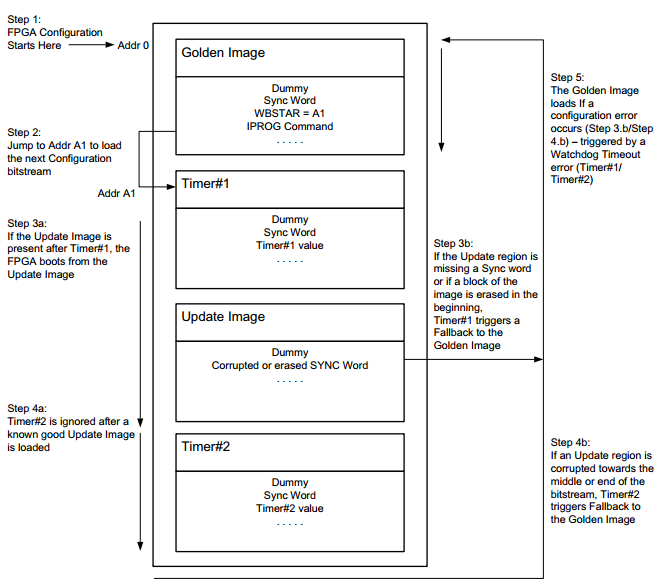
本文参照xapp1247中的Advanced Applications来制作Multiboot烧写文件,烧写文件的结构以及内部工作机制如下图所示:

步骤1:生成Timer1,Timer2文件。
在Windows命令行窗口下运行如下命令:
>> tclsh multiboot_address_table.tcl <flash_type> <data_width> <freq_mhz>
< flash_size_mbit> <bitstream_size>
其中:
flash_type: flash types tested are spi, bpi
data_width: Flash data width = 1, 2, 4, 16
freq_mhz: Frequency of CCLK = ConfigRate setting
flash_size_mbit: Size of flash device in Mb
bitstream_size: Size of bitstream in bytes
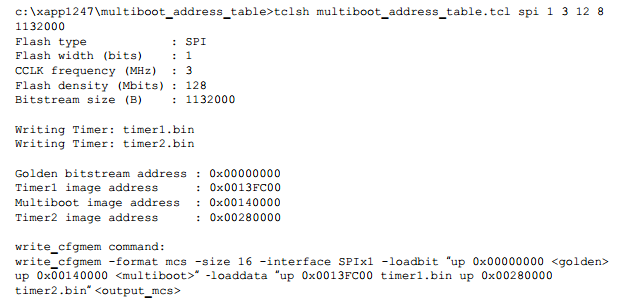
举例说明运行结果如下:

具体Capture AIO中,参数选择如下:
Flash type :SPI
Flash width (bits) :1
CCLK frequency (MHz) :3
Flash density (Mbits) : 64
bitstream size (B) :200000
命令执行完成后,在本地文件夹中会生成两个bin文件,timer1.bin, timer2.bin.
步骤2:制作Golden Image
在Golden Project中添加如下约束语句:
set_property BITSTREAM.GENERAL.COMPRESS TRUE [current_design]
set_property BITSTREAM.CONFIG.CONFIGFALLBACK ENABLE [current_design]
set_property BITSTREAM.CONFIG.NEXT_CONFIG_ADDR 0x02FFC00 [current_design]
其中参数0x02FFC00 为timer1.bin二进制代码段在最终生成的multiboot烧写文件中放置的起始地址。
编译通过后,生成golden.bit文件
步骤3:制作Update Image
在Update Project中添加如下约束语句:
set_property BITSTREAM.GENERAL.COMPRESS TRUE [current_design]
set_property BITSTREAM.CONFIG.CONFIGFALLBACK ENABLE [current_design]
编译通过后,生成update.bit文件
步骤4:生成最终的multiboot烧写文件
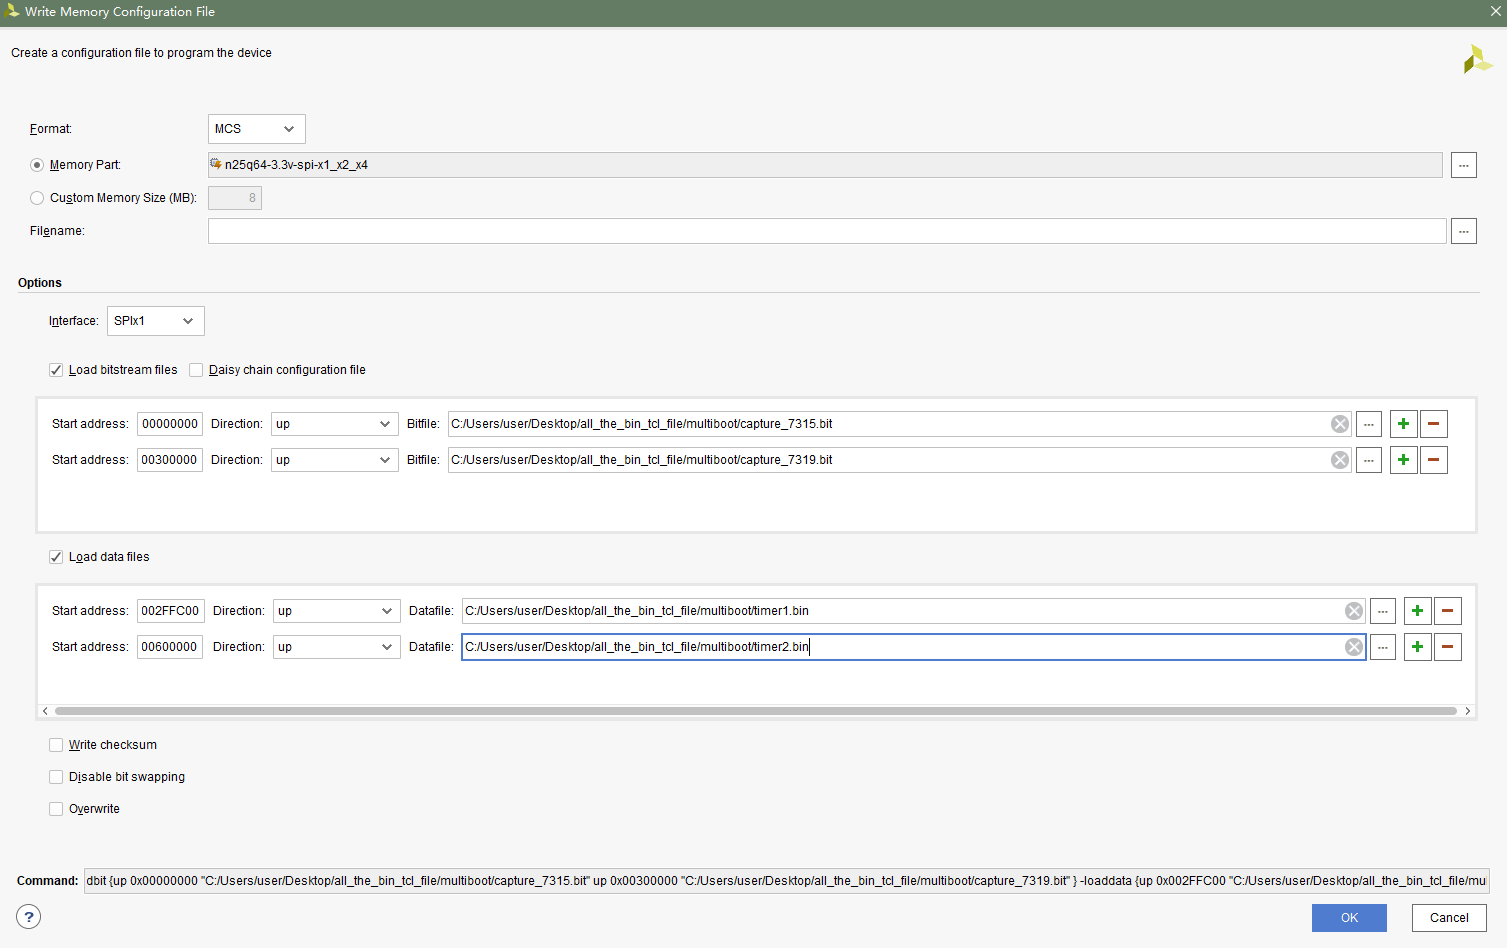
在Xilinx集成开发环境中操作如下:Tools -> Generate Memory Configuration File,此时会弹出Write Memory Configuration File对话框,用户需要手动填写如下信息:
Memory Part:用户需要选择与自己硬件对应的存储器芯片型号。
Filename: 用户需要指定生成multiboot烧写文件的文件名与本机硬盘存储地址。
Load bitstream files : 勾选并添加步骤2,步骤3生成的golden.bit,updata.bit文件。
其中:golden.bit文件的start address:00000000
updata.bit 文件的 start address : 00300000 (此地址由CardTest软件预先指定)
Load data files: 勾选,并添加步骤1中生成的timer1.bin, timer2.bin文件

其中:timer1和timer2的start address值均由用户自定义,在Capture AIO卡中,定义如下:
timer1.bin start address : 002FFC00
timer2.bin start address : 00600000
最后单击OK按钮,即可生成最终的Multiboot(msc)烧写文件。


