ElasticSearch(九):springboot项目集成消息中间件activeMQ
目的:为了将elasticsearch做成单独的服务,那么我们必须解耦,也就是业务逻辑和搜索模块是没有关系的,并且是异步的。那么项目之间通信,使用的选择有限,消息中间件是一个不错的选择。
消息中间件常用的:ActiveMQ,RabbitMQ,RocketMQ,Kafka等。由于activeMQ是使用java开发的,并且有比较完整的文档,在很多公司都有较多的应用,最重要的,产品比较成熟。所以选择了activeMQ作为中间件。由于这个项目是探索项目,所以只是一个单机版本的中间件,并且没有对消息进行持久化,也没有判断消息的重复消费和丢失等,完全是最简单的应用。
至于复杂的东西,以后会慢慢更新。
正文
1. windows下安装并启动activeMQ。
网址:这里下载最新版本的activeMQ,这里下载任意版本的activeMQ
下载完之后如下:

然后双击 bin/win64/activemq.bat (根据自己系统启动)
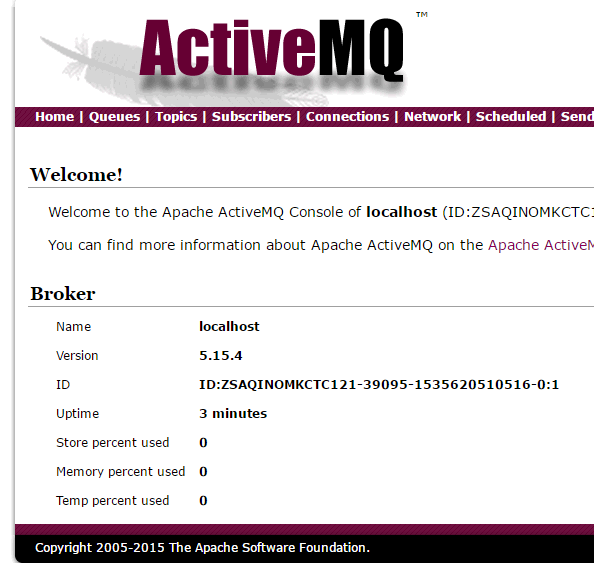
启动完成之后如下:访问 localhost:8161 ,然后点击 manager ActiveMQ broker 会要求输入账号密码,账号密码分别为admin,admin。(账号是在目录下 conf-->users.properties配置文件中)
第三个页面表示你已经等了成功了,在Queues和Topics里面可以看到接收到的发布,订阅消息。


2. application.properities文件配置activeMQ的参数。
application.properties配置文件如下:
spring.activemq.broker-url=tcp://localhost:61616    //tcp连接的网址和端口,这里端口是61616,不是8161
spring.activemq.close-timeout=15s
spring.activemq.user=admin
spring.activemq.password=admin
spring.activemq.pool.enabled=true
spring.activemq.pool.max-connections=10
3. 配置ActiveMQ的配置类

import org.apache.activemq.command.ActiveMQQueue;
import org.apache.activemq.command.ActiveMQTopic;
import org.springframework.context.annotation.Bean;
import org.springframework.context.annotation.Configuration;
import org.springframework.jms.config.DefaultJmsListenerContainerFactory;
import org.springframework.jms.config.JmsListenerContainerFactory;

import javax.jms.ConnectionFactory;
import javax.jms.Queue;
import javax.jms.Topic;

/**
 * @author: cc
 * @Date: 2018/8/29 11:22
 * @Description:
 */
@Configuration
public class JmsConfig {

    public final static String TOPIC_CREATE = "es.topic.create";
    public final static String QUEUE_CREATE = "es.queue.create";
    public final static String TOPIC_DELETE = "es.topic.delete";
    public final static String QUEUE_DELETE = "es.queue.delete";
    public final static String TOPIC_UPDATE = "es.topic.update";
    public final static String QUEUE_UPDATE = "es.queue.update";

    @Bean("esQueueCreate")
    public Queue esQueueCreate() {
        return new ActiveMQQueue(QUEUE_CREATE);
    }
    @Bean("esQueueDelete")
    public Queue esQueueDelete() {
        return new ActiveMQQueue(QUEUE_DELETE);
    }
    @Bean("esQueueUpdate")
    public Queue esQueueUpdate() {
        return new ActiveMQQueue(QUEUE_UPDATE);
    }

    @Bean("esTopicCreate")
    public Topic esTopicCreate() {
        return new ActiveMQTopic(TOPIC_CREATE);
    }
    @Bean("esTopicDelete")
    public Topic esTopicDelete() {
        return new ActiveMQTopic(TOPIC_DELETE);
    }
    @Bean("esTopicUpdate")
    public Topic esTopicUpdate() {
        return new ActiveMQTopic(TOPIC_UPDATE);
    }
    /**
     * topic模式的ListenerContainer
     * @param activeMQConnectionFactory
     * @return
     */
    @Bean
    public JmsListenerContainerFactory<?> jmsListenerContainerTopic(ConnectionFactory activeMQConnectionFactory) {
        DefaultJmsListenerContainerFactory bean = new DefaultJmsListenerContainerFactory();
        bean.setPubSubDomain(true);
        bean.setConnectionFactory(activeMQConnectionFactory);
        return bean;
    }

    /**
     * queue模式的ListenerContainer
     * @param activeMQConnectionFactory
     * @return
     */
    @Bean
    public JmsListenerContainerFactory<?> jmsListenerContainerQueue(ConnectionFactory activeMQConnectionFactory) {
        DefaultJmsListenerContainerFactory bean = new DefaultJmsListenerContainerFactory();
        bean.setConnectionFactory(activeMQConnectionFactory);
        return bean;
    }
}
解释:
这里分别定义了queue 和topic 的增加,删除,修改的消息,分别用来接收调用服务的修改,添加,删除数据的对应的操作(如果使用一个,那么就需要对数据进行判断到底是执行的什么操作。)
后来定义了两个异步的消息监听器,本质是一样的,一个监听queue,一个监听topic
4. 创建消息生成类,消息消费类
消息生成类:发送消息到activeMQ的类

import org.springframework.jms.core.JmsTemplate;
import org.springframework.stereotype.Service;
import javax.annotation.Resource;
import javax.jms.Destination;

/**
 * @author: cc
 * @Date: 2018/8/29 11:04
 * @Description:
 */

@Service
public class Producer {
    @Resource
    private JmsTemplate jmsTemplate;

    public void sendMessage(Destination destination, String message) {
        this.jmsTemplate.convertAndSend(destination,message);
    }

}
消息消费类:只需要在需要监听的方法上加上注解:(topic或者queue)
@JmsListener(destination = JmsConfig.TOPIC,containerFactory = "jmsListenerContainerTopic")
@JmsListener(destination = JmsConfig.QUEUE,containerFactory = "jmsListenerContainerQueue")
即可完成消息的监听,你可以在你的方法上直接接受String类型的消息进行解析。
如下:

public class Consumer {
    private  Logger logger = LoggerFactory.getLogger(this.getClass());

    @JmsListener(destination = JmsConfig.TOPIC_CREATE,containerFactory = "jmsListenerContainerTopic")
    public void onTopicMessage(String msg) {
        logger.info("接收到topic消息:{}",msg);
    }

    @JmsListener(destination = JmsConfig.QUEUE_CREATE,containerFactory = "jmsListenerContainerQueue")
    public void onQueueMessage(String msg) {
        logger.info("接收到queue消息:{}",msg);
    }
}
5. 完成
到这里已经可以发送消息和接受消息了,但是有很多问题的,比如消息丢失,重复消费等等问题,以后在解决。目前已经可以进行项目通信了。


 浙公网安备 33010602011771号