el-upload 上传图片
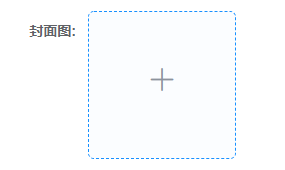
第一:看看页面效果.
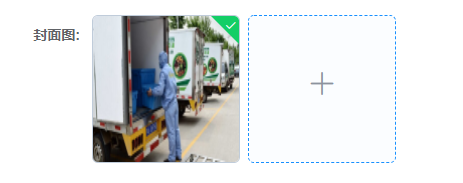
上传图片后效果如下:
第二步:页面代码:
<el-row>
<el-col :span="24">
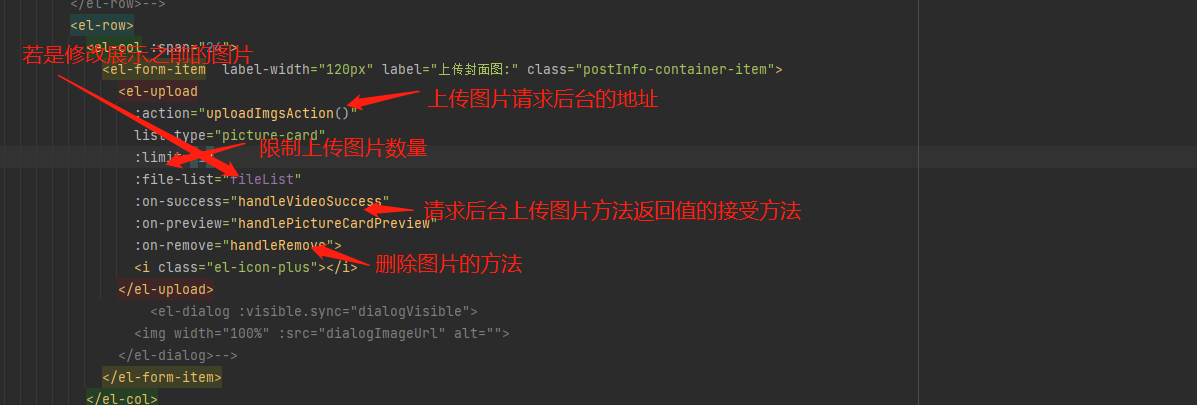
<el-form-item label-width="120px" label="封面图:" class="postInfo-container-item">
<el-upload
:action="uploadImgsAction()"
list-type="picture-card"
:limit="1"
:on-success="handleVideoSuccess"
:on-preview="handlePictureCardPreview"
:on-remove="handleRemove">
<i class="el-icon-plus"></i>
</el-upload>
<el-dialog :visible.sync="dialogVisible">
<img width="100%" :src="dialogImageUrl" alt="">
</el-dialog>
</el-form-item>
</el-col>
</el-row>
截图说明下:
我这里是请求后台上传图片接口后会返回上传后的图片地址,整个界面的代码(这个是添加页面,里面用到了上传图片)
<template>
<div class="createPost-container">
<el-form ref="postForm" :model="postForm" :rules="rules" class="form-container">
<div class="createPost-main-container">
<el-row>
<el-col :span="24">
<div class="postInfo-container">
<el-row>
<el-col :span="24">
<el-form-item label-width="120px" label="发布人:" class="postInfo-container-item">
<el-input value="孝南区市场监督管理局" :maxlength="100" name="name" required :disabled="true"/>
</el-form-item>
</el-col>
</el-row>
<el-row>
<el-col :span="24">
<el-form-item label-width="120px" label="通知标题:" class="postInfo-container-item" prop="title">
<el-input type="input" :rows="8" style="width: 800px" v-model="postForm.title"/>
</el-form-item>
</el-col>
</el-row>
<el-row>
<el-col :span="24">
<el-form-item label-width="120px" label="封面图:" class="postInfo-container-item">
<el-upload
:action="uploadImgsAction()"
list-type="picture-card"
:limit="1"
:on-success="handleVideoSuccess"
:on-preview="handlePictureCardPreview"
:on-remove="handleRemove">
<i class="el-icon-plus"></i>
</el-upload>
<el-dialog :visible.sync="dialogVisible">
<img width="100%" :src="dialogImageUrl" alt="">
</el-dialog>
</el-form-item>
</el-col>
</el-row>
<el-row :gutter="20">
<el-col :span="24">
<el-form-item label-width="120px" label="通知内容:" class="postInfo-container-item" prop="content">
<tinymce style="width: 800px" v-model="postForm.content"/>
</el-form-item>
</el-col>
</el-row>
<el-row>
<el-col :span="24">
<el-form-item label-width="120px" label="" class="postInfo-container-item" style="width:920px;">
<el-button type="primary" style='float:right;width:120px;' @click="sure">确认发布</el-button>
</el-form-item>
</el-col>
</el-row>
</div>
</el-col>
</el-row>
</div>
</el-form>
</div>
</template>
<script>
import {saveData } from '@/api/SupervisionNoticeList'
import Tinymce from '@/components/Tinymce'
import Upload from '@/components/Upload/SingleImage3'
import {AddAnnouncement} from "@/api/supervisionNotice/supervisionNotice";
const defaultForm = {
title:'',
depa:[],
content:''
}
export default {
name: 'ArticleDetail',
components: { Tinymce, Upload },
data() {
return {
dialogImageUrl: '',
dialogVisible: false,
postForm:{
title: '',
content: '',
picture:''
},
loading: false,
rules: {
title: [{ required: true, message: '请填写标题', trigger: 'change' }],
content: [{ required: true, message: '请填写内容', trigger: 'change' }]
},
temp: {},
values: [], // 存储value的数组
labels: [] // 存储label的数组
}
},
created() {
},
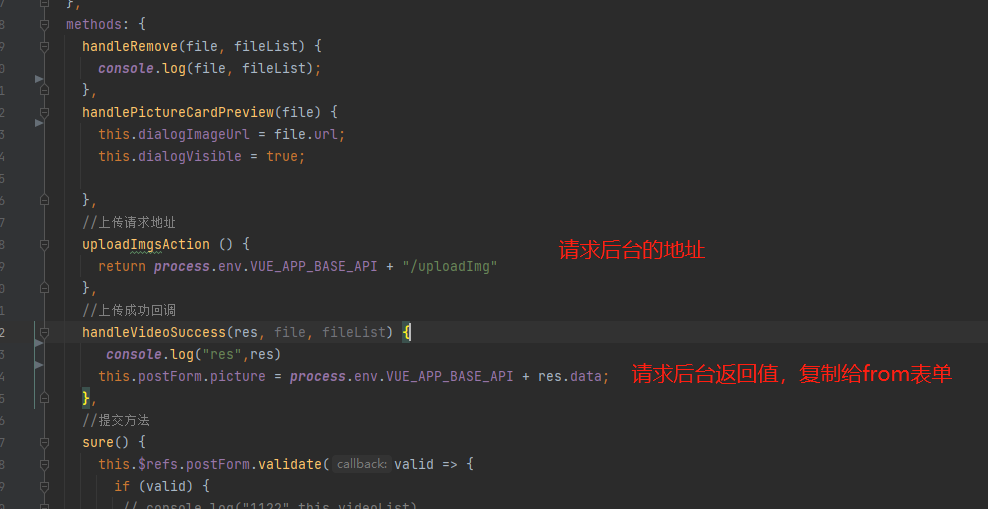
methods: {
handleRemove(file, fileList) {
console.log(file, fileList);
console.log("111",file)
},
handlePictureCardPreview(file) {
console.log("222",file)
this.dialogImageUrl = file.url;
this.dialogVisible = true;
},
//上传请求地址
uploadImgsAction () {
return process.env.VUE_APP_BASE_API + "/uploadImg"
},
//上传成功回调
handleVideoSuccess(res, file, fileList) {
console.log("res",res)
this.postForm.picture = process.env.VUE_APP_BASE_API + res.data;
},
//提交方法
sure() {
this.$refs.postForm.validate(valid => {
if (valid) {
// console.log("1122",this.videoList)
// this.postForm.pathUrl=this.picUrls.toString() //值赋值给form表单中的pathUrl
//this.postForm.pathUrl2=this.picUrls2.toString() //值赋值给form表单中的pathUrl
// this.postForm.videoUrl=this.videoList.toString() //值赋值给form表单中的pathUrl
/* const moment = require('moment')
this.postForm.eventTime = moment(this.postForm.eventTime).format('YYYY-MM-DD HH:mm:ss')*/
console.log("form值",this.postForm)
AddAnnouncement(this.postForm).then(res => {
this.$message({
message: '添加成功!',
type: 'success'
})
setTimeout(() => {
this.$router.push({ path: '/supervisionnotice/supervisionnoticelist' })
}, 1500)
})
} else {
console.log('error submit!!')
return false
}
})
},
/* selectBox(val){
this.values = [];
val.forEach(item=>{
const value = item.split(':')[0];
this.values.push(value);
this.postForm.noticeDept=this.values.toString();
});
},*/
}
}
</script>
<style lang="scss" scoped>
@import "~@/styles/mixin.scss";
.createPost-container {
position: relative;
padding-bottom: 20px;
box-sizing: content-box;
.createPost-main-container {
padding: 20px 45px 20px 50px;
.postInfo-container {
position: relative;
@include clearfix;
margin-bottom: 10px;
.postInfo-container-item {
float: left;
}
}
}
.word-counter {
width: 40px;
position: absolute;
right: 10px;
top: 0px;
}
.btn{
margin-left: 40px;
}
}
.article-textarea ::v-deep {
textarea {
padding-right: 40px;
resize: none;
border: none;
border-radius: 0px;
border-bottom: 1px solid #bfcbd9;
}
}
</style>
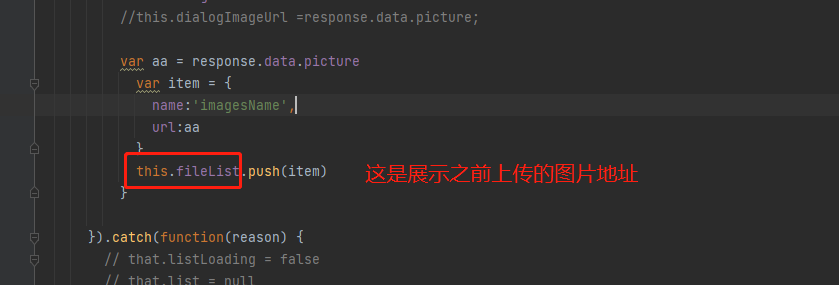
截图说明下:
添加界面的代码结束了。若需要修改界面,还要展示之前上传的图片
    showAnnouncement(id) {
      this.listLoading = true
      // console.log(this.listQuery)
      GetAnnouncementById({
        id:id
      }).then(response => {
        console.log("clj",response)
        this.listLoading = false
        if(response.code == 200){

          this.postForm = response.data
          this.dialogVisible=true
          //this.dialogImageUrl =response.data.picture;

          var aa = response.data.picture
            var item = {
              name:'imagesName',
              url:aa
            }
            this.fileList.push(item)
          }

      }).catch(function(reason) {
        // that.listLoading = false
        // that.list = null
        // console.log('catch:', reason);
      })
    },

 浙公网安备 33010602011771号