uniapp 使用u-loadmore 分页
环境:使用的是uniapp uview-ui组件,uview 组件的导入成功后才能使用
uview-ui 到导入:
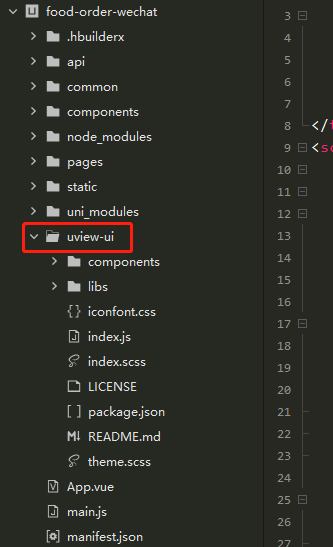
步骤1:先把该组件的包下载下来,复制到项目中如上图
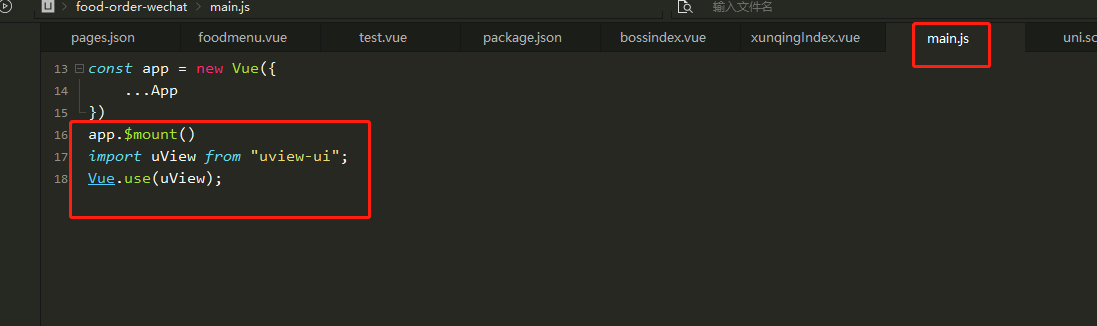
步骤2:在main.js中引入
import uView from "uview-ui";
Vue.use(uView);
如下图:
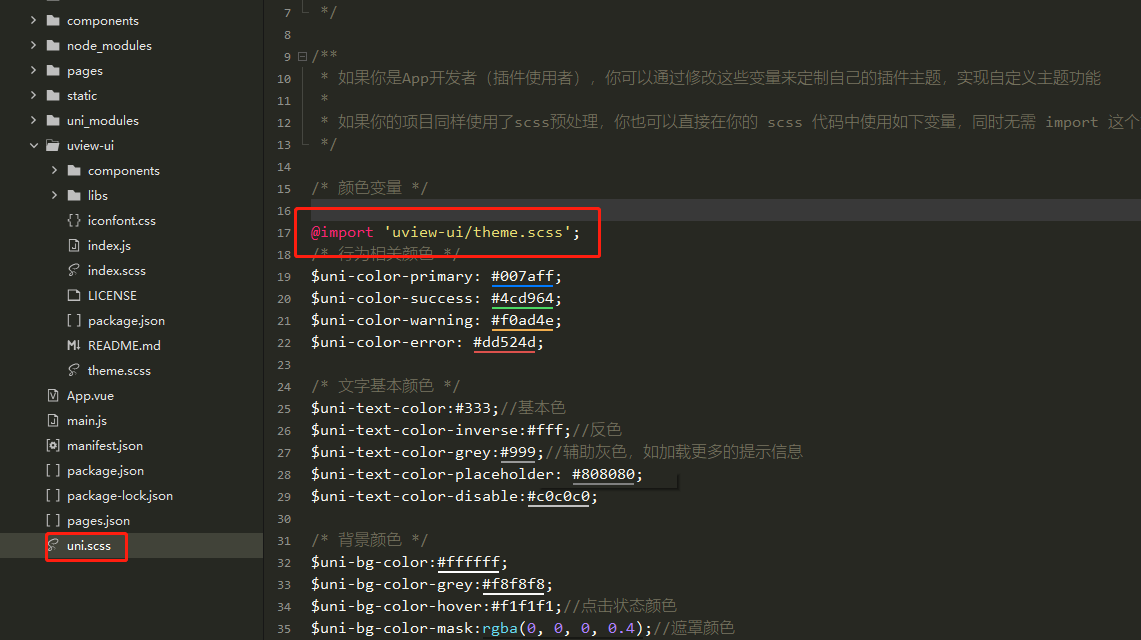
第三步:在uni.scss中引入
@import 'uview-ui/theme.scss';
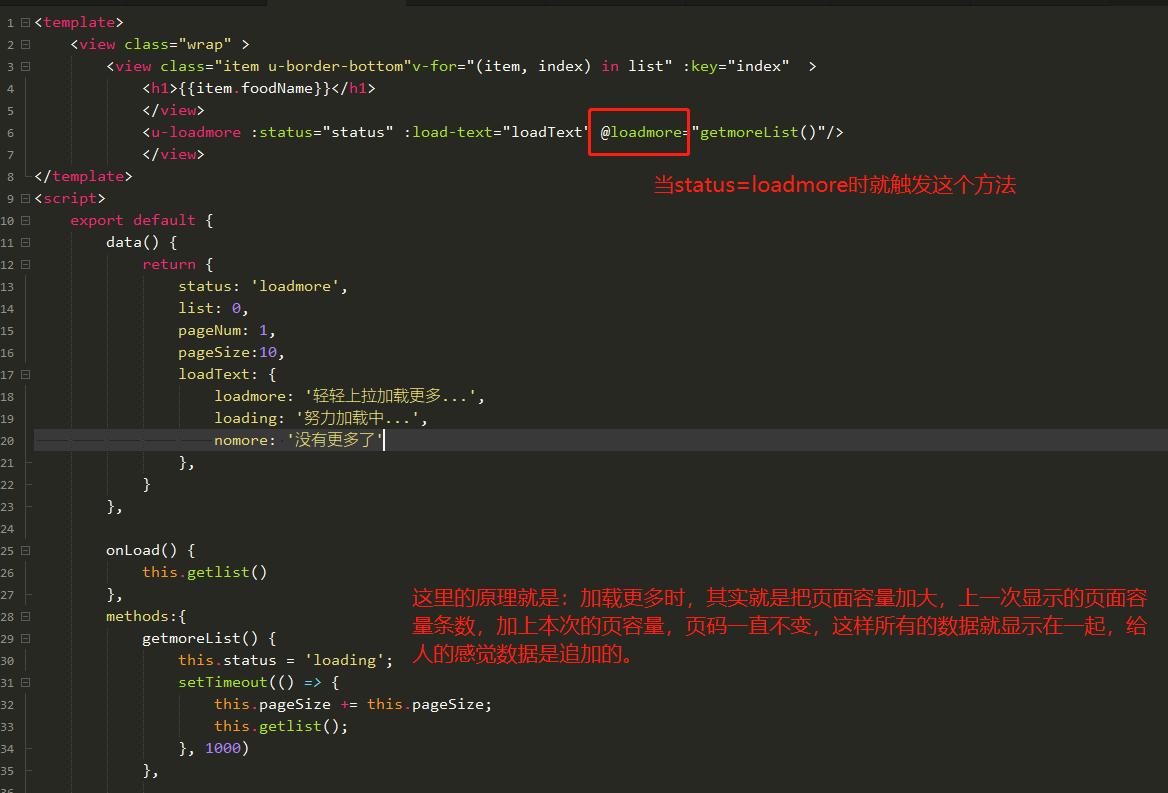
以上三个步骤弄好项目中就可以正常的使用uview-ui组件的标签了。再开始进入主题u-loadmore,的分页。代码如下:
<template>
<view class="wrap" >
<view class="item u-border-bottom"v-for="(item, index) in list" :key="index" >
<h1>{{item.foodName}}</h1>
</view>
<u-loadmore :status="status" :load-text="loadText" @loadmore="getmoreList()"/>
</view>
</template>
<script>
export default {
data() {
return {
status: 'loadmore',
list: 0,
pageNum: 1,
pageSize:10,
loadText: {
loadmore: '轻轻上拉加载更多...',
loading: '努力加载中...',
nomore: '没有更多了'
},
}
},
onLoad() {
this.getlist()
},
methods:{
getmoreList() {
this.status = 'loading';
setTimeout(() => {
this.pageSize += this.pageSize;
this.getlist();
}, 1000)
},
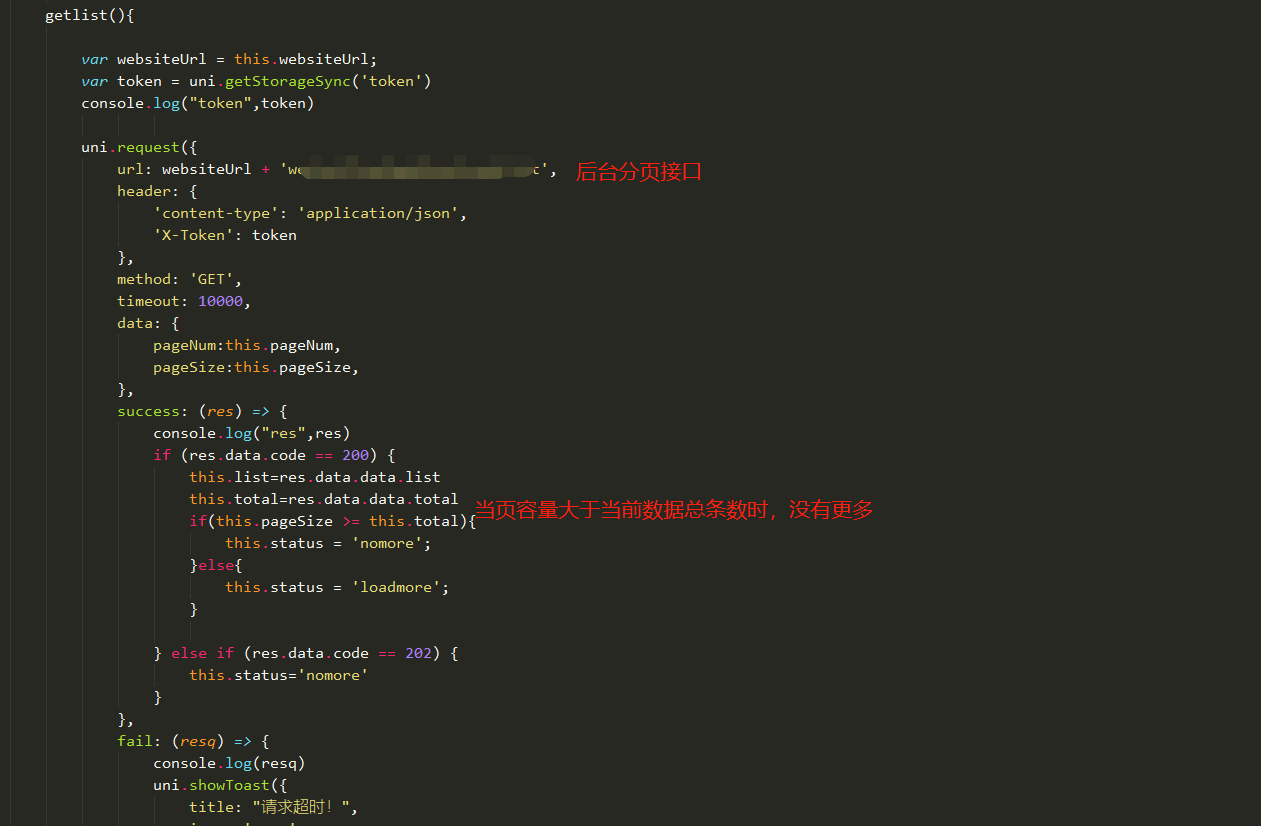
getlist(){
var websiteUrl = this.websiteUrl;
var token = uni.getStorageSync('token')
console.log("token",token)
uni.request({
url: websiteUrl + 'xxx/xxx/xxx',//写自己的后台数据接口(是分页接口)
header: {
'content-type': 'application/json',
'X-Token': token
},
method: 'GET',
timeout: 10000,
data: {
pageNum:this.pageNum,
pageSize:this.pageSize,
},
success: (res) => {
console.log("res",res)
if (res.data.code == 200) {
this.list=res.data.data.list
this.total=res.data.data.total
if(this.pageSize >= this.total){
this.status = 'nomore';
}else{
this.status = 'loadmore';
}
} else if (res.data.code == 202) {
this.status='nomore'
}
},
fail: (resq) => {
console.log(resq)
uni.showToast({
title: "请求超时!",
icon: 'none',
duration: 2000
});
}
})
}
}
}
</script>
<stylelang="scss"scoped>
.wrap {
padding:24rpx;
}
.item {
padding:24rpx0;
color: $u-content-color;
font-size:28rpx;
}
</style>
截图说明:
有些的不对的地方,谢谢指点!个人理解而已,代码本地测试功能可以正常运行!

 浙公网安备 33010602011771号