
2、添加路由
1、在项目根目录安装 vue-router:npm i vue-router@next【@next 代表的是安装最新的版本】
2、在 src 目录下新建 router/index.js,并添加路由配置项
1 2 3 4 5 6 7 8 9 10 11 12 13 14 15 | // router/index.jsimport { createRouter, createWebHashHistory } from 'vue-router'import Index from '@/views/Index.vue'const router = createRouter({ history: createWebHashHistory(), // hash 模式 routes: [ { path: '/', component: Index } ]})export default router |
3、src 目录下新增 views 目录,用于放置页面组件
4、在views中新建Index.vue,添加Index页面
1 2 3 4 5 6 7 8 9 | <template> Index</template><script>export default {}</script> |
5、上述获取文件路径是通过 @/ 的形式。这需要在 vite.config.js 下添加 resolve.alias
1 2 3 4 5 6 7 8 9 10 11 12 13 14 | import { defineConfig } from 'vite'import vue from '@vitejs/plugin-vue'import path from 'path'// https://vitejs.dev/config/export default defineConfig({ plugins: [vue()], resolve: { alias: { '~': path.resolve(__dirname, './'), '@': path.resolve(__dirname, 'src') }, }}) |
@ 代表 src 目录下的别名;~ 代表根目录下的别名,这样在项目中使用路径的时候,就不用写一长串。
6、在 src/main.js 中引入路由实例
1 2 3 4 5 6 7 8 9 10 11 12 | import { createApp } from 'vue'import App from './App.vue'import router from '@/router'import ElementPlus from 'element-plus'import 'element-plus/dist/index.css'const app = createApp(App)app.use(router) // 引用路由实例app.use(ElementPlus)app.mount('#app') |
7、修改 src/App.vue,将路由展示出来
1 2 3 4 5 6 7 8 9 10 | <template> <!--路径匹配到的组件,将会展示在这里--> <router-view></router-view></template> <script> export default { name: 'App' }</script> |
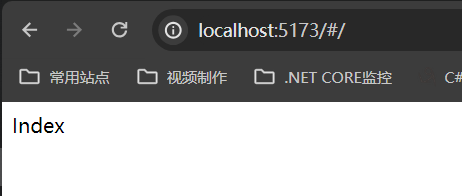
8、运行 npm run dev 启动项目


【推荐】国内首个AI IDE,深度理解中文开发场景,立即下载体验Trae
【推荐】编程新体验,更懂你的AI,立即体验豆包MarsCode编程助手
【推荐】抖音旗下AI助手豆包,你的智能百科全书,全免费不限次数
【推荐】轻量又高性能的 SSH 工具 IShell:AI 加持,快人一步
· 周边上新:园子的第一款马克杯温暖上架
· Open-Sora 2.0 重磅开源!
· 分享 3 个 .NET 开源的文件压缩处理库,助力快速实现文件压缩解压功能!
· Ollama——大语言模型本地部署的极速利器
· DeepSeek如何颠覆传统软件测试?测试工程师会被淘汰吗?