zabbix完整安装
版本说明
CentOS Linux release 7.9.2009 (Core)/Rocky Linux release 9.2 (Blue Onyx)
nginx-1.26.2.tar.gz
php-8.3.13.tar.gz
zabbix-6.4.19.tar.gz
mysql-8.0 以上

一、nginx安装
1.必要软件准备:
为了支持rewrite功能,我们需要安装pcre: yum install pcre-*
需要ssl的支持,如果不需要ssl支持,请跳过这一步: yum install openssl*
增加:
yum install gcc gcc-c++ autoconf libjpeg libjpeg-devel libpng libpng-devel freetype freetype-devel libxml2 libxml2-devel zlib zlib-devel \
glibc glibc-devel glib2 glib2-devel bzip2 bzip2-devel ncurses ncurses-devel curl curl-devel \
e2fsprogs e2fsprogs-devel krb5 krb5-devel libidn libidn-devel openssl openssl-devel openldap openldap-devel nss_ldap openldap-clients openldap-servers mysql-devel -y
2.安装nginx:
./configure --prefix=/usr/local/nginx --with-http_ssl_module --with-http_spdy_module --with-http_stub_status_module --with-pcre
出现报错:
取消--with-http_spdy_module选项
# 安装
./configure --prefix=/usr/local/nginx --with-http_ssl_module  --with-http_stub_status_module --with-pcre
make -j 4
make install

#启动
/usr/local/nginx/sbin/nginx
编译安装成功 开启防火墙端口后测试
注解:

  --with-http_stub_status_module:支持nginx状态查询
  --with-http_ssl_module:支持https
  --with-http_spdy_module:支持google的spdy,想了解请百度spdy,这个必须有ssl的支持
  --with-pcre:为了支持rewrite重写功能,必须制定pcre
二、编译安装php【已支持centos7下编译安装php-8】
1.下载php源码包
https://www.php.net/distributions/php-8.3.13.tar.gz
2.安装依赖包,确保安装之前有安装gd,png,curl,xml等等lib开发库。如果不确定,执行以下命令:
yum install gcc make gd-devel libjpeg-devel libpng-devel libxml2-devel bzip2-devel libcurl-devel sqlite-devel oniguruma oniguruma-devel openssl* krb5-devel libxslt-devel -y
3.编译安装PHP
以下参数支持,ftp,图片函数,pdo等支持,因为使用了php自带的mysqlnd,所以不需要额外安装mysql的lib库了.如果你是64位系统,参数后面加上--with-libdir=lib64,如果不是可以跳过。
./configure --prefix=/usr/local/php --with-config-file-path=/usr/local/php/etc --with-fpm-user=www --with-fpm-group=www --with-curl --with-freetype-dir --with-gd --with-gettext --with-iconv-dir --with-kerberos --with-libdir=lib64 --with-libxml-dir --with-mysqli --with-openssl --with-pcre-regex --with-pdo-mysql --with-pdo-sqlite --with-pear --with-png-dir --with-jpeg-dir --with-xmlrpc --with-xsl --with-zlib --with-bz2 --with-mhash --enable-fpm --enable-bcmath --enable-libxml --enable-inline-optimization --enable-mbregex --enable-mbstring --enable-opcache --enable-pcntl --enable-shmop --enable-soap --enable-sockets --enable-sysvsem --enable-sysvshm --enable-xml --enable-zip --enable-fpm
# 在rocky linux 9.2 中,即使安装了oniguruma oniguruma-devel,还是会报错,需要编译安装oniguruma
wget https://github.com/kkos/oniguruma/releases/download/v6.9.7.1/onig-6.9.7.1.tar.gz
tar -xzvf onig-6.9.7.1.tar.gz
cd onig-6.9.7.1
./configure && make && make install
export PKG_CONFIG_PATH=/usr/local/lib/pkgconfig:$PKG_CONFIG_PATH
查看版本:pkg-config --modversion oniguruma
make -j 4 && make install
cp php.ini-production /usr/local/php/etc/php.ini
cp /usr/local/php/etc/php-fpm.conf.default /usr/local/php/etc/php-fpm.conf
cd /usr/local/php/etc/php-fpm.d
cp www.conf.default www.conf

1.下载
    jpeg:http://www.ijg.org/files/
    freetype:https://download.savannah.gnu.org/releases/freetype/

2.安装 jpeg
    tar -xvf jpegsrc.v9c.tar.gz
    cd jpeg-9c
    ./configure --prefix=/usr/local/jpeg --enable-shared --enable-static
    make && make install

3.安装 freetype
    tar -xvf freetype-2.9.tar.gz
    cd freetype-2.9
    ./configure --prefix=/usr/local/freetype
    make &&  make install

4.编译PHP GD扩展
    cd php-8.3.13/ext/gd
    /usr/local/php/bin/phpize
    ./configure --with-php-config=/usr/local/php/bin/php-config --with-jpeg --with-freetype
    make && make install

5.编辑 vim /usr/local/php/etc/php.ini 在最后加上:
[plain] view plaincopy
extension="/usr/local/php/lib/php/extensions/no-debug-non-zts-20200930/gd.so"    #注意:这个路径以自己实际新生成的路径为准

三、整合nginx和php
1.配置nginx的配置文件nginx.conf 内容如下:
先注释掉http段server{}的内容,再在http其中增加
server {
    listen 80;
    server_name localhost;
    #access_log /data/logs/access.log main;

    index index.php index.html index.html;
    root /data/zabbix;

    location / {
        try_files $uri $uri/ /index.php?$args;
    }

    location ~ .*\.(php)?$ {
        expires -1s;
        try_files $uri =404;
        fastcgi_split_path_info ^(.+\.php)(/.+)$;
        include fastcgi_params;
        fastcgi_param PATH_INFO $fastcgi_path_info;
        fastcgi_index index.php;
        fastcgi_param SCRIPT_FILENAME $document_root$fastcgi_script_name;
        fastcgi_pass 127.0.0.1:9000;
    }
}
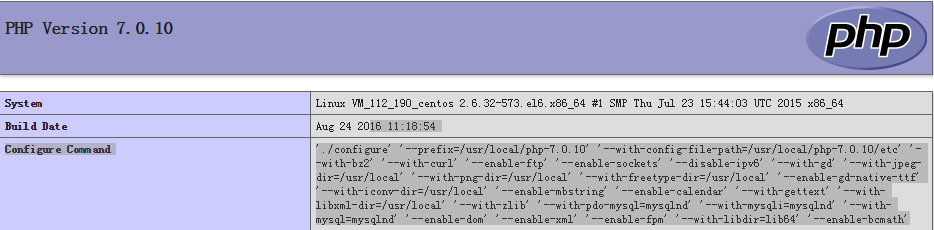
2.测试:【这个在8.0不能用了,可以跳过】
mkdir -p /data/zabbix
cd /data/zabbix
vim info.php
写入内容:<?php phpinfo(); ?>
:wq 保存退出
浏览器地址栏输入:http://IP/info.php
四、安装mysql8.0【此处使用yum安装】
1.安装
yum install mysql mysql-server -y
2.启动
systemctl restart mysqld.service
3.连接mysql 或者第一次启动会有个临时密码,留意日志即可
mysql --socket=/var/lib/mysql/mysql.sock
4.进入mysql,创建用户密码
ALTER USER 'root'@'localhost' identified by '密码';
update mysql.user set host='%' where user='root';
exit
5.连接mysql,创建zabbix数据库
mysql -h127.0.0.1 --port=3306 -uroot -p密码
create database zabbix default charset utf8mb4; 【default charset utf8mb4:设置数据库为utf8mb4,防止中文乱码】
6.使用数据库
use zabbix;
7.导入zabbix数据库文件
source zabbix-6.4.19/database/mysql/schema.sql
source zabbix-6.4.19/database/mysql/data.sql
source zabbix-6.4.19/database/mysql/images.sql
8.退出数据库
exit
五、安装zabbix
1.安装:
./configure --prefix=/usr/local/zabbix --enable-server --enable-agent --enable-proxy --with-mysql --with-net-snmp --with-libcurl --with-libxml2
提示报--with-net-snmp错

执行修复: yum install libevent-devel net-snmp.x86_64 net-snmp-devel.x86_64
make
make install
2.创建zabbix的用户组
groupadd zabbix
3.在zabbix用户组中创建zabbix用户
useradd -s /usr/sbin/nologin -g zabbix zabbix
4.配置zabbix web管理界面
cp -r zabbix-6.4.19/database/ui/* /data/zabbix/
5.配置zabbix server
【1】vim /usr/local/zabbix/etc/zabbix_server.conf
配置以下内容:
DBHost=127.0.0.1
DBName=zabbix
DBUser=root
6.启动zabbix-server
/usr/local/zabbix/sbin/zabbix_server
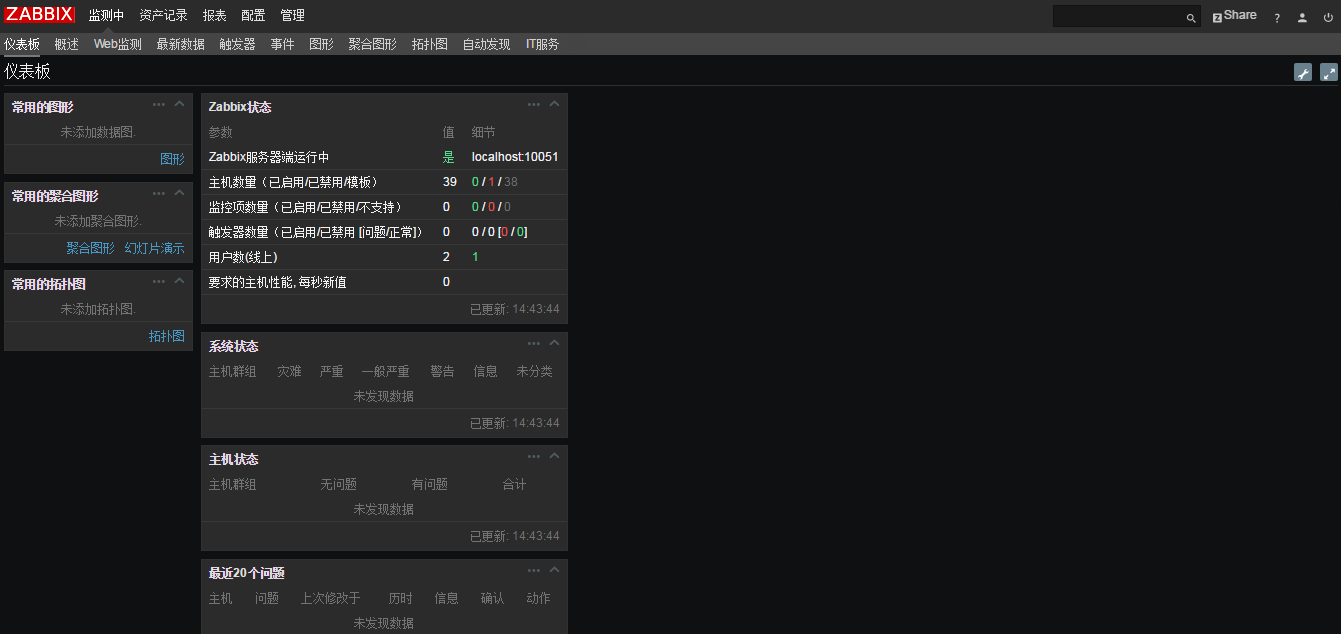
六、zabbix界面安装配置
浏览器访问zabbix web页面:http://ip
1.【缺少组件,配置php.ini】
vim /usr/local/php/etc/php.ini
配置内容如下:
max_execution_time = 300
2.【页面配置报错,提示不能连接数据库】

页面配置是报错,无法连接到数据库,原因读取不了mysql.sock文件
解决:ln -s /var/lib/mysql/mysql.sock /tmp/
也可以修改配置文件的mysql.sock的路径
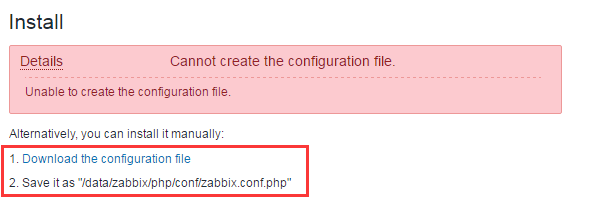
3.【无法创建zabbix.conf.php】按照页面提示照做即可

七、最后附上界面图
参考来源:http://www.ttlsa.com/zabbix/install-zabbix-on-linux-5-ttlsa/

【2】修改配置文件
vim /data/zabbix/php/include/defines.inc.php
45行:将DejaVuSans改为simkai

或者:
sed -i 's/DejaVuSans/simkai/g' ./include/defines.inc.php

以下是重点更新:2017-01-21
贴图:以下是交互式程序安装方式

关于程序可以留言或私聊交流
欢迎读者留言,继续完善或联系qq1071179133交流
不知道你成功安装了没,期待qq交流
python友情链接:http://www.cnblogs.com/chenjw-note/articles/6901585.html
一些事情一直在干,说不定以后就结果了呢
本文来自博客园,作者:chenjianwen,转载请注明原文链接:https://www.cnblogs.com/chenjw-note/p/5979050.html

 浙公网安备 33010602011771号