
x-pack-core 破解
1.建立文件夹
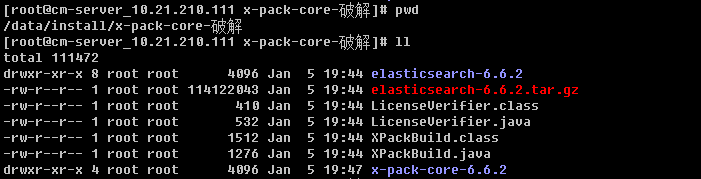
2.下载对应版本的elasticsearch
指定版本下载:https://www.elastic.co/cn/downloads/past-releases/elasticsearch-6-6-2
其他软件下载地址:https://www.elastic.co/cn/downloads/
jdk安装:https://www.cnblogs.com/chenjw-note/p/10838160.html
3.下载java反编译工具
【在windows下使用】
Luyten下载地址:https://github.com/deathmarine/Luyten/releases/tag/v0.5.3
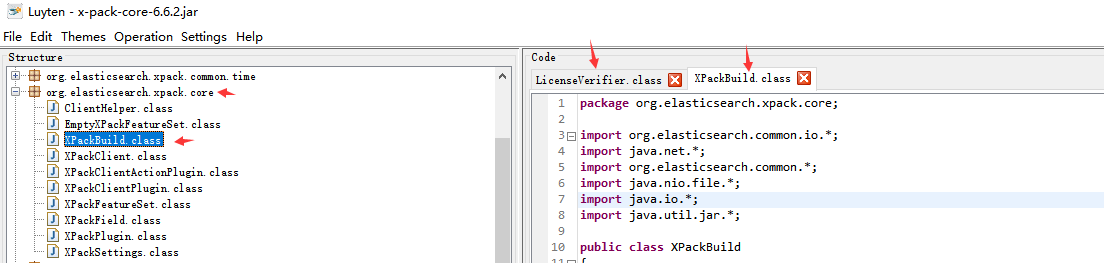
4.在windows下使用Luyten打开x-pack-core-6.6.2.jar
找到这两个文件的内容,复制粘贴到自己的文件【注意:一定要在破解对应版本复制内容,不能拷贝网上的,因为每个版本都不同】
org.elasticsearch.license.LicenseVerifier
org.elasticsearch.xpack.core.XPackBuild
5.编写对应的文件【从Luyten打开x-pack-core-6.6.2.jar打开的文件拿取内容】
vim LicenseVerifier.java 【把两个静态函数static中的内容去掉,改为return true; LicenseVerifier中有两个静态方法,这就是验证授权文件是否有效的方法,把它修改为全部返回true.】
package org.elasticsearch.license;

import java.nio.*;
import org.elasticsearch.common.bytes.*;
import java.security.*;
import java.util.*;
import org.elasticsearch.common.xcontent.*;
import org.apache.lucene.util.*;
import org.elasticsearch.core.internal.io.*;
import java.io.*;

public class LicenseVerifier
{
    public static boolean verifyLicense(final License license, final byte[] publicKeyData) {
        return true;
    }

    public static boolean verifyLicense(final License license) {
        return true;
    }
}
vim XPackBuild.java 【把最后一个 static 中 Label_xxxx 中的if,try都删掉,只留下
shortHash = "Unknown";
date = "Unknown";  】
package org.elasticsearch.xpack.core;

import org.elasticsearch.common.io.*;
import java.net.*;
import org.elasticsearch.common.*;
import java.nio.file.*;
import java.io.*;
import java.util.jar.*;

public class XPackBuild
{
    public static final XPackBuild CURRENT;
    private String shortHash;
    private String date;

    @SuppressForbidden(reason = "looks up path of xpack.jar directly")
    static Path getElasticsearchCodebase() {
        final URL url = XPackBuild.class.getProtectionDomain().getCodeSource().getLocation();
        try {
            return PathUtils.get(url.toURI());
        }
        catch (URISyntaxException bogus) {
            throw new RuntimeException(bogus);
        }
    }

    XPackBuild(final String shortHash, final String date) {
        this.shortHash = shortHash;
        this.date = date;
    }

    public String shortHash() {
        return this.shortHash;
    }

    public String date() {
        return this.date;
    }

    static {
        final Path path = getElasticsearchCodebase();
        String shortHash = null;
        String date = null;
        Label_0109: {
            shortHash = "Unknown";
            date = "Unknown";
        }
        CURRENT = new XPackBuild(shortHash, date);
    }
}
6.编译两个java文件
javac -cp "./modules/x-pack-core/x-pack-core-6.6.2.jar:./lib/*" XPackBuild.java
javac -cp "./modules/x-pack-core/x-pack-core-6.6.2.jar:./lib/*" LicenseVerifier.java
7.解压x-pack-core-6.6.2.jar替换文件并压缩
mkdir x-pack-core-6.6.2
cp -r elasticsearch-6.6.2/modules/x-pack-core/x-pack-core-6.6.2.jar x-pack-core-6.6.2/
cd x-pack-core-6.6.2/
jar -xf x-pack-core-6.6.2.jar    #解压
rm -rf x-pack-core-6.6.2.jar
cp -r ../LicenseVerifier.class ./org/elasticsearch/license/    #替换文件
cp -r ../XPackBuild.class ./org/elasticsearch/xpack/core/
jar -cvf x-pack-core-6.6.2.jar *    #压缩
8.将新的x-pack-core-6.6.2.jar拷贝到运行的elasticsearch
cp -r x-pack-core-6.6.2.jar /data/bigdata/elasticsearch-6.6.2/modules/x-pack-core/
完成上面即可继续走 https://www.cnblogs.com/chenjw-note/articles/10880637.html 的流程
一些事情一直在干,说不定以后就结果了呢
本文来自博客园,作者:chenjianwen,转载请注明原文链接:https://www.cnblogs.com/chenjw-note/articles/15768985.html

 浙公网安备 33010602011771号