API gateway 之 kong 安装 (二)
一、系统环境
[root@kong ~]# service iptables status
iptables: Firewall is not running.
[root@kong ~]# getenforce
Disabled
[root@kong ~]# cat /etc/system-release
CentOS release 6.7 (Final)
[root@kong ~]# uname -a
Linux kong 2.6.32-573.el6.x86_64 #1 SMP Thu Jul 23 15:44:03 UTC 2015 x86_64 x86_64 x86_64 GNU/Linux
二、kong的安装
根据kong的官网文档进行安装 官网:https://konghq.com/install/
1、yum源配置
[root@kong ~]# cat /etc/yum.repos.d/bintray-kong-kong-community-edition-rpm.repo
[bintraybintray-kong-kong-community-edition-rpm]
name=bintray-kong-kong-community-edition-rpm
baseurl=https://kong.bintray.com/kong-community-edition-rpm/centos/6
gpgcheck=0
repo_gpgcheck=0
enabled=1
2、安装kong 默认安装的 kong-0.10.4-1.noarch,官网已经更新到了0.13.x了,也可以手动下载最新版的rpm包安装
[root@kong ~]# yum install -y kong
如果安装是报如下错误,就在/etc/yum.conf 配置文件 sslverify=false后,重新执行上面命令
https://kong.bintray.com/kong-community-edition-rpm/centos/6/kong-community-edition-0.10.4.el6.noarch.rpm: [Errno 14] Peer cert cannot be verified or peer cert invalid
3、安装 kong 需要的数据库,默认选择的是postgreSQL,kong支持2种数据库存储(postgreSQL 和 Cassandra )
postgreSQL官网:https://www.postgresql.org/download/
Cassandra官网:http://cassandra.apache.org/download/
这里我们以postgreSQL为例进行安装
a、配置yum源
https://www.postgresql.org/download/linux/redhat/
yum install https://download.postgresql.org/pub/repos/yum/10/redhat/rhel-6-x86_64/pgdg-centos10-10-2.noarch.rpm

yum install postgresql10

yum install postgresql10-server

service postgresql-10 initdb
chkconfig postgresql-10 on
b、修改postgreSQL配置文件
/var/lib/pgsql/10/data/postgresql.conf
listen_addresses = 'localhost'

替换成如下:

listen_addresses = '*'
/var/lib/pgsql/10/data/pg_hba.conf
host    all             all             127.0.0.1/32            ident

换成如下:

host    all             all             127.0.0.1/32            trust
c、启动postgreSQL
service postgresql-10 start
d、创建kong需要的库、授权 并 把相关的数据写入库
[root@base ~]# su - postgres
-bash-4.1$ psql
psql (8.4.20, server 10.3)
WARNING: psql version 8.4, server version 10.0.
         Some psql features might not work.
Type "help" for help.

postgres=# CREATE USER kong; CREATE DATABASE kong OWNER kong;
CREATE ROLE
CREATE DATABASE
postgres=# quit
postgres-# \q
-bash-4.1$ exit
logout
[root@base ~]# kong migrations up
...................
response-ratelimiting migrated up to: 2016-08-04-321512_response-rate-limiting_policies
migrating acl for database kong
acl migrated up to: 2015-08-25-841841_init_acl
32 migrations ran
e、修改普通用户描述符,至少4096
ulimit -HSn 65535
echo "ulimit -HSn 65535" >> /etc/rc.local
4、启动 kong
[root@base ~]# kong start
Kong started

[root@base ~]# netstat -lntp|grep nginx
tcp        0      0 0.0.0.0:8000                0.0.0.0:*                   LISTEN      3984/nginx
tcp        0      0 0.0.0.0:8001                0.0.0.0:*                   LISTEN      3984/nginx
tcp        0      0 0.0.0.0:8443                0.0.0.0:*                   LISTEN      3984/nginx
tcp        0      0 0.0.0.0:8444                0.0.0.0:*                   LISTEN      3984/nginx

[root@base ~]# curl -i -X GET http://localhost:8001/
HTTP/1.1 200 OK
Date: Thu, 05 Apr 2018 08:22:56 GMT
Content-Type: application/json; charset=utf-8
Transfer-Encoding: chunked
Connection: keep-alive
Access-Control-Allow-Origin: *
Server: kong/0.10.4

{"timers":{"running":0,"pending":5},"configuration":{"admin_error_log":"logs\/error.log","cassandra_lb_policy":"RoundRobin","admin_access_log":"logs\/admin_access.log","ca ..................
..............................
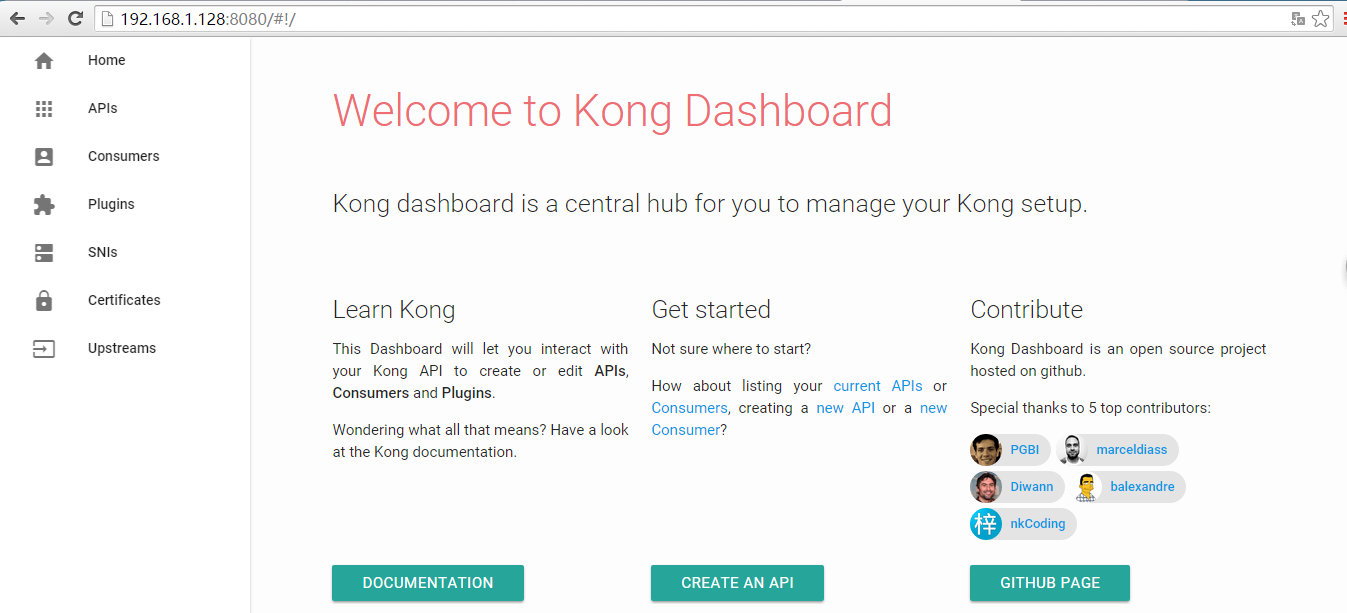
三、Kong UI管理工具
安装说明:https://github.com/PGBI/kong-dashboard
1、安装kong管理工具的环境依赖 nodejs 及 npm
nodejs 及 npm安装教程:https://nodejs.org/en/download/package-manager/#enterprise-linux-and-fedora
curl --silent --location https://rpm.nodesource.com/setup_9.x | sudo bash -

yum -y install nodejs
2、使用 npm 安装 kong-dashboard
npm install -g kong-dashboard
nohup kong-dashboard start --kong-url http://192.168.1.128:8001 &


也可以基于basic 认证,在登录是要求输入密码

nohup kong-dashboard start --kong-url http://192.168.1.128:8001 --basic-auth admin=123456 &
3、访问 kong-dashboard http://192.168.1.128:8080 (输入刚刚配置的账号密码)

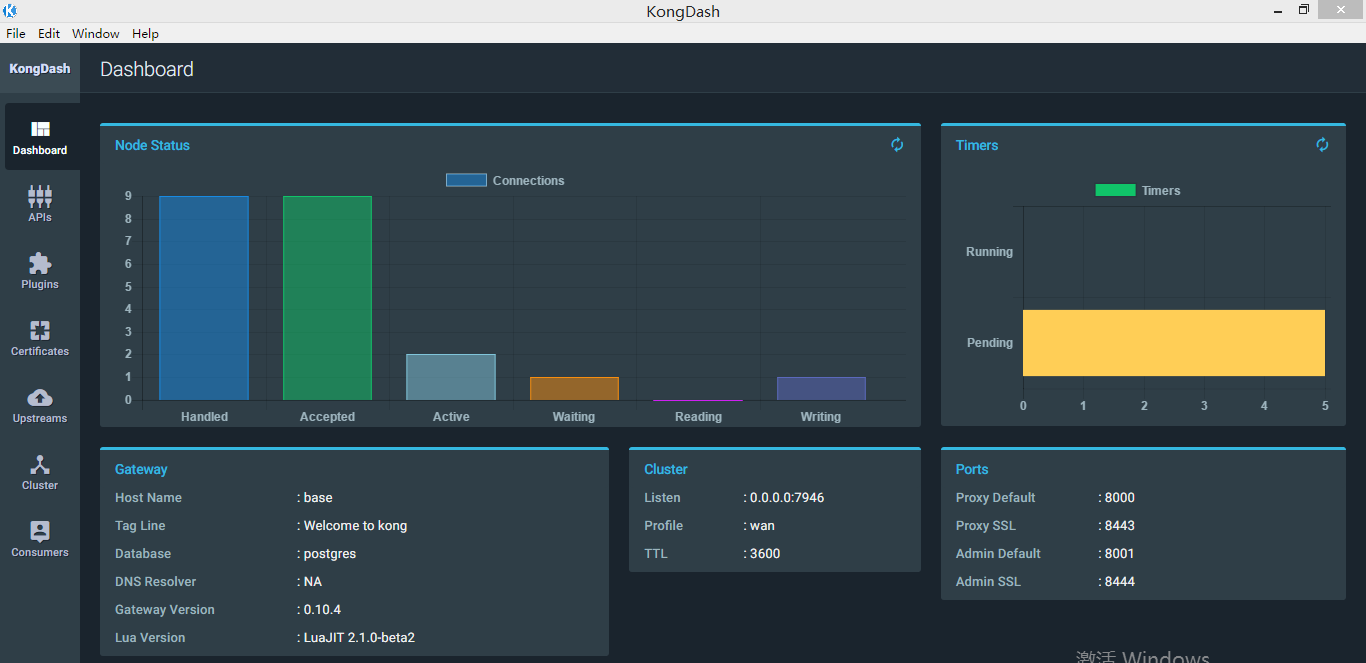
四、Kong 桌面管理工具
Kong 桌面管理工具:https://github.com/ajaysreedhar/kongdash 有linux版本,windows版本,mac版本。
下载地址:https://github.com/ajaysreedhar/kongdash/releases/download/v0.3.0/kongdash-0.3.0-ia32.exe
访问地址:http://192.168.1.128:8001/


【推荐】国内首个AI IDE,深度理解中文开发场景,立即下载体验Trae
【推荐】编程新体验,更懂你的AI,立即体验豆包MarsCode编程助手
【推荐】抖音旗下AI助手豆包,你的智能百科全书,全免费不限次数
【推荐】轻量又高性能的 SSH 工具 IShell:AI 加持,快人一步
· 从 HTTP 原因短语缺失研究 HTTP/2 和 HTTP/3 的设计差异
· AI与.NET技术实操系列:向量存储与相似性搜索在 .NET 中的实现
· 基于Microsoft.Extensions.AI核心库实现RAG应用
· Linux系列:如何用heaptrack跟踪.NET程序的非托管内存泄露
· 开发者必知的日志记录最佳实践
· TypeScript + Deepseek 打造卜卦网站:技术与玄学的结合
· Manus的开源复刻OpenManus初探
· AI 智能体引爆开源社区「GitHub 热点速览」
· C#/.NET/.NET Core技术前沿周刊 | 第 29 期(2025年3.1-3.9)
· 从HTTP原因短语缺失研究HTTP/2和HTTP/3的设计差异