docker系列(五):网络通信
1 引言
之前的几篇docker系列博客说的都是单个容器或者镜像的操作。但容器,作为一种简化的操作系统,又怎能不与机器或者容器相互协同工作呢,这就需要用到容器的网络功能。docker中提供了多种不同的方式实现网络通信。
本篇就分别说说这几种通信方式。
2 端口公开
启动容器时,如果不给容器设置任何的网络通信,那么,容器将作为一个与外界隔绝的独立机器。如果要让外界访问,其中一种方法就是向外界公开端口。端口公开使用--expose参数。
$ docker run -itd --expose 80 ubuntu
781851262fb5e407e6396a8a5094b7ba751dc68f23732a4856e10039b57e39bb
为测试端口是否公开,我们要在80端口上启动一个apache服务:
chb@chb-VirtualBox:~$ docker attach 7818512
root@781851262fb5:/# apt-get update
root@781851262fb5:/# apt-get install apache2
启动Apache2:
root@781851262fb5:/# /etc/init.d/apache2 start
* Starting Apache httpd web server apache2 *
查看一下容器的ip地址:
root@781851262fb5:/# apt-get install net-tools
root@781851262fb5:/# ifconfig
eth0: flags=4163<UP,BROADCAST,RUNNING,MULTICAST> mtu 1500
inet 172.17.0.2 netmask 255.255.0.0 broadcast 172.17.255.255
ether 02:42:ac:11:00:02 txqueuelen 0 (Ethernet)
RX packets 22321 bytes 49869522 (49.8 MB)
RX errors 0 dropped 0 overruns 0 frame 0
TX packets 19457 bytes 1063327 (1.0 MB)
TX errors 0 dropped 0 overruns 0 carrier 0 collisions 0
可以看到,容器ip地址为:172.17.0.2
回到宿主机中,使用curl命令访问容器的apache服务器:
$ curl 172.17.0.2:80
<!DOCTYPE html PUBLIC "-//W3C//DTD XHTML 1.0 Transitional//EN" "http://www.w3.org/TR/xhtml1/DTD/xhtml1-transitional.dtd">
<html xmlns="http://www.w3.org/1999/xhtml">
<!--
Modified from the Debian original for Ubuntu
Last updated: 2016-11-16
See: https://launchpad.net/bugs/1288690
-->
<head>
<meta http-equiv="Content-Type" content="text/html; charset=UTF-8" />
<title>Apache2 Ubuntu Default Page: It works</title>
<style type="text/css" media="screen">
* {
margin: 0px 0px 0px 0px;
padding: 0px 0px 0px 0px;
}
……
可以正常访问,在宿主机浏览器中也是可以访问的:

证明端口是公开的。
3 端口映射
端口映射在介绍容器的那一片博文中也提到过,即在使用docker run命令启动容器时,通过-p或-P参数来指定端口映射。其中-p(小写)可手动指定需要映射的端口,需要注意,宿主机一个端口只能绑定一个容器。而-P(大写)则是让docker自动随机映射一个49000~49900端口到容器内部开放的网络端口。
在展开介绍两者之前那,我们先下载一个nginx镜像,我们本篇博文都通过它来展开:
$ docker pull nginx
Using default tag: latest
latest: Pulling from library/nginx
fc7181108d40: Pull complete
c4277fc40ec2: Pull complete
780053e98559: Pull complete
Digest: sha256:bdbf36b7f1f77ffe7bd2a32e59235dff6ecf131e3b6b5b96061c652f30685f3a
Status: Downloaded newer image for nginx:latest
3.1 指定端口映射:-p(小写)
上面说过,-p(小写)可以指定一个宿主机的端口绑定到容器指定的端口,它支持以下几种格式:
使用HostPort:ContainerPort格式将本地的5000端口映射到容器的80端口,返回了HTML网页:
$ docker run -itd -p 5000:80 nginx
f56c5f10f6d08d4805d32cf9f9ae89bb5ad5bc1fa42d4d88e801548dbdaa0d5c
此时,使用curl命令访问本机5000端口:
$ curl 127.0.0.1:5000
<!DOCTYPE html>
<html>
<head>
<title>Welcome to nginx!</title>
<style>
body {
width: 35em;
margin: 0 auto;
font-family: Tahoma, Verdana, Arial, sans-serif;
}
</style>
</head>
<body>
<h1>Welcome to nginx!</h1>
<p>If you see this page, the nginx web server is successfully installed and
working. Further configuration is required.</p>

<p>For online documentation and support please refer to
<a href="http://nginx.org/">nginx.org</a>.<br/>
Commercial support is available at
<a href="http://nginx.com/">nginx.com</a>.</p>

<p><em>Thank you for using nginx.</em></p>
</body>
</html>
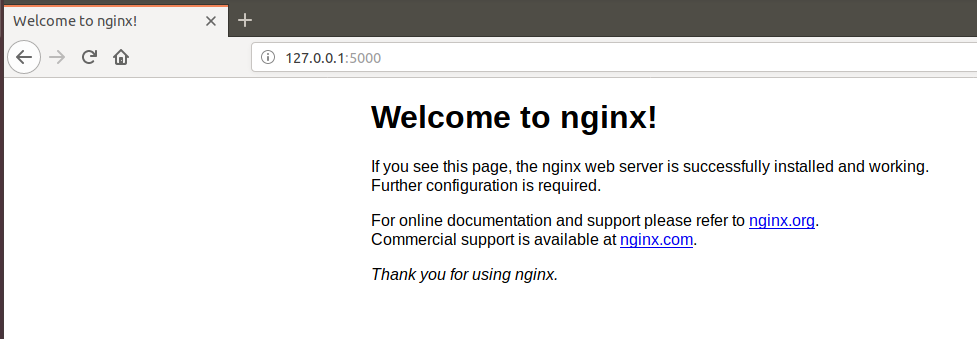
同时,在浏览器通过宿主机ip+5000端口可进行访问,如下所示,成功访问容器内运行的nginx,说明真实访问的是容器的80端口。

多次使用-p参数可以绑定多个端口:
$ docker run -itd -p 5001:5001 -p 5002:5002 nginx:latest
5b1060ff644fda68f83c653615cb04c6fb4835a65f1becad45fe7d97a5d6d06c
通过docker ps命令进行查看:

(2)IP:HostPort:ContainerPort
可以使用IP:HostPort:ContainerPort格式进行指定地址指定端口进行映射:
$ docker run -itd -p 10.0.2.15:8081:8081 nginx
5053c836089a65cd3b6456e5e1d72e780b5e86ca1d5c04e685ec7593496501b1
通过docker ps命令进行查看:

使用IP::ContainerPort格式可以将容器的指定端口映射到宿主机到任意随机端口:
$ docker run -itd -p 10.0.2.15::8088 nginx:latest
3dc8530e21f0f83d79b4825ffc8708b29f57e27d9deea67e2ed4b984fe2e0d40
通过docker ps命令进行查看:

3.2 随机端口映射:-P(大写)
当使用-P(大写)参数时,docker会随机映射一个宿主机端口到内部容器开放的网络端口:
$ docker run -d -P nginx:latest
274fea3b9da2e3f967b18e18d294167ea42f64bfcb5ac99f3a9697d11bec48a9
通过docker ps命令进行查看:

因为-P(大写)参数映射到的是容器内部的开放网络端口,所以,在宿主机通过通浏览器进行访问:

4 容器互联
容器互联机制是一种让多个容器之间进行快速交互的一种交互方式,这种方式会在在容器之间创建连接,这种连接对连接中的容器时可见的,避免了暴露端口到外部网络。容器互联是通过容器的名称来进行的,所以,需要进行创建容器互联的容器,最好制定一个容器名(当然,不指定的haul使用系统分配的名称也可以,不过自定义的名称好记一些)。使用docker run命令启动容器时,通过--link参数建立容器互联,--link命令格式:
--link 容器名1[:容器名2]
其中,容器名1是指需要与正在使用docker run命令创建的容器互联的容器,容器名2是容器名1的别名,别名可以省略。
还是以nginx为例进行说明:
我们先使用nginx作为服务器:
$ docker run -d --name nginx_server nginx
3f3e58e016b164f9cb0a17f37997e389ac4f9e0c4ef5004f1f7f155832b22b04
然后在启动一个ubuntu容器与刚启动的nginx_server进行互联:
$ docker run -it --link nginx_server:nginx_server ubuntu
root@4b10ea40eac2:/#
新启动的ubuntu容器里面没有curl命令,为了更好测试,我们安装一下curl:
root@4b10ea40eac2:/# sudo apt-get update
root@4b10ea40eac2:/# apt install curl
最后,使用curl命令访问与nginx_client容器互联的nginx_server容器:
root@4b10ea40eac2:/# curl nginx_server
<!DOCTYPE html>
<html>
<head>
<title>Welcome to nginx!</title>
<style>
body {
width: 35em;
margin: 0 auto;
font-family: Tahoma, Verdana, Arial, sans-serif;
}
</style>
</head>
<body>
<h1>Welcome to nginx!</h1>
<p>If you see this page, the nginx web server is successfully installed and
working. Further configuration is required.</p>

<p>For online documentation and support please refer to
<a href="http://nginx.org/">nginx.org</a>.<br/>
Commercial support is available at
<a href="http://nginx.com/">nginx.com</a>.</p>

<p><em>Thank you for using nginx.</em></p>
</body>
</html>
成功返回了HTML网页,证明互联成功。
多个容器可以同时互联到同一个容器中,例如在上面的例子中,多个容器可以同时互联到nginx_server中,互联的方法是一样的。
5 总结
本文介绍了几种docker的容器网络访问方式,毫无疑问,访问容器时极其重要且不可避免的操作,如何合理规划容器间的访问方式,对数据安全、整个系统的架构有着至关重要的影响.

作者:奥辰
微信号:chb1137796095
Github:https://github.com/ChenHuabin321
欢迎加V交流,共同学习,共同进步!
本文版权归作者和博客园共有,欢迎转载,但未经作者同意必须保留此段声明,且在文章页面明显位置给出原文链接,否则保留追究法律责任的权利。


