webpack3.10配置react
在项目文件的目录下新建文件webpack.config.js
const path = require('path');

module.exports = {
  entry: './path/to/my/entry/file.js',
  output: {
    path: path.resolve(__dirname, 'dist'),
    filename: 'my-first-webpack.bundle.js'
  }
};
修改webpac.config.js出口,入口
const path = require('path');

module.exports = {
    entry: './src/app.js',//入口
    output: {
        path: path.resolve(__dirname, 'dist'),
        filename: 'app.js'
    },
};
1.安装webpack
安装命令:
yarn add webpack@3.10.0 --dev
执行命令
node_modules/.bin/webpack
在dist目录下就能看到打包好的app.js
最基本的webpack打包就弄好了
2.安装html插件html-webpack-plugin
安装命令:
yarn add html-webpack-plugin@2.30.1 --dev
第一步:在webpack.config.js文件下配置html-webpack-plugin
const path = require('path');
const HtmlWebpackPlugin = require('html-webpack-plugin')
module.exports = {
    entry: './src/app.js',//入口
    output: {
        path: path.resolve(__dirname, 'dist'),
        filename: 'app.js'
    },
    plugins: [
        new HtmlWebpackPlugin({
            template: './src/index.html' //template是生成html文件按自己定义的模板,路径定义为./src/index.html
        })
    ]
};
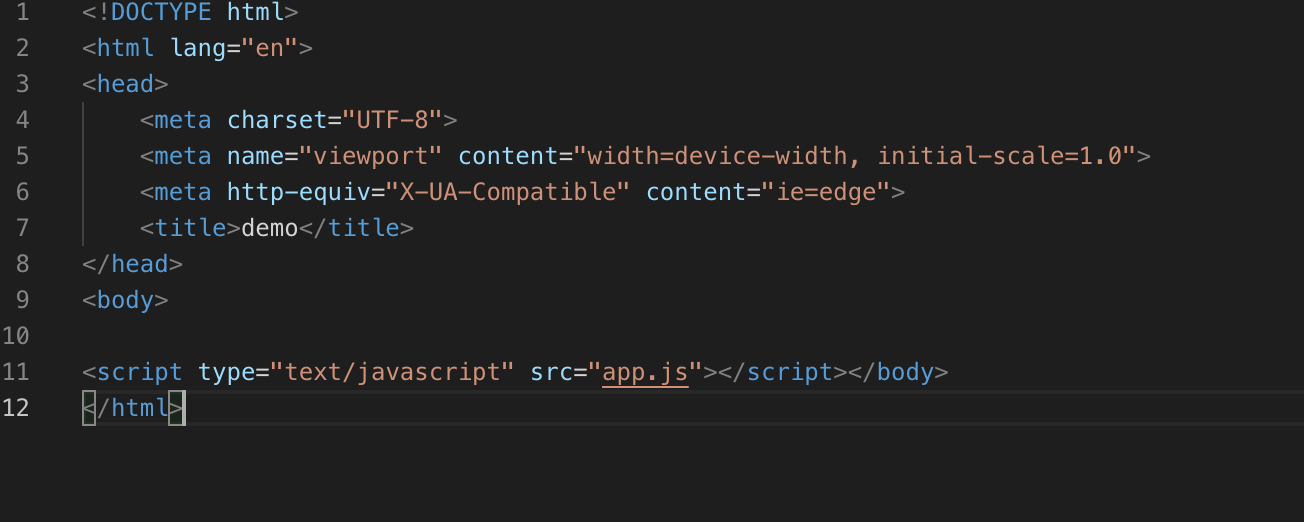
第二步:在./src目录下新建index.html,可以自己定义title,mate
第三步:执行命令:
node_modules/.bin/webpack
在dist打包目录能看到生成的index.html文件
可以看到我们生成的app.js也引入了
3.安装javasrcipt插件babel
安装命令:
yarn add babel-core@6.26.0 babel-preset-env@1.6.1 babel-loader@7.1.2 --dev
安装完命令可以在package.json,多了几个属性
第一步:webpack.config,js配置babel插件
const path = require('path');
const HtmlWebpackPlugin = require('html-webpack-plugin')
module.exports = {
    entry: './src/app.js',//入口
    output: {
        path: path.resolve(__dirname, 'dist'),
        filename: 'app.js'
    },
    module: {
        rules: [
            {
                test: /\.m?js$/,
                exclude: /(node_modules)/,
                use: {
                    loader: 'babel-loader',
                    options: {
                        presets: ['env']
                    }
                }
            }
        ]
    },
    plugins: [
        new HtmlWebpackPlugin({
            template: './src/index.html'
        })
    ]
};
yarn add babel-preset-react@6.24.1 --dev
第一步:webpack.config.js配置
module: {
        rules: [
            {
                test: /\.m?js$/,
                exclude: /(node_modules)/,
                use: {
                    loader: 'babel-loader',
                    options: {
                        presets: ['env','react']
                    }
                }
            }
        ]
    },
5.在项目中添加react.js
安装命令
yarn add react@16.2.0 react-dom@16.2.0
第一步:在src目录下的app.js添加react语法试一下
import React from 'react'
import ReactDOM from 'react-dom'

ReactDOM.render(
    <h1>hello, world</h1>,
    document.getElementById('app')
)
第二步:把app.js后缀改成app.jsx
第三步:webpack.config.js修改entry的入口文件后缀修改成jsx
entry: './src/app.jsx'
第四步:编译的后缀名js改成jsx
module: {
        rules: [
       // js文件处理
            {
                test: /\.m?jsx$/,
                exclude: /(node_modules)/,
                use: {
                    loader: 'babel-loader',
                    options: {
                        presets: ['env','react']
                    }
                }
            }
        ]
    },
第五步:执行打包命令node_modules/.bin/webpack看看效果
打开打包好的dist/index.html可以看到hello world说明刚才在app.jsx用react语法写的“hello world”编译成功了
6.安装css插件css-loader
安装命令
yarn add style-loader@0.19.1 css-loader@0.28.8 --dev
第一步:配置webpack.config.js,在rules添加一个处理css的对象
module: {
        rules: [
            {
                test: /\.m?jsx$/,
                exclude: /(node_modules)/,
                use: {
                    loader: 'babel-loader',
                    options: {
                        presets: ['env','react']
                    }
                }
            },
        // css文件处理
            {
                test: /\.css$/i,
                use: ['style-loader', 'css-loader'],
            },
        ]
    },
第二步:新建一个文件app.css,在里面写一些样式
第三步:然后在app.jsx引入样式
import './app.css'
打包之后打开dist/index.html看看样式有没有发生改变
7.安装extract-text-webpack-plugin插件
它将*.css条目块中的所有必需模块移动到单独的CSS文件中。因此,您的样式不再内联到JS包中,而是在单独的CSS文件中(styles.css)
第一步:安装插件
安装命令:
yarn add extract-text-webpack-plugin@3.0.2 --dev
第二步:配置webpack.config.js
const path = require('path');
const HtmlWebpackPlugin = require('html-webpack-plugin')
const ExtractTextPlugin = require('extract-text-webpack-pluginmodule.exports = {    entry: './src/app.jsx',//    output: {        path: path.resolve(__dirname, 'dist'),
        filename: 'app.js'
    },
    module: {
        rules: [
            {
                test: /\.m?jsx$/,
                exclude: /(node_modules)/,
                use: {
                    loader: 'babel-loader',
                    options: {
                        presets: ['env','react']
                    }
                }
            },
            {
                test: /\.css$/i,
                use: ExtractTextPlugin.extract({
                    fallback: "style-loader",
                    use: "css-loader"
                })
            },
        ]
    },
    plugins: [
        new HtmlWebpackPlugin({
            template: './src/index.html'
        }),

    new ExtractTextPlugin("index.css"),
] };
8.安装sass-loader插件
第一步:安装
安装命令:
yarn add sass-loader@6.0.6 --dev
第二步:配置webpack.config.js
const path              = require('path');
const HtmlWebpackPlugin = require('html-webpack-plugin');
const ExtractTextPlugin = require('extract-text-webpack-plugin');
module.exports = {
    entry: './src/app.jsx',
    output: {
        path: path.resolve(__dirname, 'dist'),
        filename: 'app.js'
    },
    module: {
        rules: [
            {
                test: /\.jsx$/,
                exclude: /(node_modules)/,
                use: {
                    loader: 'babel-loader',
                    options: {
                        presets: ['env', 'react']
                    }
                }
            },
            {
                test: /\.css$/,
                use: ExtractTextPlugin.extract({
                    fallback: "style-loader",
                    use: "css-loader"
                })
            },
            // sass文件的处理
            {
                test: /\.scss$/,
                use: ExtractTextPlugin.extract({
                    fallback: 'style-loader',
                    use: ['css-loader', 'sass-loader']
                })
            }
        ]
    },
    plugins: [
        new HtmlWebpackPlugin({
            template: './src/index.html'
        }),
        new ExtractTextPlugin("css/[name].css"),
    ]
};
第三步:新建一个index.scss文件
写一些scss的语法
第四步:在app.jsx引入
import React from 'react';
import ReactDOM from 'react-dom';

import './app.css'
import './index.scss' //引入scss文件
ReactDOM.render(
    <h1>hello, world</h1>,
    document.getElementById('app')
)
第四步:用打包命令执行打包
如果出现:Cannot find module 'node-sass'
安装一下node-sass
yarn add node-sass --seve-dev
然后继续打包
查看index.html样式的改变
9.安装url-loader,对图片对处理
第一步:安装
安装命令
yarn add file-loader@1.1.6 url-loader@0.6.2 --dev
第二步:配置webpack.confog.js
const path              = require('path');
const HtmlWebpackPlugin = require('html-webpack-plugin');
const ExtractTextPlugin = require('extract-text-webpack-plugin');
module.exports = {
    entry: './src/app.jsx',
    output: {
        path: path.resolve(__dirname, 'dist'),
        filename: 'app.js'
    },
    module: {
        rules: [
            {
                test: /\.jsx$/,
                exclude: /(node_modules)/,
                use: {
                    loader: 'babel-loader',
                    options: {
                        presets: ['env', 'react']
                    }
                }
            },
            {
                test: /\.css$/,
                use: ExtractTextPlugin.extract({
                    fallback: "style-loader",
                    use: "css-loader"
                })
            },
            {
                test: /\.scss$/,
                use: ExtractTextPlugin.extract({
                    fallback: 'style-loader',
                    use: ['css-loader', 'sass-loader']
                })
            },
            //图片对配置
            {
                test: /\.(png|jpg|gif)$/i,
                use: [
                    {
                        loader: 'url-loader',
                        options: {
                            limit: 8192,
                        },
                    },
                ],
            },
        ]
    },
    plugins: [
        new HtmlWebpackPlugin({
            template: './src/index.html'
        }),
        new ExtractTextPlugin("css/[name].css"),
    ]
};
第三步:放一张图片,然后引入
第四步:打包命令打包,看到dist文件多了一张重命名后的img
10.安装font-awesome
第一步:安装
安装命令
yarn add font-awesome
由于是我们业务用对代码所以不用加--dev
第二步:在app.jsx引入font-awesome
import React from 'react';
import ReactDOM from 'react-dom';

import 'font-awesome/css/font-awesome.min.css'

import './app.css'
import './index.scss'
ReactDOM.render(
    <i className="fa fa-address-book"></i>,
    <h1>hello, world</h1>,
    document.getElementById('app')
)
第三步:配置webpack.config.js
const path              = require('path');
const HtmlWebpackPlugin = require('html-webpack-plugin');
const ExtractTextPlugin = require('extract-text-webpack-plugin');
module.exports = {
    entry: './src/app.jsx',
    output: {
        path: path.resolve(__dirname, 'dist'),
        filename: 'app.js'
    },
    module: {
        rules: [
            {
                test: /\.jsx$/,
                exclude: /(node_modules)/,
                use: {
                    loader: 'babel-loader',
                    options: {
                        presets: ['env', 'react']
                    }
                }
            },
            {
                test: /\.css$/,
                use: ExtractTextPlugin.extract({
                    fallback: "style-loader",
                    use: "css-loader"
                })
            },
            {
                test: /\.scss$/,
                use: ExtractTextPlugin.extract({
                    fallback: 'style-loader',
                    use: ['css-loader', 'sass-loader']
                })
            },
            {
                test: /\.(png|jpg|gif)$/i,
                use: [
                    {
                        loader: 'url-loader',
                        options: {
                            limit: 8192,
                        },
                    },
                ],
            },
            // 字体图标的配置
            {
                test: /\.(eot|svg|ttf|woff|woff2|otf)$/,
                use: [
                    {
                        loader: 'url-loader',
                        options: {
                            publicPath:'/fonts/',//打包到fonts文件夹
                            useRelativePath:true,//设置为相对路径
                            name:'[name].[ext]'
                        }
                    }
                ]
            }
        ]
    },
    plugins: [
        new HtmlWebpackPlugin({
            template: './src/index.html'
        }),
        new ExtractTextPlugin("css/[name].css"),
    ]
};
第四步:执行打包命令可以看到生成几个字体文件
11.提出公共模块
配置webpack.config.js
const path              = require('path');
const webpack           = require('webpack');
const HtmlWebpackPlugin = require('html-webpack-plugin');
const ExtractTextPlugin = require('extract-text-webpack-plugin');
module.exports = {
    entry: './src/app.jsx',//入口
    output: {
        path: path.resolve(__dirname, 'dist'),
        filename: 'js/app.js'
    },
    module: {
        rules: [
            {
                test: /\.jsx$/,
                exclude: /(node_modules)/,
                use: {
                    loader: 'babel-loader',
                    options: {
                        presets: ['env', 'react']
                    }
                }
            },
            // css文件的处理
            {
                test: /\.css$/,
                use: ExtractTextPlugin.extract({
                    fallback: "style-loader",
                    use: "css-loader"
                })
            },
            // sass文件的处理
            {
                test: /\.scss$/,
                use: ExtractTextPlugin.extract({
                    fallback: 'style-loader',
                    use: ['css-loader', 'sass-loader']
                })
            },
            //图片配置
            {
                test: /\.(png|jpg|gif)$/i,
                use: [
                    {
                        loader: 'url-loader',
                        options: {
                            limit: 8192,
                            name: 'resource/[name].[ext]'
                        },
                    },
                ],
            },
            // 字体图标的配置
            {
                test: /\.(eot|svg|ttf|woff|woff2|otf)$/,
                use: [
                    {
                        loader: 'url-loader',
                        options: {
                            name: 'resource/[name].[ext]'
                            // publicPath:'/fonts/',//打包到fonts文件夹
                            // useRelativePath:true,//设置为相对路径
                            // name:'[name].[ext]'
                        }
                    }
                ]
            }
        ]
    },
    plugins: [
        //处理html文件
        new HtmlWebpackPlugin({
            template: './src/index.html'
        }),
        // 独立css文件
        new ExtractTextPlugin("css/[name].css"),
        //提出公共模块
        new webpack.optimize.CommonsChunkPlugin({
            name : 'common',
            filename: 'js/base.js'
        })
    ]
};
12.安装webpack-dev-serve
第一步:安装命令
yarn add webpack-dev-server@2.9.7 --dev
第二步:配置webpack.config.js
const path              = require('path');
const webpack           = require('webpack');
const HtmlWebpackPlugin = require('html-webpack-plugin');
const ExtractTextPlugin = require('extract-text-webpack-plugin');
module.exports = {
    entry: './src/app.jsx',//入口
    output: {
        path: path.resolve(__dirname, 'dist'),
        //+++
        publicPath: '/dist/',
        filename: 'js/app.js'
    },
    module: {
        rules: [
            {
                test: /\.jsx$/,
                exclude: /(node_modules)/,
                use: {
                    loader: 'babel-loader',
                    options: {
                        presets: ['env', 'react']
                    }
                }
            },
            // css文件的处理
            {
                test: /\.css$/,
                use: ExtractTextPlugin.extract({
                    fallback: "style-loader",
                    use: "css-loader"
                })
            },
            // sass文件的处理
            {
                test: /\.scss$/,
                use: ExtractTextPlugin.extract({
                    fallback: 'style-loader',
                    use: ['css-loader', 'sass-loader']
                })
            },
            //图片配置
            {
                test: /\.(png|jpg|gif)$/i,
                use: [
                    {
                        loader: 'url-loader',
                        options: {
                            limit: 8192,
                            name: 'resource/[name].[ext]'
                        },
                    },
                ],
            },
            // 字体图标的配置
            {
                test: /\.(eot|svg|ttf|woff|woff2|otf)$/,
                use: [
                    {
                        loader: 'url-loader',
                        options: {
                            name: 'resource/[name].[ext]'
                            // publicPath:'/fonts/',//打包到fonts文件夹
                            // useRelativePath:true,//设置为相对路径
                            // name:'[name].[ext]'
                        }
                    }
                ]
            }
        ]
    },
    plugins: [
        //处理html文件
        new HtmlWebpackPlugin({
            template: './src/index.html'
        }),
        // 独立css文件
        new ExtractTextPlugin("css/[name].css"),
        //提出公共模块
        new webpack.optimize.CommonsChunkPlugin({
            name : 'common',
            filename: 'js/base.js'
        })
    ],
    devServer: {
        // contentBase: './dist'
      //修改端口号
    },
};
执行命令
node_modules/.bin/webpack-dev-server
13.修改常用的打包命令
在package.json添加字段
"scripts": {
    "dev": "node_modules/.bin/webpack-dev-server",
    "dist": "node_modules/.bin/webpack -p"
  }

 浙公网安备 33010602011771号