


jQuery插件ImgAreaSelect 实例讲解二
在上一篇随笔http://www.cnblogs.com/chenguanai/p/6883401.html中,已经了解了头像的上传预览和裁剪功能;那么这次就再看一下imgareaselect的裁剪功能~~~
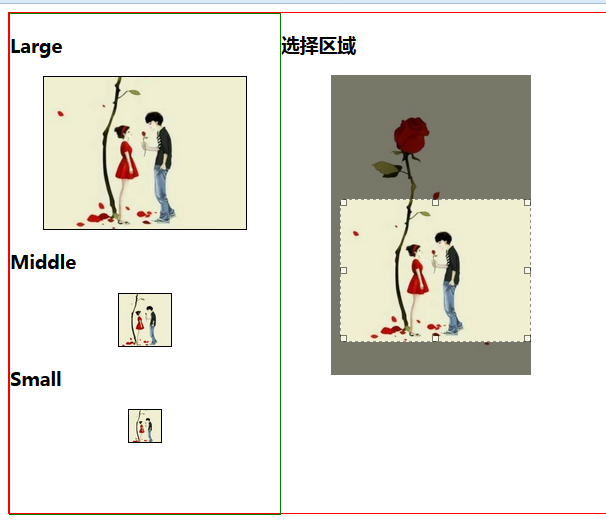
有时候,我们裁剪某一区域时,分别会有大中小三个头像显示着~~~也就是如下图所示,当在右边的原图选择时,左边会分别显示大中小三个头像,便于用户选择~~~
第一步:先引入插件和js包
<link rel="stylesheet" type="text/css" href="../jquery.imgareaselect-0.9.10/css/imgareaselect-default.css" />
<script type="text/javascript" src="../jquery-1.11.2.min.js"></script>
<script type="text/javascript" src="../jquery.imgareaselect-0.9.10/scripts/jquery.imgareaselect.pack.js"></script>
第二步:div布局
  <div class="mtb15px clearfix">   <!--大框-->
        <div class="preview">         <!--左边大框-->
            <div>
            	<h3>Large</h3>
                <div class='preview_div p_photo_l'><img src="./images/1.jpg" class="nophoto_l"/></div>

            </div>
            <div>
            	 <h3>Middle</h3>
                <div class='preview_div p_photo_m'><img src="./images/1.jpg" class="nophoto_m"/></div>

            </div>
            <div>
            	 <h3>Small</h3>
                <div class='preview_div p_photo_s'><img src="./images/1.jpg" class="nophoto_s"/></div>
            </div>
        </div>
        <div class="origin">   <!--右边大框-->
                   <h3>选择区域 </h3>
             <img id='img_origin' src="./images/1.jpg"/>
          <form id='coordinates_form' action="/profile/upload-photo/save" method="post">
                <input type='hidden' name='x' class='x' value='0'/>
                <input type='hidden' name='y' class='y' value='0'/>
                <input type='hidden' name='w' class='w' value='282'/>
                <input type='hidden' name='h' class='h' value='211'/>
            </form>
       </div>
    </div>
第三步:加样式(为了方便查看,边框在这里就不去除了)
<style>
	/*外部大框*/
	.clearfix{
		border: 1px solid red;
		width: 100%;
		height: 500px;
	}
	/*左边预览框*/
	.preview{
		border: 1px solid green;
		float: left;
		width: 20%;
		height: 500px;
	}
	/*右边图片选择框*/
	.orign{
		border: 1px solid blue;
		float: left;
		width: 500px;
		height: 500px;
		border: 1px solid gray;
		margin-left: 30px;
	}
div.preview_div{
	overflow:hidden;margin:auto;
	border: 1px solid black;
	}
div.p_photo_l{width:202px;height:152px;}
div.p_photo_m{width:52px;height:52px;}
div.p_photo_s{width:32px;height:32px;}
#img_origin{
	float: left;
	margin-left: 50px;
	height: 300px;
	width: 200px;
}
</style>
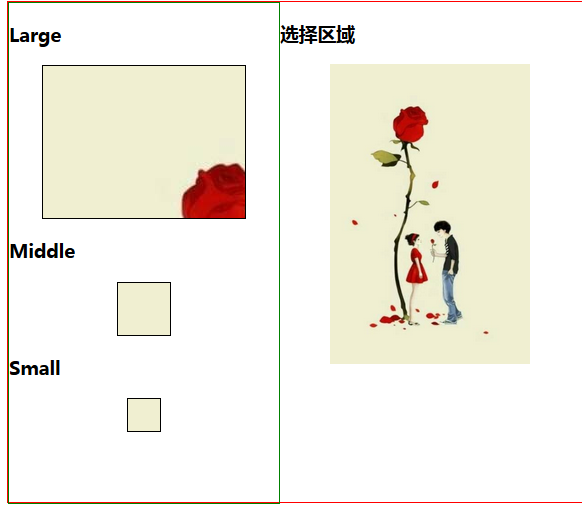
到这一步就可以实现这如下效果:(左边默认为空,右边是自己插入的图片)现在并没有裁剪功能,只是插入的图片
最后一步,也是最重要的一部,实现裁剪功能
<script>
$(document).ready(function(){
    //构造imgAreaSelectApi
    imgAreaSelectApi = $('#img_origin').imgAreaSelect({
        persistent : true,  // true,选区以外点击不会启用一个新选区(只能移动/调整现有选区)
        instance : true,    // true,返回一个imgAreaSelect绑定到的图像的实例,可以使用api方法
        onSelectChange : preview,   // 改变选区时的回调函数
        show : true,    // 选区会显示
        handles : true, // true,调整手柄则会显示在选择区域内
        resizable : true,   // true, 选区面积可调整大小
        minWidth : Math.floor(400/4),   // 选取的最小宽度
        minHeight : Math.floor(300/4),  // 选取的最小高度
        aspectRatio : '400:300' // 选区的显示比率 400:300
    });

    //加载时触发的默认选区
    $('#img_origin').load(function(){
        var form = $('#coordinates_form');

        //获取 x、y、w、h的值
        var left = parseInt(form.children('.x').val());
        var top = parseInt(form.children('.y').val());
        var width = parseInt(form.children('.w').val());
        var height = parseInt(form.children('.h').val());
        //imgAreaSelectApi 就是图像img_origin的实例 上边instance已解释
        //setSelection(),设置选区的坐标
        //update(),更新
        imgAreaSelectApi.setSelection(left, top, left+width, top+height);
        imgAreaSelectApi.update();
    });

    //preview方法 img图片参数,selection选区参数
    function preview(img, selection){
        $('div.preview_div img').attr('src',"./images/1.jpg");
        var form = $('#coordinates_form');
        //重新设置x、y、w、h的值
        form.children('.x').val(selection.x1);
        form.children('.y').val(selection.y1);
        form.children('.w').val(selection.x2-selection.x1);
        form.children('.h').val(selection.y2-selection.y1);

        //preview_photo() 左一的图片调整(与选区的图片显示一致)
        preview_photo('p_photo_l', selection);

        //preview_icon() 左二,左三的图片调整
        //(与选区的图片显示一致,为何不用preview_photo()方法呢,因为左一的是长方形,左二左三是正方形)
        preview_icon('p_photo_m', selection);
        preview_icon('p_photo_s', selection);
    }

    //preview_photo()方法 左一的图片调整(与选区的图片显示一致)
    //div_class是对应div的class
    function preview_photo(div_class, selection){
        var div = $('div.'+div_class);
        //获取div的宽度与高度
        var width = div.outerWidth();
        var height = div.outerHeight();
        //显示区域与选区图片比例 宽度之比,高度之比
        var scaleX = width/selection.width;
        var scaleY = height/selection.height;
        //css 控制图片的缩放以及偏移量
        div.find('img').css({
            width : Math.round(scaleX * $('#img_origin').outerWidth())+'px',
            height : Math.round(scaleY * $('#img_origin').outerHeight())+'px',
            marginLeft : '-'+Math.round(scaleX * selection.x1)+'px',
            marginTop : '-'+Math.round(scaleY * selection.y1)+'px'
        });
    }
    //preview_icon()方法 左二左三的图片调整 和preview_photo()相似 (我们这里要求的缩放的宽高之比1:1不是4:3)
    function preview_icon(div_class, selection){
        var div = $('div.'+div_class);
        //获取div的宽度与高度 因为这里div的宽度和高度相同
        var height = div.outerWidth();
        var scaleY = height/selection.height;
        //css 控制图片的缩放以及偏移量
        //这里左边偏移量舍弃了一部分(selection.width - selection.height)/2
        div.find('img').css({
            width : Math.round(scaleY * $('#img_origin').outerWidth())+'px',
            height : Math.round(scaleY * $('#img_origin').outerHeight())+'px',
            marginLeft : '-'+Math.round(scaleY * (selection.x1 + (selection.width - selection.height)/2))+'px',
            marginTop : '-'+Math.round(scaleY * selection.y1)+'px'
        });
    }

});
</script>
现在就可以拖拽图片在左边显示想要的区域了~~~~

此文参照http://blog.csdn.net/motian06/article/details/8017589#(原文用html5写的),但我还不会,就改成div了~~~~
