SpringCloud教程第9篇:Sleuth(F版本)
这篇文章主要讲述服务追踪组件zipkin,Spring Cloud Sleuth集成了zipkin组件。
一、简介
Spring Cloud Sleuth 主要功能就是在分布式系统中提供追踪解决方案,并且兼容支持了 zipkin,你只需要在pom文件中引入相应的依赖即可。
二、服务追踪分析
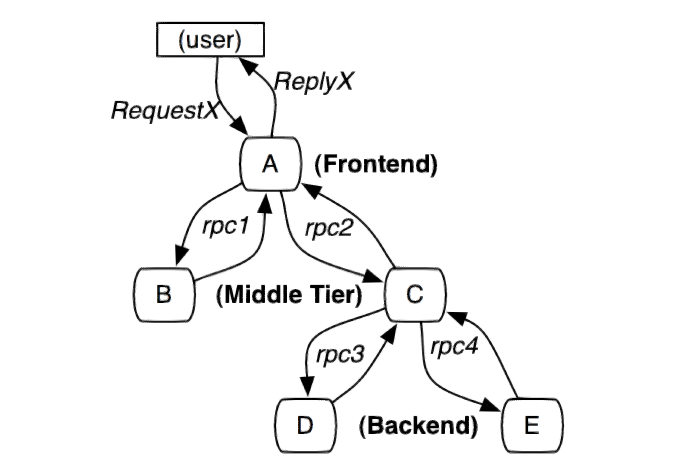
随着服务的越来越多,对调用链的分析会越来越复杂。它们之间的调用关系也许如下:

三、术语
- Span:基本工作单元,例如,在一个新建的span中发送一个RPC等同于发送一个回应请求给RPC,span通过一个64位ID唯一标识,trace以另一个64位ID表示,span还有其他数据信息,比如摘要、时间戳事件、关键值注释(tags)、span的ID、以及进度ID(通常是IP地址) span在不断的启动和停止,同时记录了时间信息,当你创建了一个span,你必须在未来的某个时刻停止它。
- Trace:一系列spans组成的一个树状结构,例如,如果你正在跑一个分布式大数据工程,你可能需要创建一个trace。
- Annotation:用来及时记录一个事件的存在,一些核心annotations用来定义一个请求的开始和结束
- cs - Client Sent -客户端发起一个请求,这个annotion描述了这个span的开始
- sr - Server Received -服务端获得请求并准备开始处理它,如果将其sr减去cs时间戳便可得到网络延迟
- ss - Server Sent -注解表明请求处理的完成(当请求返回客户端),如果ss减去sr时间戳便可得到服务端需要的处理请求时间
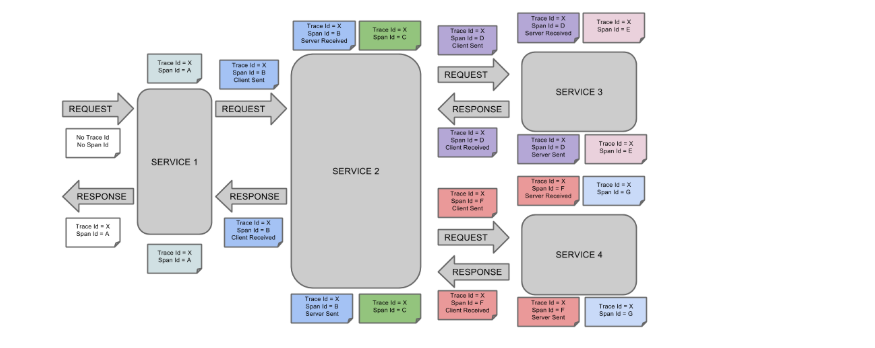
- cr - Client Received -表明span的结束,客户端成功接收到服务端的回复,如果cr减去cs时间戳便可得到客户端从服务端获取回复的所有所需时间 将Span和Trace在一个系统中使用Zipkin注解的过程图形化:
将Span和Trace在一个系统中使用Zipkin注解的过程图形化:
四、构建工程
本文的案例主要有三个工程组成:
- 一个server-zipkin,它的主要作用使用ZipkinServer 的功能,收集调用数据,并展示;
- 一个service-hi,对外暴露hi接口;
- 一个service-miya,对外暴露miya接口;
二三两个service可以相互调用;并且只有调用了,server-zipkin才会收集数据的,这就是为什么叫服务追踪了。
4.1 构建server-zipkin
在spring Cloud为F版本的时候,已经不需要自己构建Zipkin Server了,只需要下载jar即可,下载地址:
在spring Cloud为F版本的时候,已经不需要自己构建Zipkin Server了,只需要下载jar即可,下载地址:
https://dl.bintray.com/openzipkin/maven/io/zipkin/java/zipkin-server/
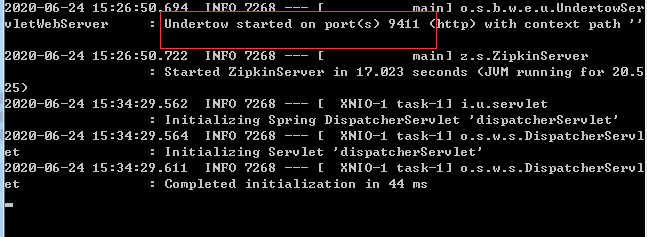
下载完成jar 包之后,需要运行jar,如下:
java -jar zipkin-server-2.11.12-exec.jar(可能你的端口跟我的不一样,自己在cmd里面找)
4.2 创建service-hi
在其pom引入起步依赖spring-cloud-starter-zipkin,代码如下:
<?xml version="1.0" encoding="UTF-8"?>
<project xmlns="http://maven.apache.org/POM/4.0.0" xmlns:xsi="http://www.w3.org/2001/XMLSchema-instance"
    xsi:schemaLocation="http://maven.apache.org/POM/4.0.0 https://maven.apache.org/xsd/maven-4.0.0.xsd">
    <modelVersion>4.0.0</modelVersion>

    <groupId>com.forezp</groupId>
    <artifactId>service-zipkin</artifactId>
    <version>0.0.1-SNAPSHOT</version>
    <name>service-hi</name>
    <description>Demo project for Spring Boot</description>

    <parent>
        <groupId>com.forezp</groupId>
        <artifactId>sc-f-chapter9</artifactId>
        <version>0.0.1-SNAPSHOT</version>
    </parent>


    <dependencies>

        <dependency>
            <groupId>org.springframework.boot</groupId>
            <artifactId>spring-boot-starter-web</artifactId>
        </dependency>

        <dependency>
            <groupId>org.springframework.cloud</groupId>
            <artifactId>spring-cloud-starter-zipkin</artifactId>
        </dependency>


    </dependencies>

    <build>
        <plugins>
            <plugin>
                <groupId>org.springframework.boot</groupId>
                <artifactId>spring-boot-maven-plugin</artifactId>
            </plugin>
        </plugins>
    </build>

</project>
在其配置文件application指定zipkin server的地址,头通过配置“spring.zipkin.base-url”指定:
server.port=8988
spring.zipkin.base-url=http://localhost:9411
spring.application.name=service-hi
通过引入spring-cloud-starter-zipkin依赖和设置spring.zipkin.base-url就可以了。
对外暴露接口:
package com.forezp.servicehi;

import brave.sampler.Sampler;
import org.springframework.beans.factory.annotation.Autowired;
import org.springframework.boot.SpringApplication;
import org.springframework.boot.autoconfigure.SpringBootApplication;
import org.springframework.context.annotation.Bean;
import org.springframework.web.bind.annotation.RequestMapping;
import org.springframework.web.bind.annotation.RestController;
import org.springframework.web.client.RestTemplate;

import java.util.logging.Level;
import java.util.logging.Logger;

@SpringBootApplication
@RestController
public class ServiceHiApplication {

    public static void main(String[] args) {
        SpringApplication.run(ServiceHiApplication.class, args);
    }

    private static final Logger LOG = Logger.getLogger(ServiceHiApplication.class.getName());


    @Autowired
    private RestTemplate restTemplate;

    @Bean
    public RestTemplate getRestTemplate(){
        return new RestTemplate();
    }

    @RequestMapping("/hi")
    public String callHome(){
        LOG.log(Level.INFO, "calling trace service-hi  ");
        return restTemplate.getForObject("http://localhost:8989/miya", String.class);
    }
    @RequestMapping("/info")
    public String info(){
        LOG.log(Level.INFO, "calling trace service-hi ");

        return "i'm service-hi";

    }

    @Bean
    public Sampler defaultSampler() {
        return Sampler.ALWAYS_SAMPLE;
    }

}
4.3 创建service-miya
创建过程痛service-hi,引入相同的依赖,配置下spring.zipkin.base-url。
对外暴露接口:
package com.forezp.servicemiya;

import brave.sampler.Sampler;
import org.springframework.beans.factory.annotation.Autowired;
import org.springframework.boot.SpringApplication;
import org.springframework.boot.autoconfigure.SpringBootApplication;
import org.springframework.context.annotation.Bean;
import org.springframework.web.bind.annotation.RequestMapping;
import org.springframework.web.bind.annotation.RestController;
import org.springframework.web.client.RestTemplate;

import java.util.logging.Level;
import java.util.logging.Logger;

@SpringBootApplication
@RestController
public class ServiceMiyaApplication {

    public static void main(String[] args) {
        SpringApplication.run(ServiceMiyaApplication.class, args);
    }

    private static final Logger LOG = Logger.getLogger(ServiceMiyaApplication.class.getName());


    @RequestMapping("/hi")
    public String home(){
        LOG.log(Level.INFO, "hi is being called");
        return "hi i'm miya!";
    }

    @RequestMapping("/miya")
    public String info(){
        LOG.log(Level.INFO, "info is being called");
        return restTemplate.getForObject("http://localhost:8988/info",String.class);
    }

    @Autowired
    private RestTemplate restTemplate;

    @Bean
    public RestTemplate getRestTemplate(){
        return new RestTemplate();
    }


    @Bean
    public Sampler defaultSampler() {
        return Sampler.ALWAYS_SAMPLE;
    }
}
4.4 启动工程,演示追踪
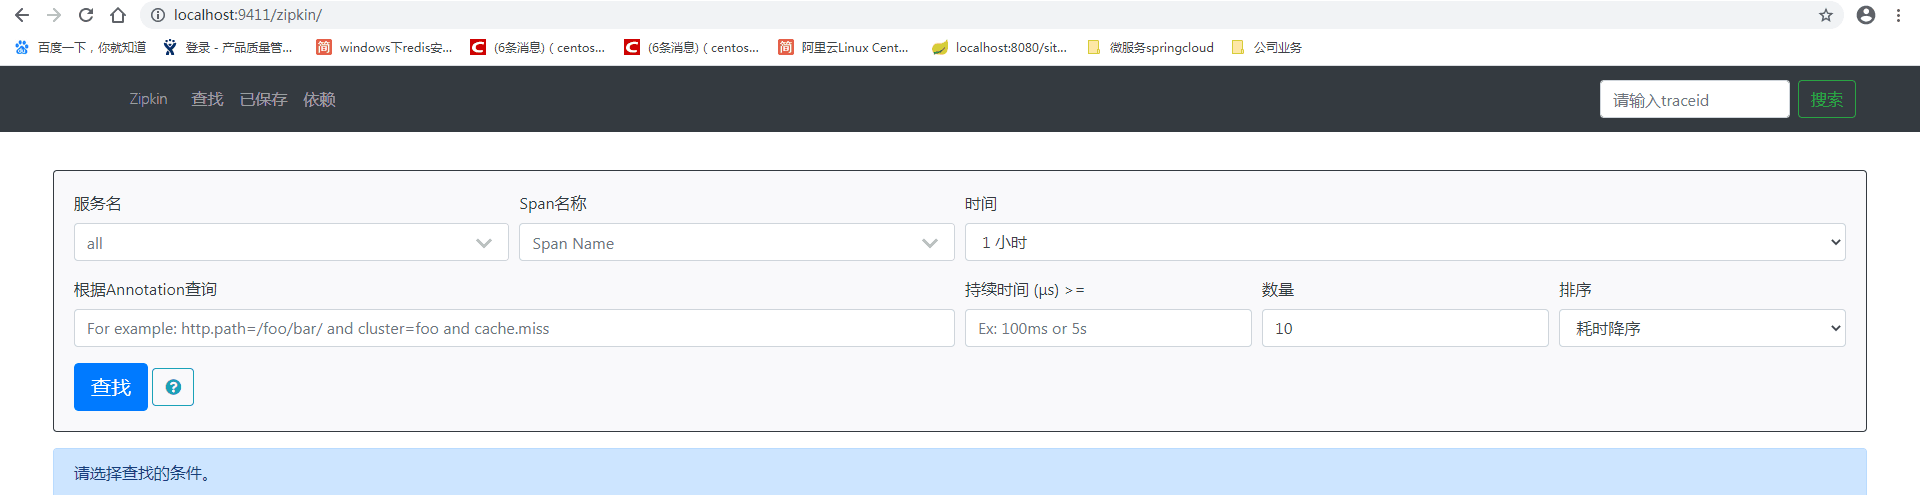
依次启动上面的工程,打开浏览器访问:http://localhost:9411/,会出现只是空空的控制台
访问:http://localhost:8989/miya,浏览器出现:
i’m service-hi
再打开http://localhost:9411/的界面,点击依赖,可以发现服务的依赖关系:

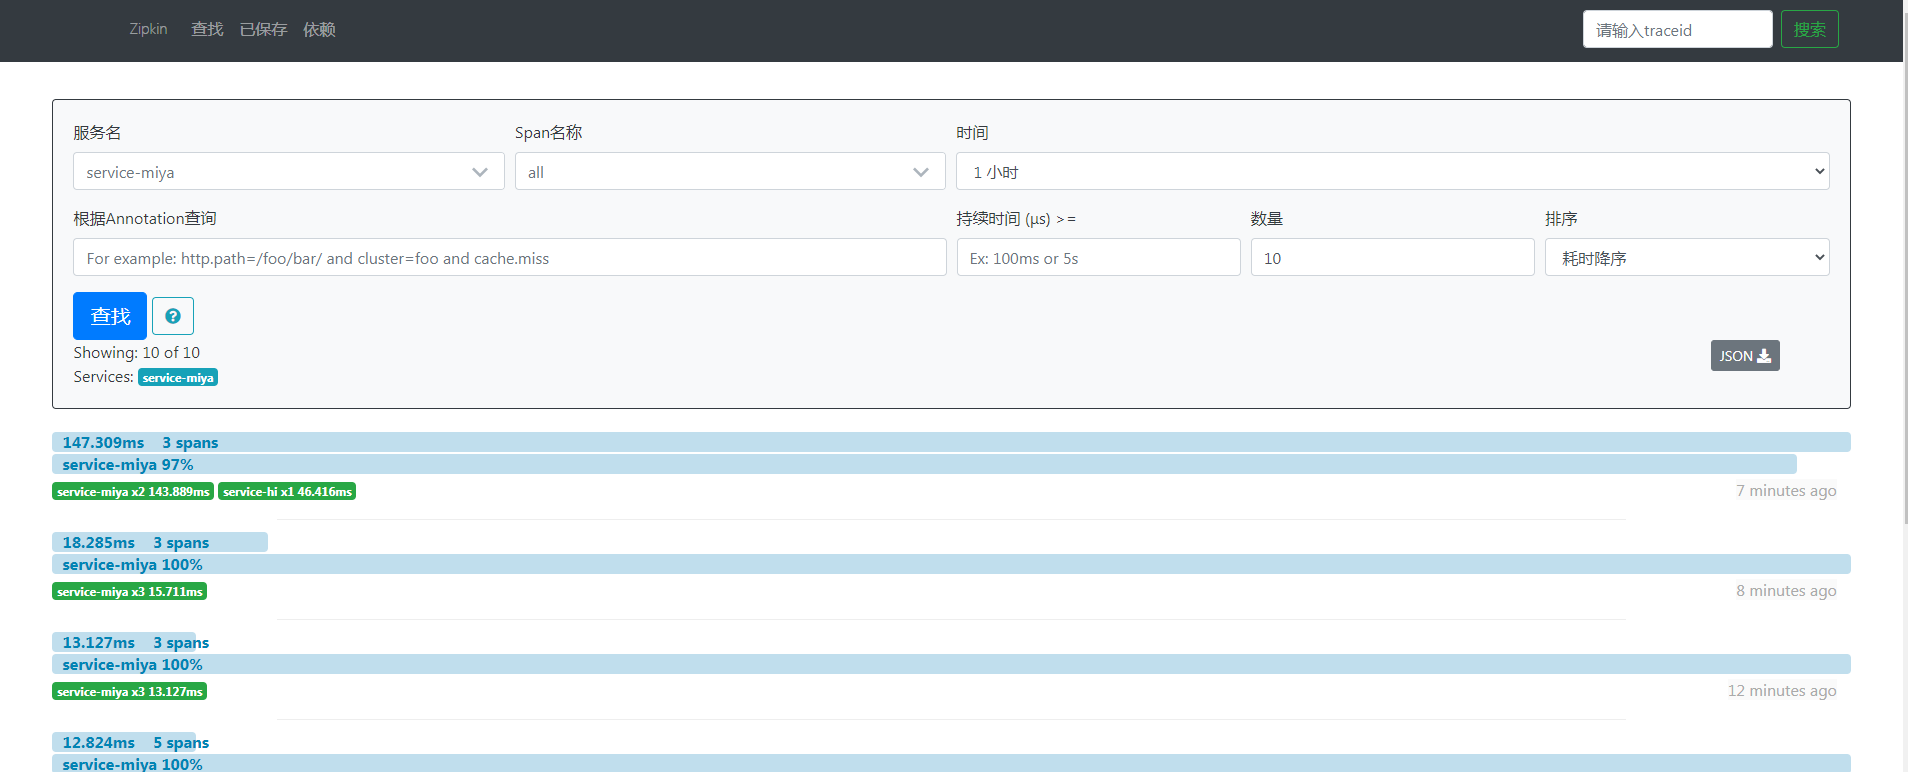
点击查找,可以看到具体服务相互调用的数据:
源码:https://github.com/CMRcircle/learnspringcloud/tree/master/sc-f-chapter9

 浙公网安备 33010602011771号