Centos 7 搭建 openstack queens版
####本随笔非原创,来源于网络https://www.cnblogs.com/puppet/p/10169139.html####
Minimal deployment for Queens
OpenStack 架构
- 概念架构
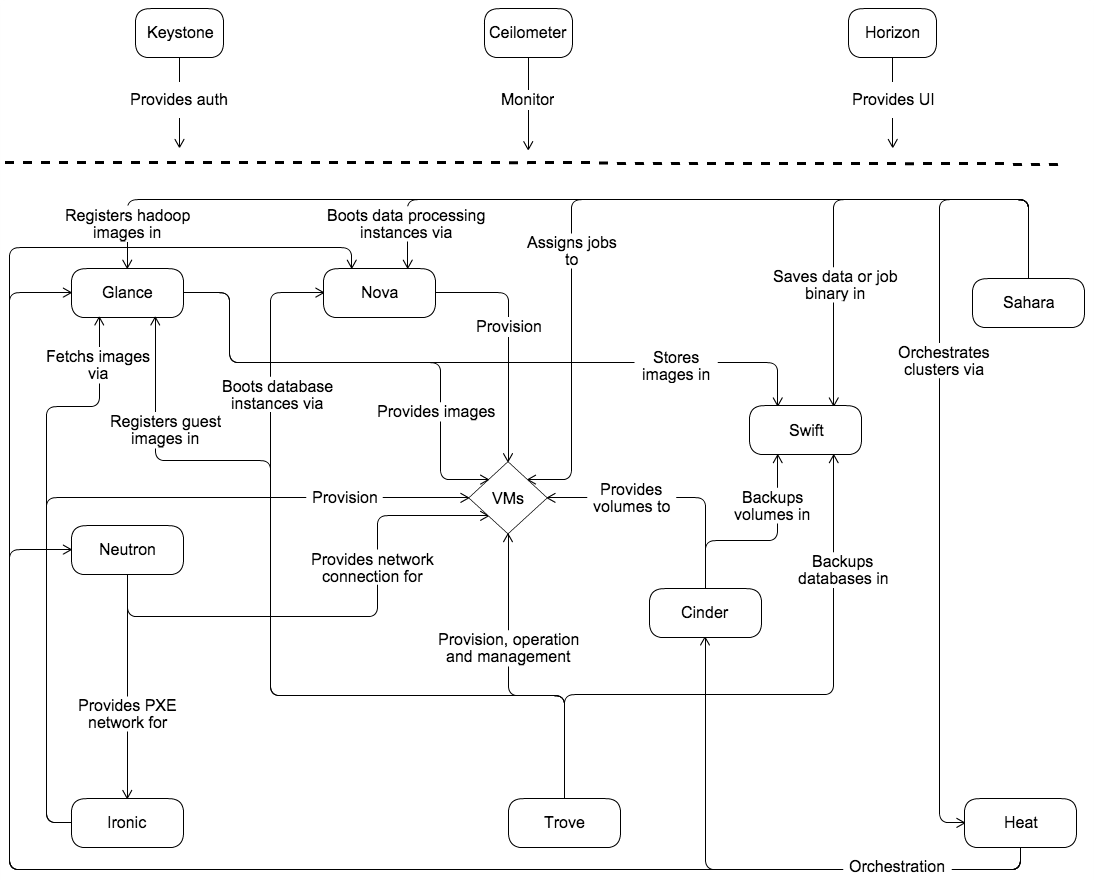
- 逻辑架构

一、部署前置准备(所有节点执行)
1.设置主机名
[root@localhost ~]# hostnamectl set-hostname 主机名
[root@localhost ~]# bash
2.配置域名解析,编辑 /etc/hosts 文件
192.168.48.100  controller
192.168.48.110  compute
192.168.48.120  cinder
3.验证网络连通性
ping www.baidu.com
ping 主机名
4.配置阿里 yum 源
mv /etc/yum.repos.d/CentOS-Base.repo /etc/yum.repos.d/CentOS-Base.repo.backup
wget -O /etc/yum.repos.d/CentOS-Base.repo http://mirrors.aliyun.com/repo/Centos-7.repo
5.安装 ntp 时钟服务
[root@controller ~]# yum install chrony -y
[root@controller ~]# vim /etc/chrony.conf
server  controller  iburst
allow 192.168.48.0/24
[root@controller ~]# systemctl enable chronyd.service
[root@controller ~]# systemctl start chronyd.service
[root@compute ~]# yum install chrony -y # cinder 节点与 compute 节点操作步骤相同
[root@compute ~]# vim /etc/chrony.conf
server controller iburst
[root@compute ~]# systemctl enable chronyd.service
[root@compute ~]# systemctl start chronyd.service
[root@controller ~]# chronyc sources # compute 和 cinder 节点同样执行此命令
二、openstack 服务安装、配置(所有节点执行)
1.下载安装 openstack 软件仓库(queens)
[root@controller ~]# yum install centos-release-openstack-queens -y
2.更新所有节点软件包
[root@controller ~]# yum upgrade
3.安装 openstack client 端
[root@controller ~]# yum install python-openstackclient -y
4.安装 openstack-selinux
[root@controller ~]# yum install openstack-selinux -y
三、安装数据库(controller节点执行)
1.安装软件包
[root@controller ~]# yum install mariadb mariadb-server python2-PyMySQL -y
2.编辑 /etc/my.cnf.d/mariadb-server.cnf 文件
[mysqld]
datadir=/var/lib/mysql
socket=/var/lib/mysql/mysql.sock
log-error=/var/log/mariadb/mariadb.log
pid-file=/var/run/mariadb/mariadb.pid
bind-address = 192.168.48.100   # bind-address 使用 controller 节点的管理IP
default-storage-engine = innodb
innodb_file_per_table = on
max_connections = 4096
collation-server = utf8_general_ci
character-set-server = utf8
3.设置服务开机启动
[root@controller ~]# systemctl enable mariadb.service
[root@controller ~]# systemctl start mariadb.service
4.通过运行 mysql_secure_installation 脚本来保护数据库服务
[root@controller ~]# mysql_secure_installation
NOTE: RUNNING ALL PARTS OF THIS SCRIPT IS RECOMMENDED FOR ALL MariaDB
      SERVERS IN PRODUCTION USE!  PLEASE READ EACH STEP CAREFULLY!

In order to log into MariaDB to secure it, we'll need the current
password for the root user.  If you've just installed MariaDB, and
you haven't set the root password yet, the password will be blank,
so you should just press enter here.

Enter current password for root (enter for none):
OK, successfully used password, moving on...

Setting the root password ensures that nobody can log into the MariaDB
root user without the proper authorisation.

Set root password? [Y/n] y
New password:
Re-enter new password:
Password updated successfully!
Reloading privilege tables..
 ... Success!


By default, a MariaDB installation has an anonymous user, allowing anyone
to log into MariaDB without having to have a user account created for
them.  This is intended only for testing, and to make the installation
go a bit smoother.  You should remove them before moving into a
production environment.

Remove anonymous users? [Y/n] y
 ... Success!

Normally, root should only be allowed to connect from 'localhost'.  This
ensures that someone cannot guess at the root password from the network.

Disallow root login remotely? [Y/n] y
 ... Success!

By default, MariaDB comes with a database named 'test' that anyone can
access.  This is also intended only for testing, and should be removed
before moving into a production environment.

Remove test database and access to it? [Y/n] y
 - Dropping test database...
 ... Success!
 - Removing privileges on test database...
 ... Success!

Reloading the privilege tables will ensure that all changes made so far
will take effect immediately.

Reload privilege tables now? [Y/n] y
 ... Success!

Cleaning up...

All done!  If you've completed all of the above steps, your MariaDB
installation should now be secure.

Thanks for using MariaDB!
四、在 controller 节点安装、配置 RabbitMQ
1.安装配置消息列队组件
[root@controller ~]# yum install rabbitmq-server -y
2.设置服务开机启动
[root@controller ~]# systemctl enable rabbitmq-server.service;systemctl start rabbitmq-server.service
3.添加 openstack 用户
[root@controller ~]# rabbitmqctl add_user openstack 123456
4.openstack 用户权限的配置
[root@controller ~]# rabbitmqctl set_permissions openstack "." "." ".*"
五、安装缓存数据库 Memcached(controller节点)
1.安装配置组件
[root@controller ~]# yum install memcached python-memcached -y
2.编辑 /etc/sysconfig/memcached 文件
OPTIONS="-l 192.168.48.100,::1,controller"
3.设置服务开机启动
[root@controller ~]# systemctl enable memcached.service;systemctl start memcached.service
六、Etcd服务安装(controller节点)
1.安装服务
[root@controller ~]# yum install etcd -y
2.编辑 /etc/etcd/etcd.conf 文件
#[Member]
ETCD_DATA_DIR="/var/lib/etcd/default.etcd"
ETCD_LISTEN_PEER_URLS="http://192.168.48.100:2380"
ETCD_LISTEN_CLIENT_URLS="http://192.168.48.100:2379"
ETCD_NAME="controller"
#[Clustering]
ETCD_INITIAL_ADVERTISE_PEER_URLS="http://192.168.48.100:2380"
ETCD_ADVERTISE_CLIENT_URLS="http://192.168.48.100:2379"
ETCD_INITIAL_CLUSTER="controller=http://192.168.48.100:2380"
ETCD_INITIAL_CLUSTER_TOKEN="etcd-cluster-01"
ETCD_INITIAL_CLUSTER_STATE="new"
3.设置服务开机启动
[root@controller ~]# systemctl enable etcd;systemctl start etcd
七、安装keystone组件(controller节点)
1.创建 keystone 数据库并授权
MariaDB [(none)]> CREATE DATABASE keystone;
Query OK, 1 row affected (0.00 sec)

MariaDB [(none)]> GRANT ALL PRIVILEGES ON keystone.* TO 'keystone'@'localhost' IDENTIFIED BY '123456';
Query OK, 0 rows affected (0.00 sec)

MariaDB [(none)]> GRANT ALL PRIVILEGES ON keystone.* TO 'keystone'@'%' IDENTIFIED BY '123456';
Query OK, 0 rows affected (0.00 sec)
2.安装、配置组件
[root@controller ~]# yum install openstack-keystone httpd mod_wsgi -y
3.编辑 /etc/keystone/keystone.conf 文件
[database]
connection = mysql+pymysql://keystone:123456@controller/keystone

[token]
provider = fernet
4.同步 keystone 数据库
[root@controller ~]# su -s /bin/sh -c "keystone-manage db_sync" keystone
5.数据库初始化
[root@controller ~]# keystone-manage fernet_setup --keystone-user keystone --keystone-group keystone
[root@controller ~]# keystone-manage credential_setup --keystone-user keystone --keystone-group keystone
6.引导身份认证服务
[root@controller ~]# keystone-manage bootstrap --bootstrap-password 123456 --bootstrap-admin-url http://controller:35357/v3/ --bootstrap-internal-url http://controller:5000/v3/ --bootstrap-public-url http://controller:5000/v3/ --bootstrap-region-id RegionOne
八、配置 apache http 服务
1.编辑 /etc/httpd/conf/httpd.conf 文件,配置 ServerName 参数
ServerName controller
2.创建 /usr/share/keystone/wsgi-keystone.conf 链接文件
[root@controller ~]# ln -s /usr/share/keystone/wsgi-keystone.conf /etc/httpd/conf.d/
3.设置服务开机启动
[root@controller ~]# systemctl enable httpd.service;systemctl start httpd.service
4.配置 administrative 账号
[root@controller ~]# export OS_USERNAME=admin
[root@controller ~]# export OS_PASSWORD=123456
[root@controller ~]# export OS_PROJECT_NAME=admin
[root@controller ~]# export OS_USER_DOMAIN_NAME=Default
[root@controller ~]# export OS_PROJECT_DOMAIN_NAME=Default
[root@controller ~]# export OS_AUTH_URL=http://controller:35357/v3
[root@controller ~]# export OS_IDENTITY_API_VERSION=3
九、创建 domain, projects, users, roles
1.创建域
[root@controller ~]# openstack domain create --description "Domain" example
+-------------+----------------------------------+
| Field | Value |
+-------------+----------------------------------+
| description | Domain |
| enabled | True |
| id | f81b0fcfe5104838a28cc8ace91770c6 |
| name | example |
| tags | [] |
+-------------+----------------------------------+
2.创建服务项目
[root@controller ~]# openstack project create --domain default --description "Service Project" service
+-------------+----------------------------------+
| Field | Value |
+-------------+----------------------------------+
| description | Service Project |
| domain_id | default |
| enabled | True |
| id | e2abab997f754239b9150ea837167ee2 |
| is_domain | False |
| name | service |
| parent_id | default |
| tags | [] |
+-------------+----------------------------------+
3.创建平台 demo 项目
[root@controller ~]# openstack project create --domain default --description "Demo Project" demo
+-------------+----------------------------------+
| Field | Value |
+-------------+----------------------------------+
| description | Demo Project |
| domain_id | default |
| enabled | True |
| id | 9d6c58e98fe649cd81a704a25f20e3da |
| is_domain | False |
| name | demo |
| parent_id | default |
| tags | [] |
+-------------+----------------------------------+
4.创建 demo 用户
[root@controller ~]# openstack user create --domain default --password-prompt demo
User Password:
123456
Repeat User Password:123456
+---------------------+----------------------------------+
| Field | Value |
+---------------------+----------------------------------+
| domain_id | default |
| enabled | True |
| id | 143c48622dd147589ae8ee603f276d81 |
| name | demo |
| options | {} |
| password_expires_at | None |
+---------------------+----------------------------------+
5.创建用户角色
[root@controller ~]# openstack role create user
+-----------+----------------------------------+
| Field | Value |
+-----------+----------------------------------+
| domain_id | None |
| id | b76f43a19ee64a23902511eea8589461 |
| name | user |
+-----------+----------------------------------+
6.添加用户角色到 demo 项目和用户 #说明:此条命令执行成功后不返回参数
[root@controller ~]# openstack role add --project demo --user demo user
十、验证操作
1.取消环境变量
[root@controller ~]# unset OS_AUTH_URL OS_PASSWORD
2.Admin 用户返回的认证 token
[root@controller ~]# openstack --os-auth-url http://controller:35357/v3 --os-project-domain-name Default --os-user-domain-name Default --os-project-name admin --os-username admin token issue
Password: 123456
+------------+-----------------------------------------------------------------------------------------------------------------------------------------------------------------------------------------+
| Field | Value |
+------------+-----------------------------------------------------------------------------------------------------------------------------------------------------------------------------------------+
| expires | 2018-11-22T03:29:57+0000 |
| id | gAAAAABb9hSlbWtXClzfxo0IGv6vGS7HRhDMcQrFYG6gThJbPVP-bLUbJxsFMrIjwK2B_8Ij8oWXQ5FKgjbdv5i5Mt6PipghJkWrZ474Me7Tbxrl_yAwrdYx04KA_zYghcQsEYg6AIAoiW3TLpW3hsAlgafC1wA4y73sV-cHOxuaMEvT9Nbg4n8 |
| project_id | 4485a7e24a2146f9a93cd313a2000ca4 |
| user_id | 78cfc01d89f44c43ab03a57de598e90d |
+------------+-----------------------------------------------------------------------------------------------------------------------------------------------------------------------------------------+
3.demo 用户返回认证 token
[root@controller ~]# openstack --os-auth-url http://controller:5000/v3 --os-project-domain-name Default --os-user-domain-name Default --os-project-name demo --os-username demo token issue
Password:
+------------+-----------------------------------------------------------------------------------------------------------------------------------------------------------------------------------------+
| Field | Value |
+------------+-----------------------------------------------------------------------------------------------------------------------------------------------------------------------------------------+
| expires | 2018-11-22T03:30:25+0000 |
| id | gAAAAABb9hTBoBbr0Y0TjEbQkPEyMkTjwZQu3RGuDXGACud9NdnXfXt_ZcG2eEfGDcxSApFCeLCSzy-kG9wEY6G0Zs8MNJmFFbb097bg7odmXYIyXKM6aOjFNYIO5IQvmHIbIhs5jrmEehjAKwpk8uhnyzooKAWpnEFyUD6z9FiJ-f_Lan4MVcA |
| project_id | 9d6c58e98fe649cd81a704a25f20e3da |
| user_id | 143c48622dd147589ae8ee603f276d81 |
+------------+-----------------------------------------------------------------------------------------------------------------------------------------------------------------------------------------+
十一、创建 openstack 客户端环境脚本
1.创建 admin-openrc 脚本
[root@controller ~]# vim admin-openrc
export OS_PROJECT_DOMAIN_NAME=Default
export OS_USER_DOMAIN_NAME=Default
export OS_PROJECT_NAME=admin
export OS_USERNAME=admin
export OS_PASSWORD=123456
export OS_AUTH_URL=http://controller:5000/v3
export OS_IDENTITY_API_VERSION=3
export OS_IMAGE_API_VERSION=2
2.创建 demo-openrc 脚本
[root@controller ~]# vim demo-openrc
export OS_PROJECT_DOMAIN_NAME=Default
export OS_USER_DOMAIN_NAME=Default
export OS_PROJECT_NAME=demo
export OS_USERNAME=demo
export OS_PASSWORD=123456
export OS_AUTH_URL=http://controller:5000/v3
export OS_IDENTITY_API_VERSION=3
export OS_IMAGE_API_VERSION=2
3.使用脚本,返回认证 token
[root@controller ~]# source admin-openrc
[root@controller ~]# openstack token issue
+------------+-----------------------------------------------------------------------------------------------------------------------------------------------------------------------------------------+
| Field | Value |
+------------+-----------------------------------------------------------------------------------------------------------------------------------------------------------------------------------------+
| expires | 2018-11-22T03:32:48+0000 |
| id | gAAAAABb9hVQa_inF1Mn0OOeFThBFN6C-8depp8JQR7t4QabhxkNENMFm9UIvw0UuKu2yBtki03CHDYJE0p2VEdm-7gkHokFCfyAjapVrhL2zA73YaeTUw9cTAldeg3FgrF9E6xvc8Y1xXmQ1BqCzTnZd8Ab9qZx_mi449tJYue-jBazC3WH3VY |
| project_id | 4485a7e24a2146f9a93cd313a2000ca4 |
| user_id | 78cfc01d89f44c43ab03a57de598e90d |
+------------+-----------------------------------------------------------------------------------------------------------------------------------------------------------------------------------------+
十二、安装 Glance 服务(controller节点)
1.创建 glance 数据库,并授权
MariaDB [(none)]> CREATE DATABASE glance;
Query OK, 1 row affected (0.00 sec)

MariaDB [(none)]> GRANT ALL PRIVILEGES ON glance.* TO 'glance'@'localhost' IDENTIFIED BY '123456';
Query OK, 0 rows affected (0.01 sec)

MariaDB [(none)]> GRANT ALL PRIVILEGES ON glance.* TO 'glance'@'%'  IDENTIFIED BY '123456';
Query OK, 0 rows affected (0.00 sec)
2.获取 admin 用户的环境变量,并创建服务认证
[root@controller ~]# source admin-openrc
[root@controller ~]# openstack user create --domain default --password-prompt glance
User Password:
123456
Repeat User Password:123456
+---------------------+----------------------------------+
| Field | Value |
+---------------------+----------------------------------+
| domain_id | default |
| enabled | True |
| id | 47798dc90e994ef088c9c51bfe4aa521 |
| name | glance |
| options | {} |
| password_expires_at | None |
+---------------------+----------------------------------+
[root@controller ~]# openstack role add --project service --user glance admin #把admin用户添加到glance用户和项目中,说明:此条命令执行不返回不返回
[root@controller ~]# openstack service create --name glance --description "OpenStack Image" image #创建 glance 服务
+-------------+----------------------------------+
| Field | Value |
+-------------+----------------------------------+
| description | OpenStack Image |
| enabled | True |
| id | 72e3372a89614a8a91a48548d9bd80e4 |
| name | glance |
| type | image |
+-------------+----------------------------------+
3.创建镜像服务 API 端点
[root@controller ~]# openstack endpoint create --region RegionOne image public http://controller:9292
+--------------+----------------------------------+
| Field | Value |
+--------------+----------------------------------+
| enabled | True |
| id | e2abcbcd09cc445c97fd02b773faf5fd |
| interface | public |
| region | RegionOne |
| region_id | RegionOne |
| service_id | 72e3372a89614a8a91a48548d9bd80e4 |
| service_name | glance |
| service_type | image |
| url | http://controller:9292 |
+--------------+----------------------------------+
[root@controller ~]# openstack endpoint create --region RegionOne image internal http://controller:9292
+--------------+----------------------------------+
| Field | Value |
+--------------+----------------------------------+
| enabled | True |
| id | ce4f9149045446c684569657399b1e49 |
| interface | internal |
| region | RegionOne |
| region_id | RegionOne |
| service_id | 72e3372a89614a8a91a48548d9bd80e4 |
| service_name | glance |
| service_type | image |
| url | http://controller:9292 |
+--------------+----------------------------------+
[root@controller ~]# openstack endpoint create --region RegionOne image admin http://controller:9292
+--------------+----------------------------------+
| Field | Value |
+--------------+----------------------------------+
| enabled | True |
| id | 02fc549cfdd54566b38a1271e7c79e04 |
| interface | admin |
| region | RegionOne |
| region_id | RegionOne |
| service_id | 72e3372a89614a8a91a48548d9bd80e4 |
| service_name | glance |
| service_type | image |
| url | http://controller:9292 |
+--------------+----------------------------------+
十三、安装和配置组件
1.安装软件包
[root@controller ~]# yum install openstack-glance -y
2.编辑 /etc/glance/glance-api.conf 文件
[database]
connection = mysql+pymysql://glance:123456@controller/glance

[keystone_authtoken]
auth_uri = http://controller:5000
auth_url = http://controller:35357
memcached_servers = controller:11211
auth_type = password
project_domain_name = default
user_domain_name = default
project_name = service
username = glance
password = 123456

[paste_deploy]
flavor = keystone

[glance_store]
stores = file,http
default_store = file
filesystem_store_datadir = /var/lib/glance/images/
3.编辑 /etc/glance/glance-registry.conf 文件
[database]
connection = mysql+pymysql://glance:123456@controller/glance

[keystone_authtoken]
auth_uri = http://controller:5000
auth_url = http://controller:35357
memcached_servers = controller:11211
auth_type = password
project_domain_name = default
user_domain_name = default
project_name = service
username = glance
password = 123456

[paste_deploy]
flavor = keystone
4.同步镜像服务数据库
[root@controller ~]# su -s /bin/sh -c "glance-manage db_sync" glance
5.设置服务开机启动
[root@controller ~]# systemctl enable openstack-glance-api.service openstack-glance-registry.service
[root@controller ~]# systemctl start openstack-glance-api.service openstack-glance-registry.service
十四、验证操作
1.获取 admin 用户的环境变量,且下载镜像
[root@controller ~]# source admin-openrc
[root@controller ~]# wget http://download.cirros-cloud.net/0.3.5/cirros-0.3.5-x86_64-disk.img
2.上传镜像
[root@controller ~]# openstack image create "cirros" --file
cirros-0.3.5-x86_64-disk.img --disk-format qcow2 --container-format
bare --public
+------------------+------------------------------------------------------+
| Field | Value |
+------------------+------------------------------------------------------+
| checksum | f8ab98ff5e73ebab884d80c9dc9c7290 |
| container_format | bare |
| created_at | 2018-11-22T02:44:48Z |
| disk_format | qcow2 |
| file | /v2/images/8a20afbc-539f-4343-8a4d-512ffaf5d9ff/file |
| id | 8a20afbc-539f-4343-8a4d-512ffaf5d9ff |
| min_disk | 0 |
| min_ram | 0 |
| name | cirros |
| owner | 4485a7e24a2146f9a93cd313a2000ca4 |
| protected | False |
| schema | /v2/schemas/image |
| size | 13267968 |
| status | active |
| tags | |
| updated_at | 2018-11-22T02:44:48Z |
| virtual_size | None |
| visibility | public |
+------------------+------------------------------------------------------+
3.查看上传的镜像
[root@controller ~]# openstack image list
+--------------------------------------+--------+--------+
| ID | Name | Status |
+--------------------------------------+--------+--------+
| 8a20afbc-539f-4343-8a4d-512ffaf5d9ff | cirros | active |
+--------------------------------------+--------+--------+
十五、controller 节点安装和配置 compute 服务
1.创建 nova_api, nova, nova_cell0 数据库
MariaDB [(none)]> CREATE DATABASE nova_api;
Query OK, 1 row affected (0.00 sec)

MariaDB [(none)]> CREATE DATABASE nova;
Query OK, 1 row affected (0.01 sec)

MariaDB [(none)]> CREATE DATABASE nova_cell0;
Query OK, 1 row affected (0.00 sec)

MariaDB [(none)]> GRANT ALL PRIVILEGES ON nova_api.* TO 'nova'@'localhost' IDENTIFIED BY '123456';
Query OK, 0 rows affected (0.00 sec)

MariaDB [(none)]> GRANT ALL PRIVILEGES ON nova_api.* TO 'nova'@'%' IDENTIFIED BY '123456';
Query OK, 0 rows affected (0.00 sec)

MariaDB [(none)]> GRANT ALL PRIVILEGES ON nova.* TO 'nova'@'localhost' IDENTIFIED BY '123456';
Query OK, 0 rows affected (0.00 sec)

MariaDB [(none)]> GRANT ALL PRIVILEGES ON nova.* TO 'nova'@'%' IDENTIFIED BY '123456';
Query OK, 0 rows affected (0.00 sec)

MariaDB [(none)]> GRANT ALL PRIVILEGES ON nova_cell0.* TO 'nova'@'localhost' IDENTIFIED BY '123456';
Query OK, 0 rows affected (0.00 sec)

MariaDB [(none)]> GRANT ALL PRIVILEGES ON nova_cell0.* TO 'nova'@'%' IDENTIFIED BY '123456';
Query OK, 0 rows affected (0.00 sec)
2.创建 nova 用户
[root@controller ~]# source admin-openrc
[root@controller ~]# openstack user create --domain default --password-prompt nova
User Password:
Repeat User Password:
+---------------------+----------------------------------+
| Field | Value |
+---------------------+----------------------------------+
| domain_id | default |
| enabled | True |
| id | 07857df5779e4b4d9cb11ad350ba88f3 |
| name | nova |
| options | {} |
| password_expires_at | None |
+---------------------+----------------------------------+
3.添加 admin 用户为 nova 用户
[root@controller ~]# openstack role add --project service --user nova admin
4.创建 nova 服务端点
[root@controller ~]# openstack service create --name nova --description "OpenStack Compute" compute
+-------------+----------------------------------+
| Field | Value |
+-------------+----------------------------------+
| description | OpenStack Compute |
| enabled | True |
| id | b0e6a3e388694e2abc17fe7bf38e4744 |
| name | nova |
| type | compute |
+-------------+----------------------------------+
5.创建 compute API 服务端点
[root@controller ~]# openstack endpoint create --region RegionOne compute public http://controller:8774/v2.1
+--------------+----------------------------------+
| Field | Value |
+--------------+----------------------------------+
| enabled | True |
| id | b1e78c396b1c480e9709d13759ec99a4 |
| interface | public |
| region | RegionOne |
| region_id | RegionOne |
| service_id | b0e6a3e388694e2abc17fe7bf38e4744 |
| service_name | nova |
| service_type | compute |
| url | http://controller:8774/v2.1 |
+--------------+----------------------------------+
[root@controller ~]# openstack endpoint create --region RegionOne compute internal http://controller:8774/v2.1
+--------------+----------------------------------+
| Field | Value |
+--------------+----------------------------------+
| enabled | True |
| id | a8f0b66d81594947a719a88026f86311 |
| interface | internal |
| region | RegionOne |
| region_id | RegionOne |
| service_id | b0e6a3e388694e2abc17fe7bf38e4744 |
| service_name | nova |
| service_type | compute |
| url | http://controller:8774/v2.1 |
+--------------+----------------------------------+
[root@controller ~]# openstack endpoint create --region RegionOne compute admin http://controller:8774/v2.1
+--------------+----------------------------------+
| Field | Value |
+--------------+----------------------------------+
| enabled | True |
| id | b67de3c1a7bc406fb43e2839cf8a6a45 |
| interface | admin |
| region | RegionOne |
| region_id | RegionOne |
| service_id | b0e6a3e388694e2abc17fe7bf38e4744 |
| service_name | nova |
| service_type | compute |
| url | http://controller:8774/v2.1 |
+--------------+----------------------------------+
6.创建一个 placement 服务用户
[root@controller ~]# openstack user create --domain default --password-prompt placement
User Password:
123456
Repeat User Password:123456
+---------------------+----------------------------------+
| Field | Value |
+---------------------+----------------------------------+
| domain_id | default |
| enabled | True |
| id | b678b6eb6e5c4dc28d61988e53c026d8 |
| name | placement |
| options | {} |
| password_expires_at | None |
+---------------------+----------------------------------+
7.创建在服务目录创建 Placement API 服务
[root@controller ~]# openstack service create --name placement --description "Placement API" placement
+-------------+----------------------------------+
| Field | Value |
+-------------+----------------------------------+
| description | Placement API |
| enabled | True |
| id | 6667d41de2c74e898cfdef5d71791d23 |
| name | placement |
| type | placement |
+-------------+----------------------------------+
8.创建 Placement API 服务端点
[root@controller ~]# openstack endpoint create --region RegionOne placement public http://controller:8778
+--------------+----------------------------------+
| Field | Value |
+--------------+----------------------------------+
| enabled | True |
| id | 51d65bc012804105b62b73c21748d44e |
| interface | public |
| region | RegionOne |
| region_id | RegionOne |
| service_id | 6667d41de2c74e898cfdef5d71791d23 |
| service_name | placement |
| service_type | placement |
| url | http://controller:8778 |
+--------------+----------------------------------+
[root@controller ~]# openstack endpoint create --region RegionOne placement internal http://controller:8778
+--------------+----------------------------------+
| Field | Value |
+--------------+----------------------------------+
| enabled | True |
| id | 92cfbc255a2f47ccb6b61351bfeb3ead |
| interface | internal |
| region | RegionOne |
| region_id | RegionOne |
| service_id | 6667d41de2c74e898cfdef5d71791d23 |
| service_name | placement |
| service_type | placement |
| url | http://controller:8778 |
+--------------+----------------------------------+
[root@controller ~]# openstack endpoint create --region RegionOne placement admin http://controller:8778
+--------------+----------------------------------+
| Field | Value |
+--------------+----------------------------------+
| enabled | True |
| id | e4b0c7c0e48b4714bf0a16dd584bfc9c |
| interface | admin |
| region | RegionOne |
| region_id | RegionOne |
| service_id | 6667d41de2c74e898cfdef5d71791d23 |
| service_name | placement |
| service_type | placement |
| url | http://controller:8778 |
+--------------+----------------------------------+
十六、安装和配置 nova 组件
1.安装软件包
[root@controller ~]# yum install openstack-nova-api
openstack-nova-conductor openstack-nova-console
openstack-nova-novncproxy openstack-nova-scheduler
openstack-nova-placement-api
2.编辑 /etc/nova/nova.conf 文件
[DEFAULT]
enabled_apis = osapi_compute,metadata
transport_url = rabbit://openstack:123456@controller
my_ip = 192.168.48.100
use_neutron = True
firewall_driver = nova.virt.firewall.NoopFirewallDriver

[api_database]
connection = mysql+pymysql://nova:123456@controller/nova_api

[database]
connection = mysql+pymysql://nova:123456@controller/nova

[api]
auth_strategy = keystone

[keystone_authtoken]
auth_uri = http://controller:5000
auth_url = http://controller:35357
memcached_servers = controller:11211
auth_type = password
project_domain_name = default
user_domain_name = default
project_name = service
username = nova
password = 123456

[vnc]
enabled = true
server_listen = $my_ip
server_proxyclient_address = $my_ip

[glance]
api_servers = http://controller:9292

[oslo_concurrency]
lock_path = /var/lib/nova/tmp

[placement]
os_region_name = RegionOne
project_domain_name = Default
project_name = service
auth_type = password
user_domain_name = Default
auth_url = http://controller:35357/v3
username = placement
password = 123456
3.由于软件包的一个 bug,需要在 /etc/httpd/conf.d/00-nova-placement-api.conf 文件中添加如下配置
<Directory /usr/bin>
   <IfVersion >= 2.4>
      Require all granted
   </IfVersion>
   <IfVersion < 2.4>
      Order allow,deny
      Allow from all
   </IfVersion>
</Directory>
4.重启 http 服务
[root@controller ~]# systemctl restart httpd
5.同步 nova-api 数据库
[root@controller ~]# su -s /bin/sh -c "nova-manage api_db sync" nova #此报错信息可忽略
/usr/lib/python2.7/site-packages/oslo_db/sqlalchemy/enginefacade.py:332: NotSupportedWarning: Configuration option(s) ['use_tpool'] not supported
exception.NotSupportedWarning
6.注册 cell0 数据库
[root@controller ~]# su -s /bin/sh -c "nova-manage cell_v2 map_cell0" nova
/usr/lib/python2.7/site-packages/oslo_db/sqlalchemy/enginefacade.py:332: NotSupportedWarning: Configuration option(s) ['use_tpool'] not supported
exception.NotSupportedWarning
7.创建 cell1 cell
[root@controller ~]# su -s /bin/sh -c "nova-manage cell_v2 create_cell --name=cell1 --verbose" nova
/usr/lib/python2.7/site-packages/oslo_db/sqlalchemy/enginefacade.py:332: NotSupportedWarning: Configuration option(s) ['use_tpool'] not supported
exception.NotSupportedWarning
3cf8ec18-ecb4-45eb-8c14-9b5cd40d4b15
8.同步 nova 数据库
[root@controller ~]# su -s /bin/sh -c "nova-manage db sync" nova
/usr/lib/python2.7/site-packages/oslo_db/sqlalchemy/enginefacade.py:332: NotSupportedWarning: Configuration option(s) ['use_tpool'] not supported
exception.NotSupportedWarning
/usr/lib/python2.7/site-packages/pymysql/cursors.py:166: Warning: (1831, u'Duplicate index `block_device_mapping_instance_uuid_virtual_name_device_name_idx`. This is deprecated and will be disallowed in a future release.')
result = self._query(query)
/usr/lib/python2.7/site-packages/pymysql/cursors.py:166: Warning: (1831, u'Duplicate index `uniq_instances0uuid`. This is deprecated and will be disallowed in a future release.')
result = self._query(query)
9.验证 nova、 cell0、 cell1 数据库是否注册正确
[root@controller ~]# nova-manage cell_v2 list_cells
/usr/lib/python2.7/site-packages/oslo_db/sqlalchemy/enginefacade.py:332: NotSupportedWarning: Configuration option(s) ['use_tpool'] not supported
exception.NotSupportedWarning
+-------+--------------------------------------+------------------------------------+-------------------------------------------------+
| Name | UUID | Transport URL | Database Connection |
+-------+--------------------------------------+------------------------------------+-------------------------------------------------+
| cell0 | 00000000-0000-0000-0000-000000000000 | none:/ | mysql+pymysql://nova:*@controller/nova_cell0 |
| cell1 | b44fc798-6a9c-4f9b-8b4e-80fbaec667c9 | rabbit://openstack:*@controller | mysql+pymysql://nova:****@controller/nova |
+-------+--------------------------------------+------------------------------------+-------------------------------------------------+
10.设置服务开机启动
[root@controller ~]# systemctl enable openstack-nova-api.service
openstack-nova-consoleauth.service openstack-nova-scheduler.service
openstack-nova-conductor.service openstack-nova-novncproxy.service
[root@controller ~]# systemctl start openstack-nova-api.service
openstack-nova-consoleauth.service openstack-nova-scheduler.service
openstack-nova-conductor.service openstack-nova-novncproxy.service
十七、安装和配置 compute 节点服务(compute节点)
1.安装软件包
[root@compute ~]# yum install openstack-nova-compute
2.编辑 /etc/nova/nova.conf 文件
[DEFAULT]
enabled_apis = osapi_compute,metadata
transport_url = rabbit://openstack:123456@controller
my_ip = 192.168.48.110
use_neutron = True
firewall_driver = nova.virt.firewall.NoopFirewallDriver

[api]
auth_strategy = keystone

[keystone_authtoken]
auth_uri = http://192.168.48.100:5000
auth_url = http://controller:35357
memcached_servers = controller:11211
auth_type = password
project_domain_name = default
user_domain_name = default
project_name = service
username = nova
password = 123456

[vnc]
enabled = True
server_listen = 0.0.0.0
server_proxyclient_address = $my_ip
novncproxy_base_url = http://controller:6080/vnc_auto.html

[glance]
api_servers = http://controller:9292

[oslo_concurrency]
lock_path = /var/lib/nova/tmp

[placement]
os_region_name = RegionOne
project_domain_name = Default
project_name = service
auth_type = password
user_domain_name = Default
auth_url = http://controller:35357/v3
username = placement
password = 123456
3.设置服务开机启动
[root@compute ~]# systemctl enable libvirtd.service openstack-nova-compute.service
[root@compute ~]# systemctl start libvirtd.service
openstack-nova-compute.service #说明:如果 nova-compute 服务无法启动,请检查
/var/log/nova/nova-compute.log,会出现如下报错信息
[root@compute ~]# more /var/log/nova/nova-compute.log
2018-11-20 13:12:58.932 129835 INFO os_vif [-] Loaded VIF plugins: ovs, linux_bridge
2018-11-20 13:12:58.997 129835 ERROR oslo.messaging._drivers.impl_rabbit [req-93d6f9a5-6141-40ea-bc88-5d6d1fec6d02 - - - - -] [56dc3f06-cc75-43dc-8b2a-a35d9b175404] AMQP s
erver on controller:5672 is unreachable: [Errno 113] EHOSTUNREACH. Trying again in 1 seconds. Client port: None: error: [Errno 113] EHOSTUNREACH
2018-11-20 13:13:00.085 129835 ERROR oslo.messaging._drivers.impl_rabbit [req-93d6f9a5-6141-40ea-bc88-5d6d1fec6d02 - - - - -] [56dc3f06-cc75-43dc-8b2a-a35d9b175404] AMQP s
erver on controller:5672 is unreachable: [Errno 113] EHOSTUNREACH. Trying again in 2 seconds. Client port: None: error: [Errno 113] EHOSTUNREACH
2018-11-20 13:13:02.103 129835 ERROR oslo.messaging._drivers.impl_rabbit [req-93d6f9a5-6141-40ea-bc88-5d6d1fec6d02 - - - - -] [56dc3f06-cc75-43dc-8b2a-a35d9b175404] AMQP s
erver on controller:5672 is unreachable: [Errno 113] EHOSTUNREACH. Trying again in 4 seconds. Client port: None: error: [Errno 113] EHOSTUNREACH
#控制器:5672上的错误消息 AMQP 服务器无法访问可能表示控制器节点上的防火墙阻止了对端口5672的访问。配置防火墙以在控制器节点上打开端口5672,并在计算节点上重新启动 nova-compute 服务
(1)在 controller 节点清空防火墙
[root@controller ~]# iptables -F
[root@controller ~]# iptables -X
[root@controller ~]# iptables -Z
(2)在 compute 节点重启计算服务
[root@compute ~]# systemctl restart libvirtd.service openstack-nova-compute.service
4.添加compute节点到cell数据库(controller节点)
[root@controller ~]# source admin-openrc
[root@controller ~]# openstack compute service list --service nova-compute
+----+--------------+---------+------+---------+-------+----------------------------+
| ID | Binary | Host | Zone | Status | State | Updated At |
+----+--------------+---------+------+---------+-------+----------------------------+
| 6 | nova-compute | compute | nova | enabled | up | 2018-11-22T03:15:07.000000 |
+----+--------------+---------+------+---------+-------+----------------------------+
5.发现计算节点
[root@controller ~]# su -s /bin/sh -c "nova-manage cell_v2 discover_hosts --verbose" nova
/usr/lib/python2.7/site-packages/oslo_db/sqlalchemy/enginefacade.py:332: NotSupportedWarning: Configuration option(s) ['use_tpool'] not supported
exception.NotSupportedWarning
Found 2 cell mappings.
Skipping cell0 since it does not contain hosts.
Getting computes from cell 'cell1': b44fc798-6a9c-4f9b-8b4e-80fbaec667c9
Checking host mapping for compute host 'compute': 0287e6eb-6107-47f7-9635-454c88001c3a
Creating host mapping for compute host 'compute': 0287e6eb-6107-47f7-9635-454c88001c3a
Found 1 unmapped computes in cell: b44fc798-6a9c-4f9b-8b4e-80fbaec667c9
十八、在 controller 节点验证计算服务操作
1.列出服务组件
[root@controller ~]# source admin-openrc
[root@controller ~]# openstack compute service list
+----+------------------+------------+----------+---------+-------+----------------------------+
| ID | Binary | Host | Zone | Status | State | Updated At |
+----+------------------+------------+----------+---------+-------+----------------------------+
| 1 | nova-consoleauth | controller | internal | enabled | up | 2018-11-22T03:16:04.000000 |
| 2 | nova-scheduler | controller | internal | enabled | up | 2018-11-22T03:16:04.000000 |
| 3 | nova-conductor | controller | internal | enabled | up | 2018-11-22T03:16:04.000000 |
| 6 | nova-compute | compute | nova | enabled | up | 2018-11-22T03:15:57.000000 |
+----+------------------+------------+----------+---------+-------+----------------------------+
2.列出身份服务中的 API 端点以验证与身份服务的连接
[root@controller ~]# openstack catalog list
+-----------+-----------+-----------------------------------------+
| Name | Type | Endpoints |
+-----------+-----------+-----------------------------------------+
| placement | placement | RegionOne |
| | | public: http://controller:8778 |
| | | RegionOne |
| | | internal: http://controller:8778 |
| | | RegionOne |
| | | admin: http://controller:8778 |
| | | |
| glance | image | RegionOne |
| | | admin: http://controller:9292 |
| | | RegionOne |
| | | internal: http://controller:9292 |
| | | RegionOne |
| | | public: http://controller:9292 |
| | | |
| nova | compute | RegionOne |
| | | internal: http://controller:8774/v2.1 |
| | | RegionOne |
| | | public: http://controller:8774/v2.1 |
| | | RegionOne |
| | | admin: http://controller:8774/v2.1 |
| | | |
| keystone | identity | RegionOne |
| | | public: http://controller:5000/v3/ |
| | | RegionOne |
| | | internal: http://controller:5000/v3/ |
| | | RegionOne |
| | | admin: http://controller:35357/v3/ |
| | | |
+-----------+-----------+-----------------------------------------+
3.列出镜像
[root@controller ~]# openstack image list
+--------------------------------------+--------+--------+
| ID | Name | Status |
+--------------------------------------+--------+--------+
| 8a20afbc-539f-4343-8a4d-512ffaf5d9ff | cirros | active |
+--------------------------------------+--------+--------+
4.检查 cells 和 placement API 是否正常
[root@controller ~]# nova-status upgrade check
/usr/lib/python2.7/site-packages/oslo_db/sqlalchemy/enginefacade.py:332: NotSupportedWarning: Configuration option(s) ['use_tpool'] not supported
exception.NotSupportedWarning
Option "os_region_name" from group "placement" is deprecated. Use option "region-name" from group "placement".
+-------------------------------------------------------------------+
| Upgrade Check Results |
+-------------------------------------------------------------------+
| Check: Cells v2 |
| Result: Success |
| Details: None |
+-------------------------------------------------------------------+
| Check: Placement API |
| Result: Failure |
| Details: Placement service credentials do not work. |
+-------------------------------------------------------------------+
| Check: Resource Providers |
| Result: Warning |
| Details: There are no compute resource providers in the Placement |
| service but there are 1 compute nodes in the deployment. |
| This means no compute nodes are reporting into the |
| Placement service and need to be upgraded and/or fixed. |
| See |
| https://docs.openstack.org/nova/latest/user/placement.html |
| for more details. |
+-------------------------------------------------------------------+
| Check: Ironic Flavor Migration |
| Result: Success |
| Details: None |
+-------------------------------------------------------------------+
| Check: API Service Version |
| Result: Success |
| Details: None |
+-------------------------------------------------------------------+
十九、安装和配置 controller 节点 neutron 网络配置
1.创建 nuetron 数据库和授权
MariaDB [(none)]> CREATE DATABASE neutron;
Query OK, 1 row affected (0.01 sec)

MariaDB [(none)]> GRANT ALL PRIVILEGES ON neutron.* TO 'neutron'@'localhost'   IDENTIFIED BY '123456';
Query OK, 0 rows affected (0.01 sec)

MariaDB [(none)]> GRANT ALL PRIVILEGES ON neutron.* TO 'neutron'@'%'   IDENTIFIED BY '123456';
Query OK, 0 rows affected (0.01 sec)
2.创建服务
[root@controller ~]# source admin-openrc
[root@controller ~]# openstack user create --domain default --password-prompt neutron
User Password:
123456
Repeat User Password:123456
+---------------------+----------------------------------+
| Field | Value |
+---------------------+----------------------------------+
| domain_id | default |
| enabled | True |
| id | b163179f06d846399f0be3e2d0f88c76 |
| name | neutron |
| options | {} |
| password_expires_at | None |
+---------------------+----------------------------------+
[root@controller ~]# openstack role add --project service --user neutron admin #添加 admin 角色为 neutron 用户
[root@controller ~]# openstack service create --name neutron --description "OpenStack Networking" network #创建 neutron 服务
+-------------+----------------------------------+
| Field | Value |
+-------------+----------------------------------+
| description | OpenStack Networking |
| enabled | True |
| id | d2c54b8c4eb047f09ad7ae90cca56c9f |
| name | neutron |
| type | network |
+-------------+----------------------------------+
3.创建网络服务端点
[root@controller ~]# openstack endpoint create --region RegionOne network public http://controller:9696
+--------------+----------------------------------+
| Field | Value |
+--------------+----------------------------------+
| enabled | True |
| id | a0367a843a09471d93e0205a72a3e2a4 |
| interface | public |
| region | RegionOne |
| region_id | RegionOne |
| service_id | d2c54b8c4eb047f09ad7ae90cca56c9f |
| service_name | neutron |
| service_type | network |
| url | http://controller:9696 |
+--------------+----------------------------------+
[root@controller ~]# openstack endpoint create --region RegionOne network internal http://controller:9696
+--------------+----------------------------------+
| Field | Value |
+--------------+----------------------------------+
| enabled | True |
| id | 78d975485e764c85b658f7da09fd0dca |
| interface | internal |
| region | RegionOne |
| region_id | RegionOne |
| service_id | d2c54b8c4eb047f09ad7ae90cca56c9f |
| service_name | neutron |
| service_type | network |
| url | http://controller:9696 |
+--------------+----------------------------------+
[root@controller ~]# openstack endpoint create --region RegionOne network admin http://controller:9696
+--------------+----------------------------------+
| Field | Value |
+--------------+----------------------------------+
| enabled | True |
| id | 59f9f81e14fe4419b897e9a65dd6f3d3 |
| interface | admin |
| region | RegionOne |
| region_id | RegionOne |
| service_id | d2c54b8c4eb047f09ad7ae90cca56c9f |
| service_name | neutron |
| service_type | network |
| url | http://controller:9696 |
+--------------+----------------------------------+
二十、配置网络部分(controller节点)
1.安装组件
[root@controller ~]# yum install openstack-neutron openstack-neutron-ml2 openstack-neutron-linuxbridge ebtables
2.配置服务组件,编辑 /etc/neutron/neutron.conf 文件
[DEFAULT]
auth_strategy = keystone
core_plugin = ml2
service_plugins =
transport_url = rabbit://openstack:123456@controller
notify_nova_on_port_status_changes = true
notify_nova_on_port_data_changes = true

[database]
connection = mysql+pymysql://neutron:123456@controller/neutron

[keystone_authtoken]
auth_uri = http://controller:5000
auth_url = http://controller:35357
memcached_servers = controller:11211
auth_type = password
project_domain_name = default
user_domain_name = default
project_name = service
username = neutron
password = 123456

[nova]
auth_url = http://controller:35357
auth_type = password
project_domain_name = default
user_domain_name = default
region_name = RegionOne
project_name = service
username = nova
password = 123456

[oslo_concurrency]
lock_path = /var/lib/neutron/tmp
二十一、配置网络二层插件(controller节点)
1.编辑 /etc/neutron/plugins/ml2/ml2_conf.ini 文件
[ml2]
type_drivers = flat,vlan
tenant_network_types =
mechanism_drivers = linuxbridge
extension_drivers = port_security

[ml2_type_flat]
flat_networks = provider

[securitygroup]
enable_ipset = true
2.配置 Linux 网桥,编辑 /etc/neutron/plugins/ml2/linuxbridge_agent.ini 文件
[linux_bridge]
physical_interface_mappings = provider:ens33

[vxlan]
enable_vxlan = false

[securitygroup]
enable_security_group = true
firewall_driver = neutron.agent.linux.iptables_firewall.IptablesFirewallDriver
3.配置 DHCP 服务编辑 /etc/neutron/dhcp_agent.ini 文件
[DEFAULT]
interface_driver = linuxbridge
dhcp_driver = neutron.agent.linux.dhcp.Dnsmasq
enable_isolated_metadata = true
4.配置 metadata,编辑 /etc/neutron/metadata_agent.ini 文件
[DEFAULT]
nova_metadata_host = controller
metadata_proxy_shared_secret = 123456
5.配置计算服务使用网络服务,编辑 /etc/nova/nova.conf 文件
[neutron]
url = http://controller:9696
auth_url = http://controller:35357
auth_type = password
project_domain_name = default
user_domain_name = default
region_name = RegionOne
project_name = service
username = neutron
password = 123456
service_metadata_proxy = true
metadata_proxy_shared_secret = 123456
6.创建服务软链接
[root@controller ~]# ln -s /etc/neutron/plugins/ml2/ml2_conf.ini /etc/neutron/plugin.ini
7.同步数据库
[root@controller ~]# su -s /bin/sh -c "neutron-db-manage --config-file
/etc/neutron/neutron.conf --config-file
/etc/neutron/plugins/ml2/ml2_conf.ini upgrade head" neutron
8.重启 compute API 服务
[root@controller ~]# systemctl restart openstack-nova-api.service
9.配置网络服务开机启动
[root@controller ~]# systemctl enable neutron-server.service
neutron-linuxbridge-agent.service neutron-dhcp-agent.service
neutron-metadata-agent.service
[root@controller ~]# systemctl start neutron-server.service
neutron-linuxbridge-agent.service neutron-dhcp-agent.service
neutron-metadata-agent.service
二十二、配置 compute 节点网络服务(compute节点)
1.安装组件
[root@compute ~]# yum install openstack-neutron-linuxbridge ebtables ipset
2.配置公共组件,编辑 /etc/neutron/neutron.conf 文件
[DEFAULT]
auth_strategy = keystone
transport_url = rabbit://openstack:123456@controller

[keystone_authtoken]
auth_uri = http://controller:5000
auth_url = http://controller:35357
memcached_servers = controller:11211
auth_type = password
project_domain_name = default
user_domain_name = default
project_name = service
username = neutron
password = 123456

[oslo_concurrency]
lock_path = /var/lib/neutron/tmp
3.配置 Linux 网桥,编辑 /etc/neutron/plugins/ml2/linuxbridge_agent.ini 文件
[linux_bridge]
physical_interface_mappings = provider:ens33

[vxlan]
enable_vxlan = false

[securitygroup]
enable_security_group = true
firewall_driver = neutron.agent.linux.iptables_firewall.IptablesFirewallDriver
4.配置计算节点网络服务,编辑 /etc/nova/nova.conf 文件
[neutron]
url = http://controller:9696
auth_url = http://controller:35357
auth_type = password
project_domain_name = default
user_domain_name = default
region_name = RegionOne
project_name = service
username = neutron
password = 123456
5.重启 compute 服务
[root@compute ~]# systemctl restart openstack-nova-compute.service
6.设置网桥服务开机启动
[root@compute ~]# systemctl enable neutron-linuxbridge-agent.service
[root@compute ~]# systemctl start neutron-linuxbridge-agent.service
二十三、在 controller 节点安装 Horizon 服务
1.安装软件包
[root@controller ~]# yum install openstack-dashboard -y
2.编辑 /etc/openstack-dashboard/local_settings 文件
OPENSTACK_HOST = "controller"
ALLOWED_HOSTS = ['*']


###配置 memcache 会话存储###
SESSION_ENGINE = 'django.contrib.sessions.backends.cache'

CACHES = {
    'default': {
        'BACKEND': 'django.core.cache.backends.memcached.MemcachedCache',
        'LOCATION': 'controller:11211',
    }
}


###开启身份认证 API 版本 v3###
OPENSTACK_KEYSTONE_URL = "http://%s:5000/v3" % OPENSTACK_HOST


###开启 domains 版本支持###
OPENSTACK_KEYSTONE_MULTIDOMAIN_SUPPORT = True


###配置 API 版本####
OPENSTACK_API_VERSIONS = {
    "identity": 3,
    "image": 2,
    "volume": 2,
}

OPENSTACK_KEYSTONE_DEFAULT_DOMAIN = 'Default'

OPENSTACK_NEUTRON_NETWORK = {
    'enable_router': False,
    'enable_quotas': False,
    'enable_distributed_router': False,
    'enable_ha_router': False,
    'enable_lb': False,
    'enable_firewall': False,
    'enable_***': False,
    'enable_fip_topology_check': False,
#修改时,注意底部采用原有的“}”,重复会无法重启 web 服务
3.完成安装,重启 web 服务和会话存储
[root@controller ~]# systemctl restart httpd.service memcached.service
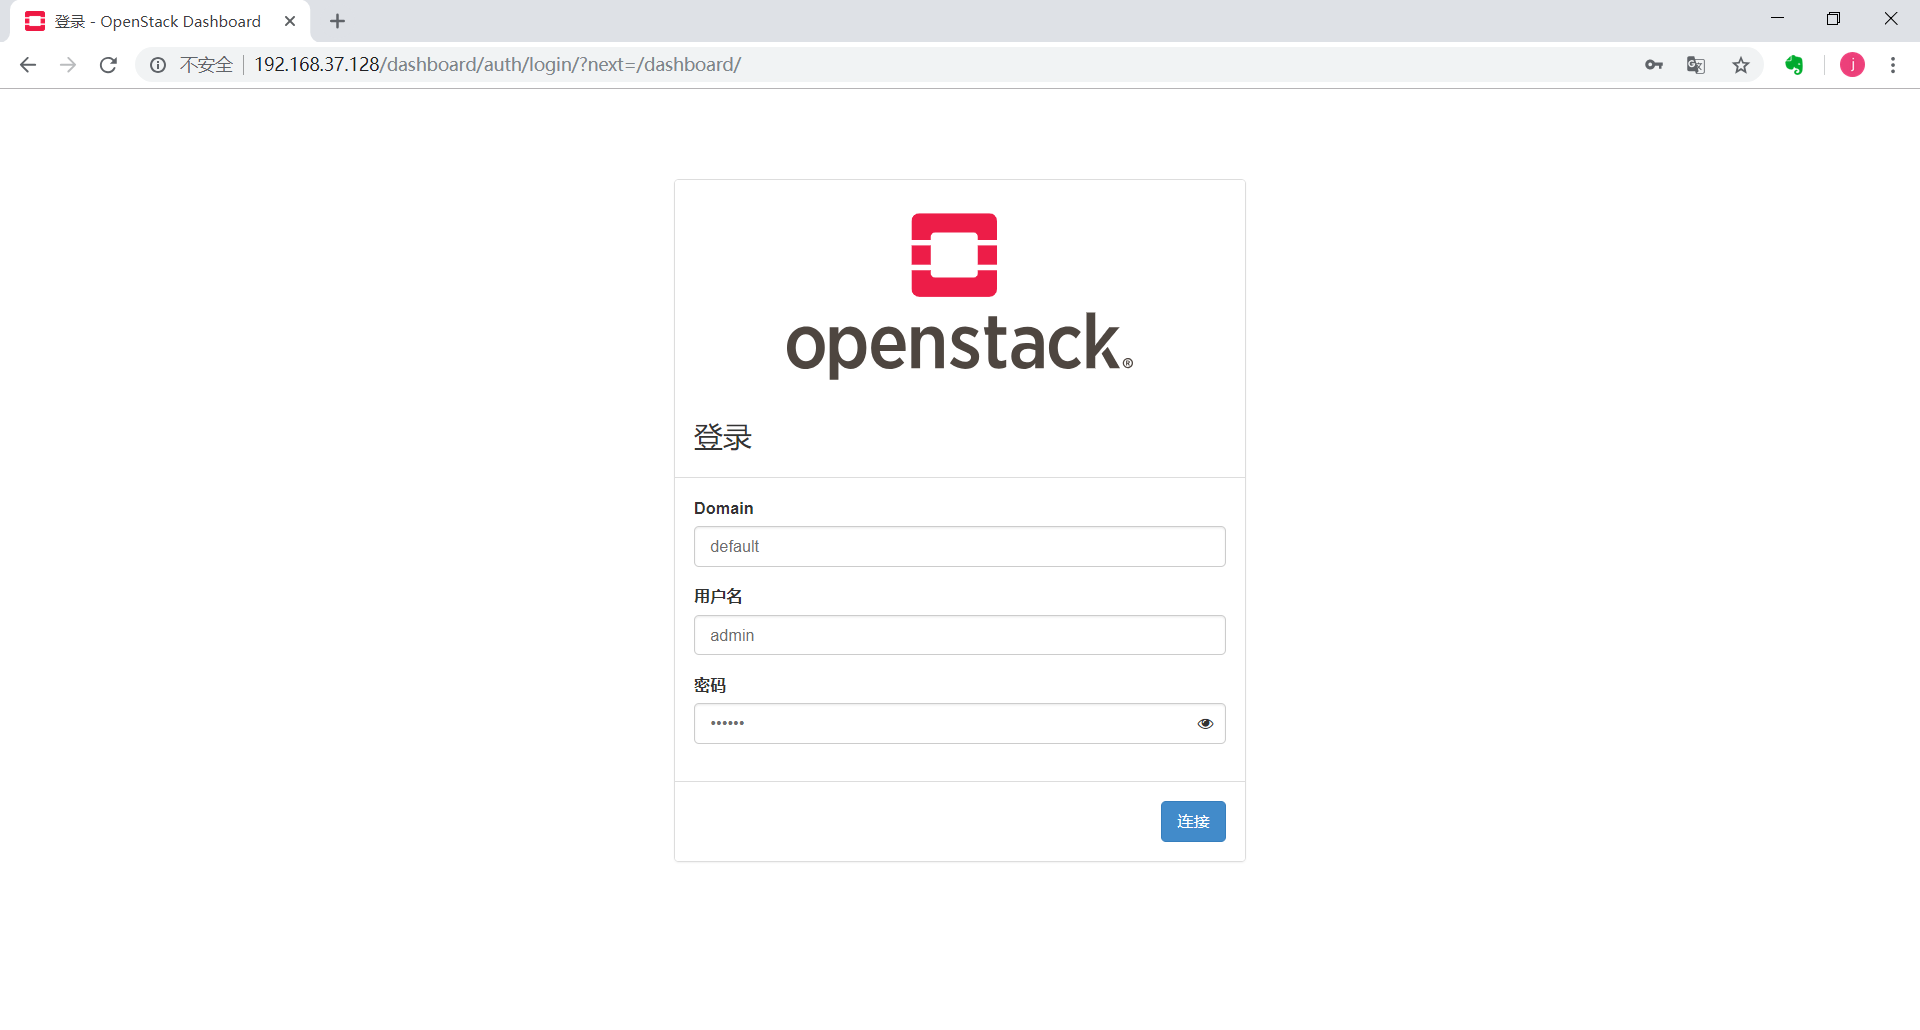
4.访问 http://192.168.48.100/dashborad 查看 openstack 的 web 页面

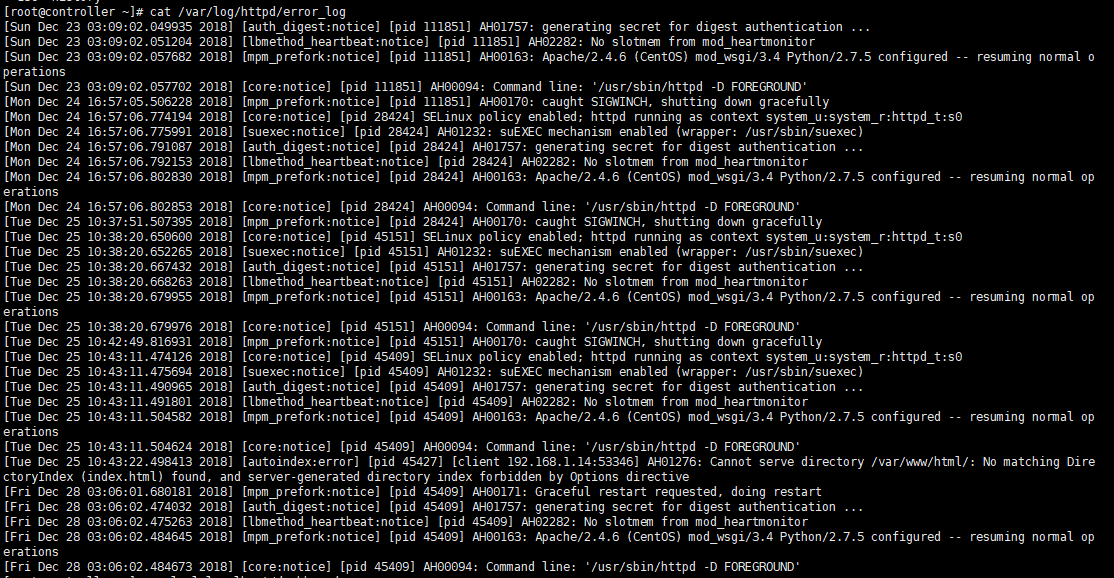
[root@controller ~]# cat /var/log/httpd/error_log
[Tue Nov 20 14:53:50.369936 2018] [core:error] [pid 8554] [client 192.168.37.1:3248] Script >timed out before returning headers: django.wsgi
[Tue Nov 20 14:54:13.014939 2018] [core:error] [pid 8451] [client 192.168.37.1:3371] Script >timed out before returning headers: django.wsgi
[Tue Nov 20 14:56:07.340768 2018] [core:error] [pid 8452] [client 192.168.37.1:3207] End of >script output before headers: django.wsgi
[root@controller ~]# vim /etc/httpd/conf.d/openstack-dashboard.conf
#在 WSGISocketPrefix run/wsgi 下添加:
WSGIApplicationGroup %{GLOBAL}
[root@controller ~]# systemctl restart httpd.service #重启后再次访问,重启时间会较长
| Domain | 用户名 | 密码 |
|---|---|---|
| default | admin | 123456 |
[root@controller ~]# cat /var/log/httpd/error_log
[Tue Nov 20 08:41:50.857910 2018] [:error] [pid 9228] RuntimeError: Unable to create a new session key. It is likely that the cache is unavailable.
[root@controller ~]# vim /etc/openstack-dashboard/local_settings
#原:SESSION_ENGINE = 'django.contrib.sessions.backends.cache'
SESSION_ENGINE = 'django.contrib.sessions.backends.file'
[root@controller ~]# systemctl restart httpd.service memcached.service #重启后再次访问
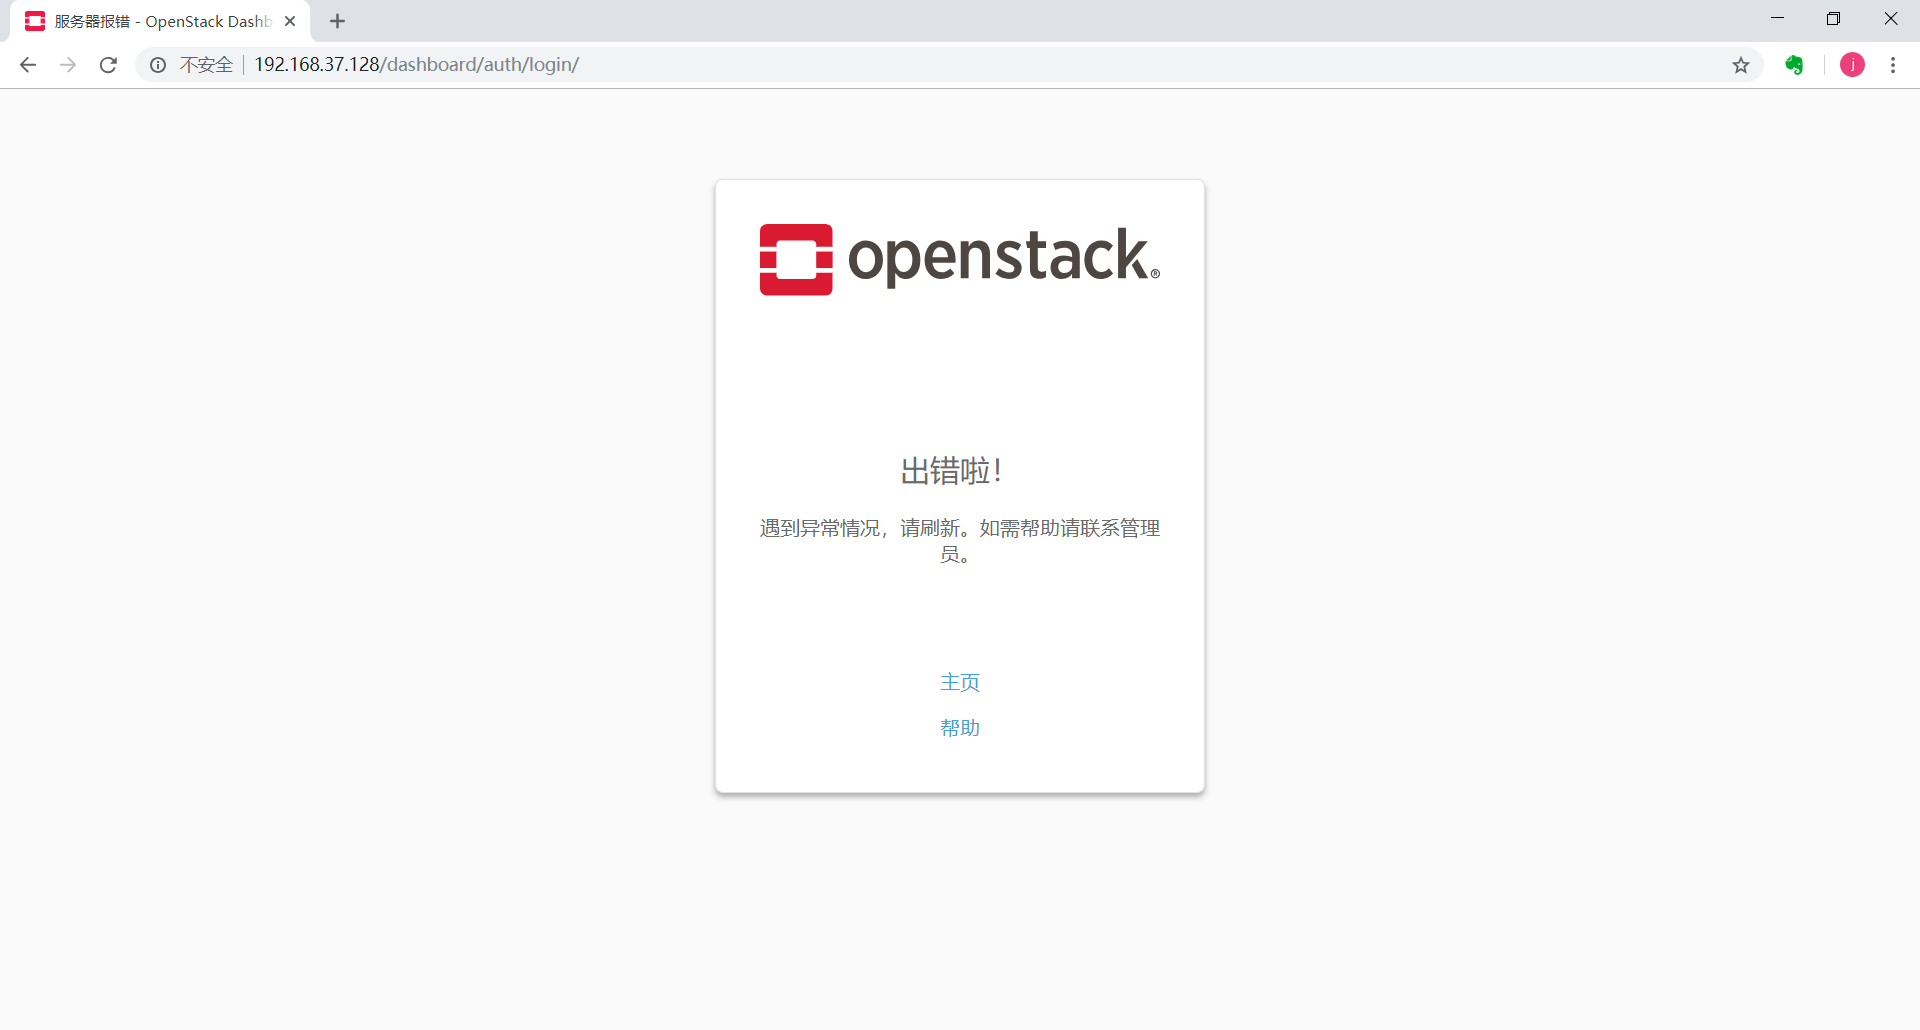
#我的好友在搭建时出现过访问dashboard界面时 404 Not Found 找不到 dashborad 的 server URL 问题,查看日志如下:
#执行如下命令:
#[root@controller ~]# curl -l localhost/dashboard #无需重启服务
执行完成以上步骤后,再次访问dashboard界面
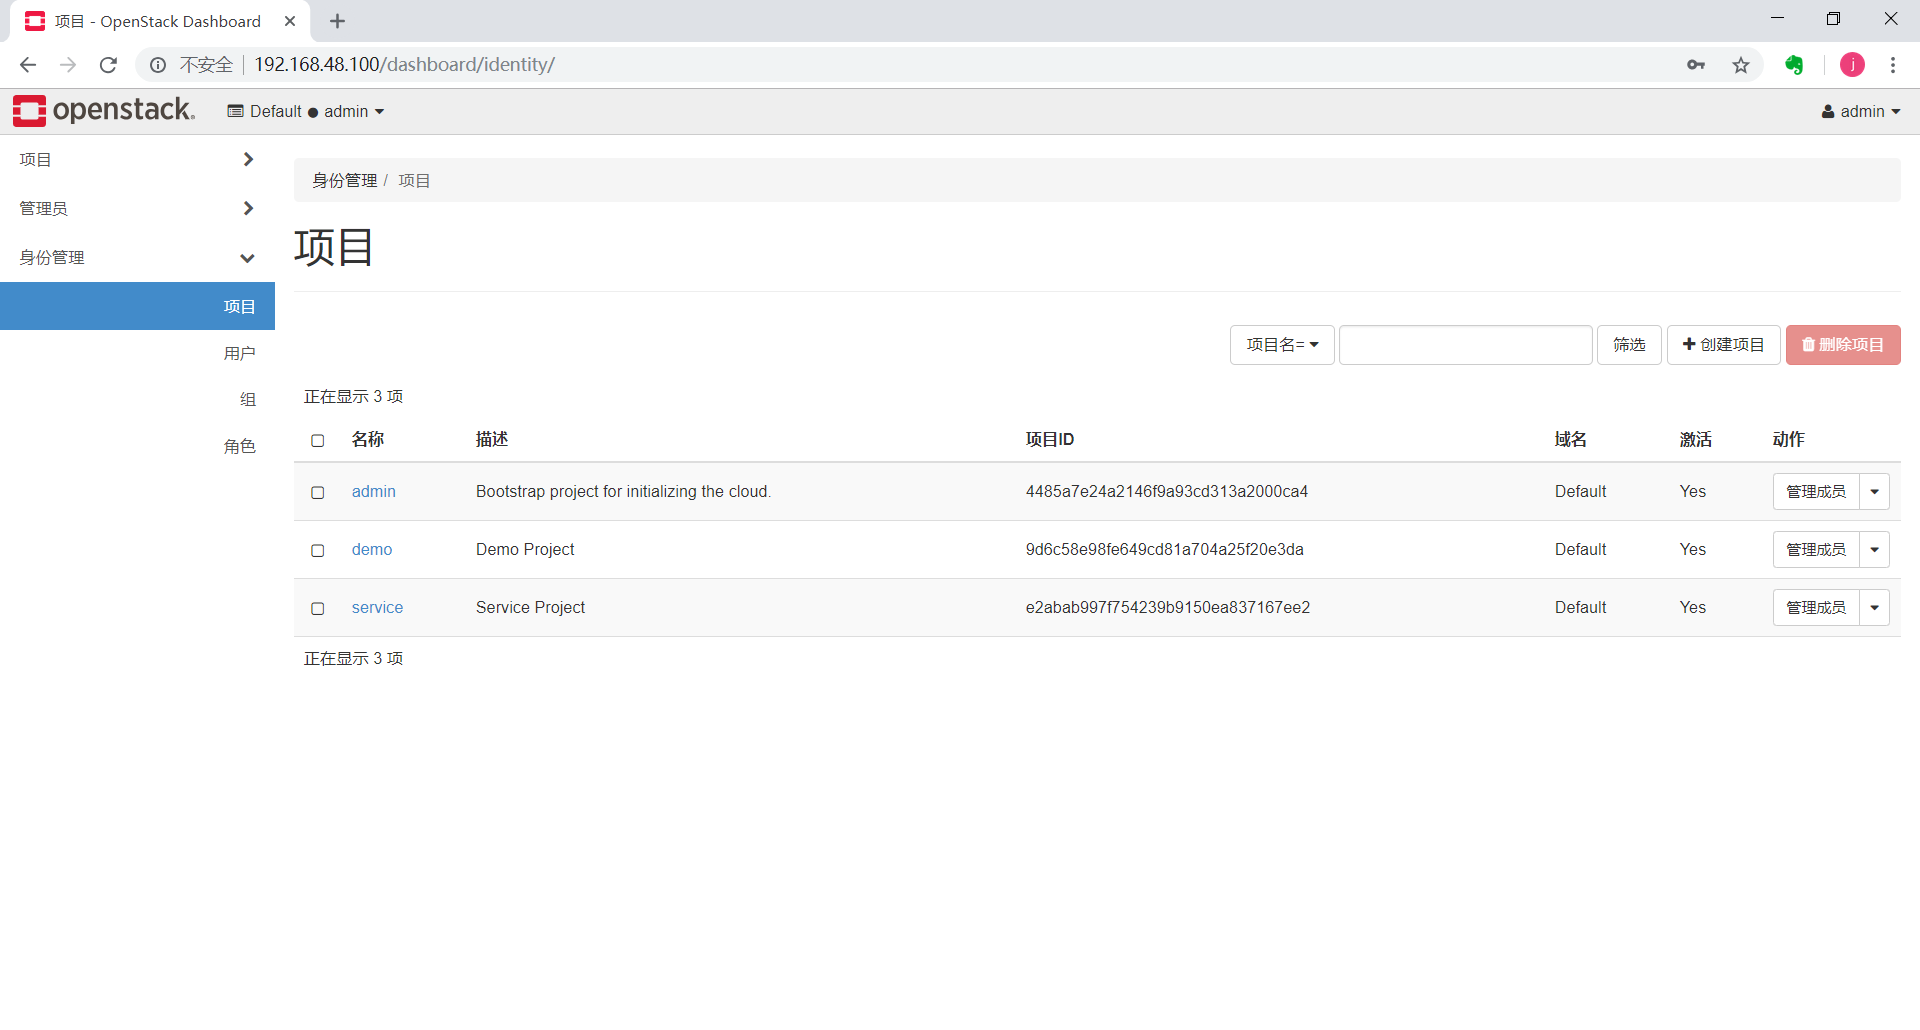
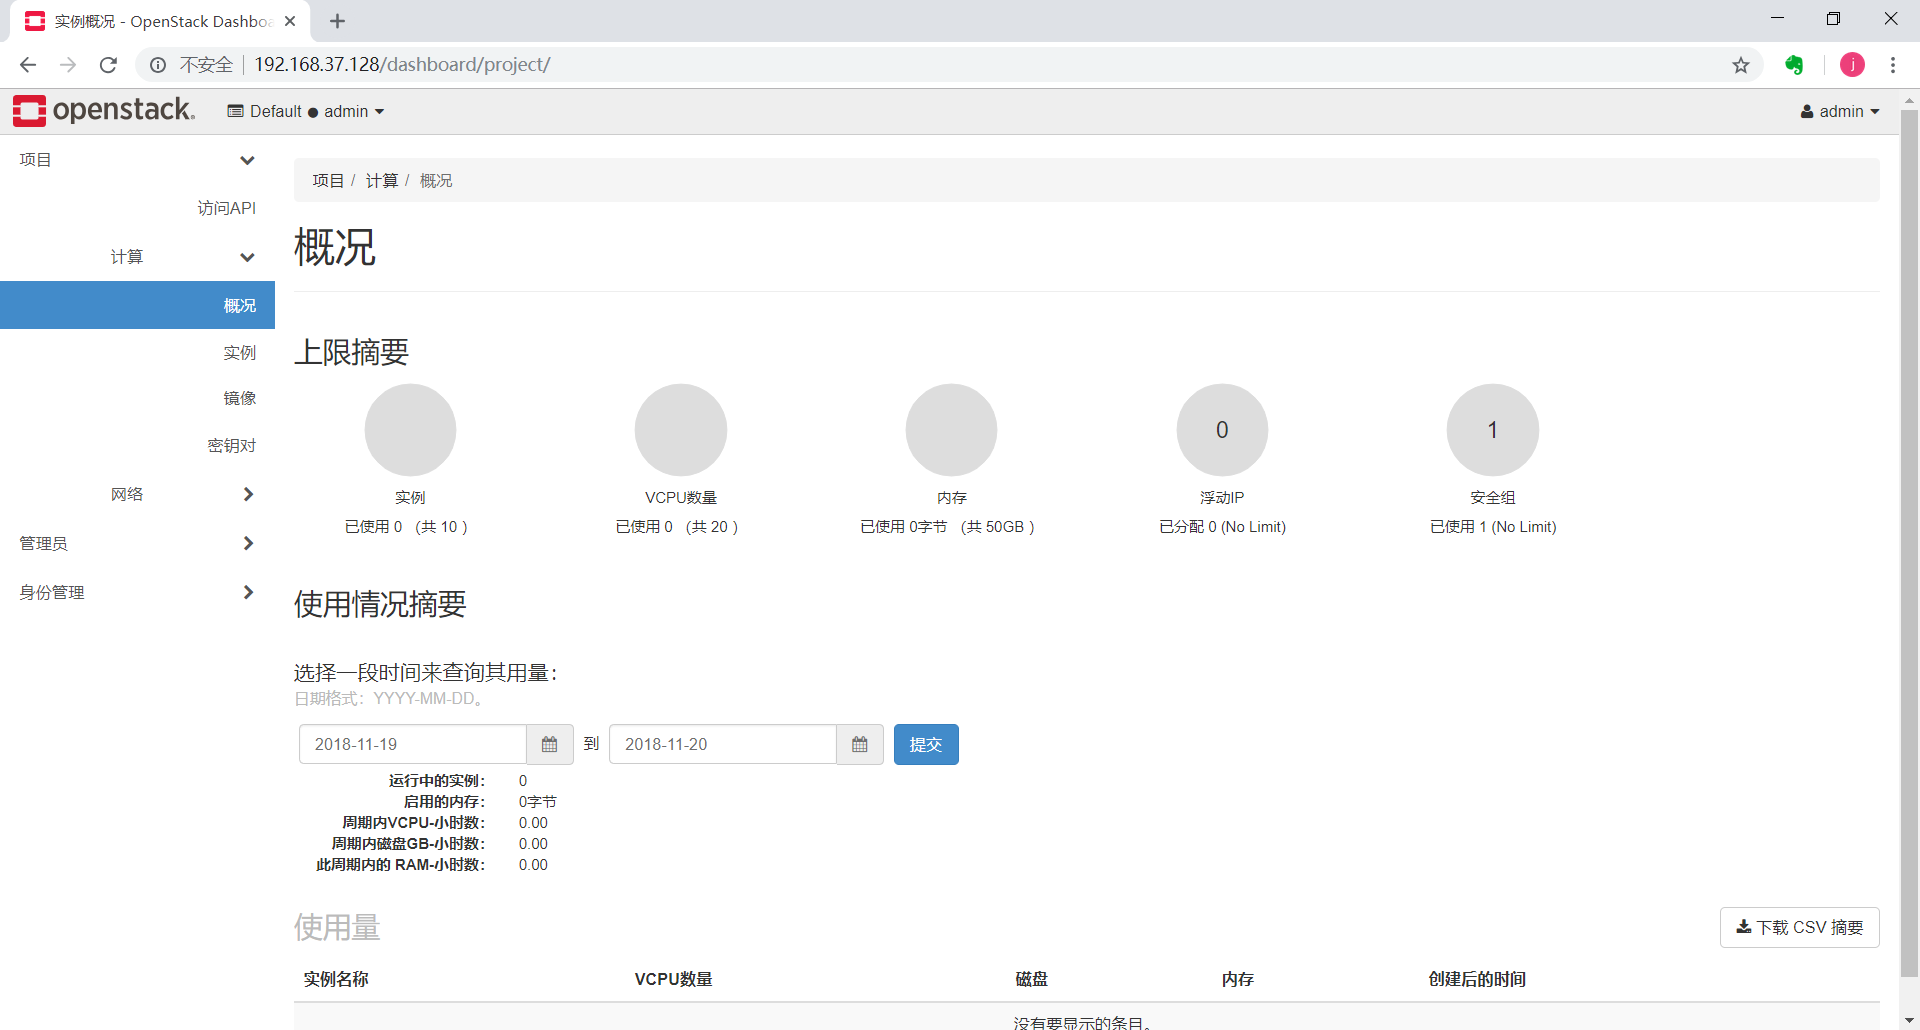
可能 dashboard 界面会出现提示 错误:无法获取浮动 ip 地址。针对这个问题我检查了 /etc/openstack-dashboard/local_settings 这个配置文件,重启 httpd 服务后再次访问则恢复正常,无报错提示,这个我也没搞清楚为什么。
存储节点的部署后续会继续补充

 浙公网安备 33010602011771号